If your 2008 Jeep Liberty’s tail light is broken or not working, it’s important to fix it quickly. A damaged tail light can cause safety issues and even lead to a ticket.
But don’t worry replacing your tail light is easier than you might think. In this guide, you’ll find simple, step-by-step instructions that anyone can follow.
By the end, you’ll save time and money by doing the job yourself. Ready to get your Jeep looking and working like new again?
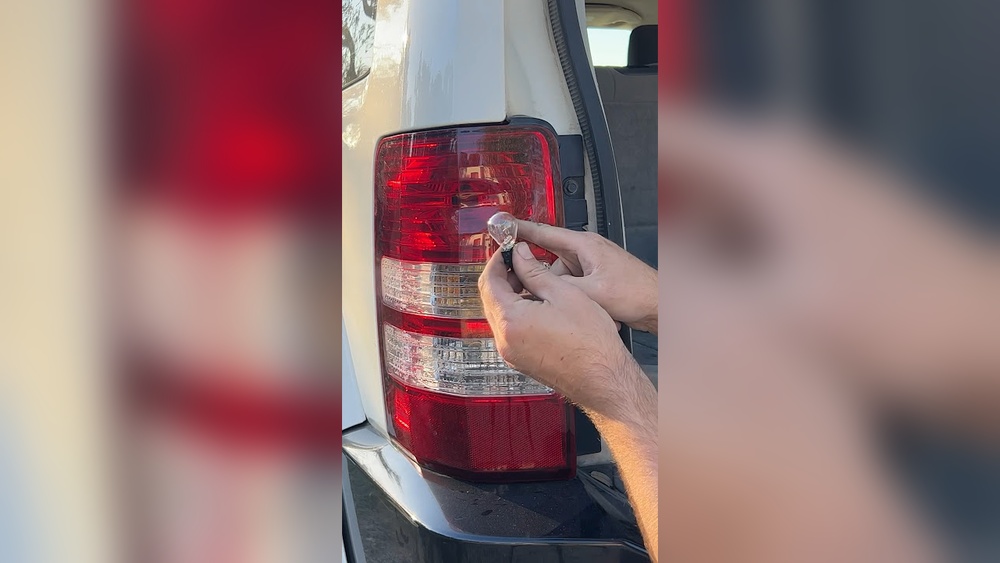
Tools Needed
Before starting to replace the tail light on your 2008 Jeep Liberty, gather the right tools. Having the correct tools makes the job easier and safer. It saves time and avoids frustration.
Most tools are common and easy to find. Some you might already have at home. Others you can buy at an auto parts store or online.
Socket Wrench Set
A socket wrench set helps remove bolts holding the tail light. Use the right socket size for a smooth job. This tool provides good grip and control.
Flathead Screwdriver
A flathead screwdriver helps pry off clips or covers. It can also help disconnect the wiring harness gently. Use it carefully to avoid damage.
Phillips Head Screwdriver
Some screws on the tail light might need a Phillips head screwdriver. It fits cross-shaped screw heads. This tool is common and easy to use.
Replacement Tail Light Bulb Or Assembly
Have the new tail light bulb or full assembly ready. Check your Jeep’s manual for the correct part number. Using the right part ensures proper fit and function.
Gloves
Wear gloves to keep your hands clean and safe. Gloves protect from sharp edges and dirt. They also help avoid smudging the new bulb.
Credit: www.tooler.it
Safety Precautions
Safety is the top priority when replacing the tail light on your 2008 Jeep Liberty. Taking the right precautions helps avoid injuries and damage to your vehicle. Before starting, prepare your work area and tools carefully. Follow these safety steps to keep the job smooth and safe.
Turn Off The Engine And Lights
Always switch off the engine and remove the key from the ignition. This prevents any electrical shock or short circuit. Make sure the tail lights are off before you begin working.
Use Gloves And Eye Protection
Wear gloves to protect your hands from sharp parts and broken glass. Use safety glasses to shield your eyes from dirt and debris. These simple tools reduce the risk of cuts and injuries.
Work In A Well-lit And Dry Area
Choose a clean, dry place with good lighting. This helps you see small screws and parts clearly. Avoid wet or slippery surfaces to prevent falls or accidents.
Disconnect The Battery
Disconnect the negative battery terminal to stop electrical power flow. This step lowers the chance of electric shock. It also protects your Jeep’s electrical system during the repair.
Handle Bulbs Carefully
Do not touch the glass part of the new bulb with bare hands. Oils from your skin can cause the bulb to burn out quickly. Use a clean cloth or gloves while installing the bulb.
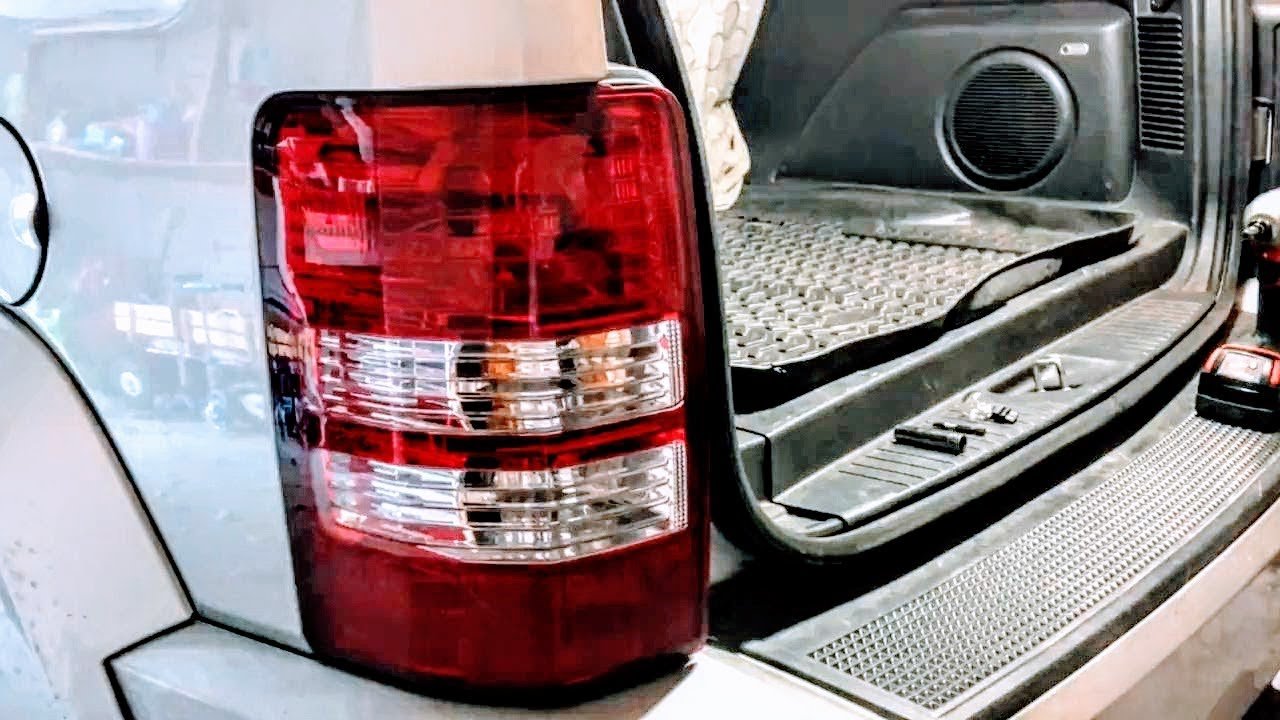
Accessing The Tail Light Assembly
Accessing the tail light assembly on a 2008 Jeep Liberty is the first step in replacing the tail light. This process is simple and requires only basic tools. Knowing how to reach the assembly makes the replacement smooth and safe. Follow these steps carefully to avoid damage to your vehicle.
Open The Tailgate
Start by opening the tailgate fully. This gives you clear access to the inside panel where the tail light assembly is located. Make sure the tailgate stays open during the entire process. A stable tailgate prevents accidents and makes the work easier.
Remove Interior Panels
Next, remove the interior panels covering the tail light assembly. Use a flat tool to gently pry off the panels. Be careful not to break the clips holding them in place. Once removed, you will see the bolts and wiring for the tail light. This step is key to reaching the assembly for removal or repair.
Disconnecting The Electrical Connector
Disconnecting the electrical connector is a key step to replace the 2008 Jeep Liberty tail light. It stops power flow to the tail light. This makes the process safe. It also prevents any damage to the wires or bulbs.
The connector links the car’s wiring to the tail light assembly. Removing it carefully avoids breaking small parts. A clean disconnect helps the new tail light work perfectly. Follow the steps below to remove the connector without trouble.
Locate The Electrical Connector
Find the connector behind the tail light. Open the rear hatch or trunk area. Look for a plastic plug attached to the light’s wiring. It may be covered by a panel or insulation. Remove any covers to see the connector clearly.
Release The Connector Lock
Most connectors have a locking tab or clip. Press or lift this tab gently. Do not force it or pull hard. This lock keeps the wires secure during driving. Unlocking it allows you to pull the connector apart smoothly.
Disconnect The Connector Carefully
Hold the connector body firmly. Pull it straight out from the tail light socket. Avoid twisting or bending the connector. This prevents damage to the pins inside. If it feels stuck, check the lock again.
Inspect The Connector For Damage
Look at both sides of the connector. Check for dirt, corrosion, or broken pins. Clean gently with a soft cloth if needed. Damaged connectors may cause the new tail light to fail. Replace the connector if it looks worn out.
Removing The Old Tail Light
Removing the old tail light on a 2008 Jeep Liberty is the first step to a successful replacement. This task requires simple tools and careful handling. Follow the steps below to take out the tail light safely without damaging your vehicle.
Unscrew Mounting Bolts
Locate the mounting bolts holding the tail light in place. Use a socket wrench or screwdriver to loosen these bolts. Turn them counterclockwise until they come out completely. Keep the bolts safe for reinstallation later.
Carefully Detach Tail Light
After removing the bolts, gently pull the tail light away from the vehicle. Avoid using too much force to prevent breaking the plastic clips. Disconnect the wiring harness by pressing the tab and pulling it free. Set the old tail light aside carefully.
Installing The New Tail Light
Installing the new tail light on your 2008 Jeep Liberty is a straightforward task. After removing the old light, you need to carefully place the new assembly. This step ensures proper fit and function. Follow each step closely to avoid any damage or misalignment.
Position The New Assembly
Hold the new tail light assembly close to the car’s rear. Align it with the mounting holes and the wiring connector. Make sure the wires are not pinched or twisted. The assembly should sit flush against the vehicle’s body. Check that the lens faces outward correctly.
Secure With Bolts
Insert the bolts into the mounting holes by hand first. Tighten them gently to keep the assembly in place. Use a wrench or socket to secure the bolts firmly. Do not overtighten, as this can crack the plastic. Confirm all bolts are tight and the light does not move.
Reconnecting The Electrical Connector
Reconnecting the electrical connector is a key step in replacing the tail light on your 2008 Jeep Liberty. This connection powers the tail light and ensures it works correctly. A loose or improper connection can cause the light to fail.
Take your time to reconnect it carefully. Check for dirt or damage before plugging it back in. A clean, secure connection helps the light function well and lasts longer.
Locate The Electrical Connector
Find the electrical connector behind the tail light housing. It usually has a plastic clip to hold it in place. Gently pull the connector free without forcing it.
Inspect The Connector And Wires
Look closely at the connector and wires. Check for broken wires or corrosion. Clean any dirt or rust with a cloth or small brush.
Align And Connect The Plug
Match the connector ends carefully. Push them together until you hear a click. The click shows it is locked securely in place.
Test The Tail Light
Turn on your Jeep’s lights to test the connection. Check if the tail light works properly. If it does not, unplug and reconnect it again.
Credit: www.amazon.com
Testing The New Tail Light
After installing the new tail light on your 2008 Jeep Liberty, testing is important. It ensures the light works correctly and keeps you safe on the road.
Testing helps find any wiring or connection issues early. It saves time and prevents future problems.
Turn On The Vehicle Lights
Start by turning on the Jeep’s headlights or parking lights. The tail light should glow dimly with these lights on. Check if the new tail light lights up evenly and brightly.
Check Brake Light Function
Press the brake pedal and have someone watch the tail light. The light should shine brighter to signal stopping. Make sure it reacts quickly and stays steady.
Test The Turn Signals
Activate the left and right turn signals one at a time. The tail light should blink clearly on the side used. Count the blinks to confirm normal timing.
Inspect Reverse Light
Shift the Jeep into reverse gear. The reverse light in the tail light assembly should turn on. Check the brightness and clarity to ensure safety.
Look For Any Flickering Or Dim Spots
Observe the tail light for flickering or dim areas. Flickering can mean a loose connection or bad bulb. Dim spots might show a faulty LED or wiring issue.
Reassembling Interior Panels
Reassembling interior panels after replacing the tail light on a 2008 Jeep Liberty is a careful process. It ensures everything fits back correctly and looks neat. Proper reassembly protects wiring and prevents rattles inside the vehicle. Take your time to avoid damage or loose parts.
Align Panels Correctly
Start by aligning the panel with the door frame. Check the clips and holes match the panel’s pins. Press the panel gently but firmly into place. Avoid forcing it to stop cracking or bending.
Secure All Clips And Screws
Push in all clips until you hear a click sound. Use a screwdriver to tighten screws removed earlier. Tighten screws evenly to keep the panel stable. Missing screws can cause the panel to move or vibrate.
Reconnect Electrical Components
Reconnect any electrical plugs behind the panel. Ensure plugs click into place for a good connection. Loose wires may cause power issues for lights or switches. Double-check all connections before closing the panel fully.
Test Functionality Before Finalizing
Check the tail light and other electrical parts for proper function. Turn on lights and signals to verify connections. Fix any issues before securing the panel completely. This saves time and effort later.
Credit: www.youtube.com
<!– wp:rank-math/faq-block {"questions":[{"id":"faq-question-e233553f97b1","title":"How Do I Remove The Tail Light On A 2008 Jeep Liberty?","content":"To remove the tail light, first open the rear hatch. Unscrew the bolts holding the tail light assembly. Gently pull the assembly out to access the wiring. Disconnect the wiring harness carefully before fully removing the tail light.
“,”visible”:true},{“id”:”faq-question-efdc41bad38e”,”title”:”What Tools Are Needed To Replace A Jeep Liberty Tail Light?”,”content”:”You will need a Phillips screwdriver, socket wrench, and possibly a flathead screwdriver. These tools help remove screws and bolts securing the tail light assembly easily and safely.
“,”visible”:true},{“id”:”faq-question-82794789b0a6″,”title”:”How Long Does It Take To Replace A 2008 Jeep Liberty Tail Light?”,”content”:”Replacing the tail light typically takes 15 to 30 minutes. This includes removing the old assembly, disconnecting wires, and installing the new tail light securely.
“,”visible”:true},{“id”:”faq-question-8b6affc28a1f”,”title”:”Can I Replace The Tail Light Myself Or Need A Mechanic?”,”content”:”You can replace the tail light yourself with basic tools. It’s a straightforward process that doesn’t require professional skills. Follow the steps carefully for a safe and effective replacement.
“,”visible”:true}]} –>How Do I Remove The Tail Light On A 2008 Jeep Liberty?
To remove the tail light, first open the rear hatch. Unscrew the bolts holding the tail light assembly. Gently pull the assembly out to access the wiring. Disconnect the wiring harness carefully before fully removing the tail light.
What Tools Are Needed To Replace A Jeep Liberty Tail Light?
You will need a Phillips screwdriver, socket wrench, and possibly a flathead screwdriver. These tools help remove screws and bolts securing the tail light assembly easily and safely.
How Long Does It Take To Replace A 2008 Jeep Liberty Tail Light?
Replacing the tail light typically takes 15 to 30 minutes. This includes removing the old assembly, disconnecting wires, and installing the new tail light securely.
Can I Replace The Tail Light Myself Or Need A Mechanic?
You can replace the tail light yourself with basic tools. It’s a straightforward process that doesn’t require professional skills. Follow the steps carefully for a safe and effective replacement.
Conclusion
Replacing the tail light on your 2008 Jeep Liberty is easier than you think. Follow the steps carefully to avoid mistakes.
A working tail light keeps you safe on the road. It also helps you avoid tickets.
Take your time and use the right tools.
Soon, you will have a bright, clear tail light again. This simple fix saves money and stress.
Try it yourself and see how well it works. Your Jeep will look better and stay safe. Simple, quick, and worth doing.