Looking for a unique and memorable gift for a baby shower or a new parent you care about? Making a diaper jeep is a fun and creative way to wow everyone while giving something practical.
You don’t need to be a craft expert or have fancy tools just a few simple supplies and some patience. Imagine building a cute, miniature jeep entirely out of diapers and baby items that will impress guests and delight parents.
Ready to learn how to make your very own diaper jeep step-by-step?
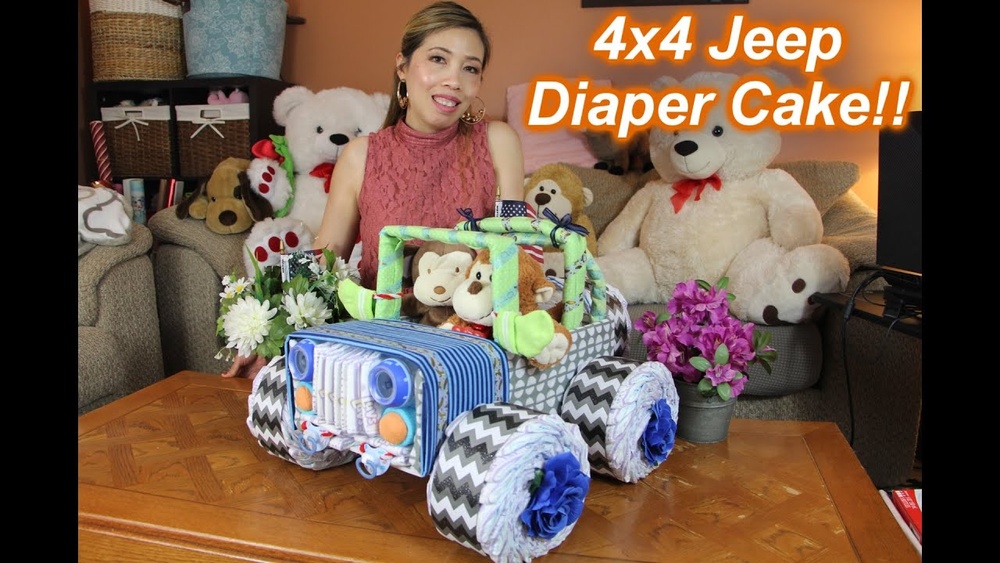
Stick with me, and I’ll guide you through the easy process so you can create a gift that’s both adorable and useful.
Materials Needed
Gathering the right materials is the first step to create a charming diaper jeep. Having all supplies ready helps the process flow smoothly. This list covers basics, extras, and tools needed for the project.
Essential Supplies
- Newborn diapers (about 40-50)
- Rubber bands or hair ties
- Baby blanket or cloth for wrapping
- Baby wipes pack (optional for decoration)
- Ribbons or strings for tying parts
- Small baby bottles (2-4)
Optional Decorations
- Mini stuffed animals or toys
- Colorful paper or cardstock for signs
- Plastic baby pacifiers
- Decorative stickers or labels
- Bow ties or hats for a fun look
Tools Required
- Scissors for cutting ribbons
- Double-sided tape or glue dots
- Hot glue gun (used carefully)
- Measuring tape or ruler
- Marker or pen for labeling
Preparing The Diapers
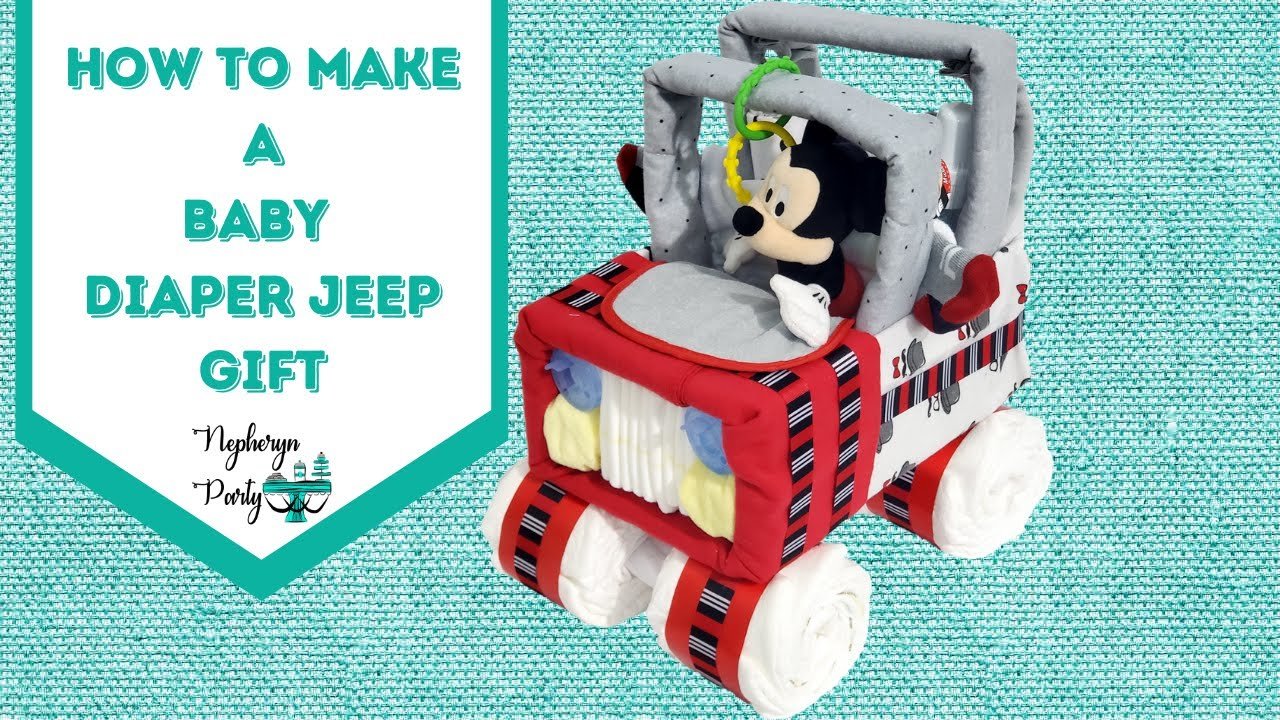
Preparing the diapers is the first step in making a diaper jeep. It ensures the structure will hold and look neat. Each diaper must be rolled and secured properly. This process creates the wheels and the body of the jeep. Use simple tools like rubber bands to keep everything tight and in place. Follow these steps carefully for the best results.
Rolling Diapers For Wheels
Start by rolling diapers tightly to make the wheels. Lay the diaper flat and roll from one end to the other. Hold the roll firmly to avoid it unraveling. Use about five diapers per wheel for a sturdy look. The wheels should be even in size and shape. This step forms the base of the jeep’s wheels.
Forming The Body Structure
Use diapers to create the jeep’s main body. Arrange diapers side by side in a rectangular shape. Roll some diapers tightly to add volume and shape. Stack diapers to build height and width as needed. This part will hold the wheels and other decorations. Keep the structure balanced for a neat finish.
Securing Diapers With Rubber Bands
Wrap rubber bands around each rolled diaper to keep it tight. Use strong bands that do not snap easily. Secure the wheels by wrapping bands around each roll tightly. For the body, use bands to hold diapers in place side by side. Check each diaper roll to make sure it won’t loosen. Proper securing keeps the diaper jeep stable and attractive.
Building The Jeep Frame
Building the Jeep frame is the key step in making a diaper Jeep. It forms the base that holds everything together. The frame must be strong yet light. It will give the Jeep its shape and support the wheels and steering wheel. Follow these simple steps to create a sturdy frame that looks great and lasts.
Creating The Base
Start by laying out a flat surface. Use a sturdy cardboard or foam board for the base. Cut it to the size of the Jeep you want. This base will support the diaper rolls and other parts. Make sure the edges are smooth to avoid any damage. Reinforce the base with tape or glue for extra strength.
Assembling The Axles
Next, prepare the axles that hold the wheels. Use wooden dowels or thick straws for this. Measure them to fit the width of the base. Attach the axles under the base with strong tape or glue. Ensure they are straight and secure. This will allow the wheels to stay in place and turn smoothly.
Adding The Steering Wheel
Finally, add the steering wheel to bring the Jeep to life. Use a small round object like a bottle cap or a toy wheel. Attach it to the front of the base with a stick or a rolled diaper as the steering column. Secure it firmly so it does not wobble. The steering wheel adds a fun and realistic touch to the diaper Jeep frame.
Constructing The Wheels
Constructing the wheels is a key part of building your diaper jeep. The wheels give the jeep its classic look and make it sturdy. Pay close attention to each step to create realistic and strong wheels. Use simple materials like rolled diapers and secure them well for a neat finish.
Making Tire Rolls
Start by selecting seven diapers for each tire. Lay five diapers flat and stagger them slightly. Roll these five diapers tightly into a cylinder shape. Hold the roll firmly to keep it compact. Next, take two more diapers and wrap them around each end. This creates the rounded tire edges. Secure all layers with rubber bands or string. The tight roll makes the tires firm and easy to handle.
Attaching Wheels To Axles
Use a sturdy cardboard tube or wooden dowel as the axle. Slide each rolled tire onto the axle carefully. Make sure the tires sit evenly and do not slide off. Secure the tires on the axle with tape or glue dots. Check that the wheels can rotate slightly for a natural look. The axle should be strong enough to hold the wheels in place without bending.
Adding Details To Tires
Add extra details to make the tires look realistic. Wrap black crepe paper or fabric around the tire rolls to mimic rubber. Use small strips of gray or silver paper for the rims. Attach these strips around the center of each tire. You can also draw tread patterns with a marker for texture. These small touches bring the diaper jeep wheels to life.
Adding Decorative Elements
Adding decorative elements brings personality to your diaper jeep. It transforms basic diapers into a fun, memorable gift. Simple touches create an eye-catching design. Use everyday baby items to decorate the jeep. These accents add charm and usefulness. Follow these tips to enhance your diaper jeep’s look.
Attaching Baby Bottles
Baby bottles make great side mirrors or headlights. Use two bottles for the front of the jeep. Secure them with ribbons or elastic bands. Position bottles evenly on both sides. This adds a cute and practical touch. Choose bottles with colorful caps for extra flair.
Using Socks And Pacifiers
Baby socks work well as seat covers or flags. Roll socks into small shapes for added texture. Attach them to the jeep with pins or glue dots. Pacifiers can decorate the steering wheel or dashboard. Tie pacifiers with ribbon to keep them in place. These items bring softness and fun to the creation.
Designing The Jeep Grill
The grill is the jeep’s front face. Use small clothespins or strips of cardboard to form grill bars. Paint or cover them with metallic paper for realism. Attach the grill firmly to the front tires or base. Add tiny details like buttons or stickers for headlights. This design step gives your diaper jeep character and style.
Final Assembly
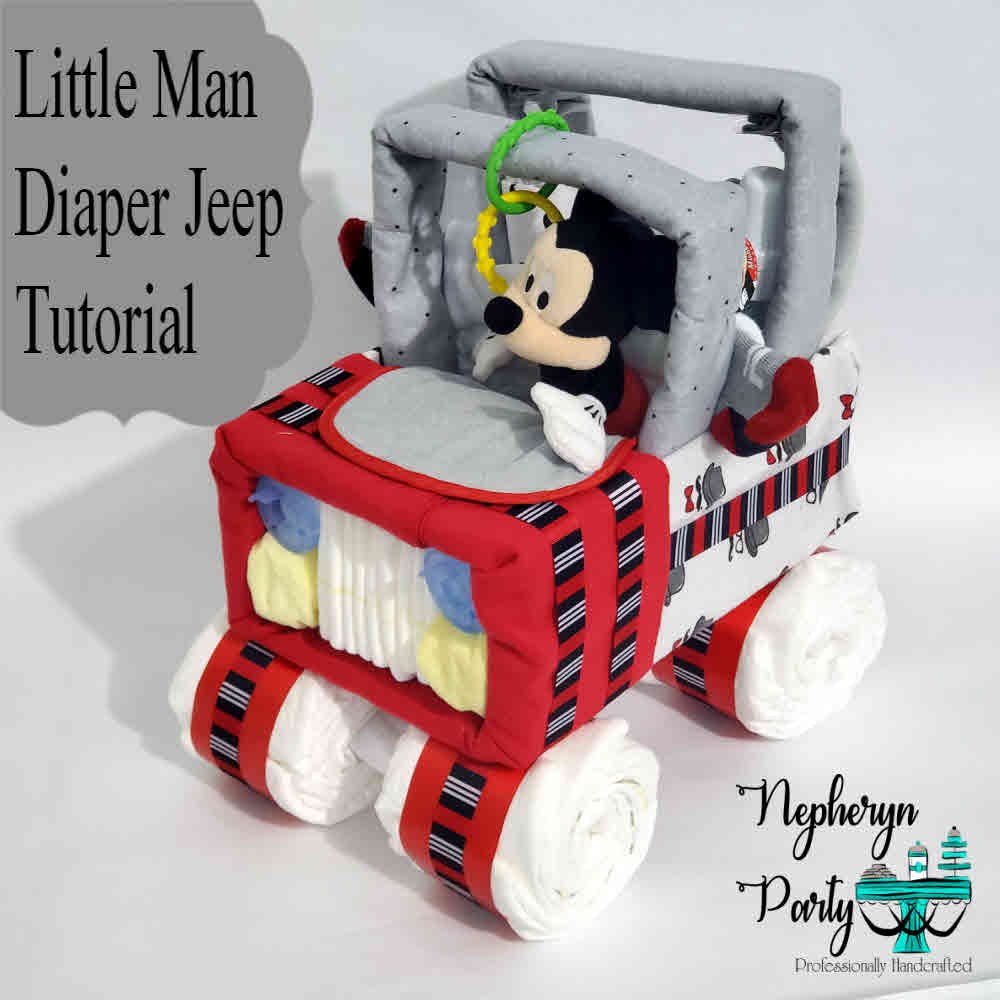
The final assembly is the last step in making your diaper jeep. It brings all parts together to create a complete, cute gift. This phase ensures the jeep looks stable and neat. Careful handling during assembly keeps everything secure and attractive.
Combining All Parts
Place the main body of the jeep on a flat surface. Attach the wheels carefully to the sides. Use rubber bands or ribbon to hold wheels in place. Add the steering wheel and front grill parts. Make sure all pieces fit tightly. Check alignment so the jeep looks balanced.
Stabilizing The Jeep
Use extra diapers or soft materials inside to fill gaps. Secure loose parts with clear tape or ribbon. Wrap ribbon around the whole jeep to hold it firm. This step stops parts from moving or falling. Test by gently shaking the jeep to see if it stays together.
Wrapping With Cellophane
Cut a large piece of clear cellophane to cover the jeep. Place the jeep in the center of the cellophane. Pull the edges up and gather them at the top. Tie with a colorful ribbon or bow. Wrapping protects the diaper jeep and makes it look gift-ready. It also keeps dust and dirt away.
Personalizing The Gift
Personalizing the diaper jeep makes the gift unique and memorable. It shows thoughtfulness and care. A special touch can turn a simple gift into a keepsake. Simple changes can reflect the baby’s personality or the parents’ style.
Choosing Themes
Select a theme that fits the baby’s nursery or parents’ interests. Popular themes include animals, cars, or favorite colors. Using a theme helps coordinate all parts of the diaper jeep. It also makes the gift visually appealing and fun.
Include the baby’s name to add a personal touch. Use tags made from wood, paper, or fabric for variety. Attach the name tag where it is easy to see. This small detail makes the gift feel special and custom-made.
Including Extra Baby Items
Add useful baby items like pacifiers, socks, or small toys. These extras increase the gift’s value and usefulness. Choose items that match the theme or color scheme. It shows extra care and thoughtfulness in your gift.
Tips For Easy Assembly
Assembling a diaper jeep can be fun and rewarding with the right approach. These tips help simplify the process. Follow them to build your diaper jeep smoothly and quickly. Avoid frustration and enjoy crafting a memorable gift for a baby shower or new parents.
Time-saving Techniques
Gather all materials before starting assembly. Lay out diapers, ribbons, and decorations neatly. Roll diapers tightly to make firm wheels. Use rubber bands to hold rolls securely. Assemble wheels first, then build the jeep frame. Work on one section at a time to stay organized. Enlist a helper to speed up the process. Use hot glue carefully for quick attachment of decorations.
Common Mistakes To Avoid
Do not skip rolling diapers tightly; loose rolls cause instability. Avoid using too many rubber bands; it can damage diapers. Do not overload the jeep with heavy items. Avoid uneven wheel sizes to keep the jeep balanced. Skip rushing; take your time for neat assembly. Avoid using weak glue or tape that may fail. Double-check each step to prevent rebuilding parts.
Storage And Transport Advice
Keep the diaper jeep in a cool, dry place before gifting. Use a large box or basket to store the jeep safely. Wrap the jeep gently with tissue paper to prevent dust. Avoid stacking heavy items on top of the jeep. Secure decorations with extra ribbon or glue for transport. Carry the jeep by its base, not decorations. Transport it in a car seat or stable container to avoid damage.
<!– wp:rank-math/faq-block {"questions":[{"id":"faq-question-ba80578b06fb","title":"How Many Diapers Do You Need To Make A Diaper Jeep?","content":"You need about 28 to 35 diapers to make a diaper jeep. This includes tires and body structure.
“,”visible”:true},{“id”:”faq-question-ce927ffc3630″,”title”:”What Do You Need To Make A Jeep Diaper Cake?”,”content”:”To make a Jeep diaper cake, gather diapers, baby bottles, pacifiers, baby socks, a small basket, foam, and crafting tools. Roll and secure diapers for tires, use bottles for axles, and decorate with socks and pacifiers. Assemble parts to create a Jeep shape.
“,”visible”:true},{“id”:”faq-question-9639cd4b9866″,”title”:”How Do I Make A Homemade Diaper?”,”content”:”To make a homemade diaper, fold a clean cloth diaper, place absorbent material inside, and secure with safety pins or fasteners.
“,”visible”:true},{“id”:”faq-question-695c44551f49″,”title”:”How Many Diapers Does It Take To Make A Four-tier Diaper Cake?”,”content”:”A four-tier diaper cake usually requires about 80 to 100 diapers. The exact number varies by diaper size and cake design.
“,”visible”:true}]} –>How Many Diapers Do You Need To Make A Diaper Jeep?
You need about 28 to 35 diapers to make a diaper jeep. This includes tires and body structure.
What Do You Need To Make A Jeep Diaper Cake?
To make a Jeep diaper cake, gather diapers, baby bottles, pacifiers, baby socks, a small basket, foam, and crafting tools. Roll and secure diapers for tires, use bottles for axles, and decorate with socks and pacifiers. Assemble parts to create a Jeep shape.
How Do I Make A Homemade Diaper?
To make a homemade diaper, fold a clean cloth diaper, place absorbent material inside, and secure with safety pins or fasteners.
How Many Diapers Does It Take To Make A Four-tier Diaper Cake?
A four-tier diaper cake usually requires about 80 to 100 diapers. The exact number varies by diaper size and cake design.
Conclusion
Making a diaper jeep is a fun and creative project anyone can try. It uses simple materials like diapers and baby items.
The steps are easy to follow and help you build a unique gift. This craft adds a personal touch to baby showers and celebrations.
Enjoy the process and be proud of your handmade diaper jeep. It brings joy and shows care in a special way.
Start gathering supplies and make your own diaper jeep today!