Is your 2009 Jeep Liberty’s brake light not working? A faulty brake light can be dangerous and may even get you a ticket.
But don’t worry changing it yourself is easier than you think. In this guide, you’ll learn simple, step-by-step instructions to fix your brake light quickly and safely.
Keep reading, and you’ll have your Jeep’s brake light shining bright in no time.
Tools Needed
Changing the brake light on a 2009 Jeep Liberty is simple with the right tools. Having the correct tools ready saves time and avoids frustration. These tools help you open the light housing and replace the bulb safely.
Most tools are common and easy to find. No need for special equipment or skills. Basic hand tools and a new brake light bulb are enough to complete the job.
Phillips Head Screwdriver
A Phillips head screwdriver removes screws holding the light cover. It fits most screws on the Jeep Liberty’s brake light assembly. Choose a medium size for better grip and control.
Flat Head Screwdriver
The flat head screwdriver helps pry off the light cover gently. Use it to lift clips or panels without breaking them. A small or medium flat head works best.
Replacement Brake Light Bulb
Buy the correct bulb type for the 2009 Jeep Liberty. Check the owner’s manual for the exact bulb number. The bulb must fit perfectly and work safely.
Gloves
Wear gloves to protect your hands and avoid dirt. Gloves also keep the new bulb clean. Oils from your skin can shorten the bulb’s life.
Socket Wrench (optional)
A socket wrench may be needed for bolts on some models. Usually, a 7mm or 8mm socket fits the brake light bolts. This tool makes removal faster and easier.
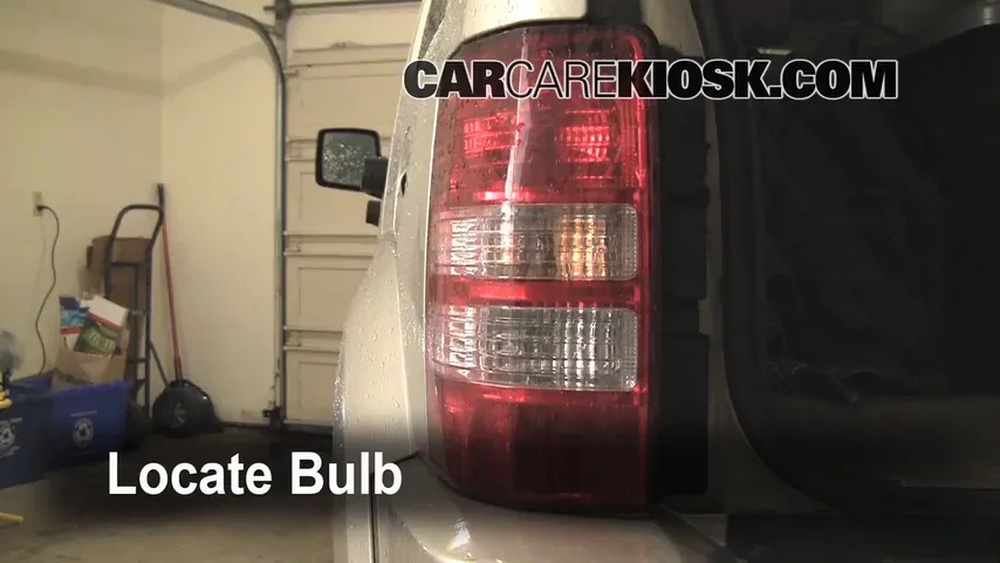
Locate The Brake Light Assembly
Finding the brake light assembly on a 2009 Jeep Liberty is the first step. It helps to know exactly where the light is before starting any work. This makes the process easier and faster.
The brake light assembly is part of the rear light cluster. It holds the brake bulb that signals other drivers when you stop. Knowing its location saves time and avoids confusion.
Open The Rear Liftgate
Start by opening the rear liftgate of your Jeep Liberty. This gives access to the back part of the light assembly. The liftgate opens upward and provides enough room to work.
Locate The Light Housing
Look at the left or right side of the rear of the vehicle. The brake light assembly sits inside the light housing. This housing contains brake, turn signal, and reverse lights.
Remove The Interior Panel
Inside the liftgate, find the plastic panel behind the light housing. Gently remove this panel to expose the brake light assembly screws. Use a flat tool to pry it off carefully.
Identify The Brake Light Bulb Socket
Look for the bulb socket in the assembly. The brake light socket usually has two or three bulbs. Twist it counterclockwise to remove it from the housing.
Remove The Brake Light Cover
Start by locating the screws holding the brake light cover on the 2009 Jeep Liberty. Carefully unscrew and lift the cover to access the bulb inside.
This step allows safe removal of the old brake light bulb.
Prepare Your Tools And Vehicle
Park your 2009 Jeep Liberty on a flat surface. Turn off the engine and set the parking brake. Gather a flathead screwdriver or a trim removal tool. These tools help you remove the brake light cover safely.
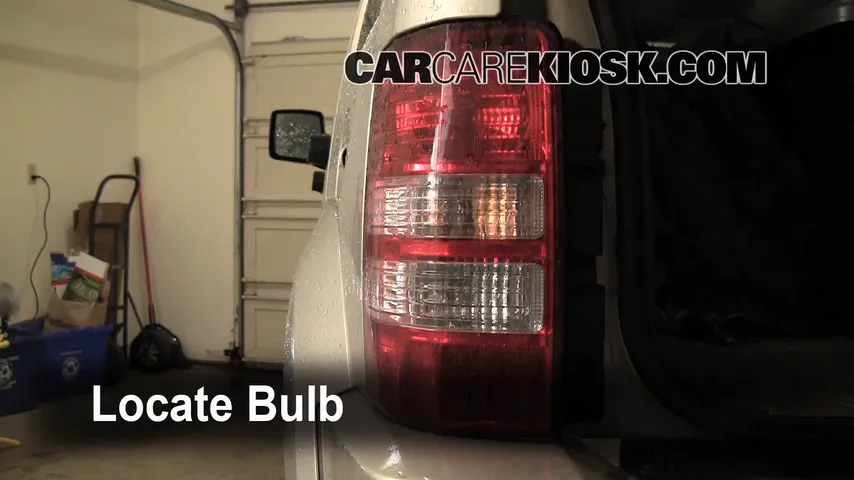
Locate The Brake Light Cover
Open the rear hatch of your Jeep Liberty. Look at the brake light assembly on the back of the vehicle. The brake light cover is the clear or red plastic lens protecting the bulb. It sits over the brake light socket.
Remove Screws Or Clips Holding The Cover
Check for screws on the brake light cover edges. Use the screwdriver to remove them carefully. Some covers use clips instead of screws. Gently pry the cover using the trim removal tool if clips hold it.
Gently Pry Off The Brake Light Cover
Insert the flathead screwdriver or trim tool between the cover and the vehicle body. Push slowly to avoid cracking the plastic. Work your way around the cover edge. Lift the cover off once it loosens.
Inspect The Cover And Surrounding Area
Look for cracks or dirt on the brake light cover. Clean the cover with a soft cloth if needed. Check the light housing for damage or corrosion. A clean, intact cover ensures proper brake light function.
Credit: www.carcarekiosk.com
Take Out The Old Brake Light Bulb
Removing the old brake light bulb on a 2009 Jeep Liberty is simple. This step is important before installing a new bulb. It ensures the light works properly and keeps you safe on the road.
Take your time and follow each step carefully. Avoid touching the glass part of the new bulb to keep it from burning out early. Let’s start with how to access and remove the old bulb safely.
Open The Tail Light Assembly
First, open the Jeep Liberty’s rear hatch. Locate the tail light assembly inside the rear corner. Use a screwdriver to remove the screws holding the tail light cover. Carefully pull the cover away to expose the bulbs.
Remove The Bulb Socket
Find the brake light bulb socket inside the assembly. Twist the socket counterclockwise to find it. Gently pull the socket out of the tail light housing. This action exposes the old brake light bulb.
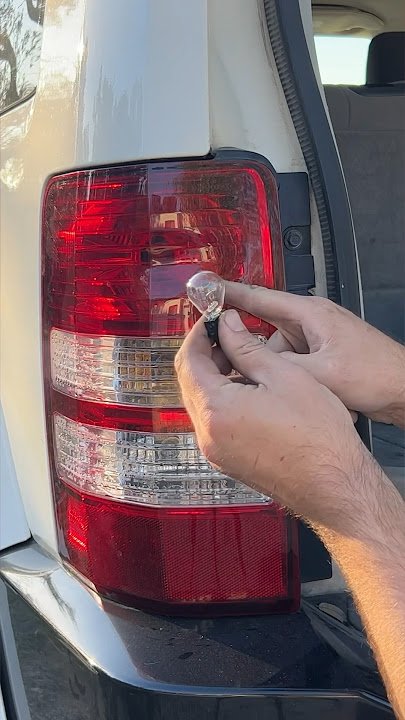
Pull Out The Old Bulb
Hold the base of the bulb and pull it straight out of the socket. Avoid twisting the bulb to prevent damage. If the bulb feels stuck, wiggle it gently until it comes free. Dispose of the old bulb safely.
Install The New Brake Light Bulb
Installing the new brake light bulb on your 2009 Jeep Liberty is a simple task. It requires care and attention to avoid damage. Follow the steps carefully to ensure the bulb fits correctly and works well.
Use clean hands or gloves to handle the new bulb. Oils from your skin can shorten the bulb’s life. Make sure the bulb type matches the original for proper fit and brightness.
Align The Bulb Properly
Hold the new bulb by its base. Do not touch the glass part. Line up the bulb’s tabs with the slots in the socket. The bulb should fit snugly without force.
Insert The Bulb Into The Socket
Push the bulb gently into the socket. Turn it clockwise until it locks in place. You will feel a slight click or resistance. Avoid pushing too hard to prevent breakage.
Secure The Brake Light Assembly
Place the brake light assembly back into its position. Make sure it fits flush against the vehicle. Tighten any screws or clips removed earlier. Check that the assembly is firm and does not move.
Turn on the ignition and press the brake pedal. Have someone watch the brake light or use a reflective surface. Confirm the light glows brightly and stays steady. Replace the cover if everything works correctly.
Credit: www.youtube.com
Test The New Brake Light
After changing the brake light on your 2009 Jeep Liberty, check if the new bulb works. Press the brake pedal and watch the light glow.
This ensures safety and confirms the replacement is done correctly.
Why Test The New Brake Light?
Testing the new brake light ensures it works properly. A working brake light keeps you safe on the road. It alerts drivers behind you when you slow down or stop. This step prevents accidents and traffic tickets.
Skipping the test might cause you to miss a broken bulb. Always check before finishing the job.
How To Test The New Brake Light
First, turn on your vehicle’s ignition without starting the engine. Press the brake pedal and ask someone to watch the light. The new brake light should glow bright and steady. If no one is available, use a reflective surface to see the light yourself.
What To Do If The Light Doesn’t Work
Double-check the bulb installation. Make sure it fits snugly and the connections are clean. Inspect the fuse related to the brake light in your Jeep Liberty. Replace the fuse if it is blown. If the light still fails, consider testing the brake light switch or wiring.
Reassemble The Brake Light Cover
Reassembling the brake light cover is the last step after changing the bulb. This part protects the new bulb and keeps moisture out. It also helps the brake light shine clearly for other drivers. Follow these steps to put the cover back properly. This ensures safety and keeps your Jeep Liberty looking good.
Align The Brake Light Cover Correctly
Place the brake light cover near its original position. Check the edges and make sure they fit the grooves. Align the cover with the plastic clips or screws. This avoids damage to the cover or the light housing.
Press The Cover Gently Into Place
Push the cover gently but firmly. Listen for a click or snap sound. This means the cover is locked in place. Do not use too much force to avoid cracking it.
Secure The Cover With Screws Or Clips
Insert screws into their holes if your model has them. Tighten screws with a screwdriver until snug. Do not overtighten to prevent stripping the threads. If clips hold the cover, press them down firmly.
Test The Brake Light After Reassembly
Turn on your Jeep and press the brake pedal. Check that the brake light shines bright and steady. This confirms the cover and bulb are secure. A working brake light keeps you safe on the road.
Common Issues And Tips
Changing the brake light on a 2009 Jeep Liberty may seem simple. Yet, some common issues can cause trouble. Knowing these helps avoid mistakes and saves time. This section covers key problems and tips to make the job easier.
Bulb Compatibility
Not all bulbs fit the 2009 Jeep Liberty. Use the exact bulb type recommended in the manual. Different bulbs can cause poor lighting or damage. Check the bulb number before buying. Choose quality bulbs for longer life and better brightness.
Handling Fragile Parts
The brake light assembly has delicate parts. Handle the plastic cover carefully to avoid cracks. Use gentle force when removing or installing bulbs. Avoid touching the glass part of the bulb with bare hands. Oils from skin can shorten bulb life.
When To Seek Professional Help
Some issues need expert care. If wiring looks damaged, call a mechanic. Complex electrical problems can cause safety risks. If the bulb still does not work after replacement, get professional help. Better safe than sorry with brake lights.
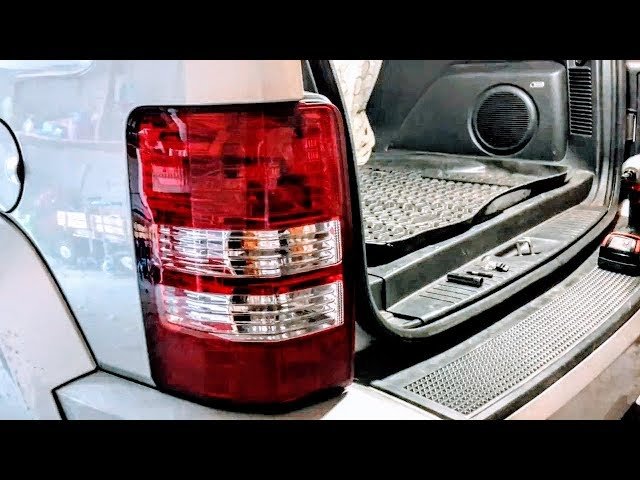
Credit: www.youtube.com
<!– wp:rank-math/faq-block {"questions":[{"id":"faq-question-ae43f0b8250d","title":"How Do I Access The Brake Light On A 2009 Jeep Liberty?","content":"To access the brake light, open the rear hatch and remove the interior trim panel. Then, locate and unscrew the brake light housing to reach the bulb.
“,”visible”:true},{“id”:”faq-question-556769f1376c”,”title”:”What Type Of Bulb Does A 2009 Jeep Liberty Use?”,”content”:”The 2009 Jeep Liberty uses a 3157 dual filament bulb for the brake light. Always check your owner’s manual to confirm the exact bulb type.
“,”visible”:true},{“id”:”faq-question-a1897cc6f437″,”title”:”How Can I Safely Remove The Brake Light Bulb?”,”content”:”Turn off the vehicle and disconnect the battery. Twist the bulb socket counterclockwise and gently pull the bulb out without forcing it.
“,”visible”:true},{“id”:”faq-question-e7a24c94aef9″,”title”:”How Long Does It Take To Change The Brake Light?”,”content”:”Changing the brake light on a 2009 Jeep Liberty typically takes 10 to 15 minutes with basic tools and no complications.
“,”visible”:true}]} –>How Do I Access The Brake Light On A 2009 Jeep Liberty?
To access the brake light, open the rear hatch and remove the interior trim panel. Then, locate and unscrew the brake light housing to reach the bulb.
What Type Of Bulb Does A 2009 Jeep Liberty Use?
The 2009 Jeep Liberty uses a 3157 dual filament bulb for the brake light. Always check your owner’s manual to confirm the exact bulb type.
How Can I Safely Remove The Brake Light Bulb?
Turn off the vehicle and disconnect the battery. Twist the bulb socket counterclockwise and gently pull the bulb out without forcing it.
How Long Does It Take To Change The Brake Light?
Changing the brake light on a 2009 Jeep Liberty typically takes 10 to 15 minutes with basic tools and no complications.
Conclusion
Changing the brake light on a 2009 Jeep Liberty is simple and quick. You only need a few tools and some patience.
Follow the steps carefully to avoid damage. A working brake light keeps you safe on the road.
Check your lights regularly to stay visible to others.
Taking care of small repairs saves time and money later. Now, you can fix your brake light without help. Ready to drive safely again?