Replacing the interior lights on your Jeep Grand Cherokee is one of the easiest ways to refresh your vehicle’s cabin. Whether you want brighter illumination, a modern look, or just need to fix a burnt-out bulb, this task is simple, cost-effective, and can be completed with basic tools.
Upgrading to LED bulbs is also popular, providing longer life and better efficiency. In this article, you’ll learn step-by-step how to replace interior lights, which tools you need, and practical tips to avoid common mistakes.
By the end, you’ll feel confident tackling this job yourself.
Types Of Interior Lights In Jeep Grand Cherokee
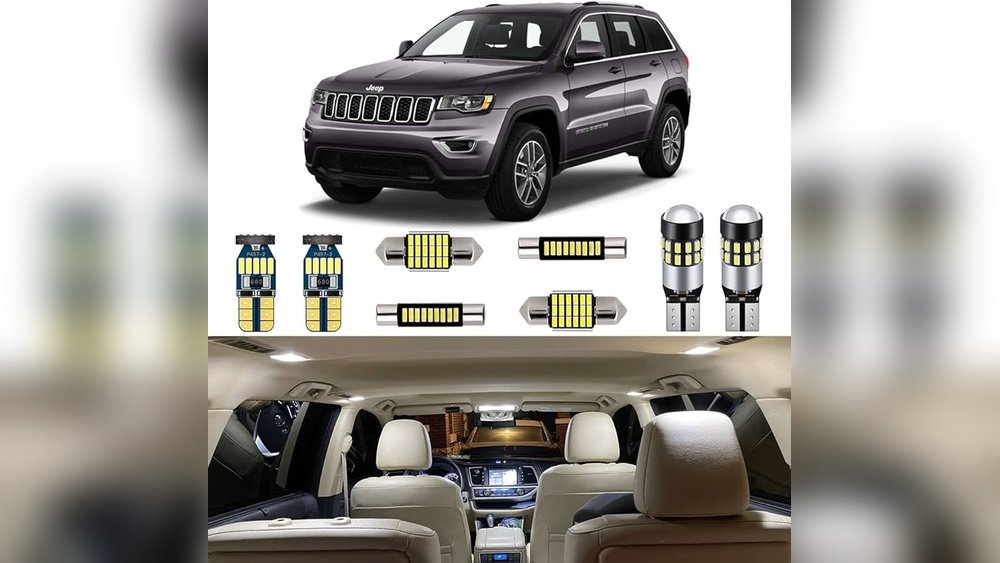
Your Jeep Grand Cherokee uses several types of interior lights. Knowing their locations helps you plan your replacement.
- Dome lights: Located in the center roof, they illuminate the whole cabin.
- Map lights: Near the front seats, these help drivers and passengers read maps or find items.
- Cargo lights: Found in the trunk area, useful for loading at night.
- Door courtesy lights: Inside the lower part of doors, they light up the ground when you enter or exit.
Different trim levels may have slightly different bulbs, so always check your owner’s manual for exact specifications.
| Light Location | Bulb Type | Average Lifespan |
|---|---|---|
| Dome | 194 or 578 | 2-3 years (halogen), 5-10 years (LED) |
| Map | W5W | 2-3 years (halogen), 5-10 years (LED) |
| Cargo | 168 | 2-3 years (halogen), 5-10 years (LED) |
| Courtesy | T10 | 2-3 years (halogen), 5-10 years (LED) |
Tools And Materials You’ll Need
Before starting, gather the following:
- Replacement bulbs (LED or halogen, matching your vehicle specs)
- Plastic trim removal tool (prevents scratching)
- Gloves (protects from oils and heat)
- Flathead screwdriver (for tight covers)
- Owner’s manual (for bulb type reference)
Most bulbs cost $5 $15 each. LED upgrades may be pricier but save money over time.
Step-by-step Guide: Replacing Interior Lights
Replacing the bulbs is straightforward. Here’s how to do it safely and efficiently.
1. Turn Off The Power
Always turn off the engine and lights before starting. This prevents electrical shock and accidental burns.
For extra safety, disconnect the negative battery terminal.
2. Remove The Light Cover
Use a plastic trim removal tool to gently pry off the light cover. If the cover is stubborn, a flathead screwdriver wrapped in a cloth can help. Be careful not to break the plastic.
3. Remove The Old Bulb
Wearing gloves, carefully pull out the old bulb. For wedge bulbs, a gentle wiggle works best.
If it’s stuck, avoid using force sometimes rotating helps.
4. Install The New Bulb
Insert the replacement bulb. If you’re using LED bulbs, note that they only work one way—if the bulb doesn’t light up, flip it around and reinstall.
5. Test The Light
Reconnect the battery (if disconnected) and turn on the light to check if the bulb works. If not, double-check bulb orientation and connection.
6. Replace The Cover
Snap the cover back in place. If it doesn’t fit easily, make sure the bulb is fully seated.
Upgrading To Led: Is It Worth It?
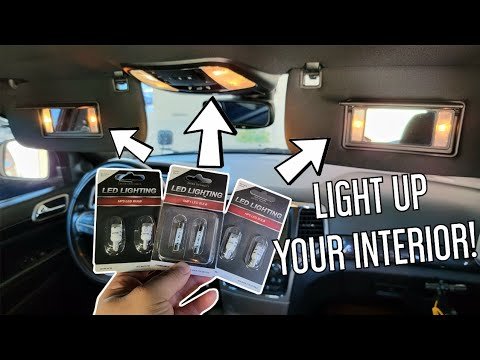
Many owners switch to LED bulbs for their interior lights. LEDs are brighter, use less energy, and last longer. Halogen bulbs may cost less up front, but LEDs reduce replacement frequency.
| Bulb Type | Brightness (Lumens) | Energy Use | Lifespan |
|---|---|---|---|
| Halogen | 60-100 | High | 2-3 years |
| LED | 200-300 | Low | 5-10 years |
One thing beginners often miss: Some cheap LED bulbs may cause flickering or error codes in newer Grand Cherokees. Choose bulbs labeled CANBUS compatible to avoid these issues.

Common Mistakes And How To Avoid Them
- Wrong bulb size: Always check the bulb type in your owner’s manual.
- Using metal tools: Metal can scratch covers or damage wiring. Use plastic tools whenever possible.
- Not disconnecting the battery: This can lead to shorts or burns, especially with metal tools.
- Touching bulbs with bare hands: Oil from skin shortens bulb life. Always wear gloves.
- Forcing covers: Excessive force breaks tabs or covers. Always pry gently.
A non-obvious tip: If your new bulb doesn’t work, check the socket for corrosion. Cleaning with electrical contact cleaner can solve this problem.
Practical Tips For A Smooth Replacement
- Replace all similar bulbs at once for consistent brightness.
- Test each bulb before finalizing the cover installation.
- Keep spare bulbs in your glove box for emergencies.
If you’re unsure about bulb compatibility or wiring, check the official Jeep Grand Cherokee forums or consult a mechanic.
When To Seek Professional Help
Most replacements are simple, but sometimes issues require expert attention:
- Light doesn’t work after replacement and socket looks damaged.
- Multiple lights fail at once (could be a fuse issue).
- You notice burning smell or sparks during replacement.
In these cases, visit a certified Jeep dealer or trusted auto shop for diagnosis.
Cost Estimates
Generally, replacing all interior bulbs costs between $30–$80. LED upgrades may raise this to $100+, but you’ll save on future replacements.
| Replacement Type | Average Cost (Parts) | Labor (DIY) | Labor (Shop) |
|---|---|---|---|
| Halogen Bulbs | $30–$50 | $0 | $40–$80 |
| LED Bulbs | $60–$100 | $0 | $40–$80 |
Frequently Asked Questions
How Do I Know Which Bulb To Buy?
Check your owner’s manual or the bulb itself for the type and size. Most auto parts stores have guides for Jeep Grand Cherokee models.
Can I Mix Halogen And Led Bulbs?
Yes, but it may cause uneven brightness. For best results, use the same type throughout the cabin.
Why Do My New Led Bulbs Flicker?
Flickering often means the bulbs are not CANBUS compatible. Choose bulbs designed for modern vehicles to avoid this issue.
Is It Safe To Replace Interior Lights Myself?
Yes, as long as you follow safety steps turn off power, use plastic tools, and avoid touching bulbs with bare hands.
Where Can I Find Official Bulb Specifications?
Visit the official Jeep website or trusted sources like Jeep’s official parts catalog for accurate information.
Replacing the interior lights in your Jeep Grand Cherokee is a quick way to improve comfort and visibility. With the right bulbs and tools, most owners can complete this task in under 30 minutes.
Take care during installation, and consider LED upgrades for a brighter, longer-lasting result.
If you run into issues, don’t hesitate to ask a professional for help.