The 2012 Jeep Liberty serpentine belt is a crucial component that drives many essential engine accessories. When this belt wears out or breaks, it can leave you stranded.
Understanding its routing and the signs of wear is vital for any Jeep Liberty owner. This guide will provide a detailed look at the serpentine belt system for the 2012 model year, helping you identify potential issues and maintain your vehicle.
Understanding The Serpentine Belt System
The serpentine belt, also known as an accessory belt, is a single, long belt that snakes around various pulleys in your engine. Its primary job is to power components like the alternator, power steering pump, air conditioning compressor, and water pump.
Unlike older V-belts that ran individual accessories, the serpentine belt simplifies the engine’s accessory drive system. For the 2012 Jeep Liberty, this belt is engineered to handle the load of all these systems simultaneously, ensuring they operate efficiently.
The 2012 Jeep Liberty serpentine belt is typically made of a durable rubber compound designed to withstand heat, tension, and constant flexing. Over time, however, this material degrades due to exposure to engine heat, oil, and the mechanical stress of its continuous operation. This degradation can lead to cracks, fraying, or stretching, all of which compromise the belt’s ability to function correctly. Regular inspection and timely replacement are key to preventing unexpected breakdowns and more costly engine damage.
The Role Of Each Pulley
Each pulley the serpentine belt interacts with plays a specific role in your Jeep Liberty’s operation. Understanding these roles helps in diagnosing problems.
- Crankshaft Pulley: This is usually the largest pulley and is directly connected to the engine’s crankshaft. It’s the driving force behind the serpentine belt, receiving power from the engine’s rotation.
- Alternator Pulley: Connected to the alternator, this pulley ensures the alternator spins to generate electricity for the vehicle’s battery and electrical systems. A worn belt or a slipping pulley here can lead to a dead battery.
- Power Steering Pump Pulley: This pulley drives the power steering pump, which provides hydraulic assistance for easier steering. If the belt slips on this pulley, you’ll notice your steering becoming stiff, especially at low speeds.
- Water Pump Pulley: The water pump circulates coolant through the engine to prevent overheating. A properly functioning pulley and belt are essential for maintaining the correct engine temperature.
- Air Conditioning (A/C) Compressor Pulley: This pulley engages the A/C compressor, which circulates refrigerant to cool the cabin. While not critical for engine operation, a faulty belt here will mean no air conditioning.
- Tensioner Pulley: This is a critical component. The tensioner pulley maintains the correct tension on the serpentine belt, ensuring it grips all other pulleys firmly. It often has a spring-loaded or hydraulic mechanism to automatically adjust belt tension as the belt wears or expands/contracts with temperature changes. A failing tensioner can cause the belt to slip, squeal, or even come off.
- Idler Pulley (if applicable): Some systems include an idler pulley, which acts like a guide or a smooth idler to reroute the belt or maintain tension. It doesn’t drive an accessory but is crucial for proper belt routing and tension.
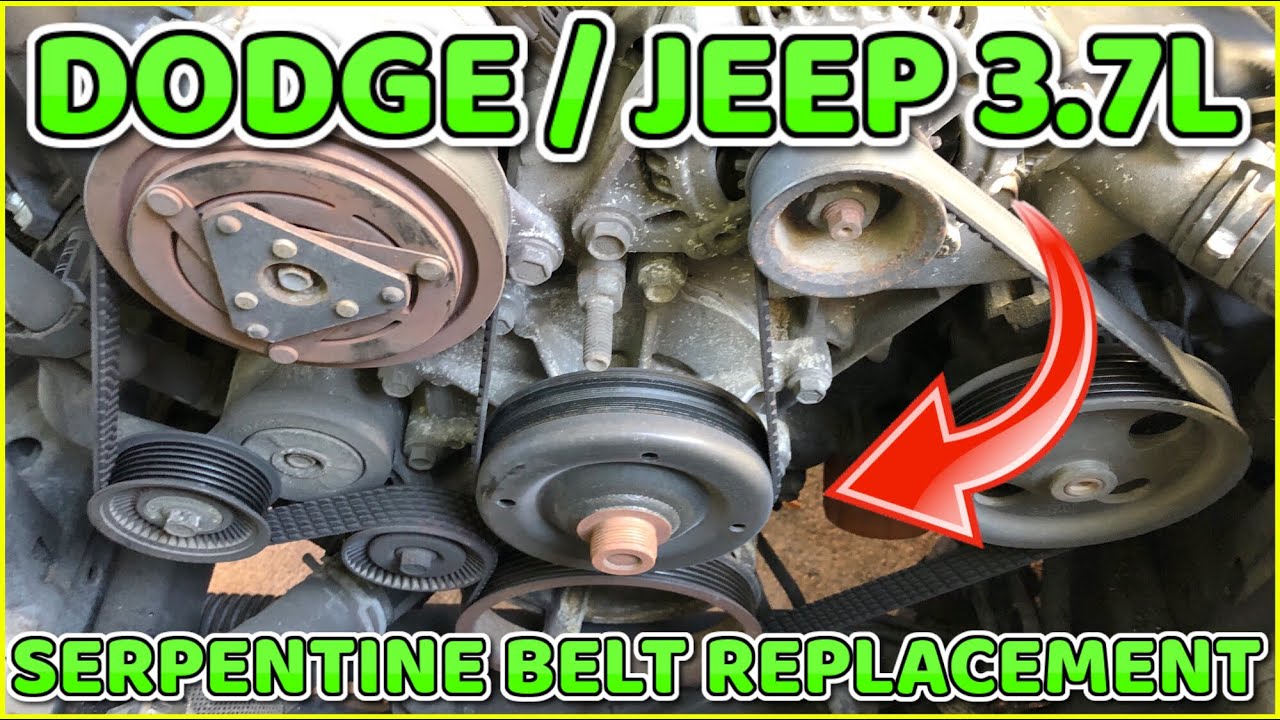
2012 Jeep Liberty Serpentine Belt Diagram And Routing
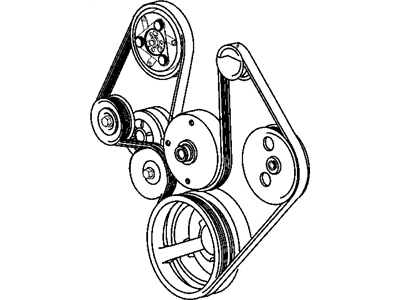
The exact routing of the serpentine belt is critical for its proper function. A 2012 Jeep Liberty serpentine belt diagram shows how the belt must wrap around each pulley in a specific sequence. Deviating from this path will prevent the belt from driving the accessories correctly, or worse, cause it to slip or come off entirely.
For the 2012 Jeep Liberty, which typically came with a 3. 7L V6 engine, the serpentine belt routing is fairly standard for this engine configuration.
The belt follows a path that allows it to engage with the crankshaft, alternator, power steering pump, water pump, and A/C compressor, all while being kept taut by the tensioner.
Visualizing The Belt Path
To best understand the routing, imagine the engine compartment from the front. The crankshaft pulley is at the bottom, driving the belt upwards. From there, it might loop around the power steering pump pulley, then down towards the water pump pulley. It then continues to the alternator pulley, often located higher up, and then towards the A/C compressor pulley, usually found lower down on the passenger side. The tensioner pulley is typically positioned to apply pressure, ensuring the belt has sufficient grip on all the other pulleys.
Pro Tip: Many owners find it helpful to take a clear photo of the belt routing with their smartphone *before* removing the old belt. This provides an instant visual reference when installing the new one, especially if the engine bay is crowded or lighting is poor.
Importance Of Correct Routing
Incorrect belt routing is one of the most common mistakes during replacement. If the belt isn’t seated properly in the grooves of the pulleys, it won’t engage all the accessories. This can manifest as:
- Lack of power steering: If the power steering pulley isn’t engaged.
- Overheating: If the water pump pulley isn’t engaged.
- Dying battery: If the alternator pulley isn’t engaged.
- A/C not working: If the A/C compressor pulley isn’t engaged.
- Excessive noise or vibration: If the belt is misaligned or rubbing.
- Belt failure: The belt could slip off or shred prematurely.
Always consult a reliable 2012 Jeep Liberty serpentine belt diagram or a service manual if you are unsure about the correct routing.
Signs Of A Worn Serpentine Belt
Serpentine belts don't fail overnight. They show signs of wear and tear that, if noticed, can prevent a breakdown.
Being aware of these signs can save you time, money, and stress.
Audible Clues
One of the first indications of a failing serpentine belt is noise.
- Squealing: A high-pitched squeal, especially on startup or when accelerating, is a common sign of a worn or loose belt. This usually happens when the belt is slipping on one of the pulleys, most often the alternator or power steering pulley. As the belt ages, it can become glazed and hardened, losing its grip. Moisture, like rain or a leaky fluid hose, can also cause temporary squealing.
- Chirping: A more persistent chirping sound might indicate a misalignment of one of the pulleys or a bearing issue in one of the accessory components, which is indirectly affecting the belt.
Visual Indicators
A thorough visual inspection can reveal a lot about the belt’s condition.
- Cracks: Look for small cracks on the ribbed side of the belt. As the rubber ages, it becomes brittle and develops cracks. The deeper and more numerous the cracks, the closer the belt is to failure.
- Fraying: The edges of the belt might start to fray or show signs of wear. This can happen if the belt is rubbing against something it shouldn’t be, or if a pulley is misaligned.
- Glazing: The ribbed surface of the belt may appear shiny or smooth. This “glazing” is a sign that the belt has been slipping and has hardened, reducing its grip.
- Contamination: If the belt is exposed to oil or coolant leaks, it can degrade the rubber prematurely, causing it to swell or become soft and mushy.
Performance Issues
The most serious signs are when the accessories driven by the belt start to malfunction.
- Dimming Headlights/Electrical Issues: If the alternator is not being driven properly due to a slipping or worn belt, the battery may not charge, leading to dim headlights or electrical system warnings.
- Stiff Steering: A slipping belt on the power steering pump pulley will make steering much harder.
- Engine Overheating: If the water pump is not circulating coolant effectively because the belt is slipping, the engine temperature gauge will rise, potentially leading to overheating.
- A/C Not Cooling: If the A/C compressor pulley is not being driven, the air conditioning system will not function.
Serpentine Belt Replacement Procedure
Replacing the serpentine belt on a 2012 Jeep Liberty is a manageable DIY task for those with basic mechanical knowledge and tools. However, it’s crucial to follow the correct procedure to avoid damaging other components.
Tools And Materials Needed
Before you start, gather the necessary items:
- New Serpentine Belt: Ensure you have the correct belt for your 2012 Jeep Liberty (3.7L engine). Check your owner’s manual or a reputable parts supplier.
- Serpentine Belt Tool Kit: This typically includes a long, breaker-bar-like tool with various socket attachments designed to fit the tensioner pulley. This allows you to release the belt tension.
- Socket Set and Ratchet: For removing any covers or components if necessary, and for using with the belt tool.
- Work Light: To see clearly in the engine bay.
- Gloves and Safety Glasses: For personal protection.
- A Clear Diagram: A printout or photo of the belt routing.
Step-by-step Replacement Guide
- Locate the Serpentine Belt and Tensioner: Open the hood and identify the serpentine belt and its path. Find the tensioner pulley, which is usually spring-loaded and has a square hole or a bolt head designed for a wrench or breaker bar.
- Note the Belt Routing: Before doing anything else, take a clear picture or sketch the belt’s path around all the pulleys. This is the most important step for a successful installation.
- Release Belt Tension: Insert the serpentine belt tool or a suitable breaker bar into the designated slot on the tensioner pulley. Apply steady pressure in the direction that loosens the belt (this direction varies, so refer to your tool’s instructions or a manual). You’ll see the tensioner pulley move, releasing tension on the belt.
- Remove the Old Belt: While holding the tensioner in the released position, carefully slip the old belt off one of the pulleys, starting with an easily accessible one like the tensioner itself or an idler pulley. Once it’s off one pulley, you can gently work it off the others.
- Inspect Pulleys: With the belt removed, take this opportunity to inspect all the pulleys. Spin each one by hand. They should rotate smoothly without any grinding, wobbling, or excessive noise. If any pulley feels rough, makes noise, or has play, it needs to be replaced. Also, check for any debris or damage on the pulley grooves.
- Install the New Belt: Route the new belt according to your diagram. Start by slipping it onto the crankshaft pulley and working it around the other pulleys, leaving the tensioner pulley for last.
- Apply Tension and Seat the Belt: Once the belt is routed around all pulleys except the tensioner, carefully move the tensioner pulley again using your tool to create slack. Slip the belt onto the final pulley (the tensioner pulley itself, if that’s the last one). Ensure the belt is fully seated in the grooves of *all* pulleys.
- Release Tensioner and Final Check: Slowly release the tensioner. The belt should now be taut. Double-check that the belt is correctly seated on every pulley and that no part of it is misaligned.
- Start the Engine: Start the engine briefly and listen for any unusual noises. Check that all accessories are functioning correctly (power steering, A/C, etc.). Let the engine run for a few minutes to ensure the new belt settles in.
Warning: Never use excessive force or pry against delicate components when releasing tension. If you are unsure about any step, consult a professional mechanic.
Maintaining Your Serpentine Belt
Regular maintenance is key to ensuring the longevity and reliability of your 2012 Jeep Liberty serpentine belt. Proactive care can prevent unexpected failures and costly repairs.
Inspection Schedule
It’s recommended to inspect your serpentine belt at least twice a year or every 10,000-15,000 miles. More frequent checks are advisable if you frequently drive in harsh conditions (extreme heat, cold, dust, or moisture).
What To Look For During Inspection
During your inspection, pay close attention to the visual signs of wear mentioned earlier: cracks, fraying, glazing, and contamination. Also, check the belt’s tension. While the tensioner is automatic, a belt that appears excessively loose or has significant slack might indicate a failing tensioner or a stretched belt beyond its service life. Listen for any new noises coming from the engine bay, especially squealing or chirping, which could point to belt or pulley issues.
When To Replace The Belt
Most serpentine belts are recommended for replacement every 60,000 to 100,000 miles, but this can vary significantly based on belt quality, driving conditions, and the specific engine. Always refer to your Jeep Liberty’s owner’s manual or a reliable service guide for the manufacturer’s recommended replacement interval. However, don’t just rely on mileage. If you notice any of the signs of wear discussed previously, it’s best to replace the belt immediately, regardless of mileage. A broken belt can leave you stranded and potentially cause further damage to other engine components if it wraps around them.
Replacing The Tensioner And Idler Pulleys
It’s often recommended to replace the serpentine belt tensioner and any idler pulleys at the same time you replace the belt, especially if they are original equipment or show signs of wear. These components work in conjunction with the belt, and a failing tensioner or a worn idler pulley bearing can quickly ruin a new belt, leading to noise, slippage, or premature failure. Replacing them together is a proactive measure that saves labor costs in the long run.
Common Serpentine Belt Issues And Troubleshooting
Even with regular maintenance, serpentine belts can develop issues. Knowing how to troubleshoot common problems can help you identify the root cause and find a solution.
Squealing Noise
- Cause: Most commonly, a slipping belt due to wear, contamination, or insufficient tension. It can also be caused by a seized or failing accessory pulley (alternator, power steering pump, A/C compressor) that is dragging the belt.
- Troubleshooting:
- Visual Inspection: Check the belt for cracks, glazing, or contamination.
- Check Tensioner: Ensure the tensioner is applying adequate pressure. If it feels weak or doesn’t move freely, it may need replacement.
- Inspect Pulleys: Spin each pulley by hand with the engine off. Listen for grinding or roughness. A seized pulley will prevent the belt from moving freely.
- Water Test (Briefly): With the engine running, carefully spray a *small* amount of water on the belt. If the