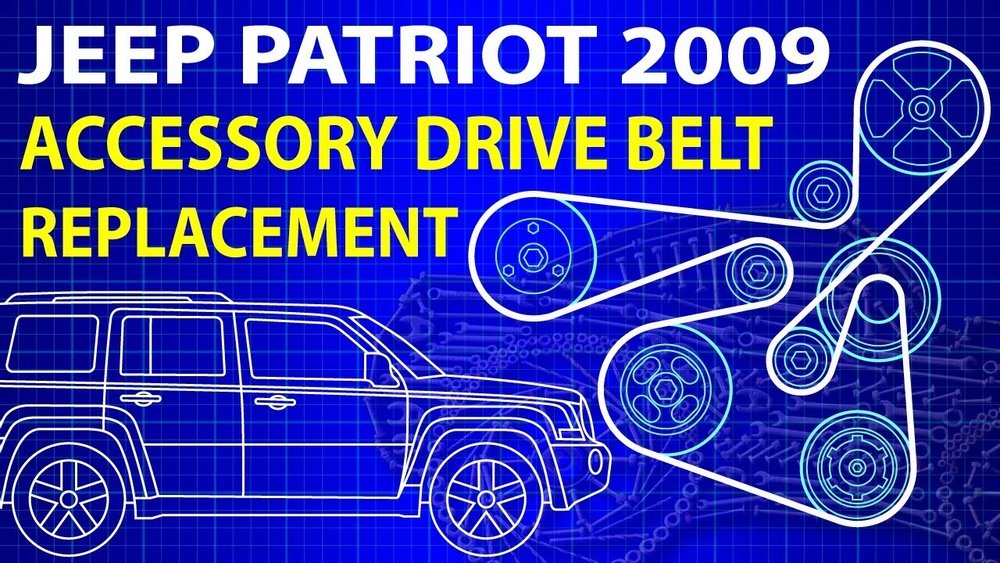
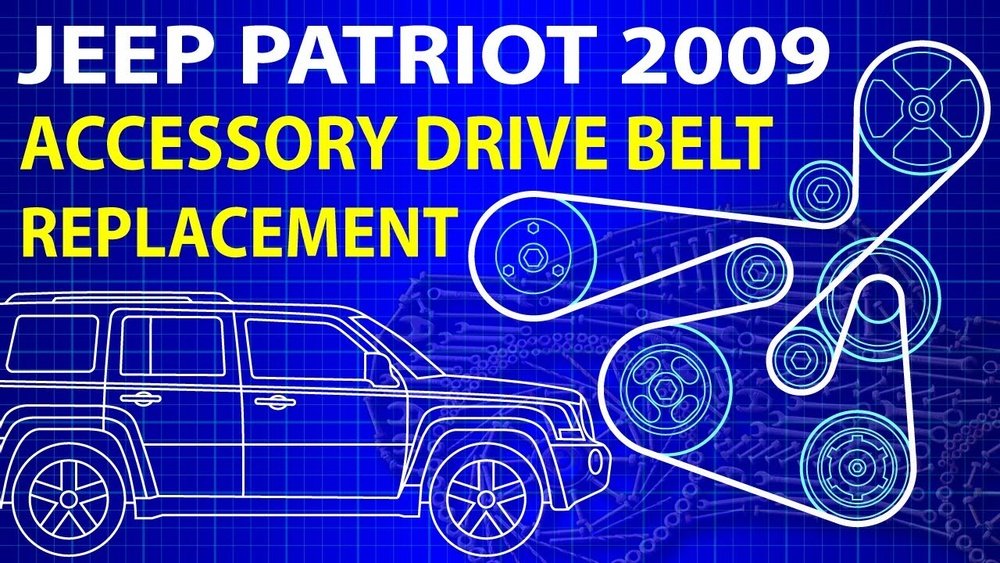
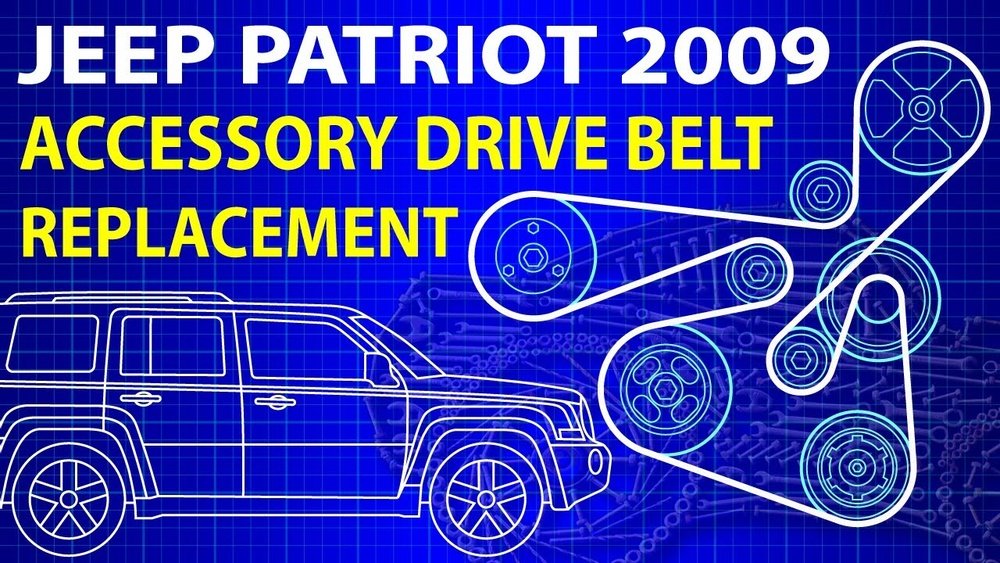
The 2010 Jeep Patriot 2. 4L engine, like any internal combustion engine, relies on a precisely timed sequence of events to operate efficiently.
A crucial component in this system is the serpentine belt, also known as the drive belt. This single, continuous belt snakes around various pulleys to power essential accessories such as the alternator, power steering pump, air conditioning compressor, and water pump.
Understanding the 2010 Jeep Patriot 2. 4 belt diagram is vital for any owner who plans to perform maintenance or repairs, particularly belt replacement.
A worn or misaligned belt can lead to a cascade of problems, from a dead battery to overheating and loss of steering assist.
This guide will walk you through the intricacies of the serpentine belt system for your specific model, ensuring you have the knowledge to keep your Jeep running smoothly.
Understanding The Serpentine Belt System
The serpentine belt system is a marvel of modern engineering, consolidating the function of multiple older V-belts into one robust, grooved belt. This design not only saves space but also increases efficiency and reduces the likelihood of belt slippage.
The belt's path is dictated by the arrangement of pulleys, each serving a specific purpose.
The tensioner pulley is a key component, maintaining the correct belt tension to prevent slippage and ensure all accessories receive adequate power. Without proper tension, the belt can slip, leading to reduced performance of the powered accessories and premature belt wear.
The 2010 Jeep Patriot with the 2. 4L engine (often referred to as the GEMA engine) has a specific serpentine belt routing that must be followed precisely.
Deviating from this path will prevent the accessories from functioning correctly, and could even cause damage to the belt or surrounding components.
The belt itself is designed to last for a considerable mileage, but factors like age, contamination from oil or coolant, and misalignment can significantly shorten its lifespan. Regular inspection is therefore paramount.
Identifying The Serpentine Belt Components
Before diving into the diagram, it’s helpful to know what each component does. On your 2010 Jeep Patriot 2.4L, you’ll find the following key players in the serpentine belt system:
- Crankshaft Pulley: This is the largest pulley and is directly connected to the engine’s crankshaft. It’s the primary source of rotational power for the belt.
- Alternator Pulley: The alternator converts engine power into electrical energy to charge the battery and power the vehicle’s electrical systems.
- Power Steering Pump Pulley: This pulley drives the power steering pump, which assists in turning the steering wheel, making it easier to maneuver the vehicle.
- Air Conditioning (A/C) Compressor Pulley: When the A/C is engaged, this pulley drives the compressor, which circulates refrigerant to cool the cabin.
- Water Pump Pulley: The water pump circulates coolant through the engine and radiator, preventing overheating.
- Idler Pulley(s): These pulleys are used to guide the belt along its path and can also help maintain belt tension. Some systems may have one or more idler pulleys.
- Tensioner Pulley: This is a spring-loaded or hydraulic pulley that automatically adjusts belt tension as the belt stretches or wears. It’s crucial for maintaining optimal performance and preventing slippage.
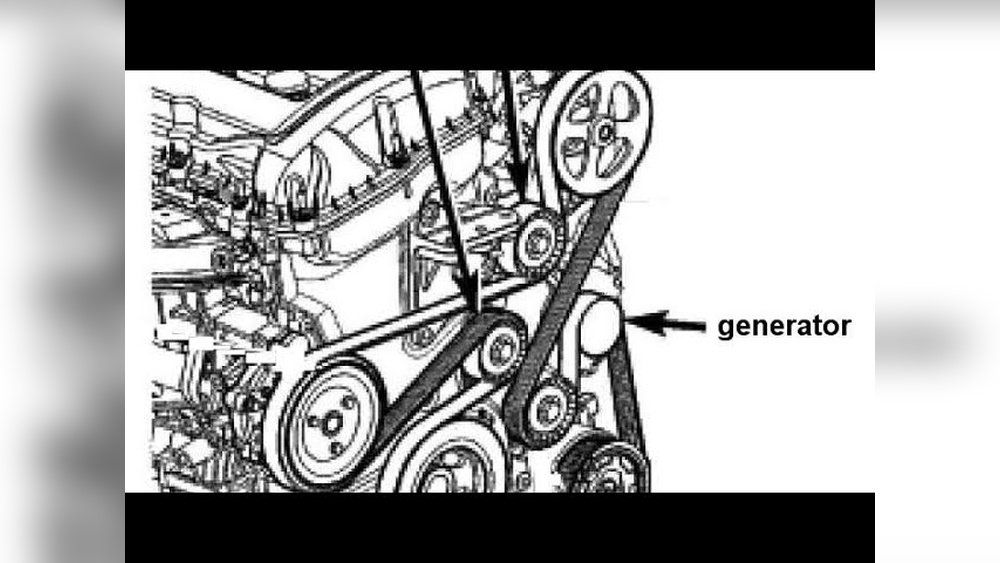
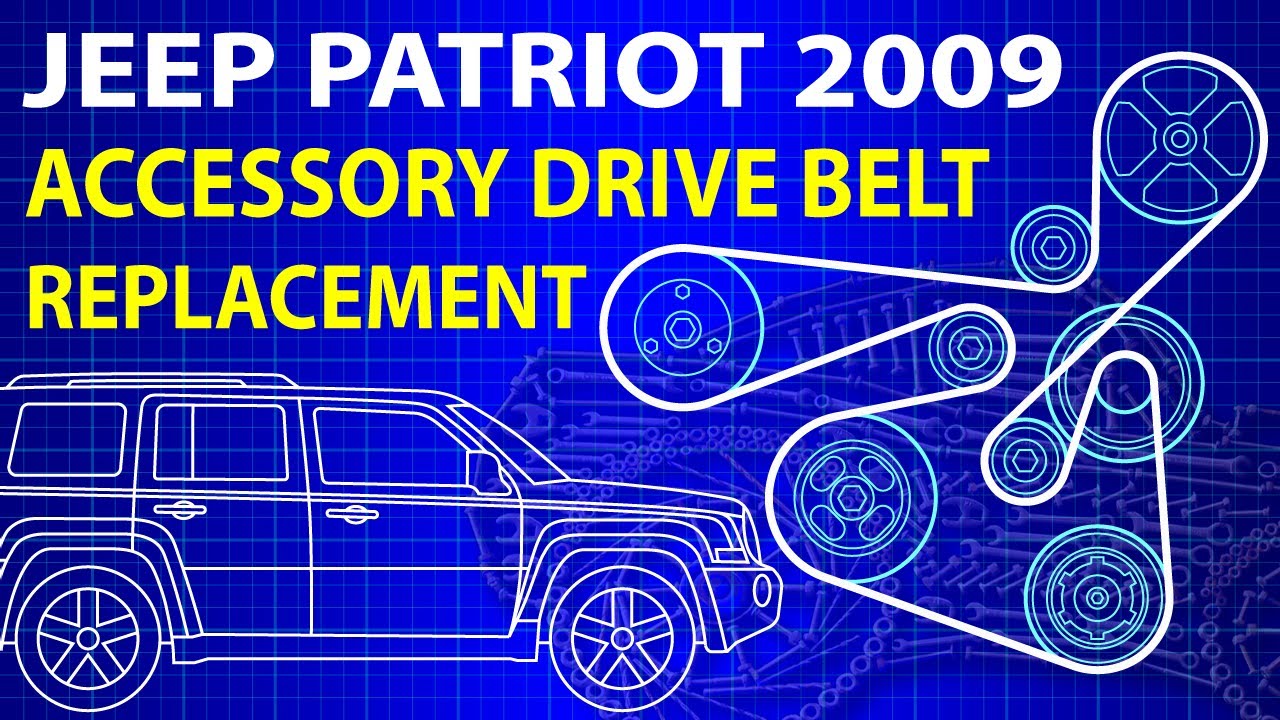
The 2010 Jeep Patriot 2.4l Serpentine Belt Diagram
The exact routing of the serpentine belt for the 2010 Jeep Patriot with the 2. 4L engine is critical for proper operation.
While a visual diagram is the most helpful, a clear textual description can also guide you. The belt typically originates from the crankshaft pulley, then wraps around the other accessory pulleys in a specific order, guided by idler pulleys, and finally returns to the tensioner pulley.
Pro Tip: Always refer to a visual diagram specific to your vehicle’s year and engine. You can often find these diagrams printed on a sticker under the hood of your Jeep, or in your owner’s manual. If not, reliable automotive repair databases or forums are excellent resources.
Here’s a general representation of the belt’s path, which you should confirm with a visual diagram:
- Start at the crankshaft pulley.
- Route the belt up and around the power steering pump pulley.
- Continue down and around the tensioner pulley.
- Move up and around the alternator pulley.
- Then, route it down and around the A/C compressor pulley.
- Finally, loop it up and around the water pump pulley before it returns to the crankshaft pulley.
This sequence ensures that each accessory receives consistent rotational force from the engine. The tensioner pulley is usually located in a position that allows it to apply pressure to the belt, keeping it taut as it moves around the other pulleys.
Steps For Replacing The Serpentine Belt
Replacing the serpentine belt on your 2010 Jeep Patriot 2. 4L is a common maintenance task that many DIYers can tackle. However, it requires careful attention to detail.
1. Gather Your Tools And Parts
Before you begin, ensure you have the following:
- New Serpentine Belt: Make sure it’s the correct part number for your 2010 Jeep Patriot 2.4L.
- Serpentine Belt Tool or Socket Wrench: You’ll need a tool to release the tension on the tensioner pulley. The specific size may vary, but a 15mm or 16mm socket is common.
- Safety Glasses: Protect your eyes from debris.
- Gloves: To protect your hands.
- Flashlight or Work Light: For better visibility.
- Diagram: A clear diagram of the belt routing.
2. Locate The Tensioner Pulley
With the hood open, identify the serpentine belt and its path. The tensioner pulley is typically spring-loaded and can be rotated to loosen the belt.
It often has a bolt head or a specific lug where you'll apply your wrench.
3. Release Belt Tension
Using your serpentine belt tool or socket wrench, engage the bolt head or lug on the tensioner pulley. Apply steady pressure to rotate the tensioner, which will loosen the belt. This might require significant force.
4. Remove The Old Belt
While holding the tensioner in the released position, carefully slip the old belt off one of the pulleys. Once it's free from one pulley, you can usually guide it completely off the other pulleys.
Slowly release the tensioner to its resting position.
5. Install The New Belt
Referencing your belt diagram, begin routing the new belt around the pulleys. Start with the pulleys that are easiest to access and work your way towards the more difficult ones.
Leave the crankshaft pulley or the tensioner pulley for last, as these are often the final connection points.
6. Apply Tension And Finalize Installation
Once the belt is routed around all pulleys except one, use your tool to rotate the tensioner pulley again to release its tension. Slip the belt onto the final pulley.
Slowly release the tensioner, allowing it to apply tension to the new belt.
7. Inspect And Start The Engine
Double-check that the belt is seated correctly in the grooves of all pulleys. Ensure there are no twists in the belt.
Start the engine and let it run for a few minutes. Listen for any unusual noises and visually inspect the belt's operation to ensure it's running smoothly on all pulleys.
Warning: If the belt squeals or appears to be slipping, immediately shut off the engine and re-check the belt’s routing and tension. Improper installation can lead to accessory failure or damage.
Common Issues And Troubleshooting
Even with proper installation, serpentine belt systems can encounter problems. Understanding these common issues can save you time and money.
Belt Squealing
A common symptom is a persistent squealing noise, especially on startup or when accessories are engaged (like turning the steering wheel or turning on the A/C). This can be caused by:
- Loose Belt: The tensioner may be weak or failing, not providing enough pressure.
- Contaminated Belt: Oil, coolant, or power steering fluid leaks can get onto the belt, causing it to slip and squeal.
- Misaligned Pulley: If a pulley is not perfectly aligned, it can cause the belt to run at an angle and squeal.
- Worn Belt: An old, glazed belt may not grip the pulleys effectively.
Belt Chattering Or Snapping
If the belt chatters, vibrates excessively, or snaps, it often points to a more serious issue:
- Failing Tensioner: A faulty tensioner might allow the belt to become too loose intermittently, leading to violent vibrations.
- Seized Accessory: If one of the accessories (like the alternator or A/C compressor) seizes, it will put immense strain on the belt, potentially causing it to break.
- Damaged Pulley: A pulley with a damaged bearing or surface can cause the belt to jump or break.
Accessory Not Working
If an accessory, such as the alternator or power steering, stops working, the first thing to check is the serpentine belt.
- Broken Belt: The most obvious reason.
- Slipped Belt: The belt may have slipped off a pulley due to lack of tension or misalignment.
- Incorrect Routing: If the belt was recently replaced and an accessory isn’t working, double-check the routing against the diagram.
In my experience, a squealing belt is often the first indicator of an issue. Addressing it promptly by inspecting the belt’s condition and the tensioner’s function can prevent more significant problems down the line.
Maintenance Schedule And Belt Lifespan
The lifespan of a serpentine belt can vary significantly based on driving conditions, environmental factors, and the quality of the belt itself. However, most manufacturers recommend inspecting the belt at regular intervals, typically every 15,000 to 30,000 miles.
Replacement is often recommended between 60,000 and 100,000 miles, or sooner if signs of wear are present.
Signs of wear include:
- Cracks: Small cracks on the ribbed side of the belt.
- Glazing: A shiny, smooth appearance on the ribbed side, indicating a loss of grip.
- Fraying: The edges of the belt appear worn or are starting to separate.
- Missing Chunks: Pieces of the belt material are missing.
Ignoring these signs can lead to belt failure, leaving you stranded. It’s also a good practice to replace the tensioner and idler pulleys when you replace the belt, especially if they are original components, as their failure can quickly damage a new belt.
Comparing Belt Materials And Quality
Serpentine belts are typically made from various rubber compounds, with EPDM (ethylene propylene diene monomer) rubber being a common and durable choice for modern vehicles. Higher-quality belts may incorporate additives for increased heat resistance and longevity.
When purchasing a replacement belt, consider brands known for their quality and durability. While cheaper alternatives exist, investing in a reputable brand can save you the hassle and cost of premature replacement.
The difference in price is often minimal compared to the potential cost of a breakdown.
Here’s a general comparison of belt types, though for the 2010 Jeep Patriot 2.4L, you’ll primarily be concerned with the standard EPDM composite belts:
| Belt Material Type | Key Characteristics | Typical Applications |
|---|---|---|
| EPDM Rubber | Excellent resistance to heat, ozone, and weathering. | Most modern passenger vehicles. |
| HNBR Rubber | Higher heat and oil resistance than EPDM. | Some performance vehicles, heavier-duty applications. |
| CR Rubber | Good oil resistance, but less heat/weather resistant. | Older vehicles, less demanding applications. |
The Importance Of The Tensioner And Idler Pulleys
While the serpentine belt is the most visible component, the tensioner and idler pulleys play equally critical roles.
The tensioner pulley is responsible for maintaining the correct belt tension. As the belt wears and stretches over time, the tensioner automatically adjusts to keep it snug. A weak or failing tensioner can lead to belt slippage, noise, and premature belt wear. Some tensioners are spring-loaded, while others are hydraulic for more consistent tension.
Idler pulleys are used to guide the belt along its path, often around obstacles or to achieve the correct routing. They ensure the belt makes proper contact with all the accessory pulleys. Like the tensioner, idler pulleys have bearings that can wear out. A noisy or seized idler pulley can cause belt damage or failure.
It is often recommended to replace the tensioner and any idler pulleys when replacing the serpentine belt, especially if they have high mileage. This proactive approach can prevent a new belt from being damaged by a failing pulley system shortly after installation.
Environmental Factors Affecting Belt Life
Several environmental factors can impact the lifespan of your Jeep Patriot’s serpentine belt:
- Extreme Temperatures: Both excessive heat and cold can degrade rubber compounds over time. Engine bay heat is a significant factor.
- Moisture and Contaminants: Exposure to water, salt (from roads in winter), oil, coolant, or power steering fluid can cause the belt material to break down, slip, and squeal. Regular cleaning of the engine bay and addressing fluid leaks promptly can help.
- Debris: Small stones, dirt, or other road debris can get lodged between the belt and pulleys, causing damage and premature wear.
Frequently Asked Questions
What Is The Correct Belt Tension For A 2010 Jeep Patriot 2.4l?
The correct belt tension is automatically maintained by the automatic tensioner pulley. You do not need to manually adjust the tension beyond ensuring the tensioner is functioning correctly and the belt is properly seated.
If you suspect incorrect tension, it's likely an issue with the tensioner itself.
How Often Should I Replace The Serpentine Belt On My 2010 Jeep Patriot 2.4l?
While there isn’t a strict mileage interval for every vehicle, it’s generally recommended to inspect the belt every 15,000-30,000 miles and replace it between 60,000-100,000 miles, or sooner if signs of wear are visible. Always consult your owner’s manual for specific recommendations.
Can I Replace The Serpentine Belt Myself?
Yes, replacing the serpentine belt is a common DIY task. You will need basic tools, a serpentine belt tool or appropriate socket wrench, and a clear diagram of the belt routing.
Safety precautions, such as wearing safety glasses, are essential.