The 2012 Jeep Liberty is a capable SUV, but like any vehicle, its engine components require proper maintenance. A key part of this maintenance involves understanding the serpentine belt system.
This belt is a single, continuous loop that drives many essential accessories in your engine, such as the alternator, power steering pump, water pump, and air conditioning compressor.
When this belt shows signs of wear or damage, it's crucial to know how to replace it, and having a clear 2012 Jeep Liberty belt diagram is your roadmap.
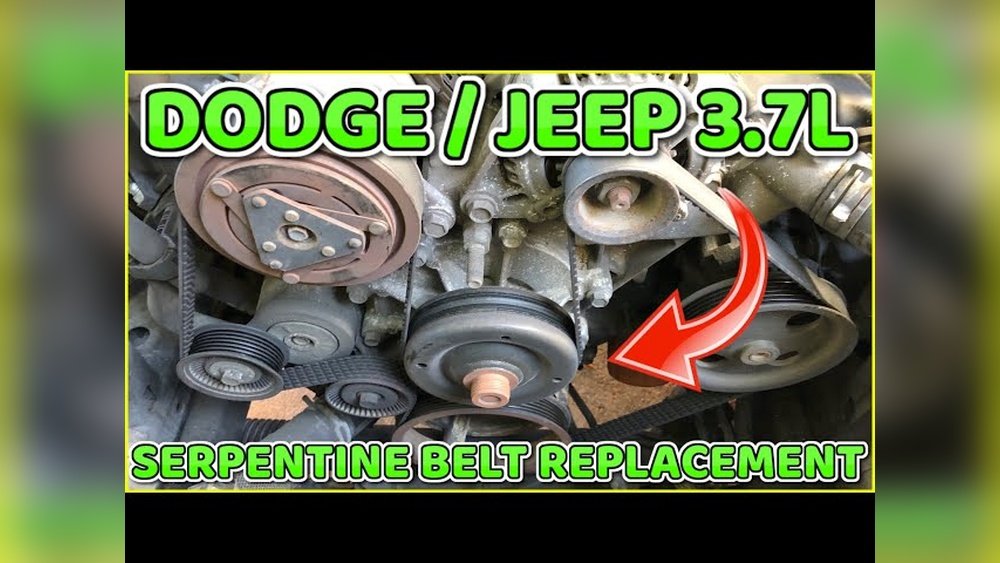
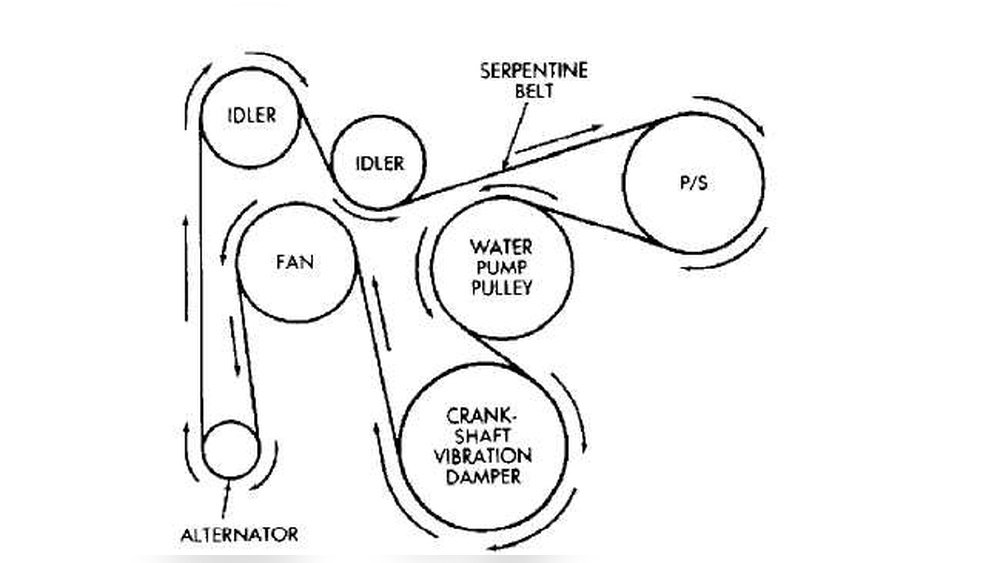
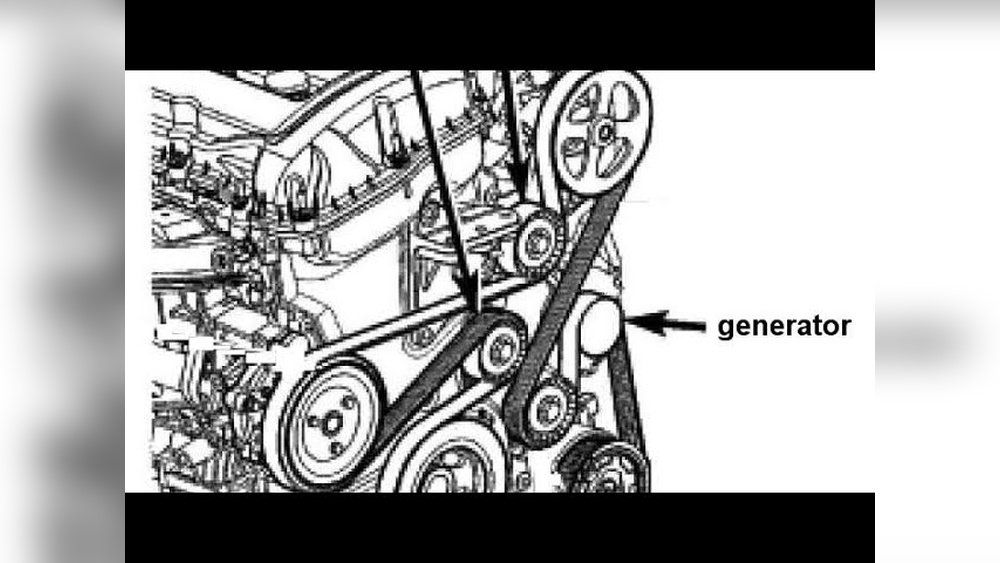
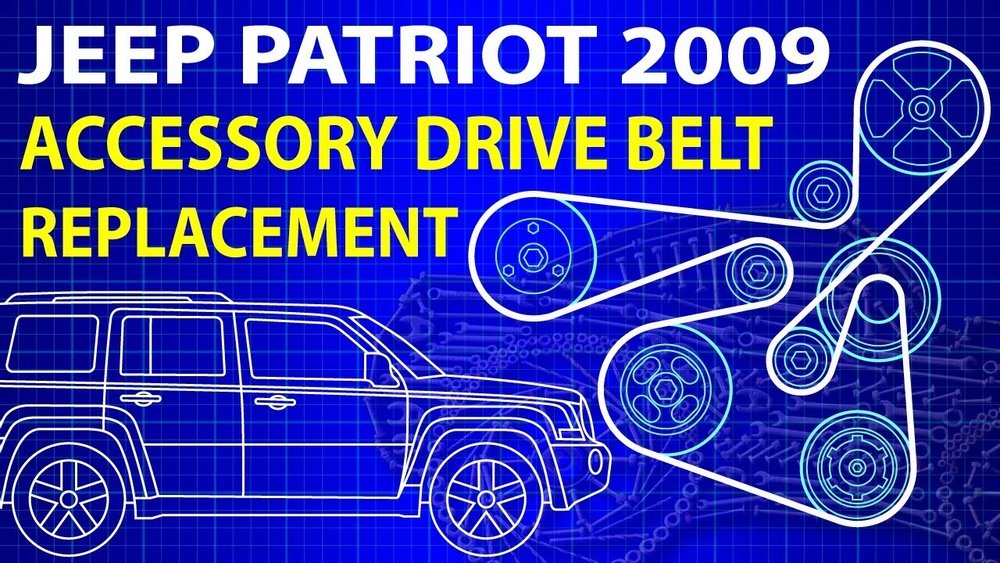
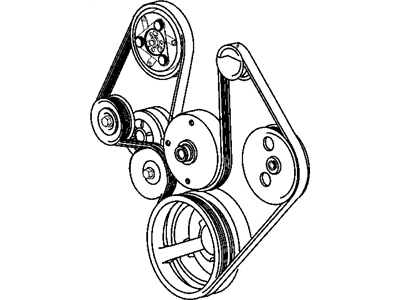
This diagram shows the exact path the belt takes around the various pulleys, ensuring you route it correctly for optimal performance and to avoid engine damage.
This guide will provide you with a detailed explanation of the serpentine belt system for the 2012 Jeep Liberty, including a visual representation of the belt’s path, common issues, replacement steps, and essential maintenance tips. Whether you’re a seasoned DIY mechanic or just starting to learn about your vehicle, understanding the serpentine belt is a valuable skill for keeping your Liberty running smoothly.
Understanding The Serpentine Belt System
The serpentine belt system in your 2012 Jeep Liberty is a marvel of automotive engineering, designed to efficiently power multiple accessories with a single belt. This belt is typically made of a durable rubber compound, often reinforced with synthetic fibers to withstand the high temperatures and constant flexing it endures.
Its name, “serpentine,” comes from the snaking path it follows around the various pulleys attached to the engine.
Function Of The Serpentine Belt
The primary function of the serpentine belt is to transfer rotational energy from the engine’s crankshaft to drive crucial components. Without a functioning serpentine belt, your Jeep Liberty would quickly become inoperable. Let’s break down the roles of the accessories it powers:
- Alternator: This component is responsible for generating electricity to charge the battery and power the vehicle’s electrical systems while the engine is running. A failing alternator will lead to a dead battery and electrical issues.
- Power Steering Pump: This hydraulic pump assists in turning the steering wheel, making it easier to maneuver the vehicle, especially at low speeds. If the belt driving the power steering pump breaks, steering will become extremely heavy and difficult.
- Water Pump: The water pump circulates coolant through the engine and radiator, preventing the engine from overheating. A broken belt means the water pump stops, leading to rapid and severe engine overheating.
- Air Conditioning (A/C) Compressor: This compressor circulates refrigerant to cool the cabin. While not essential for driving, a broken belt will result in a lack of air conditioning.
- Tensioner Pulley: This pulley is part of the system and maintains the correct tension on the serpentine belt. It often contains a spring or hydraulic mechanism to compensate for belt wear and engine vibrations.
Components Of The Serpentine Belt System
Beyond the belt itself, several other components work together to ensure the serpentine belt system operates correctly:
- Crankshaft Pulley: This is the largest pulley and is directly connected to the engine’s crankshaft. It’s the starting point of the belt’s rotation.
- Idler Pulleys: These are typically smooth pulleys that help guide the belt along its path. They don’t drive any accessories but are essential for maintaining proper belt tension and alignment.
- Accessory Pulleys: These pulleys are attached to the specific accessories (alternator, power steering pump, etc.) And are driven by the serpentine belt.
- Belt Tensioner: This component is critical for maintaining the correct tension on the belt. It can be an automatic tensioner (most common in modern vehicles like the 2012 Liberty) or a manual one. An automatic tensioner uses a spring or hydraulic pressure to keep the belt snug, even as it stretches over time. A loose belt can slip, causing noise and inefficient operation, while a belt that’s too tight can damage bearings in the accessory pulleys.
2012 Jeep Liberty Belt Diagram And Routing
Understanding the exact path the serpentine belt takes is crucial for correct installation. The routing can vary slightly depending on the engine configuration, but for the 2012 Jeep Liberty, the typical V6 engine follows a specific pattern.
Visualizing The Belt Path
Imagine the engine compartment in front of you. The belt will loop around the crankshaft pulley at the bottom front of the engine.
From there, it snakes upwards, wrapping around the power steering pump pulley, then the alternator pulley. It will then typically go around an idler pulley, possibly dip down to the A/C compressor pulley, and then around the water pump pulley before returning to the crankshaft pulley.
A tensioner pulley will apply pressure to one of the belt’s runs to keep it tight.
Pro Tip: Always refer to a specific 2012 Jeep Liberty belt diagram for your exact model year and engine. You can often find these diagrams on a sticker under the hood, in your owner’s manual, or through reputable online automotive resources.
Common Serpentine Belt Routing For 2012 Jeep Liberty (v6 Engine)
While a visual diagram is best, here’s a descriptive routing that is common for the 2012 Jeep Liberty’s V6 engine. This description assumes you are looking at the front of the engine.
- Crankshaft Pulley: The belt starts by wrapping around the large pulley at the bottom center of the engine.
- Power Steering Pump Pulley: Moving upwards and slightly to the driver’s side, the belt engages the power steering pump pulley.
- Alternator Pulley: The belt then continues upwards and towards the passenger side to wrap around the alternator pulley.
- Idler Pulley (Upper): From the alternator, the belt often moves towards the top of the engine, engaging an idler pulley mounted above the accessories.
- A/C Compressor Pulley: The belt then typically descends to engage the A/C compressor pulley, usually located lower down on the passenger side of the engine.
- Water Pump Pulley: After the A/C compressor, the belt winds its way towards the center of the engine to engage the water pump pulley.
- Belt Tensioner: The belt then makes its final run back towards the crankshaft pulley, and the tensioner pulley will press against this section of the belt to provide the necessary tension.
This is a general description. The precise order and placement of idler pulleys can vary. A clear diagram is essential to avoid errors.
Signs Of A Failing Serpentine Belt
The serpentine belt is a wear item, meaning it will degrade over time. Recognizing the signs of a failing belt can prevent inconvenient breakdowns and potential engine damage.
Audible Warnings
One of the most common indicators of a serpentine belt problem is an audible squealing or chirping noise. This noise often becomes more pronounced when you first start the engine, especially in damp or cold weather, or when you turn the steering wheel.
- Squealing: This is typically caused by the belt slipping on one of the pulleys. This can happen if the belt is worn, glazed (the surface becomes smooth and loses grip), or if there’s an issue with a pulley bearing or the tensioner.
- Chirping: A consistent chirping sound can also indicate a worn belt or a pulley that isn’t spinning freely.
Visual Indicators Of Wear
Regularly inspecting your serpentine belt can reveal signs of impending failure. Look for the following:
- Cracks: Small cracks on the ribbed or smooth side of the belt are normal as the belt ages. However, deep or widespread cracks, especially those that go through the reinforcement cords, indicate the belt is nearing the end of its life.
- Fraying: If the edges of the belt appear frayed or worn down, it’s a sign of excessive friction, possibly from misalignment of pulleys or a faulty tensioner.
- Glazing: The surface of the belt may appear shiny or glazed. This means the rubber has hardened and lost its grip, leading to slippage.
- Contamination: Oil or coolant leaks can degrade the rubber of the serpentine belt, causing it to swell, soften, or break down prematurely. If you notice any such contamination, address the leak source before replacing the belt.
Performance Issues
A failing serpentine belt can also manifest in how your Jeep Liberty performs:
- Loss of Power Steering: If the belt slips significantly, the power steering pump may not be driven effectively, resulting in heavy steering.
- Overheating: If the water pump is not being driven properly, the engine temperature gauge will rise, indicating overheating. This is a critical issue that requires immediate attention.
- Battery Warning Light: If the alternator is not turning, the battery will not be recharged, and the battery warning light on your dashboard will illuminate. The vehicle may also start to experience electrical system issues.
- A/C Not Working: While less critical for driving, a slipping belt will also cause the A/C compressor to disengage, leading to a lack of cool air.
Replacing The Serpentine Belt On A 2012 Jeep Liberty
Replacing the serpentine belt is a common DIY maintenance task that can save you money on labor costs. However, it requires care and the right tools.
Tools And Materials Needed
Before you start, gather the necessary tools and parts:
- New Serpentine Belt: Ensure you have the correct belt for your 2012 Jeep Liberty’s engine.
- Serpentine Belt Tool Kit: This is highly recommended. It includes a long-handled breaker bar and various socket attachments to work with the belt tensioner.
- Socket Wrench Set: For removing any covers or components if necessary.
- Gloves and Safety Glasses: To protect your hands and eyes.
- Flashlight: To see clearly in the engine bay.
- Printed Belt Diagram: Crucial for correct routing.
Step-by-step Replacement Guide
- Locate the Belt and Tensioner: Open the hood and identify the serpentine belt and the automatic belt tensioner. The tensioner is typically a spring-loaded arm with a pulley attached.
- Release Belt Tension: Attach the appropriate socket from your serpentine belt tool kit to the bolt head on the tensioner. Using the long breaker bar, rotate the tensioner arm away from the belt to release the tension. This will slacken the belt.
- Remove the Old Belt: While holding the tensioner in the released position, carefully slip the old belt off one of the pulleys. It’s usually easiest to remove it from an accessory pulley that’s easy to reach, like the alternator or power steering pump. Once it’s off one pulley, you can let the tensioner gently return to its resting position. Then, remove the belt completely from the remaining pulleys.
- Route the New Belt: Refer to your 2012 Jeep Liberty belt diagram. Begin routing the new belt around the pulleys, starting with the crankshaft pulley and working your way around according to the diagram. Leave one of the easier-to-access pulleys for last.
- Apply Tension and Install Last Section: Once the belt is routed around all other pulleys, position the final section of the belt onto the pulley you left for last. Now, use your serpentine belt tool to rotate the tensioner arm again to release tension, allowing you to slip the last section of the belt into place.
- Verify Routing and Tension: Double-check that the belt is seated correctly in the grooves of all pulleys and that it follows the diagram precisely. Ensure the belt is centered on each pulley.
- Release Tensioner and Inspect: Slowly release the tensioner arm, allowing it to apply tension to the new belt. Visually inspect the belt again to ensure it’s tracking straight on all pulleys.
- Start the Engine: Start the engine and listen for any unusual noises. Let it run for a few minutes. Observe the belt’s movement to ensure it’s running smoothly and not wobbling or jumping. Check that all accessories are functioning correctly (power steering, alternator, A/C).
Warning: If you hear any squealing or notice the belt jumping, immediately shut off the engine and re-inspect the belt routing and tension. It’s possible the belt is installed incorrectly, or the tensioner or a pulley may be failing.
Maintaining The Serpentine Belt System
Proper maintenance goes beyond just replacing a worn belt. It involves ensuring the entire system is in good working order.
Regular Inspections
Make it a habit to visually inspect your serpentine belt during routine maintenance like oil changes. Look for the signs of wear mentioned earlier.
Also, check the tensioner and idler pulleys for any signs of wobble, noise, or leakage from the tensioner's pivot point.
Addressing Leaks Promptly
If you notice any fluid leaks (oil, coolant, power steering fluid) in the engine bay, investigate the source immediately. These fluids can quickly degrade the serpentine belt, leading to premature failure.
Repairing the leak source is as important as replacing a damaged belt.
Understanding Belt Tensioner Health
The automatic belt tensioner is a critical component. If it becomes weak, it won't keep sufficient tension on the belt, leading to slippage and noise.
If the tensioner is excessively loose or floppy, or if it makes noise itself, it should be replaced along with the belt.
When replacing the belt, it’s often recommended to replace the tensioner and idler pulleys as well, especially if they have high mileage, as they are wear items that can fail shortly after a new belt is installed.
Common Issues And Troubleshooting
Even with proper maintenance, you might encounter specific problems with the serpentine belt system.
Squealing Noise
As mentioned, squealing is the most common symptom.
- Cause: Worn belt, glazed belt, improper tension, misaligned pulley, or a failing bearing in an accessory or idler pulley.
- Troubleshooting:
- Inspect the belt for wear and glazing. Replace if necessary.
- Check the tensioner’s range of motion. If it’s at its limit or seems weak, it may need replacement.
- Use a long screwdriver or mechanic’s stethoscope to listen to each pulley individually. A noisy bearing will usually be identifiable.
- Check pulley alignment by looking down the belt run. Any visible misalignment indicates a problem.
Belt Thumping Or Fluttering
A belt that thumps or flutters excessively while the engine is running can indicate a lack of proper tension or a damaged tensioner.
- Cause: Weak tensioner spring, damaged tensioner pulley bearing, or a bent pulley.
- Troubleshooting: Replace the belt tensioner assembly. Inspect all pulleys for damage or wobble.
Belt Shredding Or Breaking
This is a more serious issue and usually points to a more significant problem.
- Cause: A seized accessory pulley (e.g., alternator, A/C compressor) can cause the belt to shred. A misaligned pulley can also