Replacing a rear wheel bearing on a Jeep Liberty can sound intimidating, but with the right tools and guidance, many car owners can do it at home. A failing wheel bearing can cause grinding noises, vibrations, or even affect your vehicle’s safety. Learning how to replace the rear wheel bearing not only saves money but also helps you understand your Jeep Liberty better. This guide will walk you through each step, highlight important safety tips, and share insights you might not find in typical tutorials.
When To Replace Your Rear Wheel Bearing
The rear wheel bearing is a crucial part of your Jeep Liberty’s suspension and wheel system. It helps the wheel spin with minimal friction. Over time, wear and tear can cause the bearing to fail. Common signs include:
- A grinding or humming noise from the rear wheels
- Loose or wobbly wheel when the car is lifted
- Uneven tire wear
- ABS light turning on
If you notice any of these signs, inspect your bearings as soon as possible. Ignoring the problem can lead to more expensive repairs, or even a dangerous breakdown.
Tools And Parts Needed
Before starting, make sure you have the necessary tools and parts. Here’s a list to help you prepare:
- New rear wheel bearing assembly (specific for Jeep Liberty model year)
- Jack and jack stands
- Lug wrench
- Socket set (including a breaker bar)
- Torque wrench
- Screwdrivers (flat and Phillips)
- Hammer and punch
- Slide hammer (for stubborn axles)
- Pry bar
- Bearing puller or press (if needed)
- Brake cleaner
- Grease and rags
- Safety glasses and gloves
Pro tip: Always check your Jeep Liberty’s manual for the exact bearing type and torque specifications. Buying a quality bearing can make a big difference in performance and lifespan.

Preparing For The Job
Safety is the first priority. Park your Jeep Liberty on a flat surface. Engage the parking brake and chock the front wheels to prevent movement.
- Loosen the rear wheel lug nuts slightly before lifting the vehicle.
- Use a jack to lift the rear and secure it with jack stands under the frame, not the axle.
- Remove the wheel completely.
- Inspect the brakes and surrounding area for any damage or leaks.
Non-obvious insight: Take clear photos of each step as you go. This helps you remember the reassembly order, especially if you’re new to DIY repairs.
Removing The Brake Components
To access the wheel bearing, you’ll need to remove the brake parts:
- Remove the brake caliper bolts and slide the caliper off. Hang it with a zip tie or wire—never let it dangle by the hose.
- Take off the brake rotor. If it’s stuck, a few taps with a rubber mallet will help.
- Remove the brake pads and any retaining hardware.
Extra tip: Inspect your brake pads and rotors while you have them off. If they’re worn, now is a good time to replace them.
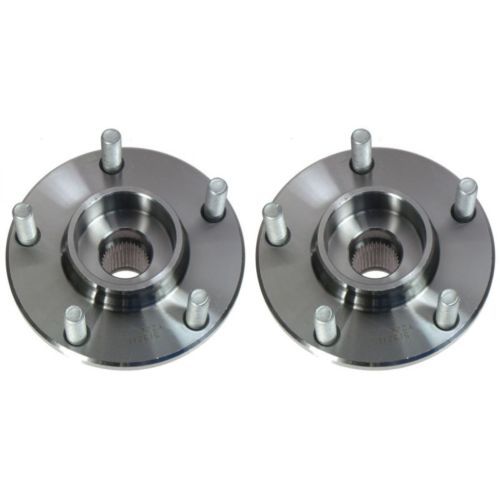
Removing The Rear Wheel Bearing
With the brakes out of the way, you can reach the rear wheel bearing assembly. The process can vary slightly depending on your Jeep Liberty’s year and whether you have disc or drum brakes, but the main steps are similar.
- Locate the axle shaft retaining bolts on the backside of the wheel hub.
- Remove these bolts with your socket set.
- Use a slide hammer to pull the axle shaft out carefully. This step can be tough—don’t rush.
- Remove the hub/bearing assembly mounting bolts.
- Use a bearing puller or carefully tap the assembly free with a hammer and punch.
- Clean the area with brake cleaner and a rag. Make sure no debris falls inside the axle housing.
Comparison: Pressed Vs Bolt-on Rear Wheel Bearings
Some Jeep Liberty models use a pressed-in bearing, while others have a bolt-on assembly. Here’s a quick comparison for clarity:
| Type | Removal Difficulty | Special Tools Needed | Time Estimate |
|---|---|---|---|
| Bolt-On Assembly | Easy | Basic hand tools | 1–2 hours |
| Pressed-In Bearing | Hard | Bearing press/puller | 2–4 hours |
Key insight: If your Jeep Liberty uses a pressed-in bearing, you may need to visit a machine shop to press out and in the new bearing unless you have a suitable press at home.
Installing The New Rear Wheel Bearing
Once the old bearing is out, it’s time to install the new one.
- Lightly grease the new bearing and the axle shaft.
- Fit the new bearing assembly into place. If pressed, use a bearing press to ensure it’s seated evenly.
- Reinstall and torque the mounting bolts to factory specifications.
- Carefully slide the axle shaft back into place. You may need to rotate it slightly for proper alignment.
- Reinstall the axle retaining bolts and tighten them securely.
Jeep Liberty Rear Bearing Torque Specifications
Using the correct torque is critical for safety and bearing life. Below are common torque specs for the rear wheel bearing assembly bolts (always check your manual for your exact year):
| Component | Torque (ft-lb) |
|---|---|
| Hub/Bearing Assembly Bolts | 95–100 |
| Axle Retaining Bolts | 40–45 |
| Lug Nuts | 95–100 |
Non-obvious insight: Always use a calibrated torque wrench. Overtightening can damage the new bearing or strip threads.
Reassembling The Brakes And Wheel
With the new bearing in, reverse the disassembly steps:
- Reinstall the brake rotor and caliper. Make sure all hardware is in place and torqued correctly.
- Double-check that the brake hose is not twisted or pinched.
- Reinstall the wheel and hand-tighten the lug nuts.
- Lower the Jeep Liberty to the ground and torque the lug nuts in a star pattern.
Pro tip: Pump the brake pedal a few times before driving to ensure the pads seat correctly.
Testing And Final Checks
Before hitting the road, perform these checks:
- Spin the wheel by hand to check for smooth rotation and no abnormal noise.
- Test the brakes in your driveway at low speed.
- Listen for any unusual sounds during a short test drive.
If you hear anything unusual, recheck your work. Sometimes, a missed bolt or misaligned part can cause problems.
Estimated Time And Difficulty
| Skill Level | Estimated Time | Cost (DIY) | Cost (Shop) |
|---|---|---|---|
| Intermediate | 2–4 hours | $100–$200 | $300–$500 |
Many Jeep Liberty owners find this repair manageable with patience and the right tools. If you’re unsure, don’t hesitate to consult a professional.
Common Mistakes To Avoid
Replacing a rear wheel bearing can go wrong if you’re not careful. Watch out for these mistakes:
- Not using a torque wrench for critical bolts.
- Mixing up brake hardware during reassembly.
- Letting the brake caliper hang by the hose.
- Not cleaning the hub and axle shaft before installing the new bearing.
- Ignoring ABS sensor connections (if equipped).
Extra tip: Keep all removed parts organized. A small tray or labeled bags can prevent confusion during reassembly.
When To Seek Professional Help
While DIY can save money, some situations call for expert help:
- Bearing is pressed-in and you lack a press or puller.
- You find damaged axle or hub parts.
- The ABS sensor or wiring is damaged.
- You’re not comfortable with brake or suspension work.
Professional mechanics have the tools and experience to handle tough cases and ensure safety.
Finding Quality Replacement Bearings
Not all bearings are equal. For your Jeep Liberty, look for:
- OEM (original equipment manufacturer) or top aftermarket brands
- Good warranty coverage (at least 1 year)
- Positive reviews from Jeep forums or parts stores
Non-obvious insight: Avoid the cheapest bearings. Low-quality parts can fail early, costing more in the long run.
For more technical background on wheel bearings and why quality matters, see this detailed overview from the Wikipedia: Wheel Bearing.
Frequently Asked Questions
How Do I Know If My Rear Wheel Bearing Is Bad?
Listen for a grinding or humming noise from the rear wheels, especially at speed. You may also feel vibrations or notice uneven tire wear. Lifting the wheel and checking for play (side to side movement) is a quick test.
Can I Drive My Jeep Liberty With A Bad Rear Wheel Bearing?
It’s not safe. A failing bearing can cause the wheel to wobble or even detach, risking an accident. Replace it as soon as possible.
Do I Need Special Tools To Replace The Rear Wheel Bearing?
For bolt-on assemblies, basic hand tools are enough. For pressed-in bearings, you’ll need a bearing press or puller. Some auto parts stores rent these tools.
How Long Should A New Wheel Bearing Last?
A quality rear wheel bearing can last 80,000–150,000 miles under normal driving. Off-road use, water exposure, or poor installation can shorten lifespan.
Can I Replace Just One Rear Wheel Bearing, Or Should I Do Both?
You can replace just the bad one, but if one bearing failed due to age or wear, the other may not be far behind. Consider replacing both for peace of mind.
Replacing the rear wheel bearing on a Jeep Liberty is a project that rewards careful planning and attention to detail. With the right tools, patience, and this guide, you can restore your Jeep’s smooth ride and save money on repairs. If anything feels uncertain, don’t hesitate to ask for help—your safety always comes first.