Replacing a brake light switch might sound complicated, but with the right guidance, most car owners can handle it themselves. This small device is crucial for safety—it ensures your brake lights turn on when you press the pedal, warning drivers behind you.
If your brake lights stop working, you risk getting rear-ended or pulled over. Fortunately, learning how to replace a brake light switch saves time and money compared to a shop visit. Here’s how you can do it confidently, with clear steps and practical tips.
What Is A Brake Light Switch?
The brake light switch is a small electrical part, usually found above the brake pedal. When you press the brake, the switch completes a circuit and turns on the brake lights. If this switch fails, your brake lights won’t light up—even if the bulbs and fuses are fine.

Common signs of a faulty brake light switch include:
- Brake lights not working at all
- Brake lights staying on all the time
- Cruise control not working
- Difficulty shifting out of park (for automatic transmissions)
Tools And Materials Needed
Before you start, gather these tools:
- Flathead screwdriver
- Phillips screwdriver
- Ratchet and socket set
- Replacement brake light switch (make sure it matches your car’s model)
- Flashlight (helpful for dark footwells)
Some cars may need extra tools, but most switches require only basic hand tools.

How To Replace A Brake Light Switch: Step-by-step
The process is similar for most cars, but always check your owner’s manual for details specific to your vehicle.
- Safety First: Turn off your car and remove the key. For extra safety, disconnect the negative battery terminal. This prevents accidental electrical shorts.
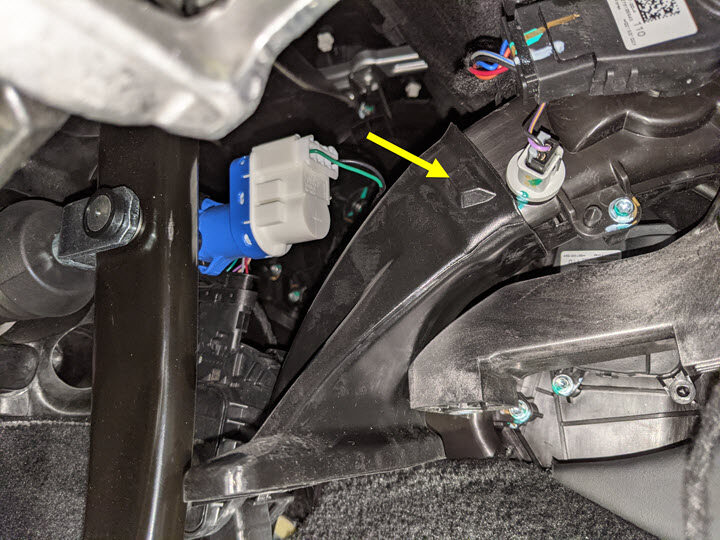
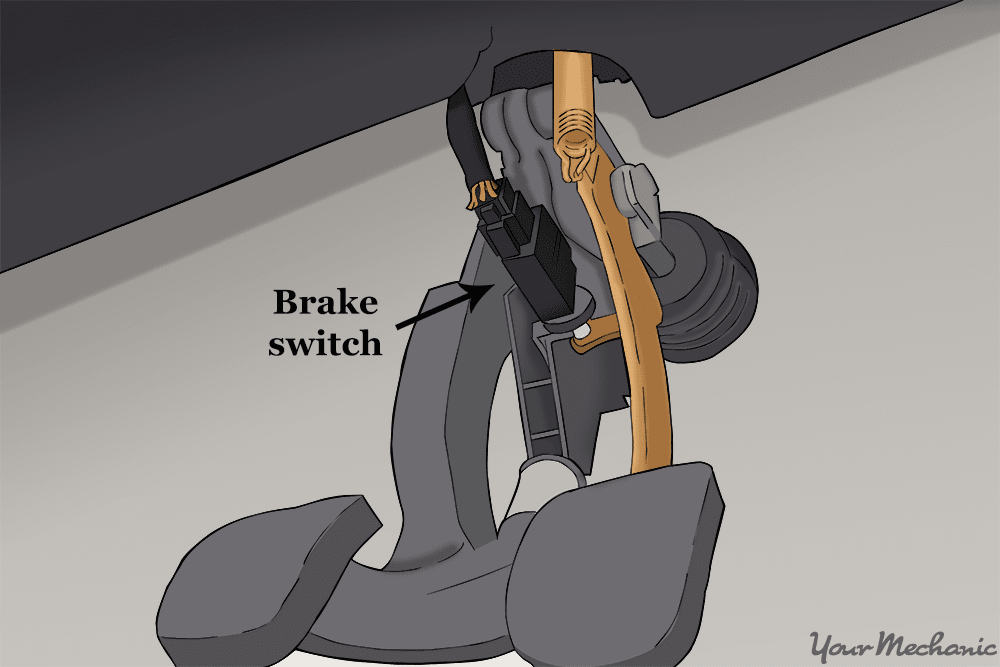
- Locate the Brake Light Switch: Look under the dashboard, just above the brake pedal arm. The switch is usually attached to a bracket, with a connector plugged into it.
- Disconnect the Wiring Harness: Press the tab on the connector and pull it straight out. If it’s stuck, gently wiggle it while pressing the tab.
- Remove the Old Switch:
- Some switches unscrew by hand or with a wrench.
- Others are held by a clip or bolt. Use the correct tool to avoid damage.
- Note the position of the old switch, as the new one must be installed at the same distance from the pedal.
- Install the New Switch:
- Insert or screw the new switch in place.
- Reconnect the wiring harness until it clicks.
- Make sure the switch is aligned so it activates when the brake pedal moves.
- Test the Brake Lights:
- Reconnect the battery (if you disconnected it).
- Press the brake pedal and check that the brake lights turn on and off correctly.
- If the lights stay on or don’t light up, adjust the switch position.
Example: Honda Civic Brake Light Switch
On a 2010 Honda Civic, the switch is held by a 12mm nut. Removal takes about 15 minutes:
- Disconnect battery
- Unplug harness
- Unscrew nut
- Replace switch
- Reinstall nut and harness
Other vehicles, like Ford F-150s, may use a twist-and-lock switch. Always double-check the procedure for your car.
Cost And Time Comparison
Doing this job yourself is much cheaper than visiting a mechanic. Here’s a look at typical costs and time:
| Method | Parts Cost | Labor Cost | Total Time Needed |
|---|---|---|---|
| DIY | $10–$40 | $0 | 15–45 minutes |
| Mechanic | $10–$40 | $70–$150 | 1–2 hours (including wait) |
Most DIYers finish in under an hour.
Common Mistakes To Avoid
Many beginners make these errors:
- Forgetting to disconnect the battery can cause blown fuses.
- Incorrect installation: If the switch is too tight or loose, the brake lights may stay on or not work at all.
- Not testing before reassembling: Always test the brake lights before putting panels or trim back.
- Buying the wrong switch: Double-check your car’s year, make, and model.
When To Seek Professional Help
If your brake lights still don’t work after replacing the switch, the problem may be elsewhere—such as wiring, bulbs, or the fuse. Also, if you have difficulty accessing the switch or feel unsure about any step, consult a trusted mechanic.
How Brake Light Switches Differ
While most brake light switches do the same job, their designs can vary. Some are simple push-button types; others include extra features for cruise control or automatic transmissions.
Here’s a quick comparison:
| Switch Type | Features | Installation Difficulty |
|---|---|---|
| Basic Push-Button | On/Off for brake lights | Easy |
| Multi-Function | Brake lights + cruise control | Moderate |
| Adjustable | Custom pedal distance | Easy to Moderate |
Always match the replacement switch to your car’s features.
Useful Tips For A Smooth Replacement
- Take a photo of the old switch before removal—this helps with reinstallation.
- Label any screws or clips you remove, so nothing gets lost.
- If the footwell is cramped, use a small mirror to see the switch.
- Test the brake lights with help from a friend, or back up to a wall to see their reflection.
Real-world Example
A 2015 Toyota Camry owner noticed his brake lights stayed on, draining the battery overnight. After reading his manual, he found the switch cost $18 and took just 20 minutes to replace. He avoided a $120 bill at the dealership and fixed the issue himself.
For more technical details, you can visit the Wikipedia brake light switch page.
Frequently Asked Questions
How Do I Know If My Brake Light Switch Is Bad?
If your brake lights don’t work or stay on all the time, or if you have trouble shifting out of park, the switch is a likely cause.
Can I Drive With A Faulty Brake Light Switch?
It’s unsafe and illegal to drive without working brake lights. Fix the issue before driving.
Do I Need To Disconnect The Battery Before Replacement?
Yes, it’s safest to disconnect the negative battery terminal to prevent electrical shorts.
Is Replacing A Brake Light Switch The Same On All Cars?
Most cars follow similar steps, but mounting methods and switch types can vary. Always check your car’s manual for details.
What Else Can Cause Brake Lights Not To Work?
Besides the switch, bad bulbs, blown fuses, or wiring issues can cause brake light failure.
Taking the time to replace a brake light switch yourself can save money and boost your confidence in car repairs. With patience and careful attention to detail, you’ll restore your car’s safety in less than an hour.