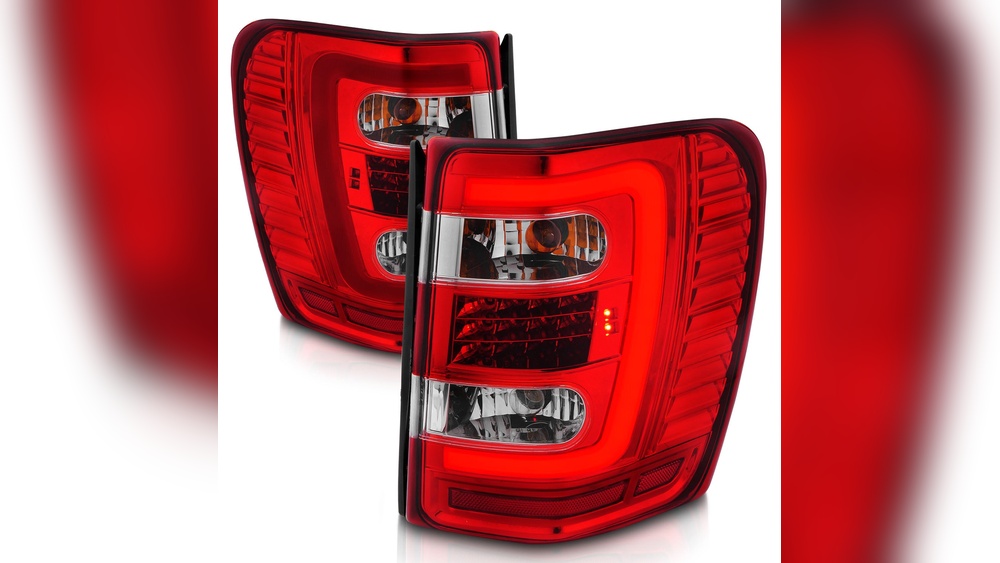
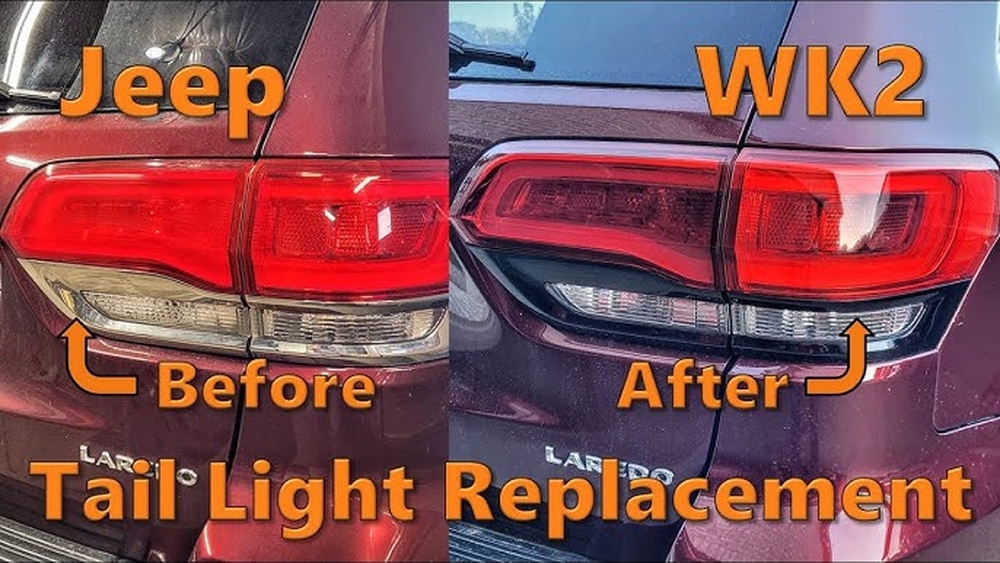
If your Jeep Grand Cherokee tail light is damaged or stops working, replacing it yourself can save time and money. While it might seem difficult at first, most owners can do the job with basic tools and a bit of patience. This guide walks you through each step, explains the tools you need, and shares tips that even experienced DIYers sometimes miss.
Tools And Preparation
Before you start, gather the right tools. Having everything ready will help you avoid delays.
- Phillips screwdriver
- Flathead screwdriver
- Socket wrench (usually 8mm or 10mm)
- Panel removal tool (optional, but helps avoid scratches)
- Gloves (to protect your hands)
Check your owner’s manual for your Jeep’s specific model year. Tail light assembly designs change between generations. For example, the 2011-2021 Grand Cherokee has a different mounting system than the 2005-2010 models.
Safety First
Always switch off your vehicle and disconnect the negative battery terminal before touching any electrical parts. This step prevents short circuits and keeps you safe from electrical shock.

Removing The Tail Light: Step-by-step
Follow these steps to remove the tail light on most Jeep Grand Cherokee models made after 2011.
1. Open The Liftgate
Open the rear liftgate to access the area around the tail light. In many models, some bolts are hidden behind the edge of the tailgate when closed.
2. Locate And Remove Fasteners
Look for two or three screws or bolts on the inside edge of the tail light. These usually hold the light assembly to the body.
- Use a Phillips screwdriver or socket wrench to remove the bolts.
- Keep these fasteners in a small cup so you don’t lose them.
3. Release The Tail Light Assembly
After removing the bolts, gently wiggle the tail light outward. Some models use plastic pins or clips to hold the light in place.
- Use a panel removal tool or flathead screwdriver to gently pry the assembly if it feels stuck.
- Never force the light; you risk cracking the lens or damaging the paint.
4. Disconnect The Electrical Connector
Once the light is loose, reach behind it and locate the electrical connector.
- Press the tab on the connector and pull it out.
- If your model uses separate bulb sockets, twist and remove each one.
5. Inspect And Remove
With the connector out, the tail light assembly should come away easily. Lay it on a soft surface to avoid scratches.
Comparison Of Tools Needed By Model Year
Here’s a quick look at tools typically required for different model years:
| Model Year | Common Tools | Special Notes |
|---|---|---|
| 2005-2010 | Phillips screwdriver, socket wrench | May need to remove trunk liner |
| 2011-2021 | Socket wrench, panel tool | Clips more common, be gentle |
| 2022+ | Socket wrench, flathead screwdriver | Check for hidden fasteners under trim |
Installing The New Tail Light
Once the old assembly is out, installing the new one is mostly the reverse process. However, there are a few important things to remember:
- Line up the plastic pins or clips carefully. Forcing them can cause alignment problems.
- Plug in the electrical connector and check the fit. A loose connector can cause flickering or warning lights on your dashboard.
- Test the new tail light before tightening all the bolts. Turn on your headlights, brake lights, and turn signals to make sure everything works.
Common Mistakes And How To Avoid Them
Even experienced DIYers sometimes make these errors:
- Losing fasteners: Place screws in a magnetic tray or cup.
- Forgetting the battery: Always disconnect the negative terminal before starting.
- Forcing the assembly: If it doesn’t come out, look for hidden clips or screws.
- Buying the wrong part: Double-check the part number for your model year. Even small changes in design can make the new assembly not fit.
How Long Does It Take?
Most people can remove and install a tail light in 20–40 minutes. Beginners might take a bit longer, especially if it’s their first time. Allow extra time if you need to remove interior panels or deal with rusted bolts.
Cost Comparison: Diy Vs. Professional
You might wonder if it’s worth doing yourself or paying a shop. Here’s a comparison:
| Method | Average Cost | Time Required |
|---|---|---|
| DIY | $60–$150 (parts only) | 30–60 minutes |
| Professional Shop | $150–$350 (parts & labor) | 1–2 hours (including wait time) |
Buying a genuine or high-quality aftermarket assembly is important. Cheaper tail lights may not fit well or could develop condensation inside after a few months.
Practical Tips For Success
- Photograph each step during removal. Pictures help you remember clip locations for reinstallation.
- If you break a plastic clip, most auto parts stores sell replacements for a few dollars.
- Wear gloves when handling bulbs. Oil from your skin can shorten bulb life.
- If your new tail light has LED bulbs, make sure it’s compatible with your Jeep’s electrical system. Some models need resistors to avoid warning lights.

When To Replace Vs. Repair
If your tail light lens is just cracked but the lights work, you might consider a repair kit. However, for water damage, broken mounting points, or electrical failures, full replacement is safest.
External Resource
For official diagrams and part numbers, the Mopar Parts Catalog is a reliable source.

Frequently Asked Questions
How Do I Know If My Jeep Grand Cherokee Needs A New Tail Light?
If you notice dimming, flickering, or your tail light doesn’t work, check the bulb first. If replacing the bulb doesn’t help, the assembly or wiring may be faulty.
Can I Change The Tail Light Without Any Special Tools?
Most models require only basic hand tools like a screwdriver and socket wrench. A panel removal tool helps avoid scratches but isn’t essential.
Will Replacing The Tail Light Affect My Car’s Warranty?
If you use genuine parts and follow proper procedures, replacing a tail light usually won’t affect your warranty. However, always check your warranty terms or speak with your dealer.
How Do I Prevent Condensation Inside My New Tail Light?
Ensure the new assembly is sealed properly and all gaskets are in place. Do not overtighten bolts, as this can warp the lens and break the seal.
Are Led Tail Lights Better Than Standard Bulbs?
LED tail lights last longer, use less power, and are brighter. However, they cost more and require compatibility with your Jeep’s electrical system.
Removing and replacing your Jeep Grand Cherokee tail light is straightforward with the right tools and a careful approach. Take your time, double-check each step, and you’ll save money while keeping your vehicle safe and legal on the road.