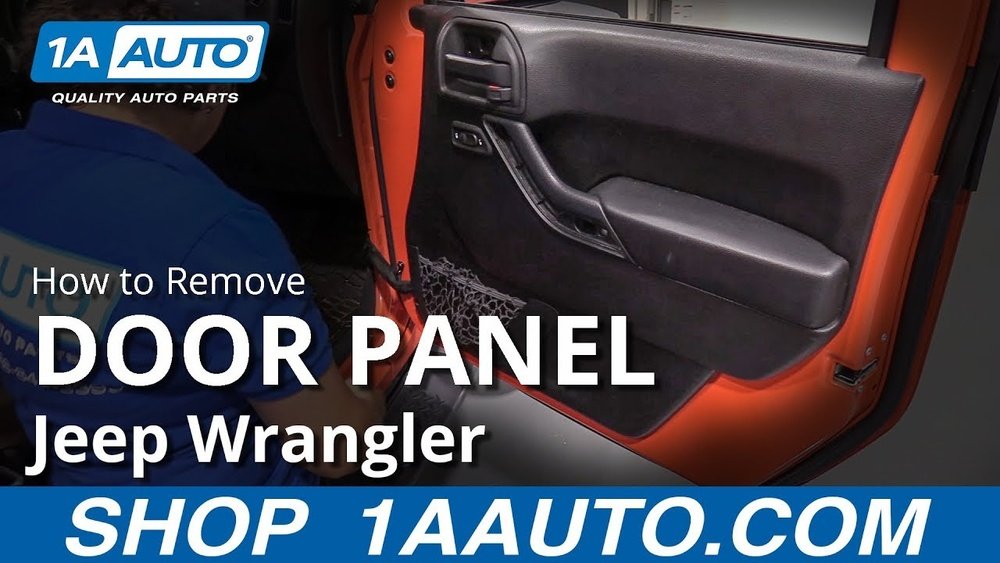
Removing the door panel of your Jeep may sound intimidating, but with the right guidance, it’s a straightforward job. Whether you want to fix a window, upgrade your speakers, or repair wiring, knowing how to remove the door panel can save you time and money.
Many Jeep owners try this themselves but miss small details that make a big difference. This article walks you through the process step by step, explains the tools you need, and shares practical tips so you don’t damage your vehicle.
Why Remove A Jeep Door Panel?
Jeep door panels often need removal for common repairs or upgrades. Here are the top reasons:
- Window repair: Fixing stuck or slow windows usually requires panel removal.
- Speaker upgrades: Replacing factory speakers means getting behind the panel.
- Door lock issues: Accessing the lock mechanism or wiring is only possible with the panel off.
- Mirror replacement: Swapping side mirrors is easier after removing the panel.
Many Jeep models, including the Wrangler, Grand Cherokee, and Cherokee, use similar panel attachment systems. The methods in this guide cover these popular types.
Tools And Preparation
Having the right tools makes the job safer and faster. Here’s what you need:
- Phillips screwdriver: For most screws.
- Flat-head screwdriver: Helpful for prying.
- Trim removal tool: Prevents scratches and broken clips.
- Socket wrench: Some models use bolts, often 7mm or 10mm.
- Panel clip pliers (optional): For stubborn clips.
Also, prepare a safe space to lay the panel once removed. Losing fasteners is common—use a small tray or bag to keep track of screws and clips.
Quick Tool Comparison
| Tool | Main Use | Why It Matters |
|---|---|---|
| Trim Removal Tool | Prying panel | Reduces damage risk |
| Phillips Screwdriver | Removing screws | Most common fastener |
| Socket Wrench | Removing bolts | Needed for some models |
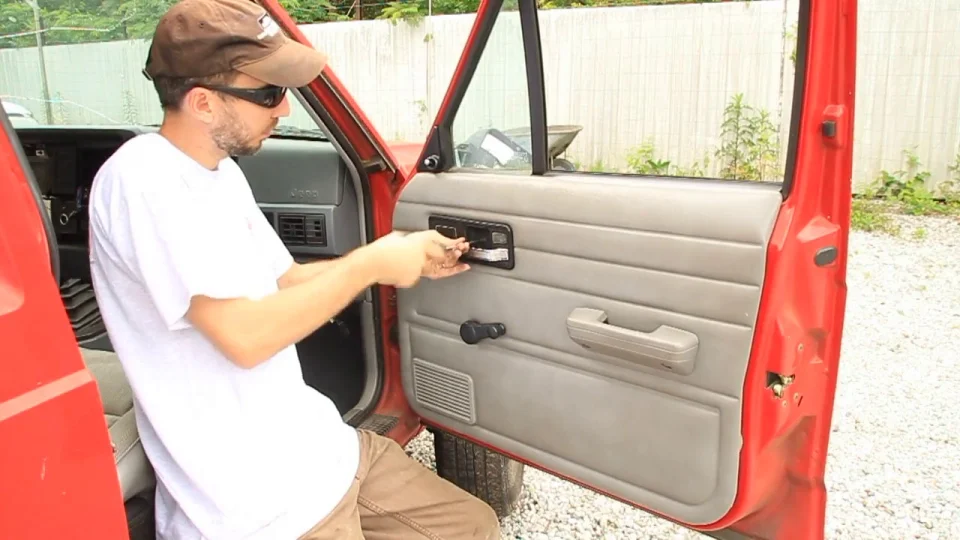
Step-by-step Guide To Removing A Jeep Door Panel
Follow these steps for most Jeep models. Always check your Jeep’s manual for small differences.
1. Disconnect The Battery
Before you start, disconnect the battery. This protects you from accidental short circuits, especially if you’ll touch window or lock wiring.
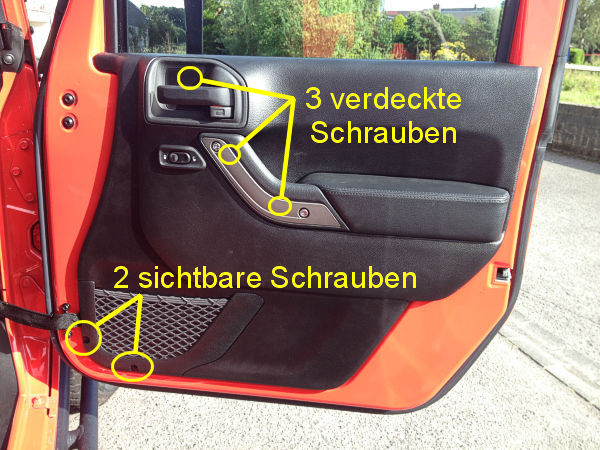
2. Locate And Remove Screws
Look for screws around the armrest, door handle, and lower panel areas. Some are visible, others may be under plastic covers. Use your Phillips screwdriver and keep screws safe.
3. Pry Off Trim Pieces
Carefully pry off any trim pieces with your trim removal tool. These could be near the door handle or window switches. Don’t force them—work gently to avoid cracks.
4. Remove Switch Panels And Cables
If your Jeep has electric windows or mirrors, gently lift the switch panel. Disconnect the wiring harness by pressing the locking tab. Some manual lock rods or cables may also need to be unhooked.
5. Release The Door Panel Clips
Most Jeep panels use plastic clips around the edges. Slide the trim tool between the panel and door and gently pop the clips loose. Start at the bottom and work your way up. Pulling too hard can break the clips.
6. Lift Off The Panel
Once all clips and screws are out, lift the panel upward to release it from the window channel. Set the panel aside on a soft surface.
7. Disconnect Wiring Or Linkages
If your Jeep has more wiring or mechanical rods attached, disconnect these before fully removing the panel. Take a photo with your phone to remember the correct connections.
Panel Fastener Types Comparison
| Fastener Type | Location | Removal Tool |
|---|---|---|
| Screw | Armrest, handle | Phillips screwdriver |
| Bolt | Lower panel | Socket wrench |
| Plastic clip | Panel edge | Trim tool/pliers |
Important Tips For Safe And Clean Removal
- Work slowly: Rushing leads to cracked panels or broken clips.
- Keep hardware organized: Use a tray or bag for all screws and clips.
- Take photos: Before disconnecting wires or rods, snap a quick photo for reference.
- Replace broken clips: If you break any, buy replacements before reassembly. Using damaged clips can cause rattles or loose panels.
A common mistake is forgetting a hidden screw, leading to panel damage. Always check around the handle and armrest for extra fasteners.
What To Do After Panel Removal
After the panel is off, you can access:
- Window regulators or tracks
- Door lock and latch assemblies
- Speaker mounts and wiring
- Mirror hardware
Check for any plastic vapor barrier behind the panel. If you need to peel it back, do so gently and reseal it before reattaching the panel.
Quick Reference: Common Jeep Models
| Model | Year Range | Main Fasteners |
|---|---|---|
| Wrangler (JK/JL) | 2007–Present | Screws, plastic clips |
| Grand Cherokee | 2011–Present | Screws, bolts, clips |
| Cherokee | 2014–Present | Screws, clips |
Reinstalling The Door Panel
To reinstall, reverse the steps:
- Reconnect any wiring harnesses or rods.
- Align the panel above the window channel and push down.
- Press the clips back into place along the edge.
- Replace all screws and trim pieces.
Always test all functions—windows, locks, and speakers—before finishing. This saves time if you need to correct a connection.

Frequently Asked Questions
How Long Does It Take To Remove A Jeep Door Panel?
Most people can remove a Jeep door panel in 20 to 40 minutes. First-timers may take longer, especially if they go slowly to avoid breaking clips.
Can I Reuse The Door Panel Clips?
You can often reuse plastic clips if they aren’t damaged, but they do become brittle with age. Always check for cracks and buy extras just in case.
Do I Need To Disconnect The Battery Every Time?
It’s safest to disconnect the battery whenever working near electrical components, especially on newer Jeeps with advanced wiring.
What If A Screw Is Stripped Or Stuck?
Apply penetrating oil and use the right size screwdriver. For stubborn screws, gentle tapping or a screw extractor can help.
Where Can I Find More Jeep Repair Guides?
The official Jeep Owner’s Site has repair guides, diagrams, and videos for most models.
Removing a Jeep door panel isn’t just for experts. With a few tools and some patience, you can handle repairs or upgrades confidently. Follow each step, keep your hardware organized, and you’ll avoid common mistakes. This simple skill can save you hundreds in labor costs and gives you more control over your Jeep’s maintenance.