Removing the radio from a Jeep Wrangler can sound challenging, but with the right guidance, it’s a job most people can do at home. Whether you want to upgrade your sound system, add Bluetooth, or fix a broken unit, learning how to remove the radio safely is an important skill for Jeep owners. This guide explains the process step-by-step for most Wranglers (especially the popular JK models, 2007–2018), highlights tools you’ll need, and shares tips to avoid common mistakes.
Why Remove Your Jeep Wrangler Radio?
Owners remove their radio for several reasons. The most common include:
- Upgrading to a modern head unit with features like navigation and smartphone integration
- Replacing a malfunctioning radio
- Adding aftermarket accessories like amplifiers or backup cameras
Knowing how to take out your radio can save money on installation costs and lets you customize your Jeep as you like.
Tools And Materials You’ll Need
Before you begin, gather these tools:
- Phillips screwdriver
- Panel removal tool (plastic trim tool)
- Socket wrench (usually 7mm or 10mm socket)
- Small container (for screws)
- Flashlight (optional, for better visibility)
Using the right tools prevents scratches and broken clips. Never use a flathead screwdriver on plastic trim—it can leave marks.
Preparing Your Jeep Wrangler
Safety comes first. Turn off your engine and remove the key. Disconnect the negative battery terminal with your socket wrench. This step is crucial, as it prevents short circuits or accidental airbag deployment.
Let your Jeep sit for five minutes after disconnecting the battery. This allows any stored electricity in the system to drain.
Step-by-step: Removing The Radio
The process may vary slightly between Jeep Wrangler model years. Below is a general guide for 2007–2018 JK models, which covers most owner needs.
1. Remove The Dashboard Trim
Most Jeep radios are covered by a center dash panel. Here’s how to take it off:
- Use your plastic trim tool to gently pry around the edges of the dashboard trim.
- Start at the bottom corners and work upwards.
- The trim is held by metal clips—apply steady, gentle force to avoid breaking them.
- Place the removed trim piece in a safe spot.
2. Unscrew The Radio
With the trim off, the radio is now visible.
- Locate the four screws holding the radio in place.
- Use your Phillips screwdriver or socket wrench (depending on your Jeep’s year) to remove the screws.
- Keep these screws in your container for reinstallation.
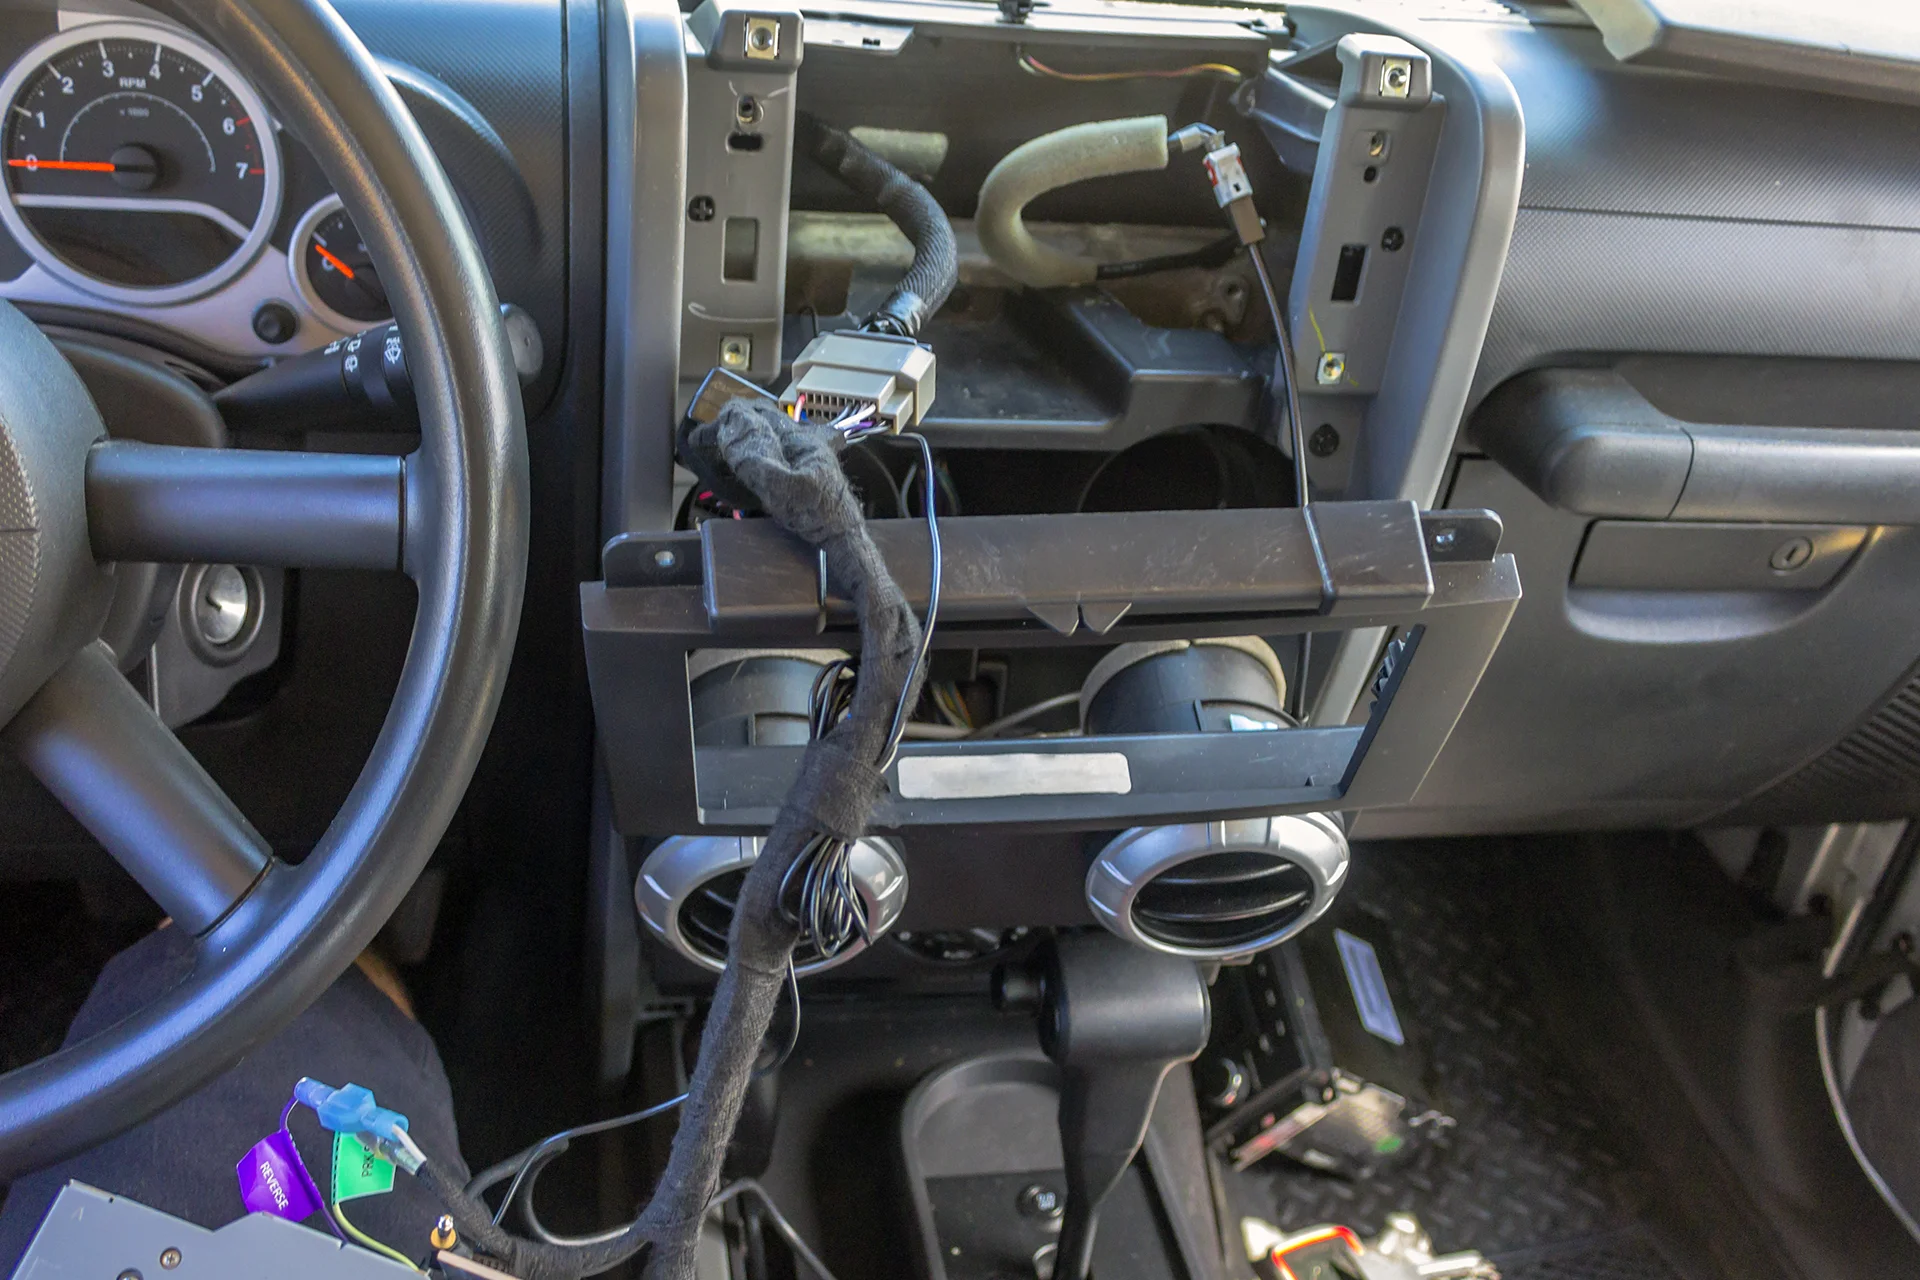
3. Disconnect The Wiring
Carefully pull the radio out just enough to reach the wires behind it. Do not yank.
- You’ll see two main connections: The antenna cable and the main wiring harness.
- Press the tab on each connector and gently pull to disconnect.
- Some models may have an extra connector for satellite radio or USB.
Your radio is now free. If you’re installing a new unit, compare the connections before proceeding.
Jeep Wrangler Radio Types And Fastener Comparison
Different Jeep Wrangler years and trims use different radios and fasteners. This table highlights the main differences:
| Model Year | Radio Type | Fastener Type | Number of Screws |
|---|---|---|---|
| 2007–2010 | Single DIN | Phillips Screw | 4 |
| 2011–2018 | Double DIN (Touchscreen) | 7mm Hex | 4 |
| 2019+ (JL) | Uconnect (Touchscreen) | Torx or Hex | 4–6 |
Common Mistakes To Avoid
Removing your Jeep’s radio is usually simple, but a few mistakes can turn it into a headache:
- Forgetting to disconnect the battery: This can cause blown fuses or airbag issues.
- Using metal tools on plastic trim: Scratches the dash.
- Losing screws: Always use a container.
- Pulling wires too hard: Jeep radio connectors are sturdy, but rough handling can break them.

Reinstallation Tips
When reinstalling your radio or a new unit, follow these tips:
- Double-check all wire connections before pushing the radio back into place.
- Test the radio and speakers with the battery reconnected before putting the dash trim back.
- If your new radio doesn’t turn on, check the fuse box—sometimes removing the radio can blow a fuse.
Jeep Wrangler Radio Upgrade Considerations
If you plan to install a new radio, some extra factors matter:
- Wiring harness adapters: Most aftermarket radios need an adapter to connect to the Jeep’s wiring.
- Steering wheel controls: Keeping these requires special modules.
- Dash kit: To fit a non-factory radio, you may need a custom dash kit for a clean look.
Here’s a quick comparison of popular Jeep Wrangler radio upgrade options:
| Feature | Factory Radio | Aftermarket Radio |
|---|---|---|
| Bluetooth | Limited | Yes |
| Navigation | Optional | Yes (most models) |
| Apple CarPlay/Android Auto | No (pre-2018) | Yes |
Practical Insights Most Beginners Miss
Many first-timers overlook the importance of documenting their steps. Take photos before disconnecting any wires. This makes reinstallation much easier, especially if you forget where a connector fits.
Another tip: some radios have a security code. If you’re putting your factory radio back in, make sure you have this code from your owner’s manual. Without it, the radio may lock you out after reinstalling.
When To Seek Professional Help
If your Jeep has a premium sound system (like Alpine or factory navigation), more wires and modules may be hidden behind the dash. In these cases, or if you’re unsure about handling airbag connectors, consider professional help. A certified installer can also ensure your new radio works with all Jeep features.

Recommended Resources
For more details on your Jeep Wrangler’s specific radio removal or installation, check the official Jeep website. You’ll find model-specific guides and wiring diagrams there.
Frequently Asked Questions
How Long Does It Take To Remove A Jeep Wrangler Radio?
Most people can remove the radio in 20 to 40 minutes. If it’s your first time, allow extra time to work carefully.
Do I Need Special Tools To Remove The Radio?
No special tools are required, but a plastic trim tool and a basic socket set make the job easier and prevent damage.
Will Removing The Radio Affect My Jeep’s Electronics?
If you disconnect the battery first, there’s little risk. However, some radios may require a security code after reinstallation.
Can I Install A Touchscreen Radio In An Older Wrangler?
Yes, but you’ll need a dash kit and possibly wiring adapters to fit a modern touchscreen radio into older models.
Where Can I Find Wiring Diagrams For My Jeep Wrangler?
Wiring diagrams can be found in the owner’s manual or on official sites like the Jeep website.
Successfully removing your Jeep Wrangler radio opens the door to better sound, more features, or a simple repair. Work patiently, keep track of your screws, and always put safety first. With these tips, you’ll be ready for your next upgrade or fix.


