Changing the wheel cylinder on a Jeep Cherokee is a practical way to restore brake performance and safety. Over time, wheel cylinders can leak or fail, causing poor braking and unsafe driving. Many Jeep Cherokee owners choose to do this repair at home to save money and learn more about their vehicles. If you have basic tools and some patience, this guide will help you complete the job confidently—even if you’re not a professional mechanic.
You’ll find clear steps, practical tips, and insights that make a real difference. Whether you’re repairing your brakes for the first time or want a refresher, this article covers everything you need to know.
Understanding The Wheel Cylinder
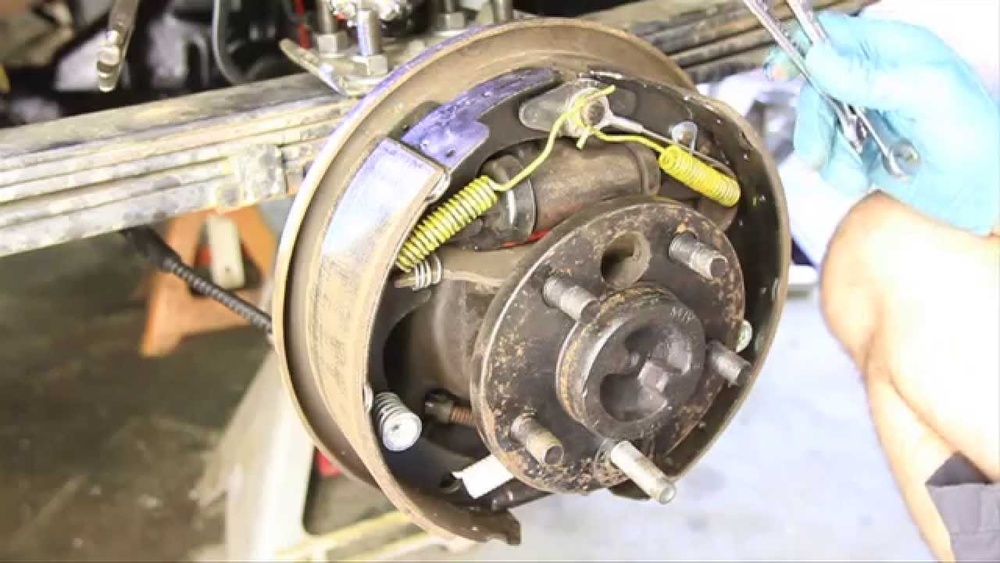
The wheel cylinder is a key part of the drum brake system found on many Jeep Cherokees, especially models produced before the mid-2000s. It sits inside the brake drum and pushes the brake shoes outward against the drum’s surface when you press the brake pedal. This friction slows and stops your vehicle.

Common signs of a failing wheel cylinder include:
- Soft or spongy brake pedal
- Brake fluid leaking inside the wheel
- Reduced braking power
- Uneven brake shoe wear
Replacing a faulty wheel cylinder is important for safe driving. Ignoring the problem can lead to total brake failure.
Drum Brake Vs. Disc Brake
Some newer Jeep Cherokees use disc brakes in the rear instead of drum brakes. Always check if your model has a drum brake before starting this repair.
| Feature | Drum Brake (Wheel Cylinder) | Disc Brake (Caliper) |
|---|---|---|
| Main Component | Wheel Cylinder | Caliper |
| Common on | Older Cherokees (rear) | Newer Cherokees |
| Maintenance | More frequent, more parts | Less frequent |
| Signs of Failure | Leaks, weak brakes | Noise, poor braking |
Tools And Parts You’ll Need
Gather all the tools and replacement parts before starting. This prevents delays and frustration.
Essential tools:
- Jack and jack stands
- Lug wrench
- Wrench set (metric/SAE)
- Brake line wrench (flare nut wrench)
- Flathead screwdriver
- Brake spring tool or pliers
- Brake cleaner spray
- Catch pan for fluid
- Rags or shop towels
Replacement parts:
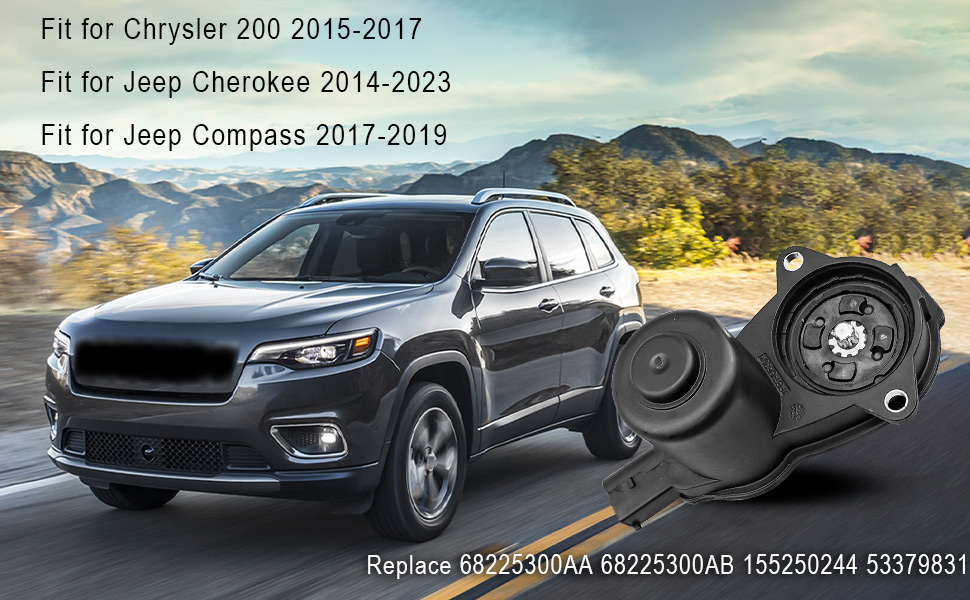
- New wheel cylinder (specific to your Cherokee’s year/model)
- Brake fluid (check owner’s manual for type)
- Optional: New brake shoes if worn
Non-obvious tip: Buy two wheel cylinders if both rear brakes are the same age. Replacing both sides saves time later and helps your brakes wear evenly.

Preparing Your Jeep Cherokee
Work on a flat, stable surface. Make sure you have enough light, and keep all parts organized.
- Loosen lug nuts slightly before lifting the vehicle.
- Jack up the rear of your Jeep and support it with jack stands.
- Remove the rear wheel for access to the drum.
- Release the parking brake so the drum can be removed more easily.
Safety reminder: Never rely on a jack alone—always use jack stands for safety.
Removing The Brake Drum
The brake drum can sometimes be stuck, especially on older vehicles.
- Tap the drum gently with a rubber mallet to loosen it.
- If the drum won’t budge, check for retaining screws or rust buildup around the hub.
- Use penetrating oil if the drum is rusted on.
- Pull the drum straight off. If it’s still stuck, adjust the star wheel (through a slot in the backing plate) to retract the shoes.
Beginner insight: Take a photo of the brake assembly before removing any parts. This will help you remember the order of springs and levers during reassembly.
Removing The Old Wheel Cylinder
With the drum off, you can see the brake shoes, springs, and the wheel cylinder at the top.
- Remove brake shoe springs using a brake spring tool or pliers. Note their position.
- Carefully pull the brake shoes apart just enough to clear the ends from the wheel cylinder.
- Locate the brake line attached to the wheel cylinder. Use a brake line wrench to loosen and disconnect it. A regular wrench may round off the fitting.
- Remove the mounting bolts (usually two small bolts) that hold the wheel cylinder to the backing plate.
- Pull the old wheel cylinder out.
Watch out for: Brake fluid may leak from the line once disconnected. Use a catch pan and avoid getting fluid on painted surfaces.
Installing The New Wheel Cylinder
- Position the new wheel cylinder in place.
- Thread in and tighten the mounting bolts securely.
- Carefully reconnect the brake line. Start threading by hand to avoid cross-threading.
- Make sure the brake line is snug but do not overtighten.
Pro tip: If the brake line fitting is rusty or hard to turn, use a small wire brush and spray with penetrating oil first.
Reassembling The Brake Shoes And Drum
- Place the brake shoes back onto the new wheel cylinder’s pistons.
- Reinstall all return springs and clips in the same order as removed.
- Check that all parts are seated correctly and move freely.
- Clean the brake area with brake cleaner to remove dust and grease.
Non-obvious insight: Inspect the condition of the brake adjuster (star wheel). If it’s sticky or dirty, clean and lubricate it before reassembly.
- Slide the brake drum back onto the hub. If it’s a tight fit, adjust the star wheel to retract the shoes slightly.
Bleeding The Brakes
Air can get trapped in the brake lines when you remove the wheel cylinder. Bleeding the brakes removes this air for safe operation.
- Fill the brake master cylinder with fresh brake fluid.
- Locate the bleeder screw on the new wheel cylinder.
- Attach a clear hose to the bleeder and place the other end in a jar.
- Have a helper press the brake pedal several times and hold it down.
- Open the bleeder screw to let fluid and air escape, then close it before your helper releases the pedal.
- Repeat until only clear fluid (no bubbles) comes out.
- Top off the master cylinder as needed.
Common mistake: Not bleeding the brakes enough. If the pedal still feels soft, repeat the process.
Testing And Final Checks
Before driving, check your work carefully.
- Reinstall the wheel and hand-tighten the lug nuts.
- Lower the vehicle and torque the lug nuts to the manufacturer’s specification.
- Pump the brake pedal to build pressure.
- Check for leaks around the new wheel cylinder and brake line.
- Test brakes at low speed in a safe area before normal driving.
Extra tip: If you replaced both rear wheel cylinders, bleed both sides for best results.
Cost And Time Estimates
Changing a wheel cylinder is affordable and can be done in about 1–2 hours per side.
| Expense | Estimated Cost (USD) |
|---|---|
| Wheel Cylinder (each) | $15–$30 |
| Brake Fluid | $6–$12 |
| Brake Spring Tool (optional) | $10–$20 |
| Labor (if done at shop) | $100–$200 per side |
DIY can save you over $150 per wheel compared to a shop.
When To Replace Both Wheel Cylinders
If your Jeep Cherokee is older or has high mileage, consider replacing both rear wheel cylinders at the same time. Brake parts wear at similar rates, and replacing both reduces the risk of uneven braking or a second failure soon after.
Example: If your left wheel cylinder is leaking, the right side is likely the same age and condition. Changing both means you won’t have to repeat the process soon.
Common Mistakes To Avoid
- Mixing up spring locations. Use your phone to take reference photos before disassembly.
- Not using a flare nut wrench. Regular wrenches can round off the soft brake line fittings.
- Forgetting to bleed brakes. Air in the system will cause poor braking.
- Reusing old brake shoes if fluid-soaked. Brake fluid can damage the lining. Replace shoes if contaminated.
- Overtightening brake lines. This can strip the threads and cause leaks.

Practical Tips For Success
- Always wear gloves and safety glasses.
- Label small parts or lay them out in order of removal.
- Check all rear brake hardware while the drum is off—replace worn adjusters or springs if needed.
- If a brake drum is scored or badly worn, have it resurfaced or replaced.
If you want more in-depth visuals or part specifications, the official Jeep Service & Care page offers additional technical details.
Frequently Asked Questions
How Do I Know If My Jeep Cherokee Has Drum Brakes In The Rear?
Most older Jeep Cherokees (especially 1984–2001 models) have drum brakes on the rear axle. Check by looking through the wheel spokes: a smooth, round drum means drum brakes, while a flat, shiny disc and caliper means disc brakes.
Can I Drive With A Leaking Wheel Cylinder?
It is not safe to drive with a leaking wheel cylinder. Leaks reduce brake fluid and pressure, leading to weak or complete brake failure. Fix the problem as soon as possible.
Do I Need To Replace Brake Shoes When Changing The Wheel Cylinder?
If your brake shoes are soaked with brake fluid or worn down, replace them. If they are dry and have enough lining, you can reuse them. Always clean off any fluid before reassembly.
What Type Of Brake Fluid Should I Use?
Most Jeep Cherokees use DOT 3 or DOT 4 brake fluid. Always check your owner’s manual to be sure. Never mix different types, as this can damage the braking system.
How Tight Should I Make The Brake Line And Wheel Cylinder Bolts?
Tighten the brake line until snug—do not overtighten, or you may damage the fitting. Wheel cylinder mounting bolts should be tightened to the manufacturer’s torque spec (usually around 10–15 ft-lbs). Double-check for leaks after installation.
Changing the wheel cylinder on your Jeep Cherokee is a rewarding repair that saves money and keeps your brakes working safely. With the right tools and careful attention, you can complete this task confidently and enjoy safer driving.