Jeep Wrangler Tj Snorkel Install Guide For Ultimate Off-road Performance
The Jeep Wrangler TJ is an icon for off-road enthusiasts. Its rugged design and capable platform make it a favorite for tackling challenging terrain.
However, to truly push the limits and conquer water crossings or dusty trails with confidence, upgrading your TJ with a safari snorkel is a smart move. A snorkel doesn't just look tough; it fundamentally improves your engine's ability to breathe in harsh environments, preventing water ingestion and reducing dust intake.
This guide will walk you through the Jeep Wrangler TJ snorkel install, detailing the process, benefits, and considerations to help you achieve ultimate off-road performance.
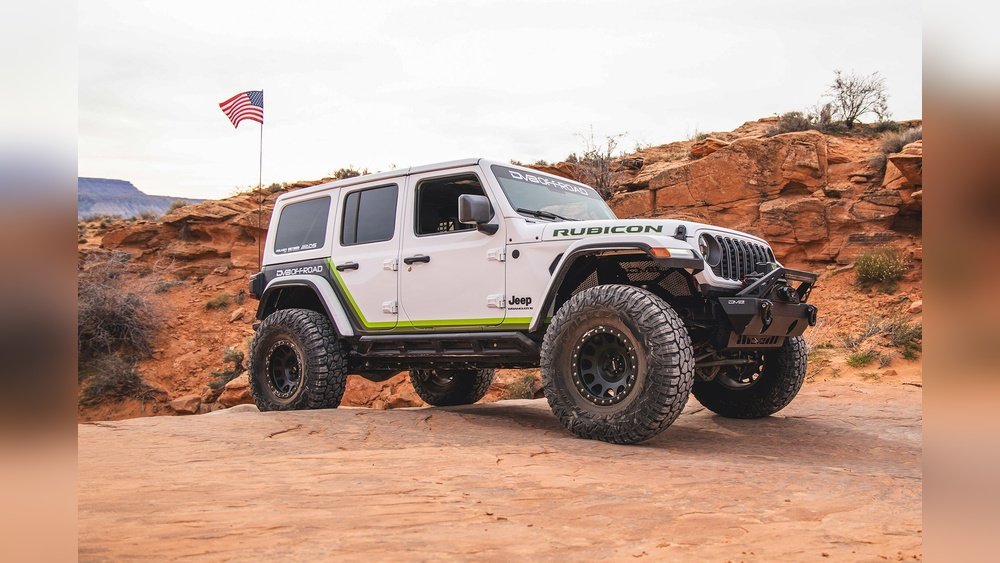
Installing a snorkel might seem daunting, but with the right tools, patience, and a clear understanding of the steps involved, it’s a manageable DIY project for many TJ owners. This upgrade is more than just an aesthetic modification; it’s a functional enhancement that can protect your engine and allow you to explore places you might have previously avoided.
We’ll cover everything from choosing the right snorkel kit to the final connection, ensuring you have the knowledge to complete the installation correctly and safely.
Why Install A Snorkel On Your Jeep Wrangler Tj?
Before diving into the installation, let’s understand why a snorkel is such a valuable addition to your TJ. The primary purpose is to relocate your engine’s air intake to a higher position, typically on the A-pillar of the windshield. This simple change offers significant advantages, especially in off-road scenarios.
Preventing Water Ingestion
One of the most critical benefits of a snorkel is the prevention of water ingestion, often referred to as hydrolock. When driving through water, the engine needs a constant supply of air. If the original air intake, located low in the engine bay, is submerged, water can be sucked directly into the cylinders. This is catastrophic for an engine, as water cannot be compressed like air. The resulting damage can range from bent connecting rods to a completely destroyed engine block. A snorkel raises the air intake well above the water level, allowing your TJ to safely cross deeper water. For a stock TJ, the wading depth is often limited by the air intake. With a snorkel, this limitation is significantly increased.
Cleaner Air Intake
Dust and mud are constant companions on off-road adventures. The standard air intake location is prone to sucking in large amounts of dust, especially when following other vehicles on dry, dusty trails. This excessive dust can clog your air filter faster, leading to reduced engine performance, decreased fuel efficiency, and increased wear on internal engine components over time. A snorkel, especially when fitted with a pre-filter or a cyclone-style pre-cleaner (often an optional accessory), can significantly reduce the amount of fine dust entering your airbox. This means your engine breathes cleaner air, maintaining optimal performance and extending the life of your air filter and engine internals.
Improved Performance And Fuel Economy (indirectly)
While a snorkel doesn’t directly add horsepower, it can indirectly improve engine performance and fuel economy by ensuring a consistent supply of cool, clean air. Cooler air is denser, meaning it contains more oxygen. More oxygen allows for more efficient combustion, which can translate to a slight increase in power and better fuel efficiency, especially at higher altitudes or in hot conditions where the air is naturally less dense. By preventing dust from clogging the air filter, the engine doesn’t have to work as hard to draw air in, further contributing to efficiency.
Aesthetics And Off-road Presence
Beyond the functional benefits, a snorkel undeniably adds to the aggressive, off-road aesthetic of a Jeep Wrangler TJ. It signals that the vehicle is built for adventure and ready to tackle tough challenges. Many owners find the rugged look of a snorkel to be a significant part of its appeal, enhancing the overall presence of their TJ on and off the trail.

Choosing The Right Snorkel Kit For Your Tj
With numerous brands and models available, selecting the right snorkel kit is important. While many function similarly, there are key differences to consider to ensure you get a kit that fits your TJ perfectly and meets your off-road needs.
Key Features To Look For
When evaluating snorkel kits, pay attention to the following:
- Material: Most quality snorkels are made from high-density polyethylene (HDPE) or UV-stabilized ABS plastic. These materials are durable, impact-resistant, and can withstand extreme temperatures and sunlight exposure without degrading. Some older or cheaper kits might use fiberglass, which can be more prone to cracking.
- Fitment and Design: The snorkel should be specifically designed for the Jeep Wrangler TJ (1997-2006). Kits vary in their design, particularly around the fender and pillar mounting points. Look for a kit that promises a precise fit to avoid gaps or the need for excessive modification. Some kits offer different snorkel head designs (e.g., high-flow ram, cyclone pre-cleaner) which can further enhance performance.
- Completeness of the Kit: A good snorkel kit should include all the necessary components for installation. This typically includes the snorkel body, intake pipe, mounting brackets, template (if applicable), fasteners (nuts, bolts, washers), hose clamps, and a Duma valve or rain guard. Some kits may also include a template for cutting holes in your fender.
- Manufacturer Reputation and Support: Research the brand. Look for manufacturers with a good reputation for quality products and customer support. Reading reviews from other TJ owners can provide valuable insights into the ease of installation and long-term durability of a particular brand.
Popular Snorkel Brands For Tj Wranglers
Several reputable brands offer snorkel kits for the Jeep Wrangler TJ. Some of the most popular include:
- ARB: Known for their high-quality, durable off-road equipment, ARB snorkels are a top choice for many. They are typically made from polyethylene and designed for a precise fit.
- Rhino Rack: Another well-respected brand, Rhino Rack offers robust snorkel solutions often made from UV-resistant ABS plastic.
- Smittybilt: Smittybilt provides a more budget-friendly option that still offers good performance and durability for most off-road applications.
- Rugged Ridge: Rugged Ridge offers a range of accessories for Jeeps, including snorkels that are designed to complement the TJ’s styling and functionality.
When comparing, consider the price point versus the material quality and included features. For extreme off-roading, investing in a premium brand like ARB might be worthwhile, while for occasional water crossings, a more affordable option could suffice.
Tools And Materials Needed For Installation
Before you begin, gather all the necessary tools and materials. Having everything ready will make the installation process smoother and more efficient.
Essential Tools:
- Drill: With various drill bit sizes, including a hole saw (typically 3-4 inches for the fender opening and smaller bits for mounting holes).
- Screwdriver Set: Phillips and flathead.
- Socket Set and Wrenches: Including metric and standard sizes.
- Pliers: Various types, including needle-nose and channel locks.
- Utility Knife or Box Cutter: For trimming and cutting.
- Measuring Tape: For accurate placement.
- Marker or Pencil: For marking cut lines and drill points.
- Angle Grinder or Jigsaw: May be needed for minor adjustments or trimming, though often not strictly necessary if the template is accurate.
- Safety Glasses: Crucial for protecting your eyes from debris.
- Gloves: To protect your hands.
- Masking Tape: To protect paint and help with marking.
- Vacuum Cleaner or Compressed Air: To clean up dust and debris after drilling.
- Silicone Sealant or RTV Gasket Maker: To seal any holes drilled through the body or airbox.
Materials (Usually Included in Kit, but good to have spares):
- Snorkel Kit (snorkel body, intake pipe, brackets, hardware)
- Template (often provided by the manufacturer)
- Silicone sealant
Pro Tip: Before drilling any holes, double-check the measurements and the placement of the template. Measure twice, cut once!
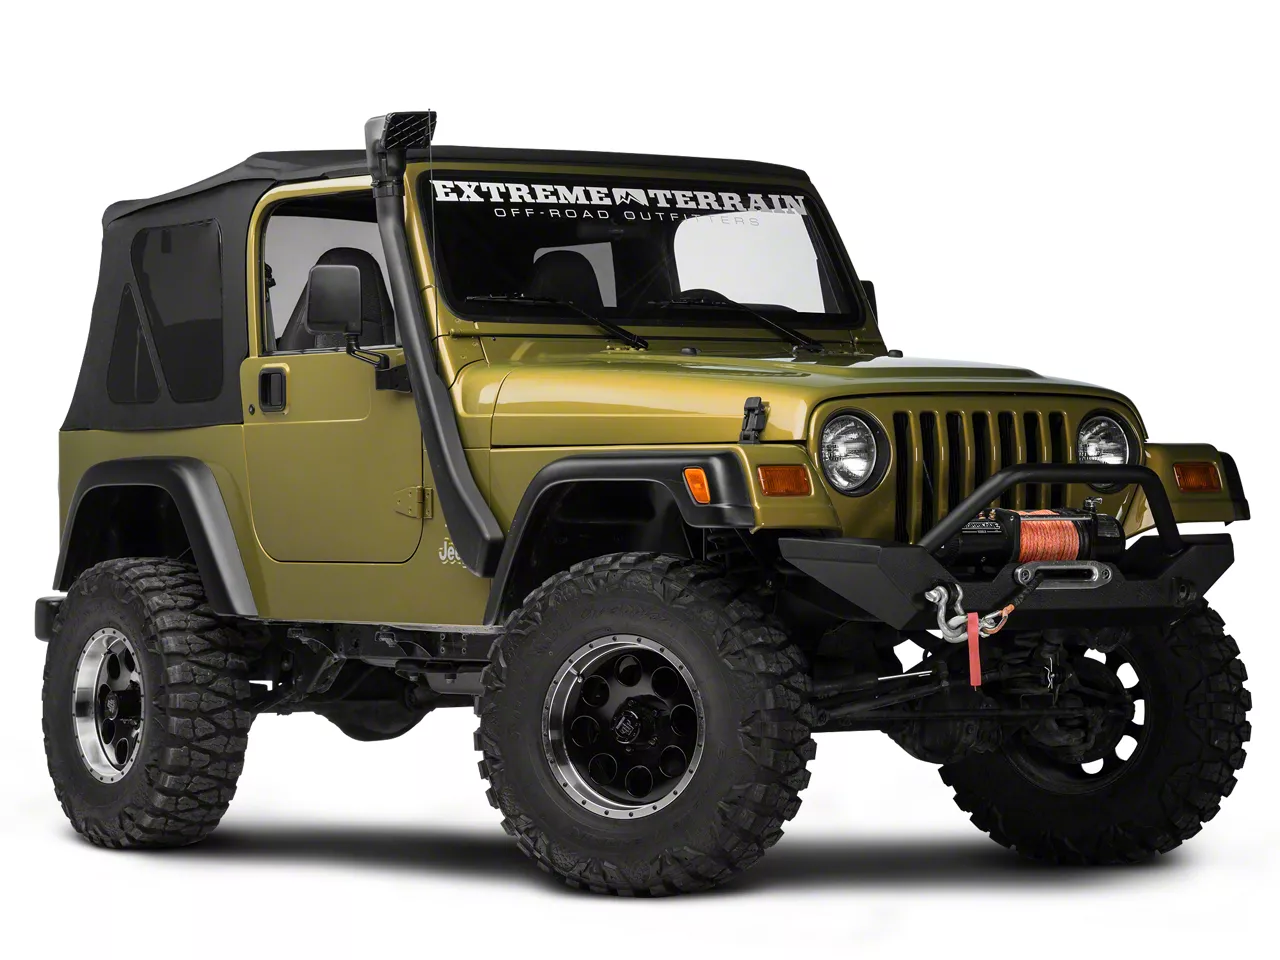
Step-by-step Jeep Wrangler Tj Snorkel Installation
Installing a snorkel on a TJ typically involves marking, cutting, drilling, and connecting. While specific details may vary slightly between brands, the general process remains consistent.
Step 1: Preparation And Component Familiarization
Unpack your snorkel kit and lay out all the components. Read the manufacturer's instructions thoroughly.
Familiarize yourself with each part and how they are intended to fit together. Identify the snorkel body, the intake pipe that connects to your airbox, the mounting brackets, and any hardware.
Crucially, locate the template provided with your kit. This template is vital for accurately marking where you need to cut and drill. If your kit doesn’t include a template, you’ll need to carefully measure and mark based on the snorkel’s design and your TJ’s fender and hood lines.
Step 2: Position The Snorkel Body
This is a critical step that determines the final look and fit.
- Dry Fit: Position the snorkel body against the A-pillar and fender of your TJ. Ensure it aligns correctly with the body lines and the hood. Most kits are designed to fit on the passenger side of the vehicle, as this is where the airbox is typically located.
- Marking: Once you’re satisfied with the position, use masking tape to secure the snorkel body temporarily. Then, carefully use your marker or pencil to trace the outline of the snorkel where it will meet the fender and pillar. This tracing will serve as your guide for cutting and drilling.
- Template Application: If your kit came with a template, this is where you use it. Tape the template securely to the fender and A-pillar, aligning it with your dry-fit position. Use the template to mark the locations for the main fender opening and the smaller mounting holes.
Important Consideration: Ensure the snorkel head is positioned high enough to clear the hood when it’s open. Also, consider how it will look aesthetically. A slight adjustment now can make a big difference later.
Step 3: Cutting The Fender Opening
This is often the most nerve-wracking part.
- Marking the Cut: Using the template or your traced lines, accurately mark the area on the fender that needs to be cut for the snorkel intake pipe. Some templates will indicate a specific shape or diameter.
- Drilling Pilot Holes: Drill a pilot hole inside the marked cutting area. This hole will allow you to insert a jigsaw or other cutting tool.
- Cutting: Carefully cut along the marked line using a jigsaw or a suitable cutting tool. Go slowly and steadily to ensure a clean cut. If using a hole saw, drill directly through the marked center.
- Deburr and Smooth: After cutting, use a utility knife or sandpaper to smooth any rough edges. This prevents sharp metal from snagging or damaging the snorkel or your hands.
Warning: Be extremely careful when cutting sheet metal. Always wear safety glasses. If you’re unsure about cutting metal, consider getting help from someone experienced.
Step 4: Drilling Mounting Holes
Now, you’ll drill the holes for the snorkel’s mounting brackets and fasteners.
- Marking: Using the template or the snorkel itself, carefully mark the locations for all mounting holes on the A-pillar and fender. These are typically smaller than the main intake hole.
- Drilling: Drill the mounting holes using appropriate drill bits. Start with a smaller bit and gradually increase the size if needed, especially for larger fasteners.
- Deburr and Clean: Clean any metal shavings from the drilled holes. Deburr the edges with a larger drill bit or a deburring tool to ensure a smooth finish and prevent rust.
- Rust Protection: Apply rust-inhibiting paint or primer to the inside of all drilled holes. This is crucial for preventing corrosion over time, especially on the fender which is exposed to the elements.
Step 5: Connecting The Snorkel To The Airbox
This step involves routing the snorkel’s intake pipe to connect with your TJ’s factory airbox.
- Access the Airbox: You’ll likely need to remove the factory air intake hose that connects the airbox to the throttle body. This usually involves loosening hose clamps.
- Modify the Airbox (if necessary): Some snorkel kits require you to cut a new opening in the airbox lid or side to accept the snorkel’s intake pipe. Use the template or manufacturer’s guide to mark and cut this opening. Again, smooth any rough edges.
- Connect the Pipe: Insert the snorkel’s intake pipe into the modified airbox. Secure it using the provided grommets, clamps, or sealant as per the kit’s instructions. Ensure a tight, airtight seal to prevent unfiltered air from entering the engine.
- Route the Pipe: Connect the snorkel body to the intake pipe using the provided flex hose or hard pipe and clamps. Ensure this connection is also secure and sealed.
Example: Many TJ snorkel kits will require you to cut a hole in the side of the factory airbox and then insert a rubber grommet and the snorkel’s intake tube. Secure this with a hose clamp.
Step 6: Mounting The Snorkel Body
With the intake pipe connected, it’s time to mount the snorkel body to the A-pillar and fender.
- Secure Brackets: Attach any required mounting brackets to the snorkel body.
- Align and Fasten: Position the snorkel body against the A-pillar and fender, aligning its mounting holes with the holes you drilled earlier.
- Install Hardware: Insert the provided bolts, nuts, and washers through the holes. Tighten them securely, but avoid over-tightening, which could crack the plastic or strip the threads.
- Seal Gaps: If there are any small gaps between the snorkel and the bodywork, apply a bead of silicone sealant to ensure a watertight seal and prevent water or dust from entering.
Step 7: Final Assembly And Testing
- Reassemble: Reinstall any components you removed, such as the factory air intake hose.
- Check Connections: Double-check all hose clamps, bolts, and connections to ensure everything is tight and secure.
- Inspect: Visually inspect the entire installation. Ensure the snorkel is firmly mounted and doesn’t wobble. Check for any sharp edges or potential snag points.
- Test: Start the engine and listen for any unusual noises. You can also spray a little soapy water around the airbox connection while the engine is running; if you see bubbles, there might be an air leak.
In my experience, taking your time during the airbox connection and ensuring a perfect seal is paramount. A leaky connection here negates many of