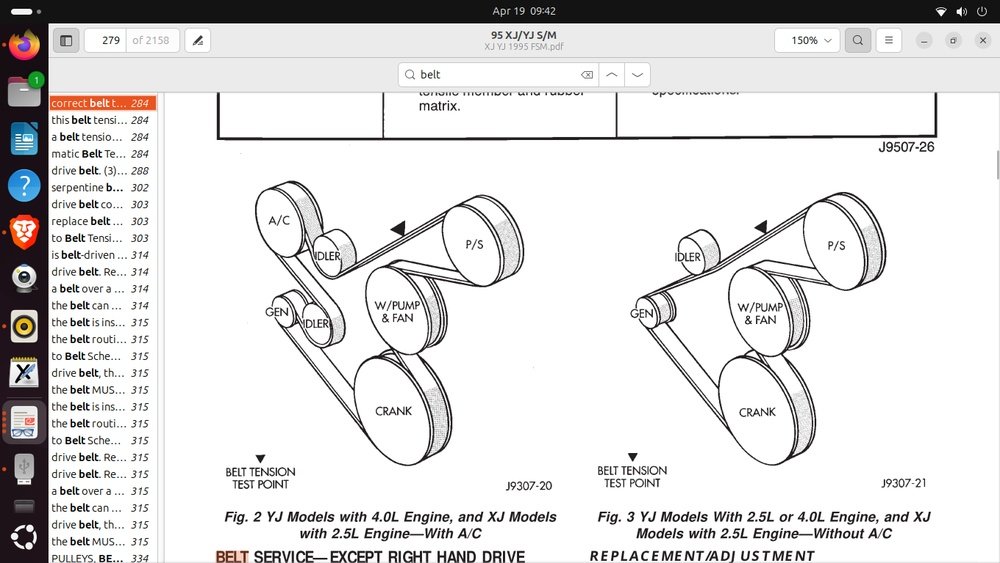
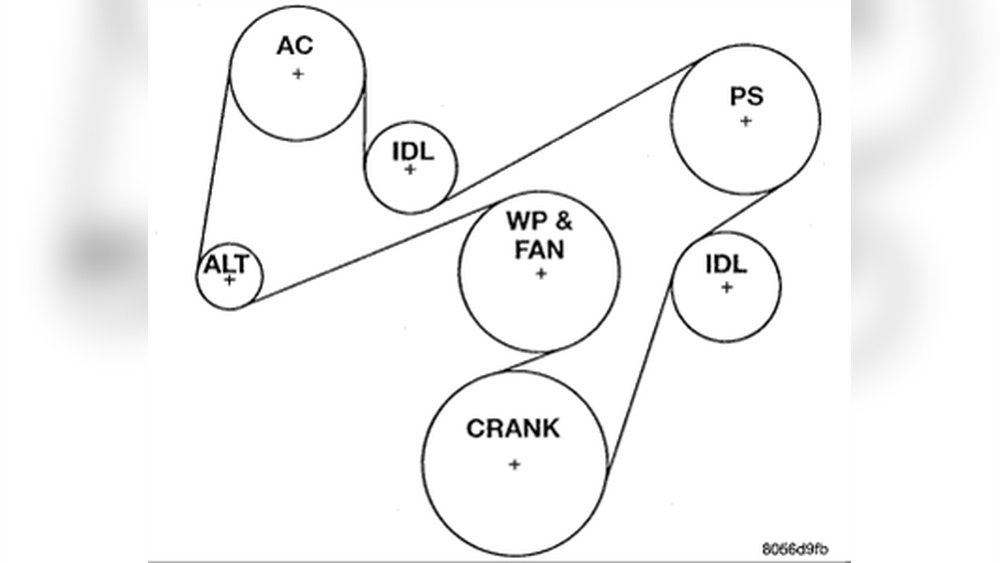
A serpentine belt is a small part with a big job in your Jeep. It connects several engine accessories like the alternator, water pump, and air conditioning compressor.
If the belt fails, your Jeep could stop running suddenly, and you may face expensive repairs. That’s why understanding the Jeep serpentine belt diagram is important for any driver or home mechanic.
It helps you see how the belt wraps around each pulley, making it easier to replace or inspect it yourself.
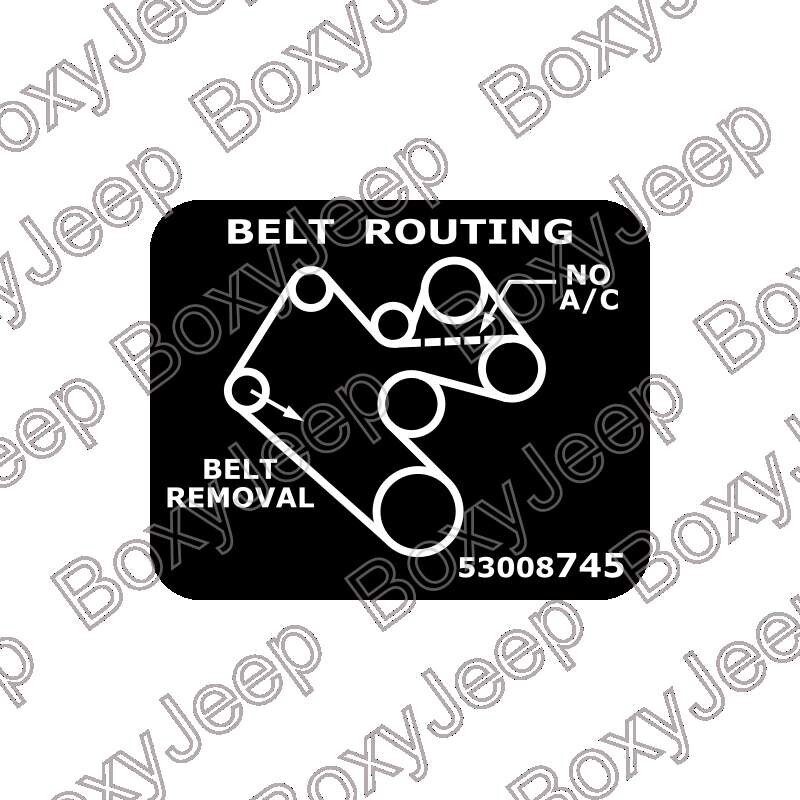
Not all Jeeps use the same serpentine belt routing. The belt’s path depends on your engine type, model year, and whether your Jeep has air conditioning.
Using the wrong diagram may cause the belt to slip off or damage engine parts.
This article explains the basics, shows common diagrams, and gives you tips to keep your Jeep running smoothly.
What Is A Serpentine Belt?
The serpentine belt is a long, flexible rubber belt. It gets its name because it “snakes” around several pulleys in the engine bay. One belt powers many parts, including:
- Alternator
- Power steering pump
- Water pump
- Air conditioning compressor
- Idler and tensioner pulleys
Older vehicles used several smaller belts, but the serpentine belt replaced them for better reliability and easier maintenance.
Why The Diagram Matters
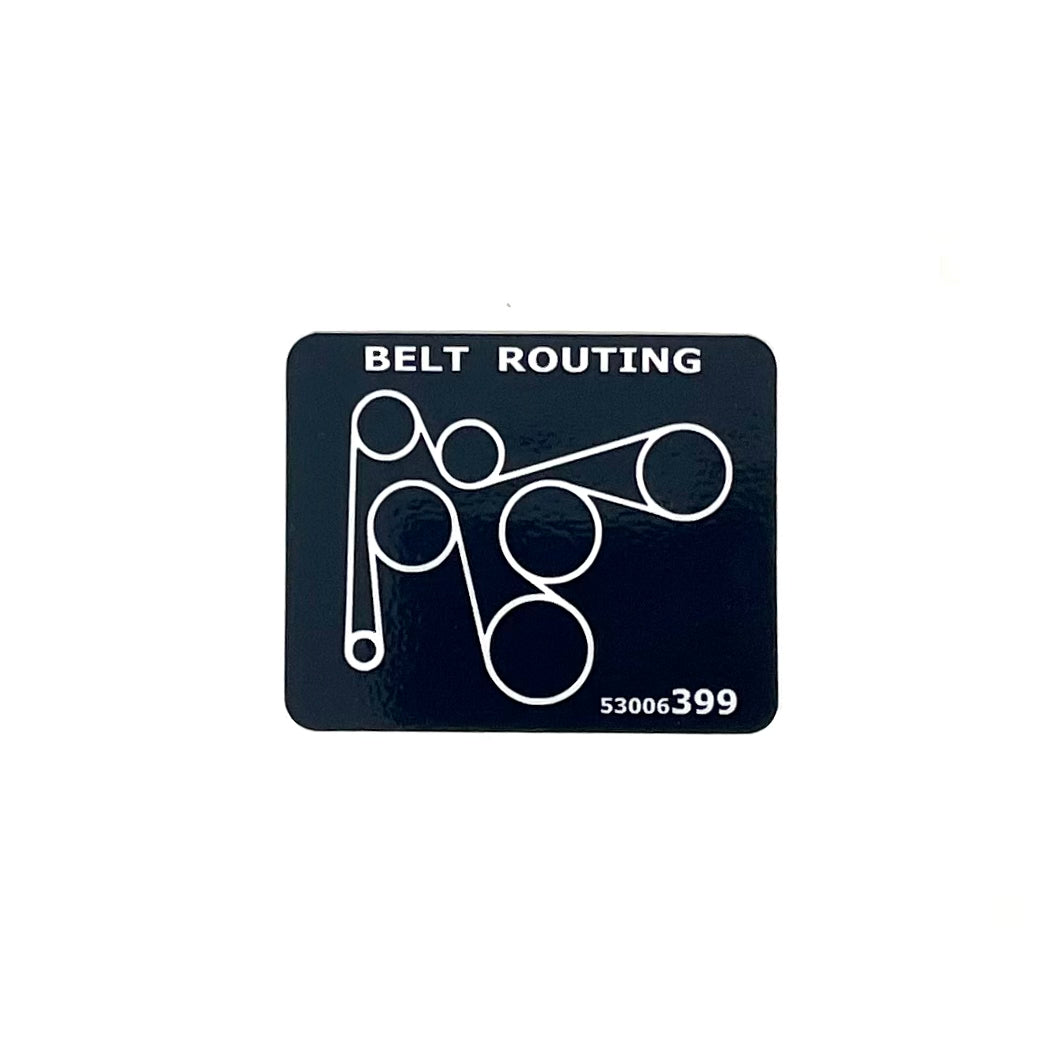
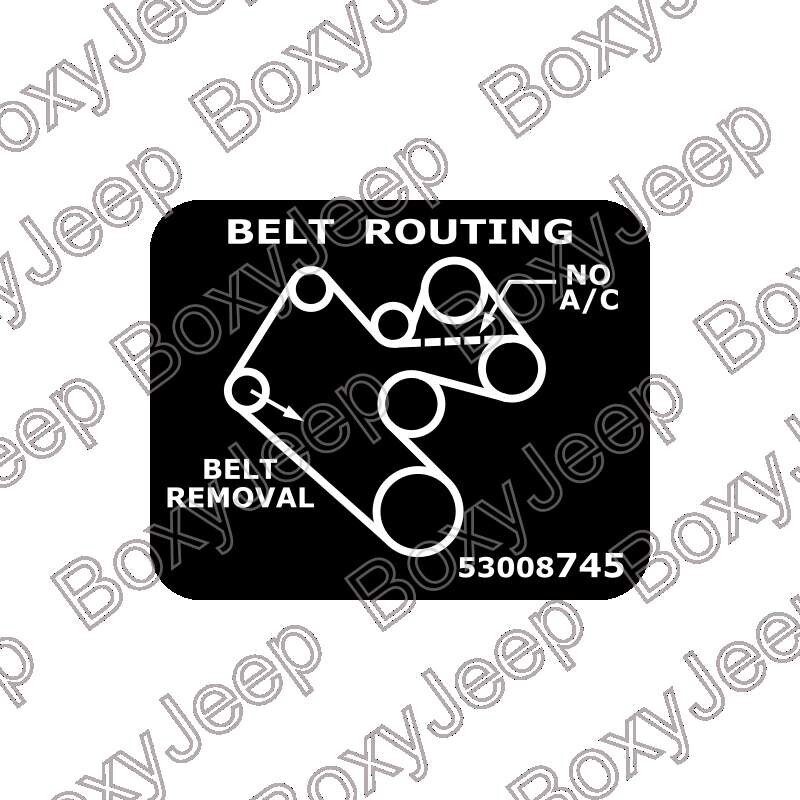
A serpentine belt diagram is a visual guide that shows the exact path of the belt around each pulley. It’s not just for mechanics—anyone can use it to:
- Check if the belt is installed correctly
- Identify worn or misaligned pulleys
- Replace the belt with confidence
Mixing up the routing can cause the belt to come off or wear quickly. In the worst case, it may damage engine accessories or leave you stranded.
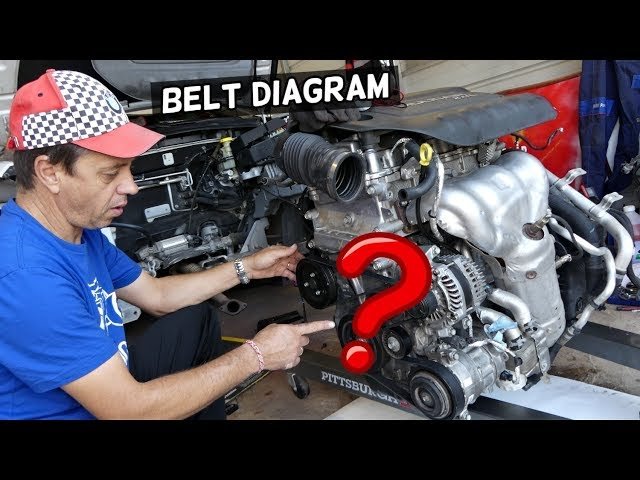
Common Jeep Serpentine Belt Diagrams
Jeep has used different engine types over the years, so belt routing varies. Let’s look at a few common examples.
Always check your owner’s manual or the sticker under the hood for your exact model.
Jeep Wrangler 4.0l (1997–2006)
This six-cylinder engine is found in many classic Wranglers. Here’s how the serpentine belt usually routes:
| Pulley | Order in Routing | Function |
|---|---|---|
| Crankshaft | Start | Drives the belt |
| Water Pump | 2 | Cools the engine |
| Alternator | 3 | Charges the battery |
| Power Steering | 4 | Assists steering |
| Idler Pulley | 5 | Guides the belt |
| A/C Compressor | 6 (if equipped) | Runs the air conditioning |
| Tensioner Pulley | Final | Maintains belt tension |
Jeep Grand Cherokee 3.6l Pentastar (2011+)
This modern V6 engine uses a slightly different path:
| Pulley | Order in Routing | Function |
|---|---|---|
| Crankshaft | Start | Main drive |
| Tensioner | 2 | Adjusts belt tightness |
| Alternator | 3 | Charges system |
| Water Pump | 4 | Cools engine |
| Idler Pulley | 5 | Guides belt |
| Air Conditioning | 6 | Controls climate |
| Power Steering | 7 | Steering assist |
Jeep Compass/patriot 2.4l
For four-cylinder engines, you’ll notice a simpler routing:
| Pulley | Order | Accessory |
|---|---|---|
| Crankshaft | 1 | Main drive |
| Alternator | 2 | Power supply |
| Water Pump | 3 | Engine cooling |
| Tensioner | 4 | Belt tension |
| Idler | 5 | Belt guide |
| A/C Compressor | 6 | Cooling |
Replacing A Jeep Serpentine Belt
Changing your Jeep’s belt is a simple job with the right diagram. Here are the basic steps:
- Locate the belt routing diagram under the hood or in the manual.
- Use a wrench to release tension on the tensioner pulley.
- Slide the old belt off the pulleys.
- Route the new belt, following the diagram exactly.
- Release the tensioner to tighten the belt.
- Double-check that the belt sits fully in all grooves.
Pro Tip: Take a photo of your engine before removing the old belt. This gives you a backup reference.
Common Mistakes To Avoid
Many Jeep owners make these errors:
- Using the wrong diagram: Even small differences, like having or missing air conditioning, change the routing.
- Not checking all pulleys: A worn or seized pulley can destroy a new belt in days.
- Skipping the tensioner: Old tensioners lose spring force, causing the belt to slip or squeal.
Signs Your Serpentine Belt Needs Replacement
A healthy belt is key to keeping your Jeep reliable. Watch for:
- Squealing or chirping noises
- Cracks, fraying, or missing ribs
- Loss of power steering or sudden engine overheating
- Battery warning light
Most belts last 60,000 to 100,000 miles. Inspect yours at every oil change.
Where To Find Reliable Diagrams
The best place for a Jeep serpentine belt diagram is your owner’s manual or the sticker under the hood. If it’s missing, visit the official Mopar website for free resources. Many auto parts stores also offer printed diagrams for common Jeep engines.
Frequently Asked Questions
What Happens If I Install The Belt Incorrectly?
If the belt is routed wrong, engine accessories won’t work. This can cause overheating, battery drain, or loss of power steering. The belt may also come off while driving.
Can I Drive My Jeep Without A Serpentine Belt?
No. The serpentine belt powers critical systems.
Driving without it can damage your engine within minutes and leave you stranded.
How Do I Check Belt Tension?
Press on the longest stretch of belt between pulleys. There should be about 1/2 inch of movement. If it’s much more or much less, the tensioner may need replacement.
How Often Should I Replace The Serpentine Belt?
Most Jeep belts last about 60,000–100,000 miles, but check your owner’s manual. Replace sooner if you see cracks, glazing, or hear squealing.
Is It Safe To Use Belt Dressing Spray?
It’s better to replace a worn belt than use sprays. Belt dressing can mask noise but does not fix the root problem.
Sprays may also damage some belts or sensors.
A Jeep serpentine belt diagram is more than a picture—it’s your guide to keeping your engine healthy. By using the right diagram for your model and double-checking your work, you save time, money, and avoid breakdowns. With just a few tools and some care, you can handle this repair confidently at home.