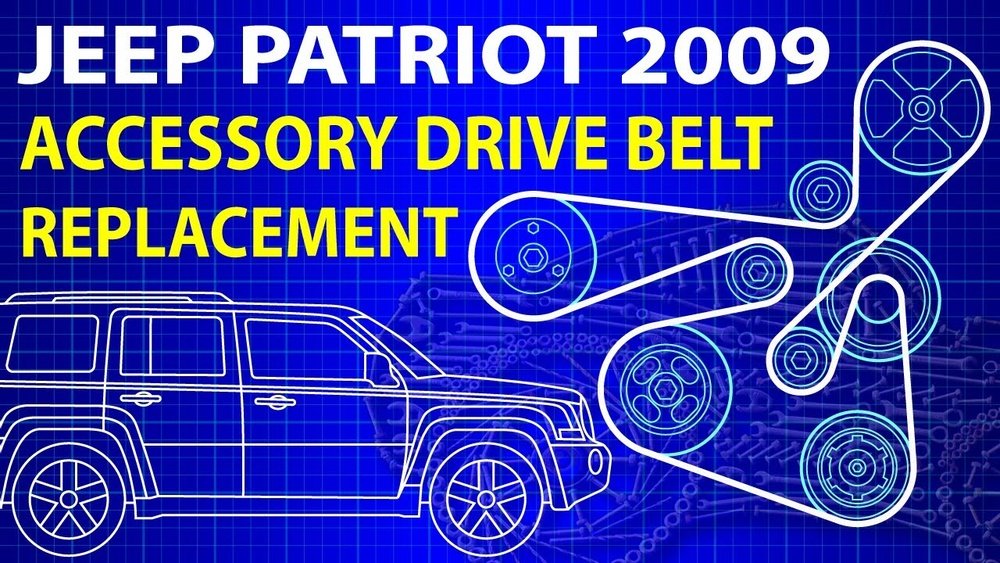
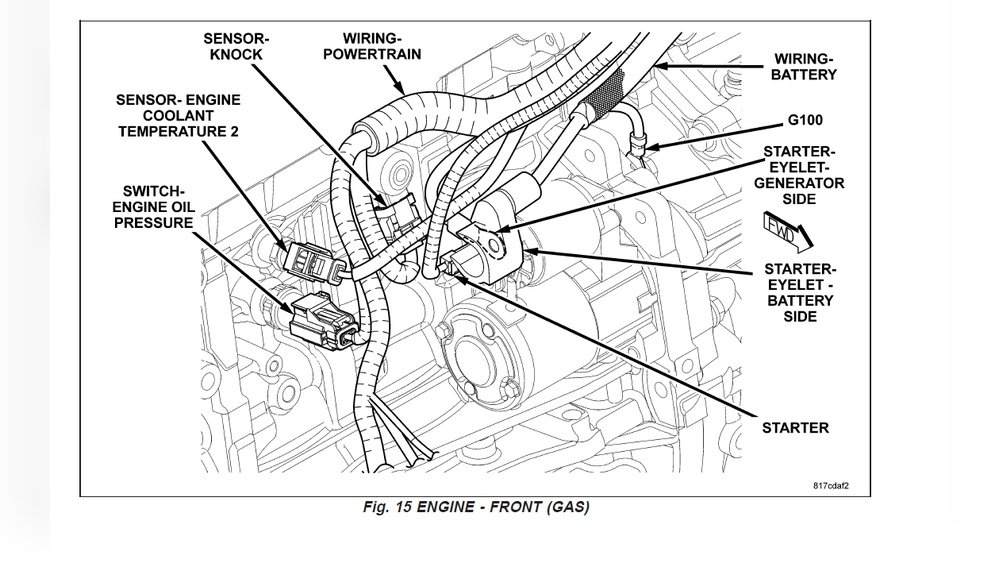
The 2014 Jeep Patriot belt diagram is a crucial piece of information for any owner needing to understand or replace the serpentine belt.
This diagram shows the path the belt takes around various pulleys on the engine, ensuring all accessories like the alternator, power steering pump, and air conditioning compressor function correctly. A broken or worn serpentine belt can quickly lead to a breakdown, leaving you stranded.
Understanding the layout is key to proper maintenance and timely replacement.
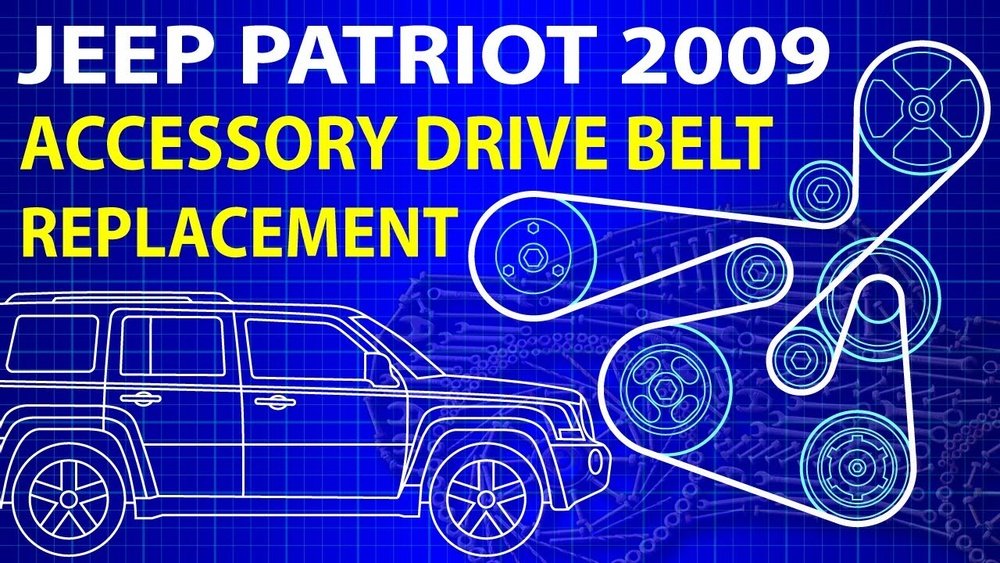
This guide will walk you through the specifics of the 2014 Jeep Patriot's serpentine belt system. We'll cover the components involved, how to read the diagram, common issues, and tips for replacement.
Whether you're a seasoned DIY mechanic or just want to understand what’s happening under your hood, this information will be invaluable.
Understanding The Serpentine Belt System
The serpentine belt is a single, continuous belt that drives multiple accessories in your engine. Unlike older vehicles that used multiple V-belts, the serpentine belt is more efficient and takes up less space. It’s typically made of a durable rubber compound designed to withstand heat, tension, and constant flexing. The belt is kept under tension by a belt tensioner, which automatically adjusts to maintain the correct tightness as the belt wears or the engine temperature changes.
Key Components Driven By The Serpentine Belt
In a 2014 Jeep Patriot, the serpentine belt drives several essential components. Knowing what each part does helps in diagnosing issues and understanding the belt’s importance.
- Alternator: This component generates electricity to charge the battery and power the vehicle’s electrical systems while the engine is running. If the alternator isn’t driven by the belt, your battery will drain, and the car will eventually stop running.
- Power Steering Pump: This pump provides hydraulic pressure to assist you in steering. Without it, steering would become extremely difficult, especially at low speeds.
- Water Pump: The water pump circulates coolant through the engine and radiator, preventing the engine from overheating. A failing water pump, driven by the belt, can lead to severe engine damage.
- Air Conditioning (A/C) Compressor: This component is responsible for cooling the cabin air. While not critical for the car’s operation, a faulty belt driving the A/C compressor means no air conditioning.
- Idler Pulley: This is an extra pulley used to reroute the belt or maintain proper tension. It doesn’t drive an accessory but is a critical part of the belt’s path.
- Belt Tensioner: As mentioned, this is a spring-loaded or hydraulic device that maintains the correct tension on the serpentine belt. A worn or failing tensioner can cause the belt to slip, squeal, or even break.
Reading The 2014 Jeep Patriot Belt Diagram
The serpentine belt diagram is essentially a map of your engine’s accessory drives. It shows the correct routing of the belt around all the pulleys. This is critical because the belt must follow a specific path to engage all the necessary components. Incorrect routing will prevent components from working and can even cause damage.
Most diagrams are visual representations, often found on a sticker under the hood of your Jeep Patriot, usually on the radiator support or the underside of the hood itself. If the sticker is missing or unreadable, you’ll need to find a reliable diagram online or in a service manual.
How To Interpret A Belt Diagram
- Identify the Pulleys: The diagram will show circles representing each pulley. Some will be labeled with the component they drive (e.g., ALT for Alternator, PS for Power Steering, WP for Water Pump, AC for A/C Compressor). Others might be labeled as Idler or Tensioner.
- Follow the Belt Path: The diagram will use lines or arrows to show how the single serpentine belt wraps around these pulleys. Pay close attention to the direction of the arrows, which indicate the belt’s movement.
- Note the Tensioner: The tensioner pulley is usually depicted with a spring or a pivot point, indicating it’s the component that applies pressure to the belt.
Common Locations For Belt Diagrams
- Under the Hood Sticker: This is the most convenient place. Look for a sticker, often white or yellow, with a line drawing of the belt routing.
- Owner’s Manual: Some manuals include basic diagrams.
- Online Automotive Forums and Repair Sites: Many websites and forums dedicated to Jeep vehicles offer diagrams and user-submitted photos.
- Service Manuals: Professional repair manuals contain detailed diagrams and specifications.
Common Serpentine Belt Problems And Symptoms
Serpentine belts don't last forever. They are subject to wear and tear, and issues can arise that require attention.
Recognizing the symptoms can help you address problems before they lead to a breakdown.
Squealing Noises
One of the most common symptoms of a failing serpentine belt is a squealing noise, especially when you start the engine or when you turn on accessories like the A/C. This often indicates that the belt is slipping. Slipping can be caused by:
- Worn Belt: The rubber can become glazed and hardened, losing its grip on the pulleys.
- Loose Belt: The tensioner may be weak or failing, not providing enough tension.
- Misaligned Pulleys: If a pulley is bent or not spinning true, it can cause the belt to slip.
- Contamination: Oil or coolant leaking onto the belt can also cause it to slip and squeal.
Cracks And Fraying
Inspect the belt visually for any signs of damage. Look for:
- Cracks: Small cracks on the ribbed side of the belt are normal with age. However, deep or widespread cracks indicate the belt needs replacement.
- Fraying: The edges of the belt might start to fray or peel.
- Glazed Appearance: The belt surface might look shiny or smooth, indicating it has hardened and lost its grip.
Worn Tensioner Or Idler Pulleys
The tensioner and idler pulleys also have bearings that can wear out. Symptoms of a bad pulley include:
- Grinding or Chirping Noises: Different from a squeal, these noises might indicate a bearing issue within a pulley.
- Pulley Wobble: If you can see a pulley wobbling when the engine is running, its bearing is likely failing.
- Excessive Belt Movement: A failing tensioner might allow the belt to bounce or flap excessively.
Complete Belt Failure
This is the worst-case scenario. If the belt breaks, all the accessories it drives will stop working immediately. You’ll likely notice:
- Loss of Power Steering: Steering becomes very heavy.
- Overheating: The water pump stops circulating coolant. The temperature gauge will rise rapidly.
- Battery Warning Light: The alternator stops charging the battery.
- Sudden Loss of Accessories: A/C stops blowing cold, etc.
If the belt breaks, you must stop driving immediately to prevent further engine damage.
Replacing The Serpentine Belt On A 2014 Jeep Patriot
Replacing the serpentine belt is a task that many DIYers can accomplish with the right tools and a clear understanding of the belt routing. Always disconnect the negative battery terminal before starting any work on the engine to prevent accidental electrical shorts.
Tools You’ll Need
- Serpentine Belt Tool Kit: This is a specialized tool that allows you to release tension on the belt tensioner. It typically includes various adapters to fit different tensioner bolt sizes.
- New Serpentine Belt: Ensure you have the correct belt for your 2014 Jeep Patriot model (engine size can matter).
- Gloves: To protect your hands.
- Safety Glasses: To protect your eyes.
- Wrench or Socket Set: To remove any covers or components if necessary.
- Flashlight: For better visibility.
- Belt Diagram: Have a clear diagram of the correct belt path.
Step-by-step Replacement Process
- Locate the Belt and Tensioner: Open the hood and find the serpentine belt. Identify the automatic belt tensioner. It’s usually a spring-loaded arm with a pulley attached.
- Release Belt Tension: Attach the appropriate adapter from your serpentine belt tool kit to the bolt head on the tensioner arm. Use a long wrench or breaker bar on the tool to rotate the tensioner arm. This action will release the tension on the belt, allowing you to slip it off one of the pulleys. Pro Tip: It’s often easiest to slip the belt off the alternator pulley or an idler pulley, as these are usually accessible.
- Remove the Old Belt: Once the tension is released, carefully slide the old belt off the pulleys. Keep track of its path as you remove it.
- Inspect Pulleys: While the belt is off, take the opportunity to inspect all the pulleys. Spin each one by hand. They should rotate smoothly and quietly. If you hear grinding, feel roughness, or notice any wobble, the pulley (or its bearing) may need to be replaced. Also, check that the pulleys are clean and free of debris.
- Install the New Belt: Refer to your belt diagram. Route the new belt around all the pulleys except for one, typically the same one you removed the old belt from (e.g., the alternator pulley). Make sure the ribbed side of the belt sits correctly in the grooves of the ribbed pulleys, and the smooth side runs on the smooth pulleys.
- Apply Tension and Seat the Belt: Use the serpentine belt tool again to rotate the tensioner arm, releasing tension. Carefully slip the final section of the belt onto the last pulley. Ensure the belt is fully seated on all pulleys.
- Release Tensioner and Final Check: Slowly release the tensioner arm, allowing it to apply tension to the new belt. Double-check that the belt is centered on every pulley and that no part of it is rubbing against any other component. Ensure the belt is following the exact path shown on the diagram.
- Start the Engine: Start the engine and listen for any unusual noises. Check that all accessories are functioning correctly. Let the engine run for a few minutes and re-inspect the belt and pulleys to ensure everything looks good.

Troubleshooting Common Belt Issues
Even after replacement, you might encounter issues. Here’s how to troubleshoot:
Persistent Squealing
If the new belt squeals, it could be:
- Incorrect Belt: The new belt might be the wrong size or type.
- Faulty Tensioner: The tensioner might not be applying enough pressure.
- Misaligned Pulley: One of the pulleys might be bent or not spinning true.
- Contamination: A new leak (oil, coolant) might be getting on the belt.
Belt Thumping Or Chattering
This often points to a problem with the tensioner. It might be weak, its spring broken, or its pulley bearing failing, causing it to oscillate and make the belt move erratically.
Belt Comes Off Pulleys
This is a serious issue and usually indicates:
- Severely Misaligned Pulley: A pulley that is significantly out of alignment will push the belt off.
- Wrong Belt Installed: An incorrect belt can cause this.
- Worn Pulleys: Grooves in the pulleys can wear down, not holding the belt properly.
- Failed Tensioner: A tensioner that doesn’t apply enough force can allow the belt to jump off.
Factors Affecting Belt Lifespan
Several factors can influence how long your serpentine belt lasts. Understanding these can help you anticipate replacement needs.
Mileage And Age
Most manufacturers recommend inspecting the serpentine belt every 30,000 to 60,000 miles. However, age is also a factor. Rubber degrades over time, even if the vehicle isn’t driven much. A belt that is 5-7 years old may need replacement regardless of mileage due to hardening and cracking.
Driving Conditions
- Extreme Temperatures: Frequent exposure to very high or very low temperatures can accelerate rubber degradation.
- Dust and Debris: Driving in dusty or sandy environments can cause abrasive materials to get under the belt, leading to premature wear.
- Frequent Short Trips: Short trips where the engine doesn’t fully warm up can sometimes lead to moisture buildup on the belt, which can contribute to wear.
Leaks
Leaks from engine components like the power steering pump, water pump, or oil seals can contaminate the serpentine belt. Oil and coolant can cause the rubber to swell, soften, and lose its grip, significantly reducing its lifespan and performance. If you notice fluid leaks near the belt area, address the leak immediately and clean or replace the belt.
Serpentine Belt Maintenance Schedule And Inspection
Regular inspection is key to preventing unexpected failures. Make it a habit to check your belt during routine maintenance like oil changes.
Visual Inspection Checklist
- Cracks: Look for cracks on the ribbed side. Small hairline cracks are normal, but deep or numerous cracks mean replacement is needed.
- Fraying/Tearing: Check the edges for any signs of wear, fraying, or tearing.
- Glazing: A shiny, smooth appearance indicates the belt has lost its grip.
- Contamination: Inspect for any signs of oil, coolant, or other fluid contamination. If contaminated, replace the belt and find the source of the leak.
- Tensioner Function: With the engine off, gently try to move the tensioner arm. It should have firm resistance. If it feels loose or moves too easily, it may need replacement.
When To Replace
- At Recommended Intervals: Follow your owner’s manual recommendations, typically between 60,000 and 90,000 miles, but always inspect.
- When Damaged: Replace immediately if you see significant cracks, fraying, or glazing.
- If Noisy: A persistent squeal or chirp that doesn’t go away after a belt adjustment usually means the belt or tensioner needs replacement.
- After a Leak: If the belt has been contaminated by fluids, replace it to ensure reliability.
Comparison Of Belt Material Types
While most 2014 Jeep Patriots likely came with a standard EPDM (ethylene propylene diene monomer) rubber belt, there are other materials and technologies available that can affect durability and performance.
| Material Type | Characteristics | Pros | Cons |
|---|---|---|---|
| EPDM Rubber | Standard, durable rubber compound. | Good heat resistance, flexibility, and wear resistance. | Can degrade with prolonged exposure to oil or high heat. |