Removing the steering wheel from a 1984 Jeep CJ7 might sound tricky, but with the right steps and tools, it’s a project almost any owner can handle. Whether you want to replace a worn steering wheel, fix a horn issue, or install a custom upgrade, understanding the process will save you time and prevent damage to your classic Jeep. This guide explains every detail so you can work confidently and avoid common mistakes.
Why Remove The Steering Wheel?
Many Jeep CJ7 owners consider removing the steering wheel for several reasons:
- Upgrading to a custom wheel for improved comfort or style
- Repairing internal parts like the horn contact or turn signal cancel cam
- Fixing steering column issues that can cause loose or unresponsive steering
- Restoring original parts for a classic look
No matter your reason, removing the steering wheel is usually the first step in steering column repairs.
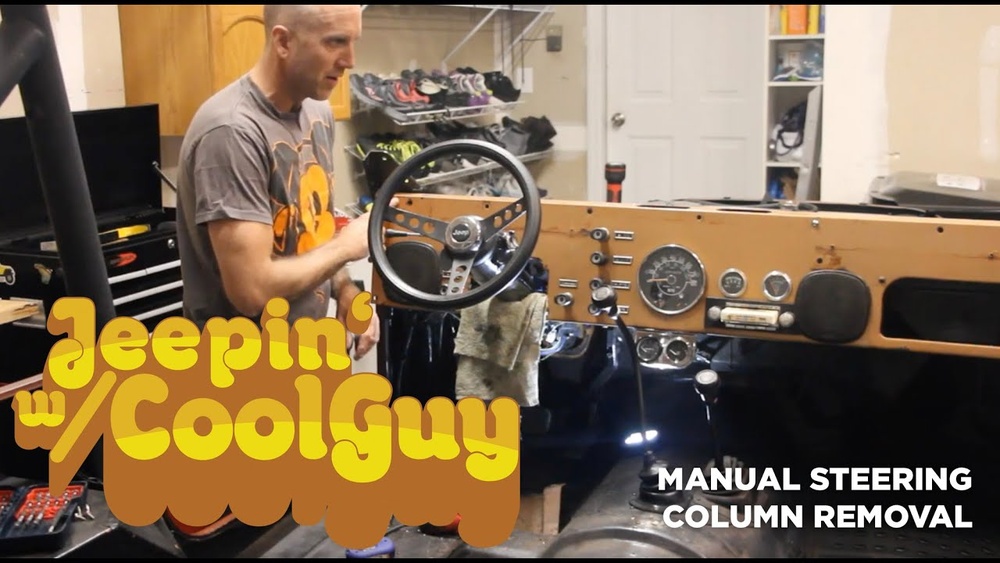
Tools And Supplies You’ll Need
Having the right tools makes the job easier and avoids damage. Here’s what you’ll need:
- Socket wrench set (especially 13/16″ and 7/8″ sockets)
- Phillips and flathead screwdrivers
- Steering wheel puller (available at auto parts stores)
- Penetrating oil (like WD-40)
- Shop rags
- Torque wrench (for reassembly)
Optional but helpful:
- Needle-nose pliers
- Marking pen or chalk (to mark alignment)
- Gloves
Using the proper steering wheel puller is important; trying to pry the wheel off can damage threads and the steering column.
Safety First
Before starting, always follow these safety steps:
- Disconnect the battery to prevent accidental horn or electrical short.
- Set the parking brake and make sure the Jeep is on a stable surface.
- Wear safety glasses to protect your eyes from dust or debris.
Skipping safety steps can lead to electrical shocks, accidental airbag deployment (not an issue in 1984 CJ7s, but a good habit), or injury.
Step-by-step Removal Process
Follow these steps to remove the steering wheel from your 1984 Jeep CJ7.
1. Disconnect The Battery
Start by disconnecting the negative cable from the vehicle battery. This prevents any electrical issues while you work on the steering column.
Most CJ7s have a horn button or cap in the center of the steering wheel. Gently pry it off with your fingers or a flathead screwdriver. Be careful not to scratch the wheel or break the plastic clips.
3. Disconnect Horn Wires
Under the horn button, you’ll see one or two wires connected to the horn contact. Carefully unplug them. If there are small screws, use a screwdriver to loosen and remove them.
4. Mark The Steering Wheel Position
Before loosening the main nut, mark the position of the steering wheel in relation to the steering shaft. This ensures you can reinstall it in exactly the same spot.
A small scratch with a marking pen or chalk works well here.
5. Remove The Steering Wheel Nut
Using a socket wrench (usually 13/16″ or 7/8″), loosen and remove the large nut in the center of the steering wheel. Keep the nut in a safe place; you’ll need it for reinstallation.
6. Use A Steering Wheel Puller
The steering wheel is usually pressed tightly onto the splined shaft. Do not try to hammer or yank it off. Instead, attach a steering wheel puller to the threaded holes on either side of the shaft. Tighten the center bolt of the puller until the wheel pops free.
If the wheel is stuck, apply a little penetrating oil and wait a few minutes.
7. Lift Off The Steering Wheel
Once the wheel is loose, lift it straight off the shaft. Be careful not to pull any wires or damage the turn signal assembly beneath.
8. Inspect And Clean
With the wheel removed, inspect the splines on the shaft and inside the wheel. Clean off any debris or corrosion. This will make reinstallation smoother and help prevent future steering problems.
Common Problems And How To Avoid Them
Many beginners run into issues when removing a steering wheel. Here are two common mistakes:
Not marking the original position: If you skip this, your wheel might be crooked when reinstalled, causing uncomfortable driving.
Forcing the wheel off: Using a hammer or too much force can bend or break internal parts. Always use a puller.
A less obvious tip: check the horn contact and turn signal cam before reassembly. If these parts are worn, it’s easier to replace them now than later.
Reinstalling The Steering Wheel
After repairs or upgrades, reinstalling the wheel is just as important as removing it. Here’s a quick summary:
- Align the marks you made earlier.
- Slide the wheel back onto the shaft.
- Hand-tighten the center nut, then torque to factory specs (usually around 25–30 ft-lbs).
- Reconnect the horn wires and replace the horn button.
- Reconnect the battery and test the horn and signals.
If anything feels loose or doesn’t work, double-check your work before driving.

Comparison: Factory Vs. Aftermarket Steering Wheels
If you’re considering a new steering wheel, it helps to compare your options. Here’s a look at factory vs. aftermarket wheels for the 1984 Jeep CJ7:
| Feature | Factory Wheel | Aftermarket Wheel |
|---|---|---|
| Material | Rubber/Vinyl | Wood, Leather, Aluminum, Custom |
| Fitment | Direct Fit | May need adapter kit |
| Style | Original, Classic | Modern, Sporty, Unique |
| Price | Low to Moderate | Moderate to High |
| Resale Value | Preserves originality | May reduce originality |
Choosing between these options depends on your goal: restore originality or customize for personal comfort.
Steering Wheel Puller Kits: What To Look For
Not all pullers are the same. Consider these features when choosing a puller:
| Feature | Basic Puller | Premium Puller Kit |
|---|---|---|
| Build Material | Standard steel | Hardened steel, longer life |
| Included Bolts | Limited selection | Multiple sizes for various vehicles |
| Price | Under $15 | $20–$40 |
| Ease of Use | Basic | More adaptable, faster setup |
For a one-time job, a basic puller will work. For regular repairs, invest in a premium kit.
Steering Wheel Removal In Different Weather Conditions
Climate can affect how easy or hard the job is. For example, if your Jeep has spent years outside, rust and grime may make the wheel harder to remove. Here are some tips:
- In humid climates, spray penetrating oil on the shaft and let it soak overnight.
- In cold weather, avoid using too much force; metal parts can snap more easily.
- In dry, dusty areas, clean out dirt before removing the wheel.
If you live in a region where rust is common, consider wearing gloves and using extra rags to protect your hands.
What To Inspect Once The Wheel Is Off
Removing the wheel gives you access to parts you rarely see. Check these components:
- Turn signal cancel cam: Should not be broken or excessively worn.
- Horn contact ring: Must be clean and not bent.
- Steering shaft splines: Look for wear or damage.
- Upper column bearings: Spin the shaft; it should turn smoothly.
Fixing these now can prevent bigger problems down the road.
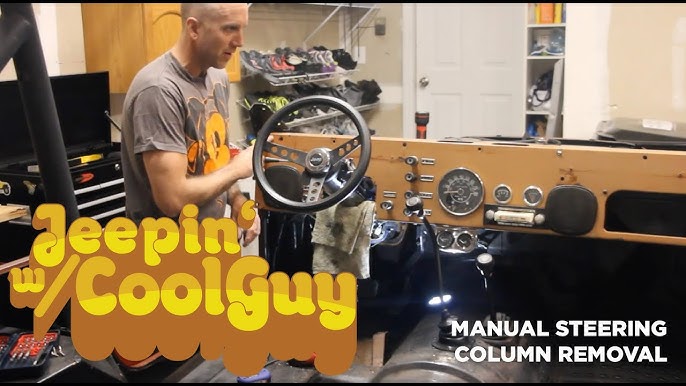
Real-world Example: 1984 Jeep Cj7 Steering Wheel Swap
Let’s look at a real case. A Jeep CJ7 owner wanted to upgrade to a classic wooden wheel. The original wheel was cracked and sticky from years of sun exposure.
He followed the steps above, using a marking pen to align the wheel before removal. The hardest part was removing the wheel from the shaft it was stuck after 40 years! He applied penetrating oil, waited 20 minutes, and then used a puller.
The wheel came off with a loud pop, but no damage occurred.
After cleaning the shaft and checking the horn contact, he installed the new wheel with an adapter kit. The result: a much more comfortable grip and a refreshed look inside the Jeep.
When To Call A Professional
If the steering wheel won’t budge, or you discover broken or seized parts, it may be time to call a mechanic. Attempting to force parts can lead to expensive damage.
Also, if you aren’t confident about wiring or safety, don’t risk it. Professional help is worth the extra cost to keep your Jeep safe.
Environmental Impact: Recycling Old Steering Wheels
Don’t just toss your old wheel in the trash. Many steering wheels contain metal and plastic that can be recycled. Check with your local recycling center for proper disposal. Some auto parts shops will take old wheels as part of a core exchange.
Key Takeaways For 1984 Jeep Cj7 Owners
- Always use a steering wheel puller—never hammer or pry.
- Mark the original wheel position before removal.
- Check and clean all parts before reinstalling.
- If in doubt, consult your service manual or a professional.
For more technical information, you can visit the Jeep CJ Wikipedia page.
Frequently Asked Questions
How Long Does It Take To Remove The Steering Wheel From A 1984 Jeep Cj7?
Most DIYers can finish the job in 30 to 60 minutes. If the wheel is rusted or stuck, it may take longer due to soaking time with penetrating oil.
Do I Need A Special Tool To Remove The Steering Wheel?
Yes, a steering wheel puller is highly recommended. It makes the job safer and prevents damage. Most auto parts stores rent or sell these kits.
Can I Replace The Steering Wheel With A Modern One?
Yes, you can install a modern or aftermarket steering wheel, but you’ll likely need an adapter kit to fit the CJ7’s steering column.
What Should I Do If My Horn Doesn’t Work After Reinstalling The Wheel?
Check the horn wire connections and the contact ring. Sometimes, wires can get pinched or disconnected during reassembly. Make sure all contacts are clean and secure.
Will Removing The Steering Wheel Affect My Jeep’s Safety?
If done correctly, removing and reinstalling the steering wheel is safe. Just make sure the wheel is torqued to the proper specification and all electrical connections are restored before driving.
Removing the steering wheel from your 1984 Jeep CJ7 opens up many possibilities for repair, restoration, or customization. With the right tools, some patience, and the guidance above, you’ll have your wheel off and back on without hassle.
Enjoy the process and the satisfaction of caring for your classic Jeep!