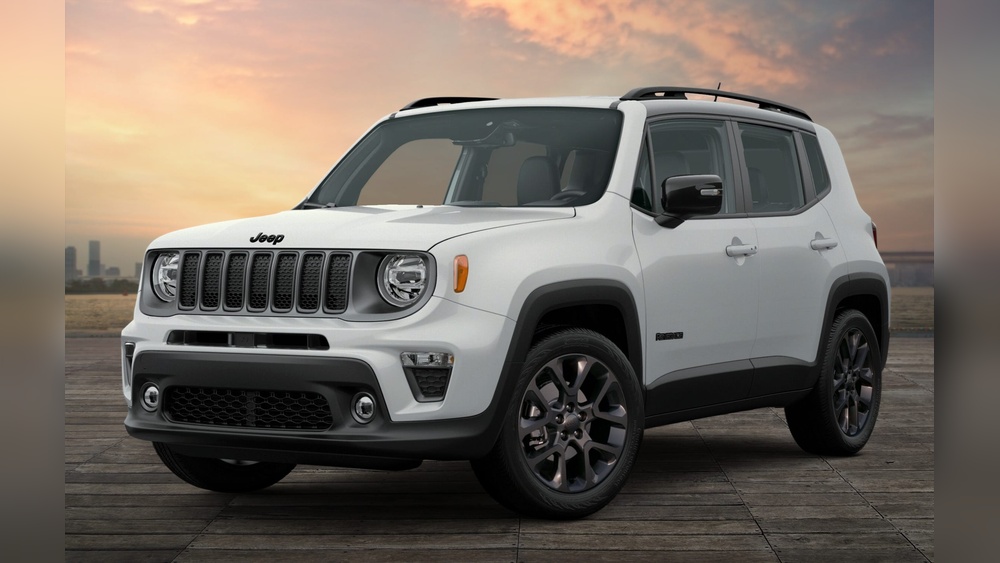
The Power Wheels Jeep Wrangler is a beloved ride-on toy for many children. It brings immense joy and imaginative play.
However, like any electronic toy, it can sometimes experience issues. One common area of concern for parents and guardians is the wiring.
Understanding the Power Wheels Jeep Wrangler wiring diagram is crucial for troubleshooting problems, making repairs, and even for safely upgrading components. This guide will break down the typical wiring found in these ride-on vehicles, helping you identify components, understand their connections, and perform necessary maintenance or repairs with confidence.
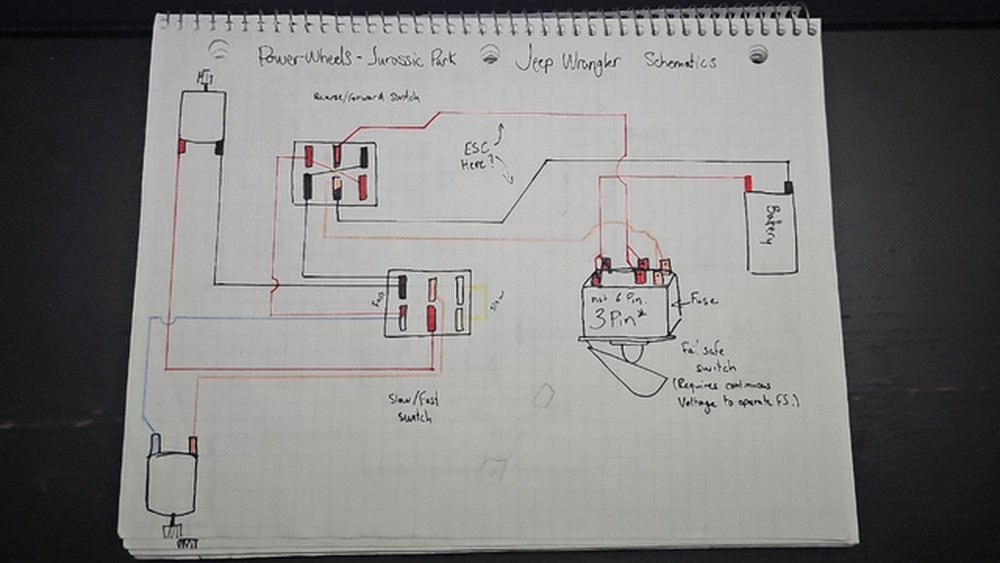
Understanding The Basic Electrical System
At its core, a Power Wheels Jeep Wrangler operates on a simple DC (Direct Current) electrical system. The main components include a battery, a motor, a foot pedal switch, and sometimes additional accessories like lights or sound systems.
The battery provides the power, the motor drives the wheels, and the foot pedal acts as the accelerator and on/off switch.
Understanding how these parts work together is the first step to deciphering any wiring diagram.
The battery is the heart of the system, storing electrical energy. It’s typically a rechargeable 6-volt or 12-volt battery, depending on the specific model of the Jeep. This battery is connected to the rest of the system, providing the necessary voltage and amperage to operate the motor.
The electric motor is what makes the Jeep move. It converts electrical energy from the battery into mechanical energy, spinning gears that turn the wheels. Most Power Wheels use a single motor, though some larger or more powerful models might have two.
The foot pedal switch is the primary control mechanism. When a child presses the pedal, it closes a circuit, allowing electricity to flow from the battery to the motor. When the pedal is released, the circuit opens, and the motor stops. This simple switch is a critical safety feature.
Key Components And Their Roles
To effectively understand a wiring diagram, you need to know what each symbol or wire represents. Here are the most common components you’ll find in a Power Wheels Jeep Wrangler’s electrical system:
The Battery
The battery is the power source. It’s usually located beneath a seat or a removable panel. Wiring diagrams will show it as a symbol representing a DC power source, often with positive (+) and negative (-) terminals clearly marked. The wire gauge (thickness) of the battery cables is important; thicker wires are needed to handle the high current drawn by the motor.
The Motor(s)
The motor is the powerhouse that makes the Jeep move. It typically has two terminals for power input. Some motors also have additional wires for internal components or for connection to a gearbox. In a wiring diagram, the motor is usually depicted as a circle with an ‘M’ inside or a symbol representing an electric motor.
The Foot Pedal Switch
This is the control center for the child. It’s a momentary switch that completes the circuit when pressed. When a child steps on the pedal, it connects the battery to the motor. When they lift their foot, the connection is broken. Diagrams show this as a switch symbol, often labeled as the “throttle switch” or “foot switch.” There are typically two main wires connected to this switch: one coming from the battery (or power distribution point) and one going to the motor.
The Gearbox And Drive System
While not strictly electrical components, the gearbox and drive system are directly linked to the motor. The motor’s rotation is transferred through gears to turn the wheels. Understanding that the motor’s output shaft connects to the gearbox helps visualize how the electrical power translates into physical movement.
Additional Components (optional)
Some Power Wheels models come with extra features that add to the wiring complexity:
- Lights: Headlights, taillights, or accent lights are powered separately, often through a fuse and a switch.
- Sound System: Some models have pre-recorded sounds or even MP3 player inputs. These have their own power needs and connections.
- Charging Port: This is where you plug in the charger. It connects directly to the battery terminals, usually with a fuse in between.
- Relays and Circuit Breakers: For safety and to handle higher currents, some systems use relays or thermal circuit breakers. These are designed to protect the motor and wiring from damage.
Decoding A Typical Wiring Diagram
Power Wheels Jeep Wrangler wiring diagrams can look complex at first glance, but they follow established conventions. Here’s how to approach one:
Basic Symbols
- Lines: Represent wires. Solid lines are direct connections.
- Dots: Indicate a connection point where wires meet.
- Circles: Often represent connection points, switches, or components like motors.
- Rectangles: Can represent various components like fuses, circuit breakers, or modules.
- Battery Symbol: Typically two parallel lines, one longer (positive) and one shorter (negative).
- Motor Symbol: A circle with an ‘M’ or a specific motor icon.
- Switch Symbol: Lines with gaps that close when activated.
Color Coding
While not always consistent across all models, many Power Wheels use a general color-coding scheme:
- Red: Usually indicates positive (+) voltage or live wires.
- Black: Typically indicates negative (-) voltage or ground wires.
- Yellow/Orange: Often used for motor connections.
- Blue/Green/Brown: Can be used for accessory connections, switches, or other specific functions.
Pro Tip: Always refer to the specific diagram for your exact Power Wheels model. Variations exist, and relying on a generic diagram can lead to incorrect connections or damage.
Tracing The Circuit
A wiring diagram shows the path electricity takes. You can trace it from the battery:
- Battery (+) connects to the main power distribution point or directly to the switch.
- The foot pedal switch receives power and, when pressed, sends it to the motor.
- Motor receives power and spins.
- Motor (-) connects back to the Battery (-) (ground).
For accessories like lights, the circuit might look like:
- Battery (+) connects to a fuse.
- Fuse connects to a switch (e.g., for headlights).
- Switch connects to the light.
- Light (-) connects back to Battery (-).
Common Wiring Issues And How To Fix Them
Many problems with Power Wheels can be traced back to simple wiring issues. Here are common problems and how to address them using the wiring diagram:
1. The Jeep Doesn’t Move At All
- Check the Battery: Ensure it’s fully charged and properly connected. Loose or corroded terminals are common culprits.
- Inspect the Foot Pedal Switch: This is a frequent failure point. Look for loose wires, burnt contacts, or a broken pedal mechanism. The diagram will show exactly where the wires should connect.
- Examine Motor Connections: Make sure the wires going to the motor are secure and not frayed.
- Check for Fuses/Circuit Breakers: Some models have resettable circuit breakers or small fuses that might have tripped or blown. The diagram will show their location.
2. The Jeep Moves Intermittently Or Slowly
- Low Battery Charge: This is the most common reason for slow or intermittent operation.
- Loose Connections: Vibration can loosen wire connections over time. Check all points shown on the diagram.
- Worn Foot Pedal Switch: The internal contacts might be dirty or worn, causing inconsistent power delivery.
- Motor Issues: The motor itself might be failing or overheating.
3. One Wheel Doesn’t Turn (if Dual Motor)
- Check Motor Connections: Ensure the wires for that specific motor are securely attached.
- Inspect the Motor: The motor for that wheel might have failed.
- Gearbox Problem: While not wiring, a jammed gearbox can prevent the wheel from turning, making it seem like a motor issue.
4. Accessories (lights, Sounds) Don’t Work
- Check Fuses: Accessories often have their own fuses.
- Inspect Switches: Ensure the switches for these accessories are functioning and properly wired according to the diagram.
- Verify Power Source: Confirm that the accessory is receiving power from the correct point in the circuit.

Safety First: Working With Power Wheels Wiring
Working with any electrical system, even a low-voltage toy, requires caution. Always follow these safety guidelines:
- Disconnect the Battery: Before touching any wires or components, always disconnect the battery to prevent short circuits and accidental shocks.
- Use the Correct Tools: Have a good set of screwdrivers, wire strippers, pliers, and a multimeter.
- Refer to Your Specific Diagram: As mentioned, models vary. Find the exact wiring diagram for your Power Wheels Jeep Wrangler. You can often find these on the manufacturer’s website or through online forums.
- Proper Wire Gauge: If you need to replace wires, use the same gauge or a thicker gauge to handle the current. Using thinner wires can cause them to overheat and melt.
- Secure Connections: Ensure all connections are tight and insulated. Use electrical tape or heat shrink tubing where appropriate.
- Test Thoroughly: After making repairs, reconnect the battery and test all functions carefully.
Example Wiring Scenario: Troubleshooting A “no Power” Issue
Let’s imagine your Power Wheels Jeep Wrangler suddenly stopped working. You suspect a wiring issue.
- Initial Check: Ensure the battery is charged. If it is, proceed.
- Disconnect Battery: Remove the battery to be safe.
- Inspect Visible Wires: Look for any obvious damage, loose connections, or burnt wires, especially around the battery terminals, foot pedal switch, and motor.
- Locate the Foot Pedal Switch: This is a common failure point. Trace the wires connected to it using your wiring diagram.
- Test the Switch (with multimeter):
- Set your multimeter to continuity mode (beeps when a circuit is complete).
- With the battery disconnected, place one probe on each terminal of the foot pedal switch.
- Press the pedal. If the switch is working, the multimeter should beep.
- If it doesn’t beep when pressed, the switch is likely faulty and needs replacement.
- Trace Power Flow: If the switch seems okay, use the diagram to trace the wire from the battery to the switch, and then from the switch to the motor.
- Check Fuses/Breakers: If your model has them, locate them on the diagram and test them for continuity. A blown fuse will not have continuity.

Upgrading And Modifying Wiring
While most users focus on repairs, some enthusiasts modify their Power Wheels. This can include adding more powerful batteries, motors, or accessories. If you plan to modify the wiring:
- Understand Current Draw: More powerful components draw more current (amperage). Ensure your wiring, switches, and battery can handle the increased load. Consult the specifications for each component.
- Use Appropriate Connectors: Solder connections or use high-quality crimp connectors for reliability.
- Add Fusing: Always add fuses to protect new components and the main wiring harness from overcurrent situations. The fuse rating should be slightly higher than the expected operating current of the component it protects.
- Consider a Circuit Breaker: For high-power modifications, a resettable circuit breaker offers better protection than a simple fuse.
- Consult Online Resources: Many online communities and forums are dedicated to Power Wheels modifications. These can be invaluable resources for understanding advanced wiring techniques and component compatibility.
Common Components And Their Schematics
Let’s look at how some common components are represented and wired.
The Battery And Main Power Flow
The battery is the starting point. A typical 12V system might look like this:
- Battery (+) Terminal: Connects via a thick red wire to the input of the foot pedal switch.
- Battery (-) Terminal: Connects via a thick black wire to the ground point, which then connects to the negative terminals of the motor(s) and any other components requiring a ground connection.
The Foot Pedal Switch
This is the core control. A simple switch has two terminals.
When the pedal is pressed, these terminals are connected.
- Input Terminal: Receives power from the battery (often via a red wire).
- Output Terminal: Sends power to the motor (often via a yellow or orange wire).
Some advanced switches might have three or four terminals for features like reverse or speed control, but the basic principle remains: it interrupts or completes the power flow to the motor.
The Motor Connections
A typical DC motor used in Power Wheels has two main terminals.
- Positive Input: Receives power from the foot pedal switch (e.g., yellow wire).
- Negative Input (Ground): Connects to the main ground wire from the battery (e.g., black wire).
For dual-motor setups, each motor will have its own set of connections, but they usually share the same power source and ground lines, controlled by the same foot pedal switch.
Fuse And Circuit Breaker Placement
Fuses and circuit breakers are safety devices. They are always placed in the positive (+) wire path, between the power source (battery) and the component they are protecting.
- Fuse: A replaceable element designed to melt and break the circuit if current exceeds a safe level.
- Circuit Breaker: An automatically resetting device that trips when overloaded and resets after a cool-down period.
The wiring diagram will clearly show the fuse holder or circuit breaker symbol in the line connecting the battery to the rest of the system, or to specific components.

Tools For Wiring Work
Having the right tools makes the job much easier and safer.
- Wire Strippers: For safely removing insulation from wires.
- Wire Crimpers: For attaching connectors securely.
- Screwdrivers (various sizes): For removing body panels and accessing components.
- Pliers (needle-nose and standard): For gripping and manipulating wires and connectors.
- Multimeter: Essential for testing voltage, continuity, and resistance. This is your best friend for diagnosing electrical problems.
- Electrical Tape/Heat Shrink Tubing: For insulating connections.
- Soldering Iron (optional but recommended for permanent repairs): For creating strong, reliable electrical joints.
Power Wheels Jeep Wrangler Wiring Diagram: A Visual Example
While we cannot display an actual diagram here, imagine a simplified version for a single-motor 12V Jeep Wrangler:
- [Battery Symbol] — (Thick Red Wire) —> [Foot Pedal Switch Terminal 1]
- [Foot Pedal Switch Terminal 2] — (Thick Yellow Wire