Jeep Wrangler Tj Led Light Bar Installation Guide For Ultimate Off-road Lighting
The Jeep Wrangler TJ is an icon of off-road capability, and for many enthusiasts, the adventure doesn't stop when the sun goes down. Enhancing your TJ's lighting with an LED light bar is a popular upgrade that dramatically improves visibility on dark trails, dusty roads, or during nighttime expeditions.
This guide will walk you through the entire process, from choosing the right light bar to securely installing it and wiring it up for maximum performance.
We'll cover everything you need to know to confidently tackle this project yourself, transforming your TJ into a beacon of light for any nocturnal adventure.
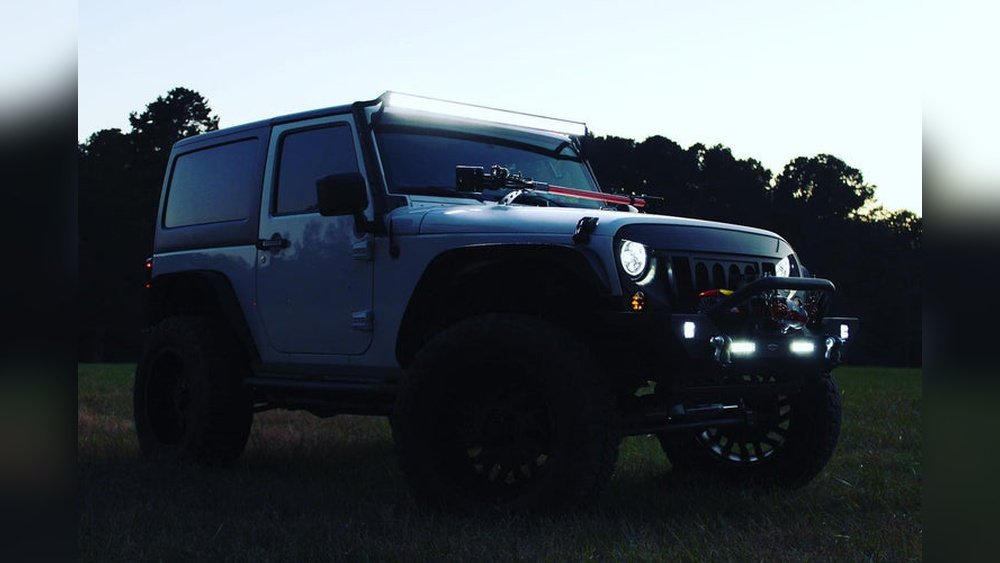
Why Upgrade To An Led Light Bar On Your Tj?
Stock headlights on older vehicles like the Jeep Wrangler TJ, while functional for daily driving, often fall short when you venture off the beaten path after dark. They provide a limited beam pattern and intensity, leaving crucial areas of the trail in shadow. LED light bars offer a superior solution for several key reasons:
- Brighter Illumination: LEDs produce a much brighter light than traditional halogen bulbs. This means you can see further ahead and wider around your vehicle, spotting obstacles, hazards, and the trail itself with greater clarity.
- Improved Visibility: Light bars come in various beam patterns, spot, flood, or a combination. A spot beam projects a focused, long-distance light, ideal for spotting distant features. A flood beam spreads light over a wider area, illuminating the immediate surroundings. Many bars offer a combo beam for the best of both worlds.
- Lower Power Consumption: Despite their brightness, LEDs are incredibly energy-efficient. This is crucial for off-road vehicles where electrical systems can be strained by accessories. An LED light bar draws less power than equivalent halogen lights, reducing the load on your alternator and battery.
- Durability and Longevity: LEDs are solid-state devices, meaning they have no filaments to break. They are highly resistant to vibration and shock, making them ideal for the rough conditions encountered off-road. They also have a significantly longer lifespan than traditional bulbs.
- Enhanced Aesthetics: A sleek LED light bar mounted on your TJ’s bumper or windshield can give it a more aggressive and modern off-road look.
Choosing The Right Led Light Bar For Your Tj
Selecting the perfect LED light bar involves considering several factors to ensure it meets your specific needs and fits your TJ.
Size And Mounting Location
The TJ offers a few common mounting locations, each dictating the maximum size of the light bar you can install:
- Bumper Mount: This is the most common and often the easiest location. Most aftermarket TJ bumpers have provisions for a light bar, typically between 10 inches and 20 inches in length. Ensure the bar will not obstruct airflow to your radiator.
- Windshield/A-Pillar Mount: Many TJ owners opt for mounting brackets that attach to the A-pillars or the windshield frame. This location often accommodates longer bars, from 20 inches up to 50 inches for some custom setups. Be aware that longer bars here can create significant wind noise and may partially obstruct your view.
- Roof Mount: While less common on TJs due to the stock soft or hard top, some custom roof racks can accommodate light bars. This is usually reserved for much larger, more powerful setups.
Pro Tip: Measure the available space for your chosen mounting location *before* you buy. Don’t forget to account for bracketry and clearance.
Beam Pattern: Spot, Flood, Or Combo
The beam pattern is critical for how the light is dispersed:
- Spot Beam: Typically 6-10 degrees. Projects a very narrow, intense beam that can reach hundreds of meters. Best for seeing far down a straight trail or identifying distant landmarks.
- Flood Beam: Usually 60-90 degrees. Spreads light widely and evenly, illuminating the immediate area around your vehicle. Excellent for slow-speed maneuvering and seeing what’s right beside you.
- Combo Beam: A mix of spot and flood optics, often with spot beams in the center and flood beams on the sides. This offers a versatile solution for a wide range of off-road conditions. For most TJ owners, a combo beam is the most practical choice.
Led Pods Vs. Light Bars
While this guide focuses on light bars, it’s worth noting that LED pods (smaller, individual light units) are another option. They can be mounted in various locations, like fog light openings or custom brackets, and offer more flexibility in placement but may not provide the same sheer volume of light as a full-width bar.
Durability And Ingress Protection (ip) Rating
Off-roading means exposure to dust, mud, water, and vibrations. Look for light bars with:
- High-Quality Construction: Aluminum housings are common and durable.
- Sealed Lenses: Polycarbonate lenses are impact-resistant and less prone to cracking than glass.
- IP Rating: An IP rating (Ingress Protection) indicates how well the light bar is sealed against solids (like dust) and liquids (like water). Look for at least IP67 (dust-tight and submersible up to 1 meter for 30 minutes) or IP68 (even better protection).
Lumens And Wattage
- Lumens: This measures the total amount of visible light emitted by the source. Higher lumens mean a brighter light.
- Wattage: This indicates the power consumption. Generally, higher wattage means more power draw but also potentially more brightness. It’s more about efficiency to compare lumens per watt.
Don't get too caught up in marketing numbers. Look at reviews and real-world performance.
A 120W, 12,000-lumen bar will be significantly brighter than a 36W, 3,000-lumen bar.
Essential Tools And Materials For Installation
Before you start, gather all the necessary tools and materials. Having everything ready will make the installation process smoother and faster.
Tools:
- Socket Set and Wrenches: For removing old parts and mounting the new light bar. Common sizes include 10mm, 13mm, 15mm, and 17mm.
- Screwdrivers: Phillips and flathead.
- Wire Strippers/Crimpers: Essential for making electrical connections.
- Drill and Drill Bits: May be needed for mounting or running wires.
- Multimeter: To test for voltage and continuity, ensuring correct wiring and troubleshooting.
- Torque Wrench: For tightening bolts to the manufacturer’s specifications, especially on mounting hardware.
- Zip Ties: For securing wiring neatly.
- Electrical Tape: For insulating connections.
- Safety Glasses: Always protect your eyes.
- Gloves: To keep your hands clean and protected.
Materials:
- LED Light Bar: Your chosen light bar.
- Mounting Brackets: Specific to your TJ and the chosen mounting location (bumper, windshield, etc. ).
- Wiring Harness: Many light bars come with a basic harness, but you might need a more robust one, especially for larger bars. A good harness includes:
- Inline Fuse: Protects your electrical system.
- Relay: Protects the switch and allows a low-amperage signal to control a high-amperage circuit.
- In-line Fuse Holder: For the main power wire.
- Weatherproof Connectors: For secure and durable connections.
- Add-a-Circuit Fuse Tap: A convenient way to tap into an existing fuse box circuit for the switch power.
- Butt Connectors or Wago Connectors: For splicing wires.
- Optional: Rocker Switch (to mount in your dash), Battery Terminal Connectors, Grommets (for firewall pass-through).
Step-by-step Installation Guide
This guide assumes a common bumper-mounted light bar installation. Windshield or A-pillar mounts will follow similar wiring principles but differ in the physical mounting steps.
Step 1: Mount The Light Bar Brackets
- Locate Mounting Points: For a bumper mount, identify the pre-drilled holes or mounting locations on your aftermarket TJ bumper. If your bumper doesn’t have them, you might need to drill new holes. Measure carefully to ensure the brackets are level and the light bar will be centered.
- Attach Brackets: Securely attach the light bar brackets to the bumper using the provided hardware. Do not fully tighten the bolts yet; leave them slightly loose so you can adjust the position.
- Position the Light Bar: Place the LED light bar onto the brackets. Loosely attach it using its mounting hardware.
- Align and Tighten: Adjust the light bar so it’s perfectly straight and centered. Ensure it doesn’t interfere with any other components. Once aligned, tighten all bracket bolts and light bar mounting hardware securely. Use a torque wrench if specifications are available.
Step 2: Route The Wiring Harness
This is the most critical part of the installation. Proper wire routing prevents damage, chafing, and electrical shorts.
- Identify Power Source: The main power wire from the light bar harness needs to connect directly to the positive (+) terminal of your TJ’s battery.
- Install Inline Fuse: Before connecting to the battery, install the inline fuse holder on the positive wire. Ensure the fuse rating is appropriate for your light bar (check the manufacturer’s recommendation, typically 10-30 amps).
- Connect to Battery: Connect the fused positive wire to the positive (+) battery terminal. Use a battery terminal connector if necessary for a clean and secure connection.
- Route the Ground Wire: The harness will have a ground wire (usually black). This needs to be connected to a clean, unpainted metal surface on the TJ’s chassis. A bolt on the frame or engine block is a good option. Sand away any paint or rust at the connection point for good conductivity.
- Route the Switch Wire: The harness will have a thinner wire intended for the switch. This wire needs to be routed from the light bar harness location (often near the firewall or engine bay) into the Jeep’s cabin.
- Firewall Pass-Through: The cleanest way to get wires into the cabin is through a grommeted hole in the firewall. TJs often have unused grommets, or you may need to drill a new hole and install a rubber grommet to protect the wire from chafing.
- Under Dash Routing: Carefully route the wire under the dashboard, away from moving parts like pedals, steering column, and seat tracks. Use zip ties to secure the wire neatly to existing looms or brackets.
Step 3: Wire The Switch And Relay
This step involves connecting the switch and the relay, which controls the power flow to the light bar.
- Mount the Switch: Decide where you want to mount your rocker switch. Common locations include an empty spot in the dash panel, a custom switch pod, or a pillar-mounted panel. Drill a hole for the switch and install it.
- Connect Switch Power (Trigger Wire): The switch needs a low-amperage power source to activate the relay.
- Add-a-Circuit Fuse Tap: This is the easiest method. Find an accessory fuse in your TJ’s fuse box (e.g., for the cigarette lighter or radio). Plug the add-a-circuit tap into the fuse slot, then insert the original fuse and the tap’s fuse into their respective spots. Connect the switch’s power wire to the tap’s pigtail. This ensures the switch only gets power when the ignition is on, preventing accidental battery drain.
- Direct Connection (Less Recommended): You could tap into an existing ignition-switched wire, but this is riskier and less clean.
- Connect Switch to Relay: Connect the other terminal on your switch to the relay’s trigger terminal (often labeled ’85’ or ’86’).
- Connect Relay to Ground: Connect the other relay trigger terminal to a good chassis ground.
- Connect Relay to Light Bar Power: Connect the relay’s main power terminal (often labeled ’30’) to the positive wire coming from the light bar harness (the one that will eventually connect to the battery, or directly to the battery if you haven’t fully connected it yet).
- Connect Relay to Light Bar: Connect the relay’s output terminal (often labeled ’87’) to the positive wire that goes directly to your LED light bar.
Wiring Diagram Overview:
- Battery (+) → Inline Fuse → Relay Terminal 30
- Relay Terminal 87 → Light Bar (+) Wire
- Light Bar (-) Wire → Chassis Ground
- Ignition Switched Power (from Add-a-Circuit) → Switch Terminal 1
- Switch Terminal 2 → Relay Terminal 85
- Relay Terminal 86 → Chassis Ground
Step 4: Final Connections And Testing
- Double-Check All Connections: Before powering anything up, meticulously review every wire connection. Ensure all crimps are secure, all connections are insulated with electrical tape or heat shrink, and no wires are pinched or exposed.
- Test the Switch: Turn on your Jeep’s ignition. Flip the switch. You should hear a click from the relay.
- Test the Light Bar: Turn on the light bar. It should illuminate brightly. If it doesn’t, immediately turn everything off and re-check your wiring with a multimeter.
- Check for voltage at the battery.
- Check for voltage at the relay terminals.
- Check for voltage at the light bar itself.
- Secure Wiring: Once confirmed working, use zip ties to neatly secure all wiring. Route it away from heat sources (engine, exhaust) and moving parts. Ensure no wires hang down where they can be snagged or damaged off-road. Use grommets anywhere wires pass through metal.
Step 5: Final Touches And Adjustments
- Clean Up: Tidy up your workspace.
- Test Again: Turn the light bar on and off a few times to ensure reliable operation.
- Adjust Beam (if applicable): Some light bars allow for minor angle adjustments. Aim the beam where you need the most light, considering local regulations about off-road lighting.
Important Considerations And Best Practices
Installing an LED light bar on your TJ is a rewarding project, but a few extra points can make a big difference.