Understanding Jeep Wrangler Steering Wheel Screw Sizes
The Jeep Wrangler is an iconic vehicle, known for its ruggedness and off-road capabilities. For many owners, customizing and maintaining their Wrangler is a passion.
One common area of focus for DIY enthusiasts is the steering wheel. Whether you're upgrading to a new steering wheel, replacing a worn-out component, or simply curious about the mechanics, knowing the correct Jeep Wrangler steering wheel screw size is crucial.
This guide will break down what you need to know, covering common screw types, how to identify them, and essential tips for working on your Wrangler's steering wheel.
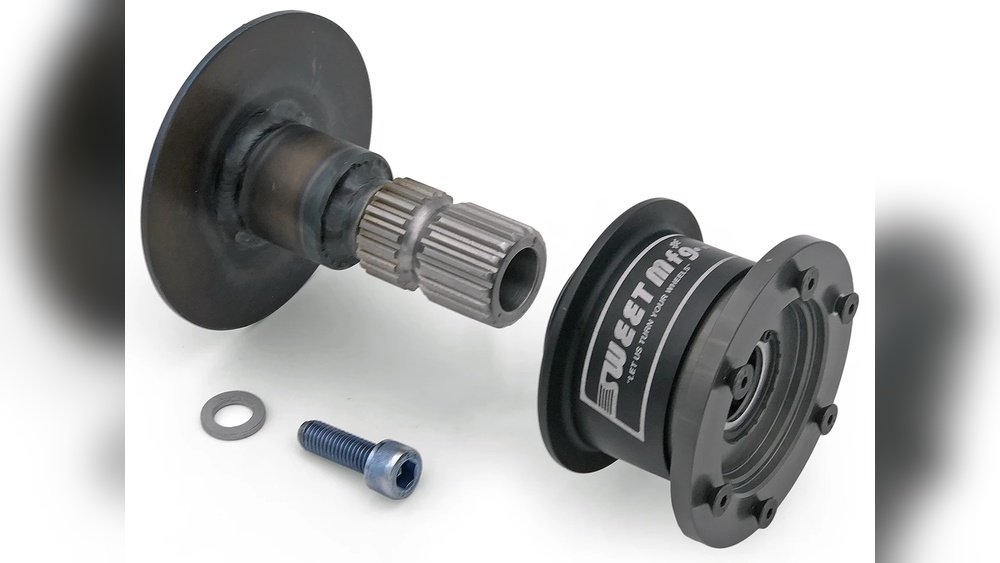
Working on a steering wheel can seem intimidating, but with the right information and tools, it’s a manageable task for many. The steering wheel is a central point of interaction with your vehicle, and ensuring its components are secure and correctly sized is vital for both safety and functionality.
This article aims to provide clear, straightforward information to help you tackle any steering wheel screw-related project on your Jeep Wrangler. We will explore the specific types of screws used, the common sizes you’ll encounter, and the best practices for ensuring a successful and safe installation or repair.
Common Steering Wheel Screw Types On Jeep Wranglers
Jeep Wranglers, like most vehicles, use a variety of fasteners to secure components. For the steering wheel assembly, several key areas require specific types of screws. Understanding these different types is the first step in correctly identifying the Jeep Wrangler steering wheel screw size you need.
Bolts Securing The Steering Wheel Hub
The steering wheel itself is typically attached to the steering column via a central nut, but the decorative or functional cover, often housing airbag components, is secured by bolts. These bolts are designed to hold the steering wheel trim and the airbag module in place.
- Torx Bolts: Many modern Jeep Wranglers, including various JK and JL models, utilize Torx bolts to attach the steering wheel trim and airbag assembly. Torx fasteners have a star-shaped pattern with six points. They are designed to prevent cam-out (where the driver slips out of the fastener head under torque) and allow for higher torque application compared to Phillips or flathead screws. The common sizes for these bolts on a Wrangler steering wheel can range from T20 to T30 Torx bits. The exact size can vary depending on the specific year and trim of your Wrangler.
- Phillips Head Screws: Older Jeep Wrangler models, particularly YJs and some TJs, might still use traditional Phillips head screws for certain trim pieces around the steering wheel. While less common for the main steering wheel attachment on newer models, they can still be found on associated plastic shrouds or covers. These are easily identifiable by their cross-shaped recess.
Screws For Steering Wheel Trim And Covers
Beyond the main steering wheel hub, there are often plastic covers, trim pieces, or even buttons for the horn or audio controls that are secured by smaller screws.
- Phillips Head Screws: These are frequently used for plastic trim pieces that don’t bear significant structural load. They are generally smaller in size, often in the #1 or #2 Phillips head range.
- Small Machine Screws: In some cases, particularly for attaching specific modules or internal components within the steering wheel assembly, small machine screws with standard hex heads or Phillips heads might be employed. These are less common for the exterior trim but can be present internally.
Airbag Module Retaining Screws
The airbag module itself is a critical safety component and is secured within the steering wheel. The screws holding the airbag in place are typically Torx, designed for security and to withstand significant forces. It is absolutely paramount that the correct type and size of fastener are used when working with the airbag system. Using the wrong screw could compromise the airbag’s function in an accident, leading to severe injury.

Identifying The Correct Jeep Wrangler Steering Wheel Screw Size
Pinpointing the exact Jeep Wrangler steering wheel screw size can sometimes be a challenge, as manufacturers may change specifications between model years or even within a production run. Here’s how to approach identification:
Visual Inspection
The first step is always a careful visual inspection. Look at the head of the fastener.
- Torx: Does it have a six-pointed star shape? If so, you’ll need a Torx bit set.
- Phillips: Does it have a cross shape? You’ll need a Phillips head screwdriver.
- Hex/Allen: Does it have a hexagonal recess? You’ll need an Allen wrench or socket.
Using A Measuring Tool
Once you’ve identified the type, you might need to measure.
- Torx Size: Torx sizes are typically designated by a ‘T’ followed by a number (e.g., T20, T25, T30). If you have a set of Torx bits, try fitting them into the fastener head. The one that fits snugly without wobbling is the correct size.
- Phillips Size: Phillips screwdrivers are sized by number (e.g., #1, #2, #3) or by shaft diameter. A #2 Phillips is the most common for automotive interior work. Again, try fitting your screwdrivers until you find the one that engages the screw head properly.
- Thread Size (Less Common for DIY): For machine screws or bolts that pass through into a threaded hole, you might need to know the thread pitch and diameter (e.g., M6x1.0, 1/4-20). This is less common for simple steering wheel trim removal but essential if you’re replacing a fastener entirely. You can use a thread gauge or carefully measure the diameter and count the threads per inch (or millimeters per thread).
Consulting Your Owner’s Manual Or Service Manual
Your Jeep Wrangler’s owner’s manual is an excellent resource for general maintenance information. While it might not list every single screw size, it can provide guidance on component removal and reassembly. For more detailed specifications, a factory service manual (FSM) or a reputable aftermarket repair manual (like Haynes or Chilton) for your specific model year is invaluable. These manuals often include detailed diagrams and lists of fasteners used in various assemblies.
Online Forums And Communities
Jeep Wrangler owners are a passionate community. Online forums dedicated to Jeep Wranglers are treasure troves of information.
Searching for your specific model year and the task you're undertaking (e. g.
, "JK steering wheel removal screws") can often yield discussions where other owners have already identified the exact screw sizes needed.
Trial And Error (with Caution)
If all else fails, and you have a good set of common automotive Torx and Phillips bits, you can carefully try them. Exercise caution not to strip the screw head. If a bit doesn’t fit easily, don’t force it. Move to the next size. Stripping a screw head can turn a simple job into a much more complicated one.
Common Screw Sizes And Applications In Jeep Wrangler Steering Wheels
While specifications can vary, certain screw sizes are more commonly found on Jeep Wrangler steering wheels across different generations. Knowing these common sizes can save you time and frustration.
Jeep Wrangler Jk (2007-2018)
The JK generation is a very popular model, and many owners work on their steering wheels.
- Steering Wheel Airbag Module/Trim: The most common fasteners here are Torx bolts. You will most likely need a T20 or T25 Torx bit to remove the steering wheel cover and access the airbag module. Some sources suggest that the bolts holding the airbag module itself might be slightly larger, potentially a T30, but the primary trim screws are often T20/T25.
- Steering Column Shrouds: The plastic covers around the steering column are often secured with Phillips head screws, typically a #2 Phillips.
Jeep Wrangler Jl (2018-present)
The JL generation continues the trend of using Torx fasteners for security and ease of assembly.
- Steering Wheel Airbag Module/Trim: Similar to the JK, the JL often uses Torx screws for the steering wheel trim and airbag. The common sizes are generally T20 and T25. It’s always best to confirm with a bit set before starting.
- Interior Trim: Other interior trim pieces that might be near the steering column could use a mix of Phillips head screws and potentially smaller Torx sizes.
Jeep Wrangler Tj (1997-2006)
The TJ generation, while older, still has a robust aftermarket and owner community.
- Steering Wheel Trim: TJs might use a combination. Some models could have Phillips head screws for the main steering wheel trim, while others might have transitioned to Torx fasteners, possibly in the T25 or T30 range. It’s less standardized than the later models.
- Horn Button/Cap: The center cap or horn button might be secured by Phillips head screws.
Jeep Wrangler Yj (1987-1995)
The YJ is the oldest generation commonly referred to as a Wrangler.
- Steering Wheel Components: Fasteners on the YJ are more likely to be Phillips head screws or standard hex bolts/nuts. If you’re working on a YJ, having a good set of Phillips screwdrivers and a socket set is essential.
Important Note On Variations
It’s crucial to remember that these are common sizes, not absolute rules. Manufacturing can change, and aftermarket steering wheels will have their own specific fastener requirements.
Always verify the size before starting your work.

Tools Needed For Steering Wheel Screw Replacement
Having the right tools makes the job of dealing with Jeep Wrangler steering wheel screws significantly easier and safer. Here’s a list of essential tools:
- Torx Bit Set: Essential for JK and JL models. Ensure your set includes common sizes like T15, T20, T25, T30, and T40. A bit driver or a socket set with Torx bits is ideal.
- Phillips Head Screwdriver Set: You’ll need a few sizes, with #2 Phillips being the most common. A magnetic tip can be very helpful for catching small screws.
- Socket Set: While not directly for the screws themselves, you’ll likely need sockets to remove the central steering wheel retaining nut (which requires a specific size, often 15/16″ or similar, and a torque wrench for reinstallation) or for any hex-head fasteners.
- Ratchet Wrench: To easily turn your sockets and bits.
- Trim Removal Tools: Plastic trim removal tools are highly recommended. They allow you to pry off plastic covers without scratching or damaging them, which is common when using metal screwdrivers or pry bars.
- Torque Wrench: Absolutely critical for reinstalling the main steering wheel retaining nut. Overtightening or undertightening this nut can be extremely dangerous. The FSM will specify the correct torque value.
- Safety Glasses: Always wear safety glasses when working on your vehicle, especially when dealing with components that could spring loose or when using tools.
- Gloves: Protect your hands and improve grip.
- A Container for Screws: Small magnetic trays or labeled baggies are perfect for keeping track of which screw came from where. This is vital for reassembly.
Step-by-step Guide: Removing A Jeep Wrangler Steering Wheel (focus On Screws)
This guide focuses on the screw removal aspect. Remember that working on the steering wheel, especially with airbags, requires caution.
If you are uncomfortable at any point, seek professional help.
Disclaimer: Disconnecting the battery and waiting is crucial for airbag safety. Always consult a service manual for your specific year and model.
Preparation And Safety
- Disconnect the Battery: This is the most critical safety step. Use a wrench (usually 10mm or 13mm) to disconnect the negative battery terminal. Tuck the cable away so it cannot accidentally reconnect.
- Wait: Allow at least 15-30 minutes for the airbag system’s backup power to dissipate. This significantly reduces the risk of accidental deployment.
- Position the Steering Wheel: Turn the steering wheel so the front wheels are pointing straight ahead. This helps with alignment during reinstallation.
Locating And Removing Steering Wheel Screws
- Identify Screw Locations: Look at the back of your steering wheel. Most Wranglers (especially JK and JL) have two Torx bolts accessible from the rear, often in small recesses. These bolts typically secure the entire steering wheel assembly or the airbag module to the steering column splines.
- Select the Correct Tool: Based on your inspection, choose the correct Torx bit (commonly T20 or T25 for JK/JL) or Phillips head screwdriver.
- Remove the Screws: Insert the bit or screwdriver into the screw head. Apply firm, steady pressure and turn counter-clockwise to loosen. Be prepared for the screws to be tight. If they are difficult to turn, ensure you have the correct size bit fully seated to avoid stripping the head.
- Keep Screws Safe: Place the removed screws in a labeled container. Note which side they came from.
- Airbag Module Removal (If Applicable): Once the screws are removed, the airbag module can usually be carefully pulled away from the steering wheel. It might still be connected by wiring harnesses. Gently disconnect these connectors (often by pressing a small tab). Never force these connectors.
- Steering Wheel Retaining Nut: After the airbag is removed, you will see a large central nut holding the steering wheel to the steering column splines. This nut typically requires a large socket (e.g., 15/16 inch) and is often torqued to a high specification. Do not remove this nut unless you intend to remove the entire steering wheel. Remember its torque value for reinstallation.
Reassembly
- Reverse the Process: Reinstalling is the reverse of removal.
- Reconnect Wiring: Carefully reconnect any wiring harnesses for the airbag and steering wheel controls. Ensure they click securely into place.
- Position Steering Wheel: Place the airbag module back into position.
- Install Screws: Reinstall the Torx or Phillips screws you removed earlier. Tighten them snugly, but do not overtighten, as you could strip the threads or crack the plastic.
- Reinstall Central Nut (If Removed): If you removed the central nut, install it and tighten it to the manufacturer’s specified torque using a torque wrench. This is a critical safety step.
- Reconnect Battery: Reconnect the negative battery terminal.
- Test: Start the vehicle. The airbag warning light should illuminate briefly and then turn off. Test the