Jeep Wrangler Mopar 4-inch Lift Kit: Your Step-by-step Upgrade Guide
The Jeep Wrangler is an icon of off-road capability. But for many owners, the desire to push its limits further is a constant call.
One of the most popular and effective ways to enhance both the look and performance of your Wrangler is by installing a lift kit.
Among the many options available, the Mopar 4-inch lift kit stands out for its factory integration and robust design. This guide will walk you through the entire installation process, from preparation to final checks, ensuring you can confidently tackle this significant upgrade.
Installing a 4-inch lift kit is not a simple bolt-on job; it requires mechanical knowledge, the right tools, and a good understanding of vehicle mechanics. If you’re new to this kind of work, consider having a professional mechanic perform the installation, or at least assist you.
However, for the mechanically inclined, this guide provides a clear, step-by-step roadmap to successfully fitting your Mopar 4-inch lift kit. This upgrade will not only give your Wrangler a more aggressive stance but also significantly improve its ability to clear obstacles, allowing you to explore more challenging terrains.
Understanding The Mopar 4-inch Lift Kit
Before diving into the installation, it’s crucial to understand what this kit includes and what it aims to achieve. The Mopar 4-inch lift kit is designed by the same company that builds your Jeep, ensuring a high level of compatibility and quality.
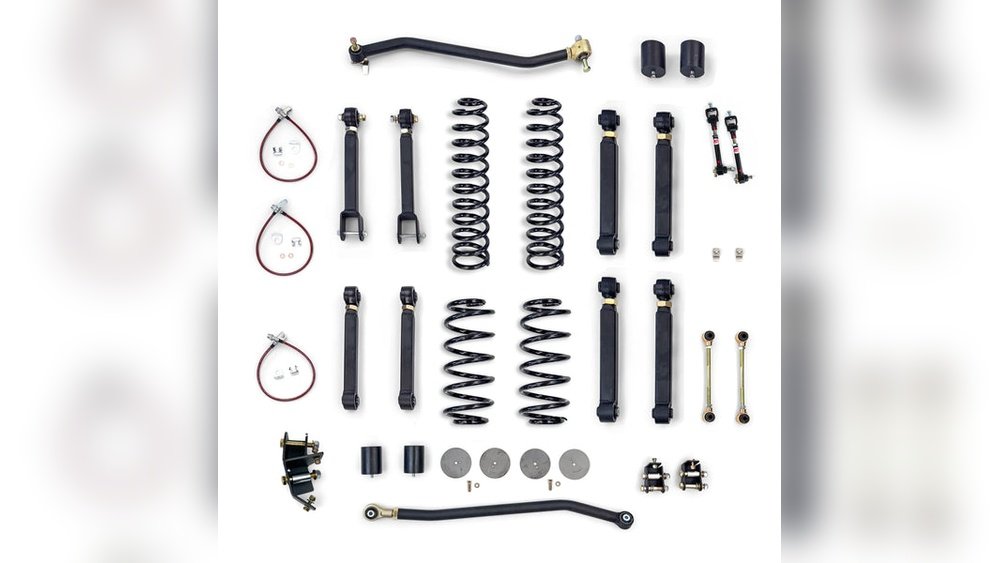
It typically includes components like longer springs, shocks, sway bar links, and sometimes new control arms or track bars, depending on the specific kit version. The primary goal is to increase the vehicle’s ground clearance by 4 inches, which allows for the fitment of larger tires and improves the suspension’s articulation over uneven surfaces.
The benefits of a 4-inch lift are substantial. Firstly, the increased ride height provides more space between the axles and the ground, reducing the risk of damage when traversing rocks, logs, or other trail hazards.
Secondly, it allows for the installation of larger tires, which offer a greater contact patch and can often provide better traction and a smoother ride over rough terrain.
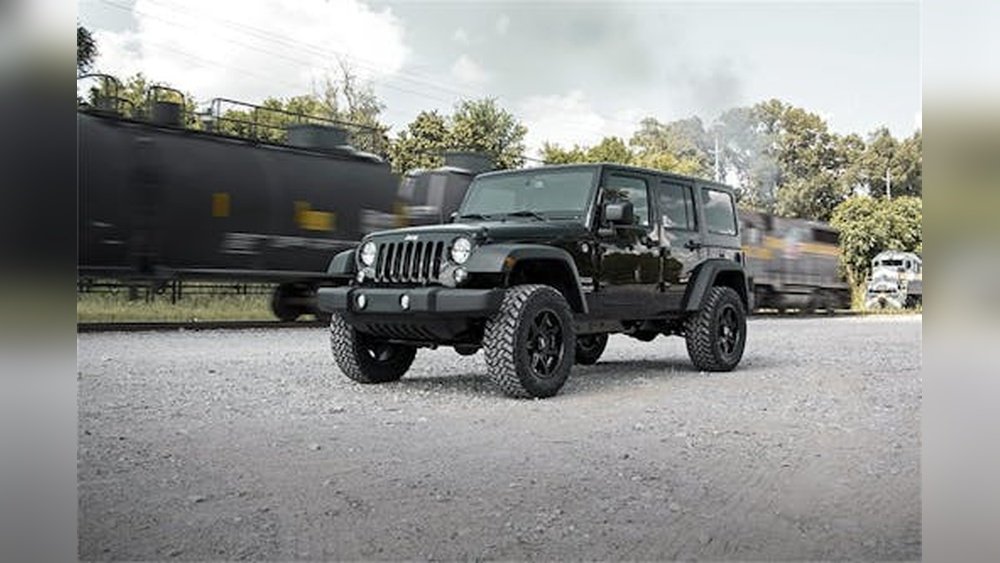
Aesthetically, the lifted stance gives the Wrangler a commanding presence that many enthusiasts desire. However, it’s important to note that a lift kit can also affect on-road handling, braking, and fuel economy, which are factors to consider.
Tools And Preparation: Setting The Stage For Success
A successful lift kit installation hinges on thorough preparation and having the correct tools. Attempting this job without the right equipment can lead to frustration, damage to parts, and potentially unsafe installation.
Essential Tools You’ll Need:
- Jack and Jack Stands: Heavy-duty hydraulic jack and at least four sturdy jack stands are paramount for safely lifting and supporting the vehicle. Never work under a vehicle supported only by a jack.
- Socket Set and Wrenches: A comprehensive set of metric sockets and wrenches, including deep sockets, is necessary. Sizes typically range from 8mm to 22mm or larger.
- Torque Wrench: Essential for tightening critical suspension components to the manufacturer’s specifications. Overtightening or undertightening can lead to component failure or safety issues.
- Pry Bars and Breaker Bars: For loosening stubborn bolts and prying components into place.
- Spring Compressors (if applicable): Some kits may require reusing factory springs, necessitating spring compressors. Exercise extreme caution when using these tools, as they store significant energy.
- Grease Gun and Grease: For lubricating suspension components as specified.
- Wire Brush: To clean rust and debris from bolt holes and mating surfaces.
- Penetrating Oil: To help loosen rusted or seized bolts.
- Safety Glasses and Gloves: Always protect your eyes and hands.
- Wheel Chocks: To prevent the vehicle from rolling.
- Impact Wrench (Optional but Recommended): Can significantly speed up the removal and installation of numerous bolts.
- Drill and Drill Bits (if applicable): Some kits may require drilling new holes for brake lines or other components.
- Shop Rags and Cleaning Supplies: To keep the work area clean.
Pre-Installation Checks and Preparations:
- Read the Instructions: Thoroughly read the Mopar installation manual that comes with your kit. Familiarize yourself with each step and any specific warnings or recommendations.
- Gather Your Parts: Ensure you have all the components included in the Mopar 4-inch lift kit. Check them for any shipping damage.
- Clean the Area: Work in a clean, level, and well-lit area. A garage or a sturdy driveway is ideal.
- Disconnect Battery: For safety, it’s good practice to disconnect the negative terminal of your vehicle’s battery.
- Inspect Existing Components: Before you start removing parts, inspect your Jeep’s current suspension for any existing wear or damage. This is a good opportunity to address any underlying issues.
- Lubricate: Apply penetrating oil to all bolts and nuts that will need to be removed. Let it soak for a while to ease removal.
Step-by-step Installation Of The Mopar 4-inch Lift Kit
This section breaks down the installation process into manageable steps. Remember that specific details might vary slightly based on your Wrangler's model year and configuration.
Always refer to the official Mopar instructions for your kit.
1. Lifting The Jeep And Removing Stock Components
The first physical step is to get the Jeep safely off the ground and begin removing the original suspension parts.
- Secure the Vehicle: Place wheel chocks behind the rear wheels to prevent any movement.
- Lift the Jeep: Using your hydraulic jack, lift the front of the Jeep high enough to comfortably work underneath. Place jack stands securely under the frame rails or designated support points. Repeat for the rear. Ensure the vehicle is stable before proceeding.
- Remove Front Wheels: Loosen and remove the lug nuts, then take off the front wheels.
- Disconnect Front Sway Bar Links: The sway bar connects to the suspension to reduce body roll. You’ll need to disconnect the links from the sway bar or the axle. This often involves removing a nut and bolt.
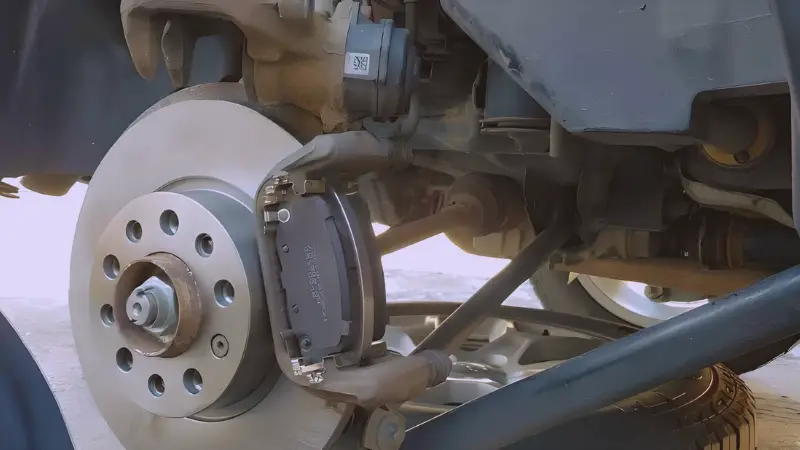
- Disconnect Front Brake Lines: Carefully unbolt the brake line brackets from the frame or axle. You may need to disconnect the line from the caliper or shock absorber. Be gentle, as these lines are crucial for safety. It’s often advised to let the brake fluid drain or to cap the lines to prevent contamination.
- Remove Front Shocks and Springs: Support the front axle with jack stands. You’ll need to unbolt the top mounts of the front shocks from the inner fender well and the bottom mounts from the axle. Once the shocks are free, the springs can be carefully removed. If your kit reuses factory springs, you might need spring compressors here, but the Mopar 4-inch kit typically includes new springs.
- Remove Front Track Bar (if applicable): Some 4-inch kits require the removal of the factory track bar to allow for axle centering after the lift. This bar connects the frame to the axle, ensuring it stays centered under the vehicle. You’ll typically unbolt it from both ends.
- Repeat for Rear: Follow the same procedure for the rear suspension: disconnect sway bar links, brake lines, remove shocks and springs, and the rear track bar if necessary.
2. Installing New Lift Components
With the stock parts removed, it’s time to install the new components from your Mopar 4-inch lift kit.
- Install New Springs: Place the new, taller Mopar springs into their respective positions on the front and rear axles. Ensure they are seated correctly in their perches.
- Install New Shocks: Mount the new Mopar shocks. Align the top mounts with the frame and the bottom mounts with the axle, then secure them with the provided hardware. Tighten bolts to the specified torque.
- Install New Sway Bar Links: Attach the new, longer sway bar links. These are designed to work with the lifted suspension and maintain proper sway bar function.
- Install New Track Bar (if applicable): If your kit includes a new track bar or requires relocating the factory one, install it now. This is critical for proper axle alignment. Ensure it’s bolted securely at both ends. Many aftermarket track bars are adjustable to help center the axle perfectly.
- Install Other Components: Depending on your specific kit, you might need to install new bump stops, differential drop brackets, or extended brake lines. Follow the Mopar instructions precisely for these components.
3. Installing Extended Brake Lines And Other Ancillaries
Brake lines are a critical safety component. When you lift a vehicle, the original lines may become stretched or stressed, which is dangerous.
- Brake Line Installation: Carefully attach the new, extended brake lines. Ensure they are routed correctly and secured to the frame or axle to prevent rubbing or kinking. It’s vital to bleed the brake system thoroughly after installing new lines to remove any air. Air in the brake lines will result in a spongy pedal and reduced braking performance.
- Differential Drop Brackets (if included): Some lift kits include brackets to lower the differential slightly. This helps to correct the pinion angle of the driveshaft, reducing vibration and wear on the U-joints, especially with significant lifts. Install these according to the instructions.
- Bump Stops: New, often taller, bump stops may be included to prevent the suspension from bottoming out excessively after the lift. Install these in their designated locations.
4. Installing New Control Arms Or Brackets (if Applicable)
Higher lifts often necessitate changes to the suspension geometry, which can be corrected with new control arms or brackets.
- Control Arm Installation: If your kit includes new control arms (upper or lower), install them now. These are designed to correct the caster and camber angles, which are affected by the lift. Ensure you use the correct hardware and torque specifications.
- Brackets: Some kits use brackets to relocate mounting points for existing suspension components, achieving a similar effect to new control arms. Follow the instructions for precise placement and secure fastening.
5. Reconnecting And Finalizing Front And Rear Suspension
Once all the new components are in place, you’ll need to reconnect everything.
- Reconnect Sway Bar: Reattach the sway bar links to the sway bar.
- Reconnect Steering Components: If any steering components were disconnected, reconnect them now.
- Torque All Bolts: This is a critical step. Go back through every bolt and nut you’ve installed and tighten them to the torque specifications listed in the Mopar manual. This includes shock mounts, spring perches, control arm bolts, and track bar bolts. Use your torque wrench diligently.
- Inspect All Connections: Visually inspect all suspension and brake components to ensure everything is properly seated, secured, and clear of any obstructions.
6. Bleeding Brakes And Wheel Installation
After the suspension is fully installed, the brake system needs attention.
- Bleed the Brakes: This is a crucial safety step. With the help of an assistant, or using a vacuum bleeder, bleed the brake system to remove all air from the lines. Start with the wheel furthest from the master cylinder and work your way closer.
- Reinstall Wheels: Mount the wheels back onto the Jeep. Hand-tighten the lug nuts.
- Lower the Vehicle: Carefully lower the Jeep off the jack stands.
- Torque Lug Nuts: Once the vehicle is on the ground, torque the lug nuts in a star pattern to the manufacturer’s specifications.
Post-installation Checks And Adjustments
The installation is not truly complete until you’ve performed thorough checks and made necessary adjustments.
Alignment And Steering Wheel Correction
After a lift, your Jeep’s alignment will almost certainly be affected.
- Steering Wheel Alignment: It’s common for the steering wheel to be off-center after a lift, especially if the track bar was adjusted or replaced. You can often correct this by adjusting the drag link. Loosen the jam nut on the drag link, twist the link to adjust the position of the steering wheel, and then retighten the jam nut.
- Professional Alignment: It is highly recommended to take your Jeep to a qualified alignment shop after installing a lift kit. They have the specialized equipment to measure and adjust caster, camber, and toe angles to factory specifications, ensuring optimal tire wear and handling. The 4-inch lift will change these angles, and a professional alignment is essential for safety and performance.
Tire Fitment And Clearance
A 4-inch lift kit is typically installed to accommodate larger tires.
- Tire Size: This lift is generally suitable for tires ranging from 33 inches up to 37 inches in diameter, depending on the specific Wrangler model (JK, JL, etc.) And any additional modifications like fender flares.
- Fender Flare Clearance: Check for any rubbing between the tires and the fenders or fender flares, especially when turning the steering wheel or compressing the suspension. You may need aftermarket fender flares or to trim your factory ones for adequate clearance.
- Tire Pressure: Adjust tire pressure according to the tire manufacturer’s recommendations for your new tire size.
Drivetrain And Driveshaft Angles
Significant lifts can affect drivetrain components.
- Driveshaft Angles: A 4-inch lift can alter the pinion angle of your front and rear driveshafts. If the angle becomes too steep, it can cause vibrations and premature wear on the universal joints (U-joints). As mentioned, differential drop brackets can help with this. If vibrations persist, you might need to address the driveshaft angles further, possibly with aftermarket driveshafts or adjustable control arms.
- Transfer Case Lowering (Optional): For some lifts, particularly on older models or with very aggressive off-roading, a transfer case drop kit might be recommended to further correct driveshaft angles. Check your Mopar kit’s recommendations.
Suspension Cycling And Flex Testing
Once everything is torqued and aligned, it’s time to test the suspension’s range of motion.
- Articulation Test: On a suitable, safe off-road location, gently articulate the suspension to ensure no components are binding or rubbing. Watch for any issues with brake lines, ABS wires, or sway bar links.
- On-Road Test Drive: After the initial checks, take your Jeep for a slow, careful test drive. Listen for any unusual noises, check for vibrations, and test the brakes. Gradually increase speed and assess handling.
Common Pitfalls And How To Avoid Them
Even with a detailed guide, mistakes can happen. Being aware of common issues can save you a lot of trouble.
- Rusted Bolts: Jeeps, especially those used in areas with salt or off-road, can have severely rusted bolts. Be prepared for some bolts to break. Having replacements on hand or a plan for dealing with broken bolts