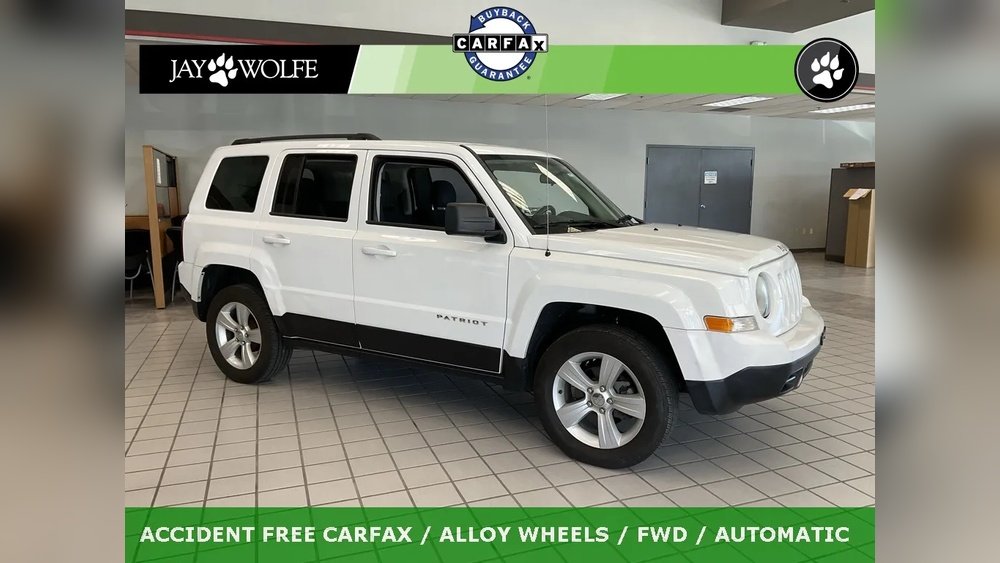
When you work on your 2014 Jeep Patriot, one of the most important steps is correctly tightening the lug nuts on your wheels. This process, known as wheel torque, ensures your wheels are securely attached to your vehicle.
If lug nuts are too loose, a wheel could detach while driving, which is incredibly dangerous. If they are too tight, you can damage the studs, the nuts, or even the wheel itself.
Getting the Jeep Patriot wheel torque right for your 2014 model is crucial for safety and the longevity of your vehicle's components.
This article will guide you through everything you need to know about the correct wheel torque for your 2014 Jeep Patriot. We will cover the specific torque value, why it’s important, the tools you’ll need, and a step-by-step process for tightening your lug nuts correctly.
We’ll also discuss common mistakes to avoid and when you might need professional help.
Understanding Wheel Torque For Your 2014 Jeep Patriot
Wheel torque refers to the specific amount of rotational force applied to the lug nuts that hold your wheels onto the vehicle. This force is measured in foot-pounds (ft-lbs) or Newton-meters (Nm). Each vehicle model and year has a recommended torque specification from the manufacturer. For the 2014 Jeep Patriot, this specification is critical for ensuring the wheel is mounted securely without causing damage.
Why Wheel Torque Matters
The correct wheel torque is not just a technical detail; it’s a fundamental aspect of vehicle safety.
- Safety: The primary reason for correct torque is to prevent wheels from coming loose. A loose wheel can lead to loss of control, accidents, and serious injury. When wheels are torqued properly, the lug nuts create even pressure that holds the wheel firmly against the hub.
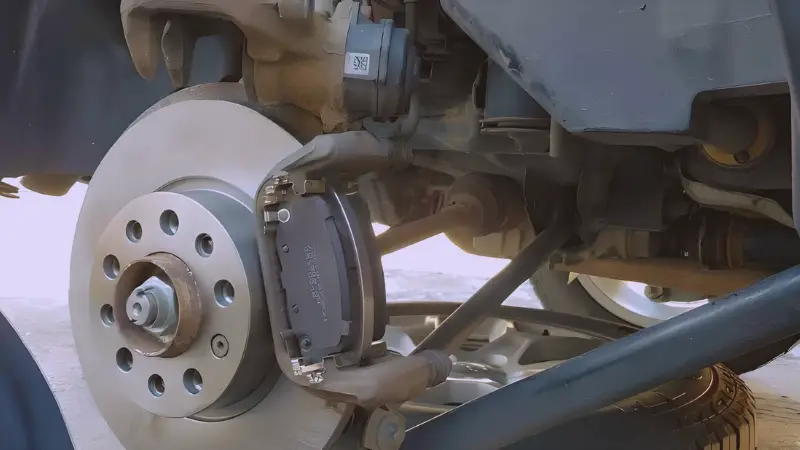
- Component Longevity: Overtightening lug nuts can lead to several problems. It can stretch or break the wheel studs, which are the threaded bolts that lug nuts screw onto. It can also damage the lug nuts themselves, making them difficult to remove later. Furthermore, excessive force can warp or crack the brake rotors, leading to costly repairs and potential braking issues.
- Even Contact: Proper torque ensures that the wheel sits flush against the hub assembly. This even contact is important for the proper functioning of the brakes and suspension system. Uneven pressure can cause vibrations and affect braking performance.
- Preventing Corrosion: When wheels are properly seated, it helps prevent moisture and dirt from getting between the wheel and the hub, which can cause corrosion and make future removal more difficult.
The Specific Torque Value For The 2014 Jeep Patriot
For the 2014 Jeep Patriot, the recommended wheel torque specification is 100 ft-lbs (135 Nm). This value is consistent across most Jeep Patriot models from this generation. This specification is designed to provide sufficient clamping force to keep the wheel secure without stressing the wheel studs or other components.
It’s crucial to always refer to your vehicle’s owner’s manual for the most accurate and up-to-date specifications. While 100 ft-lbs is the widely accepted value, the manual is the definitive source.
Essential Tools For Tightening Lug Nuts
To perform this task correctly, you’ll need a few specific tools. Using the right equipment ensures accuracy and prevents damage.
- Torque Wrench: This is the most important tool. A torque wrench allows you to apply a precise amount of force to the lug nuts. There are several types, but a click-type or digital torque wrench is generally recommended for DIY use. Ensure it is calibrated and in good working order.
- Lug Wrench or Socket Wrench: You’ll need a socket that fits your Jeep Patriot’s lug nuts. This is typically a 13/16 inch (21mm) socket. A lug wrench that comes with the vehicle can work, but a socket wrench with an extension provides better leverage and control.
- Extension Bar (Optional but Recommended): An extension bar for your socket wrench can help you reach the lug nuts more easily, especially on wheels with deep recesses.
- Wheel Chocks: These are wedges placed behind the wheels to prevent the vehicle from rolling while it’s jacked up. Safety is paramount, and wheel chocks are a critical safety item.
- Jack and Jack Stands: You’ll need a reliable jack to lift the vehicle and jack stands to support it safely while you work. Never rely solely on the jack.
- Wire Brush: To clean the wheel studs and the inside of the lug nuts before installation. This ensures a clean surface for proper tightening.
- Gloves and Safety Glasses: To protect your hands and eyes.

Step-by-step Guide To Torquing Your 2014 Jeep Patriot Wheels
Performing the wheel torque procedure correctly involves more than just tightening the nuts. It requires a systematic approach.
Step 1: Prepare The Vehicle
- Park your 2014 Jeep Patriot on a flat, level surface.
- Engage the parking brake firmly.
- Place wheel chocks behind the wheels that will remain on the ground. For example, if you are working on the front right wheel, chock the rear wheels.
- If you are changing a flat tire, you would have already loosened the lug nuts slightly before jacking up the vehicle. If you are simply re-torquing them (e.g., after a tire rotation or a few thousand miles), ensure the nuts are not excessively tight.
Step 2: Loosen Lug Nuts (if Necessary)
If you are installing a wheel or have found the lug nuts to be very tight, you may need to loosen them slightly first. Use your socket wrench and turn counter-clockwise.
Loosen each nut about half a turn to a full turn.
Do this while the wheel is still on the ground for maximum leverage.
Step 3: Jack Up The Vehicle
- Consult your owner’s manual for the correct jacking points for your Jeep Patriot.
- Position the jack under the designated point and lift the vehicle until the wheel you are working on is completely off the ground.
- Place a jack stand securely under a strong point of the vehicle’s frame or suspension near the jack. Lower the vehicle slowly onto the jack stand. The jack can remain in place as a backup, but the jack stand should bear the primary weight.
Step 4: Remove The Wheel (if Necessary)
If you are replacing a wheel or tire, you can now fully remove the lug nuts and take off the wheel. Place the wheel aside.
Step 5: Prepare The Hub And Wheel
- Inspect the wheel studs for any damage, such as stripped threads or cracks.
- Use a wire brush to clean the wheel studs and the mating surface of the wheel hub. This removes rust, dirt, or debris that could affect torque readings.
- Clean the inside of the lug nuts with a wire brush as well.
- If you are installing a wheel, align it with the wheel studs and slide it onto the hub.
Step 6: Install Lug Nuts By Hand
- Thread each lug nut onto a stud by hand. This helps prevent cross-threading, which can damage the studs and nuts.
- Tighten them until they are snug against the wheel.
Step 7: Tighten Lug Nuts With A Wrench (initial Pass)
- Using your socket wrench, tighten the lug nuts in a star pattern (also known as a criss-cross pattern). This ensures the wheel is seated evenly. For a five-lug wheel, the pattern is: Tighten one, skip the next, tighten the one after that, and so on.
- Tighten each nut a little at a time, moving around the wheel in the star pattern. This gradually pulls the wheel onto the hub.
- Do not fully tighten any single nut at this stage. The goal is to get the wheel evenly seated.
Step 8: Set And Use The Torque Wrench
- Set your torque wrench to the specified value: 100 ft-lbs (135 Nm).
- Continue tightening the lug nuts in the star pattern.
- Place the socket onto a lug nut and apply steady, even pressure until the torque wrench clicks or indicates the set torque has been reached.
- Important: Do NOT use your foot or apply excessive force to the torque wrench. Let the tool do the work. If you are using a click-type wrench, stop applying pressure as soon as you hear the click.
- Work your way around the wheel, tightening each nut to the specified torque in the star pattern. After completing one full pass, go around a second time in the same star pattern to ensure all nuts are still at the correct torque. Sometimes, tightening one nut can slightly loosen another.
Step 9: Lower The Vehicle
- Once all lug nuts on the wheel are torqued to specification, remove the jack stand and slowly lower the vehicle back to the ground using the jack.
- Remove the wheel chocks.
Step 10: Repeat For All Wheels
- Repeat steps 3 through 9 for each of the remaining wheels on your 2014 Jeep Patriot.
Common Mistakes To Avoid
Even with the right tools and instructions, mistakes can happen. Being aware of common errors can help you avoid them.
- Ignoring the Star Pattern: Tightening lug nuts in a circular pattern can cause the wheel to mount unevenly, leading to vibrations and potential damage. Always use the star pattern.
- Overtightening or Undertightening: As discussed, both extremes are dangerous and can cause damage. Using a torque wrench is the only way to ensure accuracy. Many people rely on “feel,” which is highly unreliable.
- Not Cleaning Studs and Nuts: Dirt, rust, or debris can interfere with the seating of the wheel and affect torque readings. A clean surface is essential.
- Cross-Threading Lug Nuts: Forcing a lug nut onto a stud crookedly can strip the threads. Always start threading lug nuts by hand to ensure they go on straight.
- Using an Impact Wrench for Final Tightening: While impact wrenches are great for quickly removing lug nuts or for the initial tightening pass, they should never be used for the final torque specification. They can easily overtighten nuts and damage components. If you use one, always follow up with a torque wrench.
- Forgetting to Re-Torque: Especially after installing new wheels or tires, or after a tire rotation, it’s good practice to re-check the torque after driving about 50-100 miles. The lug nuts can sometimes settle.
- Lubricating Studs or Nuts: Unless specifically recommended by the manufacturer (which is rare for lug nuts), do not apply oil, grease, or anti-seize to the threads of wheel studs or lug nuts. This can alter the torque reading, leading to overtightening even when using a torque wrench set to the correct value. The friction between the threads is accounted for in the torque specification.

When To Seek Professional Help
While changing a tire or performing basic maintenance like checking wheel torque is often a DIY task, there are situations where it’s best to consult a professional mechanic.
- Damaged Threads: If you discover damaged wheel studs or lug nuts, do not attempt to force them. A mechanic can assess the damage and replace the necessary parts.
- Difficulty Removing Lug Nuts: If lug nuts are seized or extremely difficult to remove, they might be cross-threaded or damaged. Forcing them could lead to breaking a stud.
- Unsure About the Process: If you are uncomfortable with any part of the process, or if you don’t have the necessary tools, it’s always safer to take your Jeep Patriot to a qualified technician.
- Vibrations or Noises: If you experience persistent vibrations, especially at certain speeds, or hear unusual noises coming from your wheels after performing maintenance, have it checked immediately. This could indicate an improperly seated wheel.
- After a Tire Incident: If you’ve had a blowout, a significant impact, or any other tire-related incident, it’s wise to have a professional inspect your wheels, studs, and hubs.
Understanding Wheel Torque Specifications Table
Here’s a quick reference table for the 2014 Jeep Patriot wheel torque and related specifications.
| Specification | Value (Imperial) | Value (Metric) | Notes |
|---|---|---|---|
| Wheel Lug Nut Torque | 100 ft-lbs | 135 Nm | For all 2014 Jeep Patriot models. Always verify with owner’s manual. |
| Common Lug Nut Size | 13/16 inch | 21 mm | Standard size for most Jeep Patriots. |
| Recommended Re-Torque Interval | 50-100 miles | 80-160 km | After initial installation or tire rotation. |

Factors Affecting Wheel Torque
While the 100 ft-lbs specification is standard, a few factors can subtly influence the process or outcome.
- Wheel Material: The material of your wheels (steel vs. alloy) can have minor differences in how they seat, but the torque specification remains the same. Alloy wheels might be more susceptible to damage from overtightening, reinforcing the need for a torque wrench.
- Aftermarket Wheels: If you have installed aftermarket wheels, it’s essential to confirm their torque requirements. While most will use the factory specification, some custom wheels might have slightly different recommendations due to their design or material. Always check with the wheel manufacturer.
- Corrosion: Significant corrosion on the hub face or wheel mounting surface can prevent the wheel from sitting perfectly flush. This can lead to the wheel wobbling slightly and can affect the clamping force distribution. Thorough cleaning is crucial.
- Tire Pressure: While not directly related to torque, ensuring your tires are properly inflated before re-torquing is good practice. Incorrect tire pressure can affect how the vehicle sits and feels, potentially masking issues.
The Importance Of Regular Checks
Wheel torque isn’t a “set it and forget it” maintenance item. Regular checks are part of good vehicle ownership.
- Routine Maintenance: Incorporate checking your wheel torque into your regular vehicle maintenance schedule. This could be every oil change, tire rotation, or at least twice a year.
- Pre-Trip Inspection: Before embarking on a long road trip, it’s wise to quickly check your lug nut torque. This is especially important if you’ve recently had tires changed or