The Jeep Liberty is a popular SUV known for its strong off-road abilities and practical design. Like most vehicles, it relies on a serpentine belt to run several important engine components.
If you own a Jeep Liberty, understanding the belt diagram is essential for both routine maintenance and emergency repairs. Many drivers find themselves stuck when a belt breaks or squeals, and a clear diagram can save time and frustration.
Let’s dive into everything you need to know about the Jeep Liberty belt diagram, common mistakes, and practical tips for working with the belt system.
Why The Belt Diagram Matters
The serpentine belt is a long, winding belt that powers devices such as the alternator, power steering pump, air conditioning compressor, and water pump. If the belt fails or is installed incorrectly, your engine may overheat, lose electrical power, or become difficult to steer.
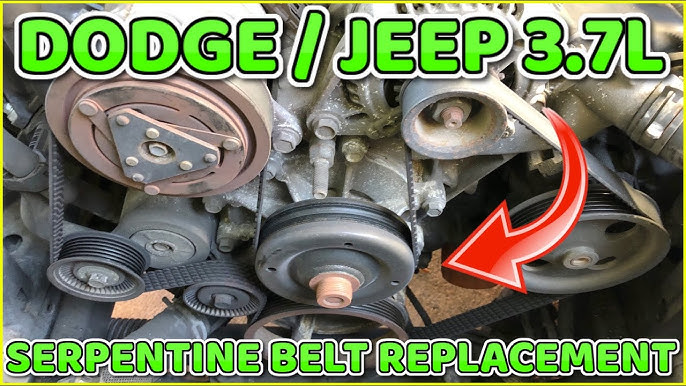
A belt diagram shows how the belt routes around each pulley. Without it, even an experienced mechanic can make mistakes, especially because the belt’s path is not always intuitive. Jeep Liberty models from different years and with different engines may have unique belt routes, making the diagram even more important.
Jeep Liberty Belt Diagram Overview
Here’s a typical belt routing diagram for a Jeep Liberty with a 3.7L V6 engine (2002–2012 models):
| Component | Position in Belt Route | Function |
|---|---|---|
| Crankshaft Pulley | Start/End | Drives the belt |
| Alternator | Top left | Charges battery |
| Power Steering Pump | Upper right | Steering assistance |
| AC Compressor | Lower right | Air conditioning |
| Idler Pulley | Middle | Guides belt |
| Tensioner Pulley | Lower middle | Keeps belt tight |
| Water Pump | Upper middle | Cools engine |
The belt wraps around these parts in a specific order. A sticker under the hood often shows the diagram, but these can fade or fall off over time.
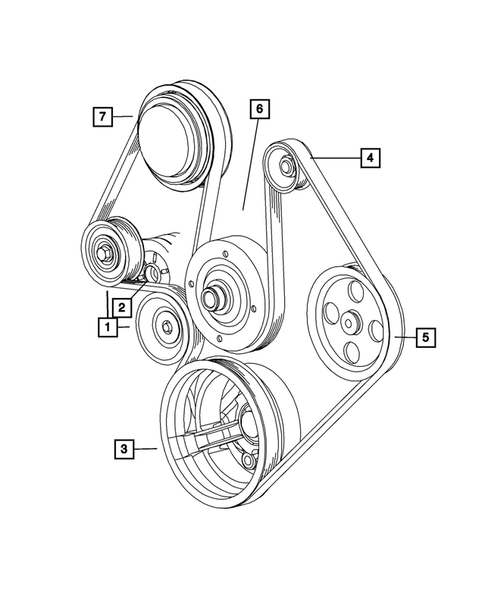
Step-by-step: Reading And Using The Diagram
If you need to replace your Jeep Liberty’s serpentine belt, follow these steps:
- Identify the engine type. Most Liberty models have either a 3.7L V6 or a 2.4L I4 engine. The routing may be slightly different for each.
- Locate all pulleys. Stand in front of your engine with the hood open. Find the crankshaft pulley at the bottom center—it’s the largest.
- Compare with the diagram. Match each real pulley to the ones shown in the diagram. Do not assume positions, as errors here are common.
- Note the tensioner location. The tensioner pulley is spring-loaded. It’s often on the right side and used to loosen or tighten the belt.
- Route the belt. Start at the crankshaft pulley and follow the diagram exactly. Most diagrams use arrows or lines to guide you.
- Release the tensioner. Use a wrench to move the tensioner and slip the belt over the last pulley.
- Double-check. Make sure the belt sits in the grooves of each pulley. One misaligned groove can cause noise or damage.
Here’s a simplified comparison of the belt route for the two main engine types:
| Engine | Main Routing Difference | Number of Pulleys |
|---|---|---|
| 3.7L V6 | Includes power steering and AC | 7 |
| 2.4L I4 | No AC in some models | 5–6 |
Common Mistakes And How To Avoid Them
Even with a diagram, mistakes happen. Here are some tips to avoid the most frequent problems:
- Skipping the tensioner: Many first-timers forget the tensioner. Always include it in the belt path.
- Installing the belt backwards: The smooth side of the belt should ride on smooth pulleys; the ribbed side on grooved pulleys.
- Overstretching the belt: Forcing a belt can damage it. If it doesn’t fit, check the routing.
- Ignoring worn pulleys: Replace noisy or rough pulleys. A new belt on a bad pulley will fail quickly.
- Not checking the diagram twice: Always double-check your work before starting the engine.

When To Replace Your Serpentine Belt
Most serpentine belts last between 60,000 and 100,000 miles. Check for these signs that a belt replacement is needed:
- Cracks or splits on the belt surface
- Squealing noise when starting or turning
- Belt slipping off pulleys
- Power loss to accessories like AC or steering
If you drive in extreme heat or cold, inspect your belt more often. The Jeep Liberty’s engine bay can get hot, which wears belts faster.
Practical Tips For Diy Owners
Replacing a belt is a good entry-level DIY job. Here’s what helps:
- Take a photo of your old belt before removal.
- Buy a quality replacement belt, not just the cheapest.
- Keep a copy of the belt diagram in your glove box.
- If you’re unsure, ask for help from a mechanic or check the Jeep Liberty’s manual.
- Consider replacing the tensioner and idler pulleys if your Jeep has over 100,000 miles.
One insight many overlook: belt noise is not always from the belt itself. Old pulleys or tensioners can squeak. Also, a belt that’s too tight can cause bearing failure in your accessories.
Jeep Liberty Belt Diagram Resources
If your under-hood sticker is missing, you can find diagrams in the owner’s manual or on reliable auto repair sites. For more detailed diagrams, visit the Jeep Liberty Wikipedia page or trusted automotive forums. Always use a diagram that matches your engine year and type.
Frequently Asked Questions
What Happens If I Install The Belt Incorrectly?
An incorrect installation can cause engine overheating, battery drain, or loss of power steering. In some cases, the belt may come off completely, leaving you stranded.
How Can I Tell If My Belt Tensioner Is Bad?
A bad tensioner often makes a rattling or squeaking noise. If the belt looks loose or moves too much while the engine runs, the tensioner may need replacing.
Can I Drive My Jeep Liberty Without The Serpentine Belt?
No. Without the serpentine belt, you will quickly lose power steering, electrical charging, and cooling. The engine will overheat within minutes.
How Do I Know Which Belt Diagram To Use?
Check your engine size and model year. Diagrams differ between the 3.7L V6 and 2.4L I4 engines, and sometimes between years. Always match the diagram to your exact Jeep.
Is It Hard To Replace The Serpentine Belt Myself?
It’s a moderate DIY task. With the right tools, a diagram, and patience, most owners can do it in 30–60 minutes. Beginners should watch a video or read their manual first.
Understanding your Jeep Liberty’s belt diagram is a simple but powerful way to keep your SUV reliable. With the right information and careful attention to details, you can save money and avoid common mistakes.