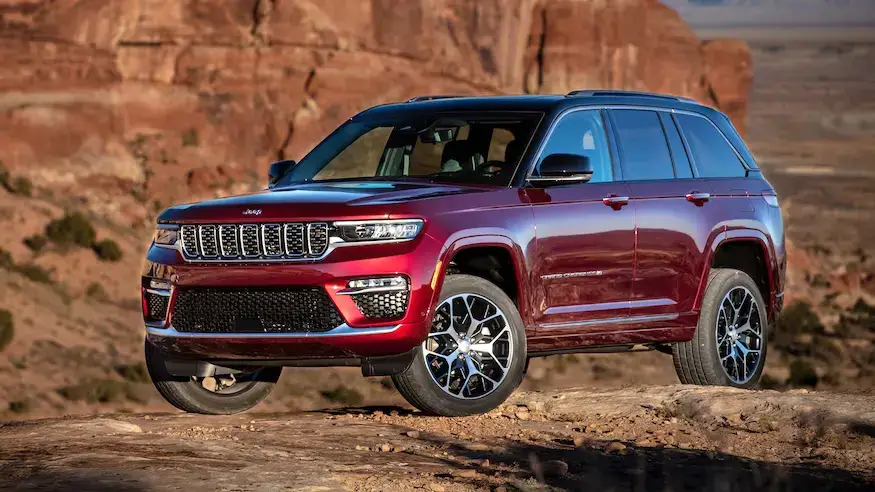
The Jeep Grand Cherokee is well-known for its blend of comfort, off-road capability, and advanced technology. Still, many owners face challenges when upgrading or repairing the radio system—especially when it comes to the radio wiring diagram.
Understanding this diagram is key for anyone looking to install a new stereo, troubleshoot speaker issues, or add features like amplifiers. If you want your Grand Cherokee’s audio system to sound its best, or you just need to fix a problem, having the right wiring information makes all the difference.
Why The Radio Wiring Diagram Matters
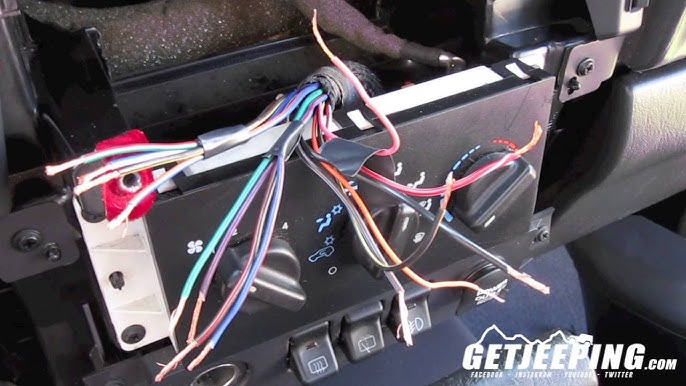
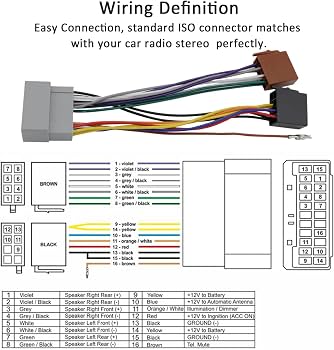
Car audio wiring can be confusing, even for experienced DIYers. The radio wiring diagram shows the color codes and functions of each wire behind your Jeep’s dashboard. Without this diagram, you risk connecting wires incorrectly, which can cause sound problems, blown fuses, or even damage to your stereo or vehicle electronics.
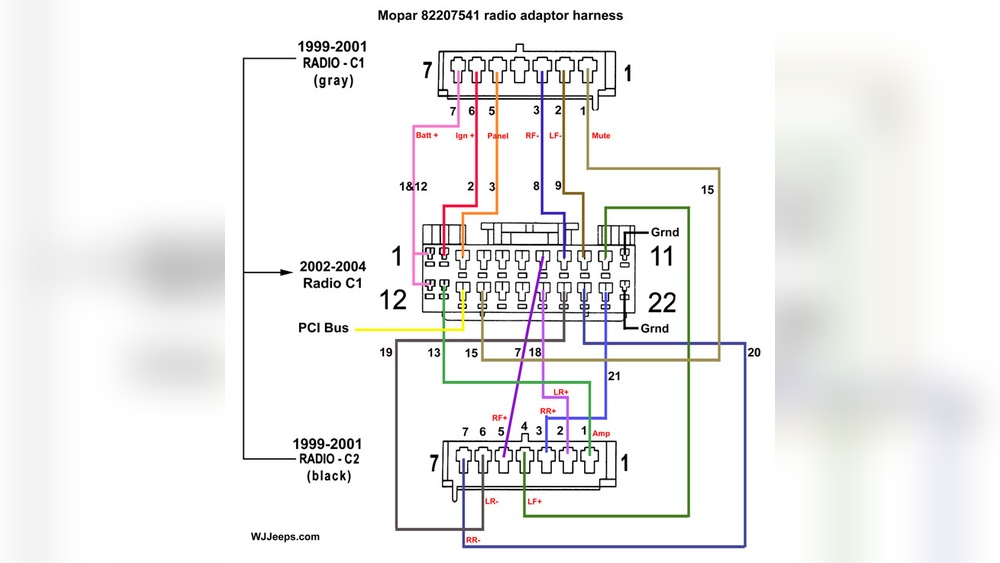
For the Jeep Grand Cherokee, wiring can vary by model year and audio package. For example, a basic Laredo model may use a different speaker layout and wire colors than a Limited with a premium sound system. Always double-check your model year before starting any work.
Key Components In The Wiring Diagram
Most Jeep Grand Cherokee radio wiring diagrams include:
- Power wires: For constant (memory) and switched (ignition) power.
- Ground wire: Essential for electrical safety and noise-free audio.
- Speaker wires: Usually four pairs, one for each speaker.
- Antenna wire: For radio signal reception.
- Illumination/Dimmer wire: Adjusts radio brightness with your headlights.
- Amplifier/Remote wire: Activates factory or aftermarket amplifiers.
Each wire is usually color-coded. Here’s a comparison of standard Jeep Grand Cherokee radio wire colors for common model years:
| Wire Function | 1999-2004 (WJ) | 2011-2026 (WK2) |
|---|---|---|
| 12V Constant (Memory) | Pink/White | Red/White |
| Ignition (Switched) | Red | Pink |
| Ground | Black | Black |
| Front Left Speaker (+/-) | Dark Green / Brown | White / White-Black |
| Front Right Speaker (+/-) | Violet / Blue | Gray / Gray-Black |
| Rear Left Speaker (+/-) | Brown / Yellow | Green / Green-Black |
| Rear Right Speaker (+/-) | Dark Blue / Red | Purple / Purple-Black |
How To Read And Use The Diagram
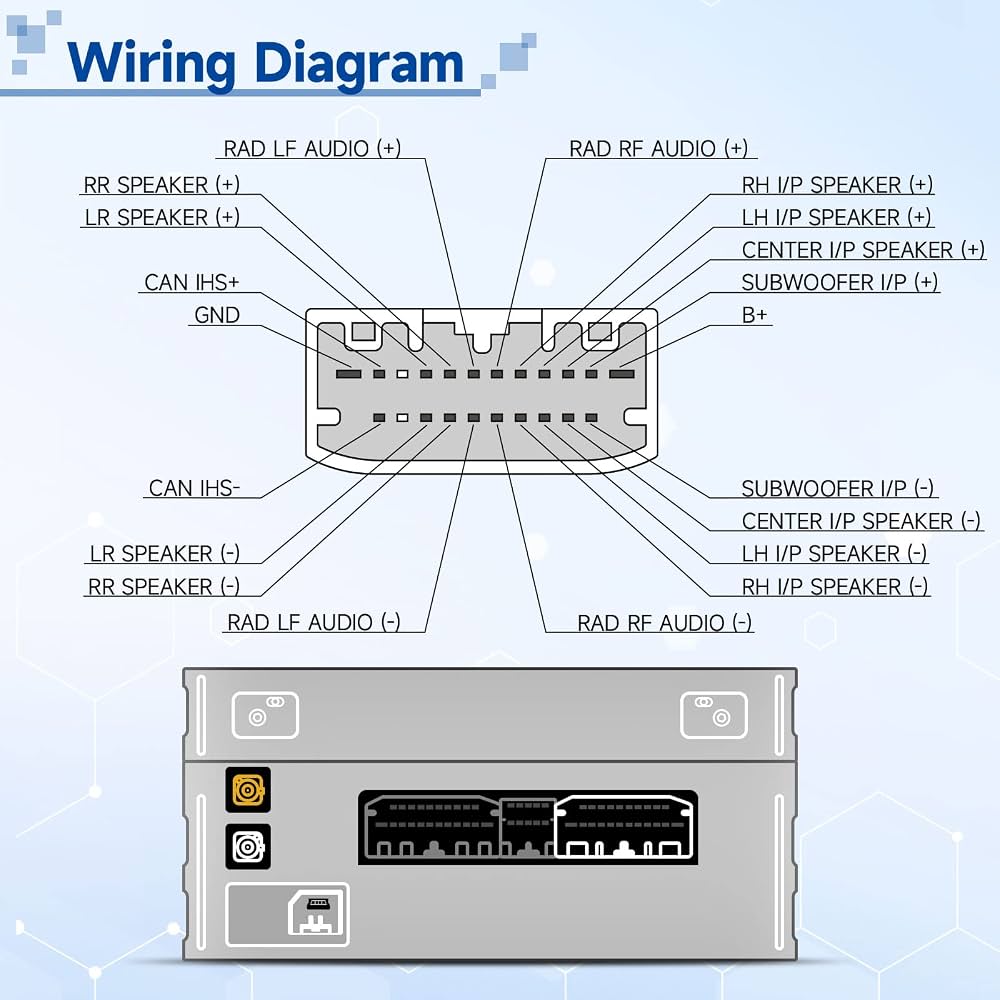
Start by identifying the radio connector in your Jeep. Most models have a rectangular plug with multiple pins. The wiring diagram will show which pin corresponds to each wire color and function. If you have an aftermarket radio, you’ll also need a wiring harness adapter that matches your factory connector.
Here’s a basic process to follow:
- Disconnect your battery before working on any wiring to avoid shorts.
- Access the radio by removing trim panels and unscrewing the radio unit.
- Match each wire from your harness to the diagram—don’t trust wire colors alone, as they can vary.
- Use crimp connectors or solder joints for solid, long-lasting connections.
- Test the system before reassembling the dash.
A practical tip: take a photo of your factory wiring before making any changes. This makes it easier to return to stock if needed.
Common Upgrades And Wiring Challenges
Many Jeep Grand Cherokee owners want to upgrade to a touchscreen radio, add subwoofers, or improve speaker quality. These upgrades often require understanding the factory wiring and sometimes bypassing the original amplifier.
Here’s a quick look at common upgrade scenarios:
| Upgrade Type | Key Wiring Steps | Potential Issues |
|---|---|---|
| Aftermarket Head Unit | Wiring harness adapter, connect power/ground/speakers | Steering wheel control integration |
| Add Subwoofer | Tap rear speaker wires or use RCA outputs, run power wire | Factory amp integration, alternator whine |
| Replace Speakers | Direct swap, match polarity, check wire colors | Door panel removal, mounting depth limits |
One non-obvious insight: Some Grand Cherokees use a CAN-BUS system for radio signals. This means simple wire splicing may not work; you need special adapters to retain features like steering wheel controls or factory backup cameras.
Another tip: Factory radios sometimes power on but produce no sound after installation. This often means the amplifier turn-on wire is not connected, or the wrong speaker wires are used.
Safety And Best Practices
Whenever you work with vehicle wiring, safety comes first. Always disconnect the negative battery terminal before starting. Use a digital multimeter to verify voltage and ground connections instead of guessing by color. This avoids blown fuses and protects sensitive electronics.
If you’re not confident in your wiring skills, consider asking a professional installer. Many mistakes, like crossed wires or poor connections, can lead to expensive repairs or even electrical fires.
Where To Find Accurate Diagrams
Official Jeep service manuals or websites like the Jeep Official Site provide reliable wiring diagrams. Some enthusiast forums and aftermarket harness suppliers also offer diagrams, but always double-check their accuracy for your specific year and trim.