Wiring offroad lights on a 1999 Jeep TJ can transform your night driving experience, whether you’re crawling over rocks or heading down a dark trail. Many Jeep owners are surprised to learn that installing auxiliary lights is a practical DIY project, not just something for professional shops. With the right steps, tools, and safety checks, you can add powerful lighting to your Jeep that works reliably for years. This guide is designed for enthusiasts with basic mechanical knowledge who want a thorough, safe, and clean installation.
Why Add Offroad Lights To Your 1999 Jeep Tj?
The factory headlights on a 1999 Jeep TJ are decent for city streets, but they struggle in offroad or rural environments. Offroad lights offer wider and longer beams, cutting through darkness, rain, and fog. They help you:
- Spot obstacles, animals, or hazards early.
- Enjoy safer camping and overlanding.
- Improve visibility for night repairs or recoveries.
Adding offroad lights is not just about looks it’s about safety and utility. Many trails require extra lighting by law or club rule.
Essential Tools And Materials
Before starting, gather these items:
- Offroad light kit (with mounting hardware)
- 12V automotive relay (typically 40A)
- Inline fuse holder and fuse (20A or as recommended)
- Switch (waterproof recommended)
- Automotive wire (14-16 gauge, red and black)
- Wire connectors (ring terminals, butt connectors)
- Wire stripper/crimper tool
- Drill and drill bits
- Electrical tape and heat shrink tubing
- Zip ties and cable clamps
- Multimeter (for testing)
- Basic hand tools (screwdrivers, wrenches)
- Rust inhibitor (for drilled holes)
Choosing quality components prevents future electrical headaches. Avoid reusing old or mismatched wires, as they may cause voltage drops or shorts.
Planning Your Installation
A common mistake is to start bolting on lights without a clear plan. Think about:
- Light location: Bumper, windshield pillars, roof, or grille
- Wiring route: Away from moving parts and hot surfaces
- Switch location: Easy to reach but not in the way
- Battery access: Clean connections, space for relay and fuse
Sketch your wiring path on paper. This helps you estimate wire lengths and spot potential issues, such as tight bends or sharp edges.
Step-by-step Wiring Instructions
1. Mounting The Lights
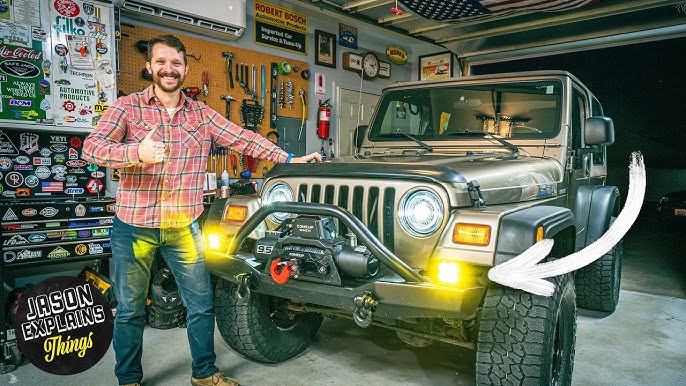
Position your offroad lights on the chosen brackets. Typical locations for a 1999 Jeep TJ are the front bumper or windshield pillar mounts.
Use the provided hardware and follow the manufacturer’s instructions for secure attachment. If you need to drill holes, mark them carefully, drill slowly, and treat bare metal with rust inhibitor.
2. Running The Wires
Measure and cut your wires, leaving a bit extra for flexibility. Run the wires from each light toward the engine bay, following the frame or existing wiring paths.
Use zip ties or cable clamps to secure them. Avoid running wires near the exhaust, driveshaft, or steering parts.
Pro tip: Run a single wire harness for both lights to reduce clutter.
3. Installing The Relay And Fuse
A relay is essential for high-power lights. It acts as a switch, letting you use a small dashboard switch to control a high-current device safely. Mount the relay close to the battery but away from heat and moisture. Connect the relay:
- Pin 30: To battery positive (through the inline fuse)
- Pin 87: To the lights’ positive wires
- Pin 85: To ground (chassis or battery negative)
- Pin 86: To the switch inside the Jeep
Place the fuse holder as close to the battery as possible. This protects your Jeep from electrical fires if a wire shorts.
4. Connecting The Switch
Drill a hole in your dashboard or use an existing knockout for the switch. Run a wire from relay pin 86 to one terminal on the switch.
Connect the other terminal to an ignition-switched 12V source (so your lights can’t be left on accidentally).
Secure all wiring behind the dash and avoid pinching.
5. Grounding
Connect the negative wire from each light to a clean, bare metal spot on the Jeep’s chassis. Scrape away any paint or rust for solid contact. Use a ring terminal and bolt, then cover with dielectric grease to prevent corrosion.
6. Testing And Adjusting
Before finishing, double-check all connections. Use a multimeter to confirm voltage at each point.
Turn on the Jeep, flip the new switch, and check that the lights work as expected. Adjust the aim of the lights so they illuminate the trail, not the sky or other drivers.
Common Mistakes And How To Avoid Them
Many Jeep owners run into problems because of these errors:
- Skipping the relay: Direct-wiring lights to the switch can melt wires or cause fires.
- Poor grounds: Weak or rusty ground connections cause flickering or dim lights.
- Wrong fuse size: Too large a fuse won’t protect your system; too small will blow constantly.
- Exposed wires: Unprotected wires can be cut by sharp metal or melt on hot surfaces.
- No wire slack: Wires that are too tight may snap when the Jeep flexes offroad.
Check your work before every trip. Lights that fail in the city are annoying; lights that fail on a dark trail can be dangerous.
Example Wiring Diagram
Here’s a simple layout for two bumper-mounted offroad lights:
Battery (+) Inline Fuse Relay Pin 30
Relay Pin 87 → Light Positive Wires
Relay Pin 86 → Dashboard Switch → Ignition (+)
Relay Pin 85 → Ground
Light Negatives → Ground
This circuit keeps high current out of your dash and protects the whole system.
Comparing Offroad Light Types
Different offroad lights suit different needs. Here’s a quick comparison:
| Type | Beam Pattern | Best Use | Pros | Cons |
|---|---|---|---|---|
| Spot | Narrow, long-range | Open trails, high speed | Far reach | Small area |
| Flood | Wide, short-range | Slow trails, work area | Good coverage | Limited distance |
| Combo | Spot + flood | Mixed conditions | Versatile | Price |
Choosing The Right Switch Location
A well-placed switch makes all the difference. Consider:
- Easy reach from the driver’s seat
- Out of the way of knees or gear shifters
- Near other accessory switches for a clean look
Some owners mount switches in the center console, others use the blank panels near the steering wheel. Avoid running wires where they might get snagged.
Wiring Safety Tips
- Always disconnect the battery before working on wiring.
- Use heat shrink tubing over all connections for moisture protection.
- Route wires away from sharp edges and use grommets when passing through metal.
- Label wires if you plan future upgrades.
Electrical safety is critical in offroad vehicles, where vibration and water can cause hidden problems.
Costs And Time Estimate
Installing offroad lights on a 1999 Jeep TJ typically costs:
- Light kit: $60–$300 (LEDs are more expensive but last longer)
- Wire, fuse, relay, switch: $25–$50
- Tools (if you need to buy): $20–$80
Expect to spend 2 4 hours on the installation, depending on your experience.
Real-world Example: Troubleshooting
Suppose you wire your lights, but they don’t turn on. Here’s how to troubleshoot:
- Check the fuse for continuity.
- Test for 12V at the relay input and output.
- Confirm the switch is getting power and grounding properly.
- Inspect grounds at both the relay and light mounting points.
Often, the issue is a missed ground or an inline fuse that’s not fully seated.
Comparison: Diy Vs. Professional Installation
| Aspect | DIY | Professional |
|---|---|---|
| Cost | Lower | Higher |
| Time | 2–4 hours | 1–2 hours |
| Customization | Full control | Limited (unless requested) |
| Learning | High | Low |
If you enjoy hands-on projects and want to understand your Jeep’s systems, DIY is rewarding. If you lack time or confidence, a pro can do a fast, tidy job.
Non-obvious Tips For Beginners
- Use weatherproof connectors if you frequently ford water or drive in mud. Regular connectors corrode quickly.
- Leave a little extra wire length at mounting points. Jeeps flex a lot offroad; tight wires can pull loose or break.
- Plan for future upgrades. If you think you’ll add more lights later, install a larger gauge wire and an extra relay socket now. This saves you time and effort down the road.
Sourcing Quality Parts
Don’t cut corners on safety. Use automotive-grade wire (rated for 105°C or higher) and sealed relays.
Cheap wiring kits from unknown brands may cause electrical fires or fail when you need them most. Trusted auto parts stores or reputable online suppliers are best.
For more detail on relay wiring and electrical basics, check out Wikipedia’s relay page.
Final Checks Before Hitting The Trail
After installation:
- Test your lights in a safe area.
- Inspect all connections for heat or looseness.
- Make sure wires are not rubbing or hanging.
- Take a short test drive to check for vibration issues.
A little extra time now can save you hours of trouble on the trail.
Adding offroad lights to your 1999 Jeep TJ is a practical project that boosts both safety and enjoyment. With careful planning and attention to detail, you can install a system that’s reliable, upgradeable, and looks great on your Jeep.
How Many Auxiliary Lights Can I Add To My 1999 Jeep Tj Safely?
Most Jeeps can handle two to four auxiliary lights with proper relays and fuses. The key limit is your alternator’s output and total accessory draw. If you add more than four large lights, consider upgrading your alternator and battery.
Can I Wire Offroad Lights Directly To The Battery Without A Relay?
It’s not recommended. Relays prevent overheating, protect switches, and make your system safer. Direct wiring can melt switches or cause electrical fires.
What Gauge Wire Should I Use For Offroad Lights?
For most LED or halogen lights, 14-gauge wire is safe for runs up to 10 feet. For longer runs or higher-wattage lights, use 12-gauge. Always use wire rated for automotive use.
Do I Need To Aim My Offroad Lights?
Yes. Proper aiming ensures you light up the trail—not other drivers’ eyes. Adjust lights on flat ground, pointing slightly downward and centered on your trail path.
Will Adding Offroad Lights Drain My Battery?
If you use high-wattage lights for long periods with the engine off, your battery can drain quickly. With the engine running, your alternator supplies power. Monitor your battery voltage if you add multiple lights or use them while parked.
Adding offroad lights to your 1999 Jeep TJ isn’t just about style; it’s a smart upgrade for safer, more enjoyable adventures. With the right tools, careful planning, and attention to detail, you can tackle this project and hit the trails with confidence.