Removing the glove box from your Jeep Wrangler is a task many owners face, whether for repairs, upgrades, or simply accessing the area behind it. While the process is straightforward, there are a few steps and details that can make your experience smoother.
This guide explains how to take the glove box off, highlights common mistakes, and gives practical advice. Even for beginners, the instructions below will help you finish the job quickly and safely.
Reasons To Remove The Glove Box
People remove the glove box for many reasons. Some need to access the cabin air filter or wiring behind it. Others want to add accessories like dash cams or fix rattles. If you plan to replace the glove box or clean behind it, knowing how to take it off safely is important.
Tools And Preparation
Before starting, gather these basic tools:
- Phillips screwdriver
- Flathead screwdriver (optional)
- Trim removal tool (optional)
You do not need special equipment for most Jeep Wrangler models, but having the right tools avoids scratches and broken clips. Make sure your Jeep is parked safely and the engine is off.

Step-by-step Removal Process
Taking the glove box off is not difficult, but missing a step can cause damage. Follow this process for most Jeep Wrangler models, including JK, JL, and TJ.
1. Open The Glove Box
Pull the handle and swing the glove box open. Empty its contents to prevent items from falling.
2. Locate The Stops
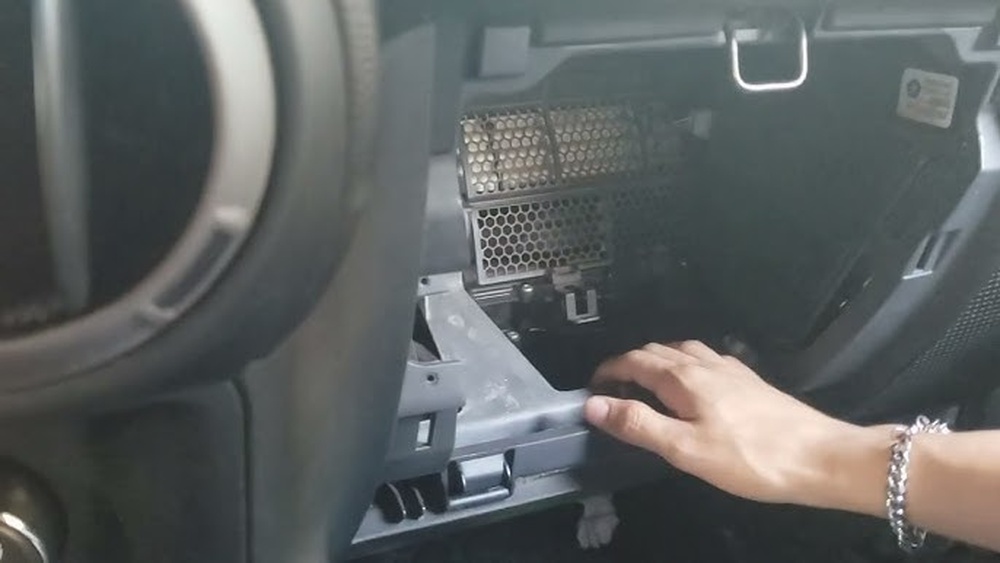
When fully open, you’ll see two plastic stops on either side. These prevent the glove box from dropping further.
3. Release The Stops
Gently push the sides of the glove box inward. This moves the stops past the dashboard edges.
For some models, you may need to press harder but avoid forcing.
4. Remove The Glove Box
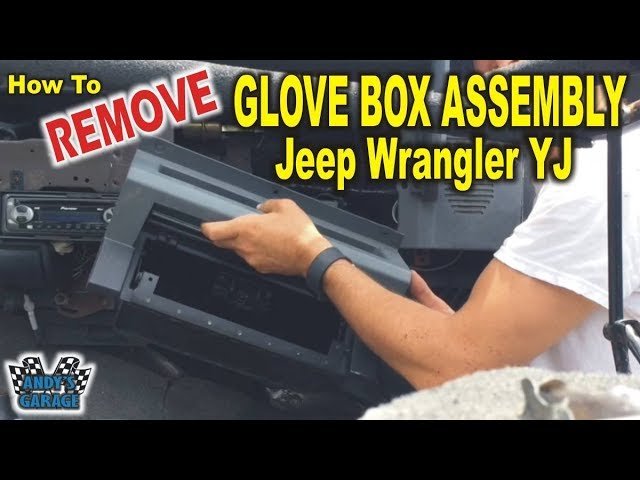
Once the stops are bypassed, the glove box will hang loosely. Lift it upwards and pull it towards you. For certain models (especially JL), you may need to disconnect a damper string on the right side. Use a flathead screwdriver if necessary.
5. Inspect The Area Behind
Now, you can access the air filter, wiring, or other components. If you find dust or debris, clean it before reinstalling.
Here’s a quick comparison of removal steps for popular Wrangler models:
| Model | Stop Release Method | Damper String | Common Issues |
|---|---|---|---|
| JK (2007–2018) | Push sides inward | None | Broken clips |
| JL (2018–present) | Push sides + screwdriver | Yes | Damper string snaps |
| TJ (1997–2006) | Push sides inward | None | Stuck stops |
Tips For Safe Removal
- Use a trim removal tool if the stops are stuck.
- Do not force the glove box—plastic parts can break easily.
- If you disconnect the damper string, remember how it attaches for reinstallation.
- Place screws and small parts in a safe spot.
Beginners often miss the damper string on JL models, causing it to snap. Another common mistake is forgetting to empty the glove box before removal.
Reinstalling The Glove Box
Putting the glove box back is simple:
- Position the glove box in the opening.
- If your model has a damper string, reconnect it.
- Push the sides inward again and align the stops.
- Close the glove box to check for proper fit.
If the glove box does not close smoothly, check for misaligned stops or loose parts.
Troubleshooting Problems
Occasionally, issues arise during removal or installation. Here’s a quick troubleshooting guide:
| Problem | Possible Cause | Solution |
|---|---|---|
| Glove box stuck | Stops not released | Push sides harder; use trim tool |
| Damper string broken | Pulled too hard | Replace string (available online) |
| Clips damaged | Forced removal | Replace clips; check for spares |
| Noisy after install | Misaligned glove box | Reinstall and align properly |
Extra Advice For Beginners
- Take a photo before you start. It helps you remember how everything looks for reinstallation.
- If you see wires or connectors behind the glove box, do not pull or twist them.
- Clean the area using a microfiber cloth to avoid scratching surfaces.
- If you need new parts, check the official Jeep site for compatibility (Jeep Official Site).
- Never rush the process—most glove boxes break because of impatience.
Frequently Asked Questions
How Long Does It Take To Remove The Glove Box?
For most Jeep Wrangler models, it takes about 5–10 minutes. First-timers may need a bit longer, especially if the stops are tight or there is a damper string.
Do I Need To Disconnect The Battery Before Removing The Glove Box?
No, unless you plan to work with electrical parts behind the glove box. For simple removal, disconnecting the battery is not required.
Will Removing The Glove Box Void My Warranty?
Removing the glove box itself does not affect your warranty. However, damaging parts or interfering with electrical components may cause issues. Always check your Jeep’s warranty policy.
What If The Glove Box Won’t Come Out After Releasing The Stops?
If the glove box is stuck, check for hidden screws or clips. Use a trim removal tool to gently pry if needed. Avoid excessive force to prevent breaking plastic parts.
Can I Upgrade The Glove Box After Removal?
Yes, many owners upgrade to locking glove boxes or larger storage units. Make sure any new glove box fits your Wrangler’s model and year.
Taking the glove box off your Jeep Wrangler is a practical skill that helps with maintenance and upgrades. With careful steps and attention to detail, you’ll avoid damage and save time.
Remember, patience and preparation are key most mistakes happen when rushing or using the wrong tools.
If you ever feel unsure, consult your Jeep owner’s manual or online forums for extra guidance.