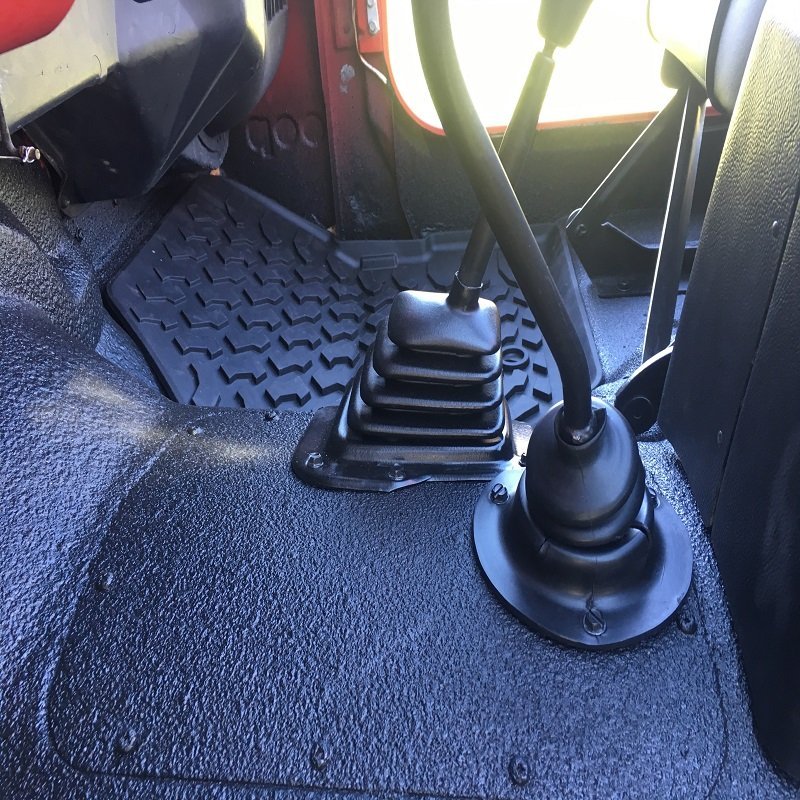
Rhino lining your Jeep’s interior is a smart way to protect it from dirt, water, and wear. Many Jeep owners love this upgrade because it makes cleaning easier and gives the interior a rugged, custom look.
If you’re thinking about doing this yourself, it’s possible with some careful preparation and a weekend of work. This guide will show you how to rhino line Jeep interior step by step, what you need, and the things most people overlook.
Why Rhino Line Your Jeep Interior?
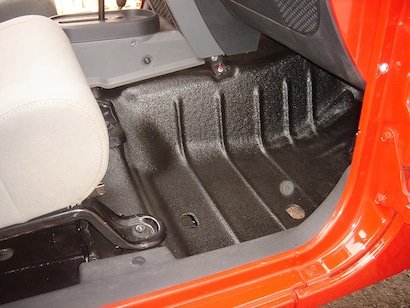
Rhino lining isn’t just about looks. It’s a tough, spray-on or roll-on coating that makes your Jeep’s floor and cargo area resistant to rust, scratches, and mud.
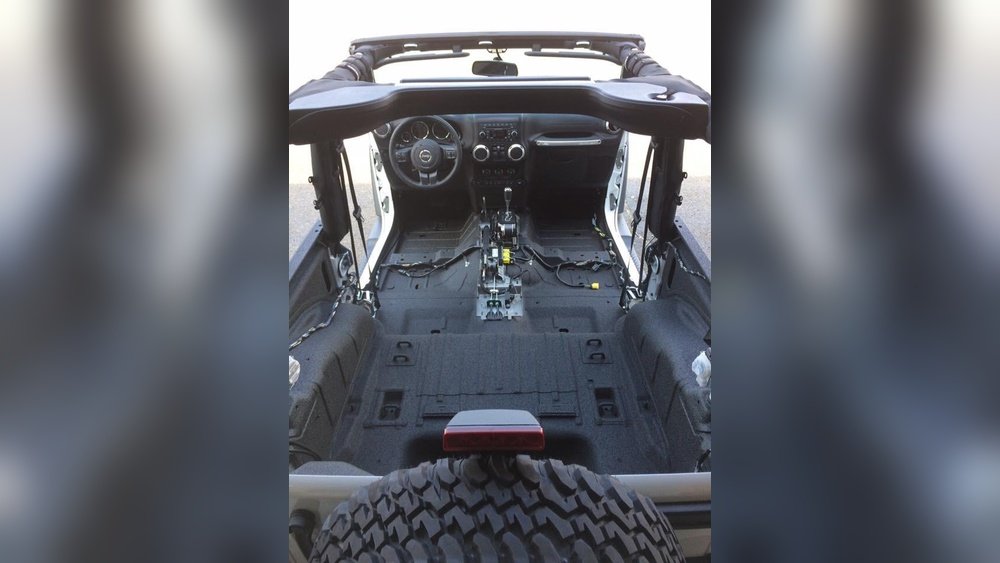
If you often drive off-road or live where it rains a lot, this kind of protection is especially valuable.
Another benefit is noise reduction rhino lining can help make your ride quieter by absorbing some of the road noise.
People often overlook one thing: resale value. A well-done rhino line job can make your Jeep more attractive to buyers who want a vehicle that’s ready for adventure.
What You Need To Rhino Line A Jeep Interior
Before you start, gather all the tools and materials. Missing something can slow you down or cause mistakes.
Essential Supplies:
- Rhino Liner kit (choose spray-on or roll-on)
- Painter’s tape and plastic sheets
- Sandpaper (60–120 grit) or a wire brush
- Degreaser or acetone
- Safety gear: Gloves, mask, goggles
- Screwdriver and socket set
- Paint roller or spray gun (if not in kit)
- Shop vacuum
Tip: Don’t skip on safety gear. Rhino liner is strong stuff, and fumes can be harmful in a closed space.
Step-by-step Process
1. Remove Seats And Carpets
Take out all the seats, carpet, and plastic trim. Most Jeeps need a socket wrench to remove the bolts. Store all hardware in labeled bags.
Non-obvious insight: Some wiring runs under the carpet—disconnect battery cables to prevent short circuits.
2. Clean And Prep The Surface
Vacuum the entire floor. Use a degreaser to clean off any oil, dirt, or glue.
The liner won’t stick to dirty or oily surfaces.
Sand the surface or use a wire brush to rough up the paint. The goal is to create a surface the liner can grip.
Pro tip: Pay special attention to corners and seams. These are weak spots where the liner might peel if not prepped well.
3. Mask And Protect
Use painter’s tape and plastic sheets to cover areas you don’t want coated like the dashboard, pedals, and door seals.
4. Apply The Rhino Liner
Mix the liner according to the instructions. If spraying, use smooth, overlapping strokes.
For roll-on types, use a foam roller and work in small sections.
Let the first coat dry (usually 1 2 hours), then apply a second coat for extra durability.
Data point: Most Rhino liner kits cover 60–80 square feet with two coats, which is enough for a Jeep interior.
5. Curing And Reassembly
Let the liner cure at least 24 hours before walking on it. For heavy use, wait 72 hours before reinstalling seats and trim.
Check all wiring before putting the battery cables back. Reinstall seats and other parts in reverse order.
Choosing Spray-on Vs Roll-on Liner
Not sure which type to use? Here’s a quick comparison:
| Type | Pros | Cons |
|---|---|---|
| Spray-On | Smoother finish, reaches tight spaces, dries faster | Needs special equipment, more masking work |
| Roll-On | Easier for beginners, less mess, cheaper | Thicker texture, might miss corners |
Insight: Spray-on liners are great for complex interiors, but roll-on kits are usually enough for most Jeep owners.
Cost Breakdown
Rhino lining your interior yourself is much cheaper than paying a shop, but prices still vary.
| Item | DIY Cost | Professional Cost |
|---|---|---|
| Rhino Liner Kit | $120–$180 | Included |
| Tools & Supplies | $30–$70 | Included |
| Labor | Your time | $400–$800 |
If you’re handy, the savings can be $300 $700. However, a professional job may come with a warranty and a more even finish.
Common Mistakes To Avoid
- Skipping prep: Poor cleaning or sanding leads to peeling.
- Not using enough liner: Thin coats crack or wear fast.
- Rushing reassembly: Liner needs full cure time for best results.
- Ignoring weather: High humidity or low temperatures can affect curing.
Example: A Jeep owner in Florida had to redo the floor because humidity made the liner bubble. Always check the weather forecast before you start.
Maintenance Tips
Rhino lining is tough, but it still needs care:
- Sweep or vacuum dirt regularly.
- Wash with mild soap, not harsh chemicals.
- Inspect for chips after heavy off-road trips.
If you see damage, patch kits are available to fix small areas.
Is Diy Rhino Lining Worth It?
If you enjoy working on your Jeep and want to save money, DIY rhino lining is a practical project. It’s not just about protection; you also gain a sense of pride every time you open your doors. Still, it’s not for everyone.
If you dislike sanding and masking, a professional installer may be a better choice.
For more details about professional Rhino lining, you can visit the official Rhino Linings site.
Frequently Asked Questions
How Long Does It Take To Rhino Line A Jeep Interior?
The whole process usually takes a weekend. Plan for 4 6 hours of work and at least 24 hours for curing before using your Jeep.
Can I Rhino Line Over Rust?
No. Remove all rust and treat affected areas before applying the liner.
Rhino liner does not stop rust and can trap moisture if applied over it.
How Much Rhino Liner Do I Need For A Jeep?
For most two-door Jeeps, one standard kit (1 gallon) is enough for two coats. Four-door models may need a bit more, especially if you want thick coverage.
Does Rhino Lining Add Weight?
Yes, but not much. The added weight is usually 15 25 pounds, depending on thickness and coverage area.
Is Rhino Liner Waterproof?
Yes, once cured, Rhino liner is waterproof and protects against spills, mud, and rain. However, always make sure there are no gaps or missed areas for full protection.
Rhino lining your Jeep interior is a rewarding project when done carefully. With the right tools and patience, you’ll get a durable finish that stands up to adventure and makes cleanup a breeze.