Replacing the rear wheel bearing on a 2004 Jeep Grand Cherokee can feel intimidating, but with the right tools, clear steps, and a bit of patience, it’s very doable—even for beginners. A worn wheel bearing is more than just an annoying noise; it can affect handling, fuel efficiency, and safety.
If you hear a humming or grinding from your rear wheels, or notice uneven tire wear, it’s time to check the bearings. This guide will take you through every step, highlight common mistakes, and offer practical advice to make your repair successful and stress-free.
Signs You Need To Replace Your Rear Wheel Bearing
Recognizing the symptoms early can prevent bigger problems. Watch for these signs:

- Humming or grinding noise from the rear wheels, especially when turning or at higher speeds.
- Uneven tire wear despite correct alignment.
- Vibration through the floor or steering wheel.
- Wheel play (movement when you push/pull the wheel by hand).
- ABS warning light (sometimes triggered by bad bearings).
For the 2004 Jeep Grand Cherokee, these symptoms are quite common as the vehicle ages. Ignoring them can lead to damaged axles or brakes.
Sometimes, the noises might start softly and get worse over weeks or months. It’s easy to confuse a bad bearing sound with tire noise or brake issues, but wheel bearings usually get louder as speed increases and don’t change when braking.
If you’re unsure, try driving at different speeds or gently swerving left and right; a bearing noise often gets louder or quieter depending on which side carries more load.
Tools And Materials You’ll Need
Having the right tools makes the job easier and safer:
- Jack and jack stands (or a hydraulic lift)
- Lug wrench
- Socket set (with breaker bar)
- Torque wrench
- Hammer
- Bearing puller (or slide hammer)
- Punch or drift
- Screwdrivers
- Pliers
- Replacement rear wheel bearing
- Grease (high-temp, automotive)
- Shop rags
- Safety glasses and gloves
Pro tip: If you don’t have a bearing puller, some auto parts stores lend tools for free or a small deposit.
Having extra shop rags and gloves helps keep your workspace clean and protects your hands from sharp edges. A magnetic tray is handy for holding bolts and small parts so nothing gets lost.
If you’re working outside, lay cardboard or a mat under your Jeep to catch dropped tools and make cleanup easier.
Safety First: Preparing Your Jeep
Before you start, safety is crucial:
- Park on a level surface and set the parking brake.
- Chock the front wheels to prevent movement.
- Wear safety glasses—bearings and tools can send debris flying.
If you’re new to working on cars, take your time and don’t rush. Double-check each step before moving to the next.
Double-check that jack stands are locked and stable before crawling under the vehicle. Keep a fire extinguisher nearby if you’re working in a garage, and make sure there’s good ventilation if you’re dealing with brake or axle fluids.
Step-by-step: Removing The Rear Wheel Bearing
1. Lift And Secure The Vehicle
Use your jack to lift the rear of the Jeep. Place jack stands under the frame, never under the axle or suspension arms.
Remove the rear wheel using your lug wrench.
Make sure the Jeep is fully stable before you start removing any parts. Give the vehicle a gentle push to confirm it doesn’t rock or shift. If it moves, reposition the stands.
2. Remove The Brake Assembly
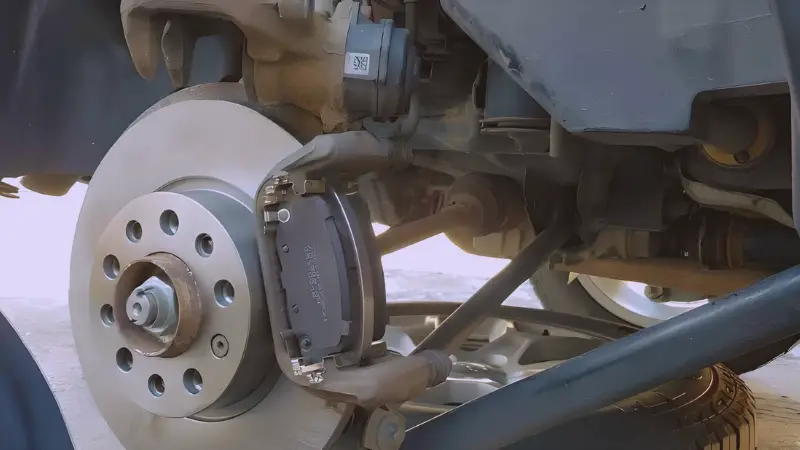
- Take off the brake caliper (usually two bolts).
- Hang it safely with wire—never let it dangle from the brake line.
- Remove the brake rotor. If it’s stuck, tap gently with a hammer.
Sometimes brake rotors become rusted to the hub. If tapping doesn’t work, spray penetrating oil and wait a few minutes.
Avoid prying, which can damage the rotor or hub.
3. Remove The Axle Shaft
- If your Jeep has a solid rear axle (common in Grand Cherokees), you’ll need to open the differential cover.
- Drain the fluid (have a catch pan ready).
- Remove the retaining bolt for the axle shaft.
- Slide the axle shaft out carefully.
Be careful not to damage the axle seals as you remove the shaft. If fluid leaks onto your hands or tools, wipe it up quickly axle fluid is slippery and can make parts hard to grip.
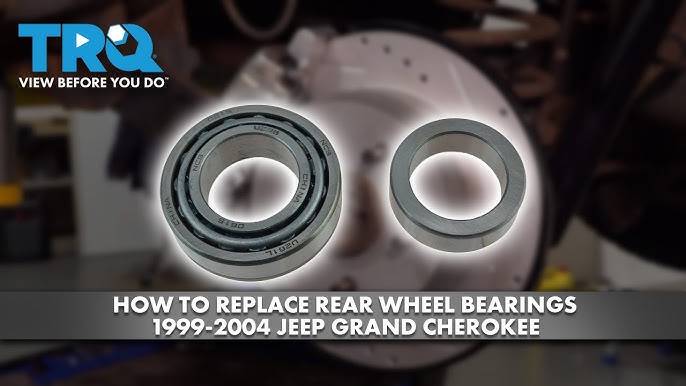
4. Remove The Old Wheel Bearing
- Locate the bearing in the axle tube.
- Use a bearing puller or slide hammer to extract the bearing.
- If stuck, a punch and hammer can help loosen it.
Non-obvious insight: Many beginners forget to check for axle wear at this point. Inspect the axle surface where the bearing sits—deep grooves mean the axle may need replacement.
Check the bearing for signs of overheating, like blue discoloration. If you see this, check your axle and differential fluid level it might indicate past lubrication problems.
5. Clean The Area
Wipe out old grease and debris from the axle tube. This prevents contamination when installing the new bearing.
Use a flashlight to look for leftover bits of metal or old bearing fragments. Removing all debris ensures the new bearing seats properly and lasts longer.
Installing The New Rear Wheel Bearing
1. Grease The New Bearing
Apply a thin layer of high-temp grease to the new bearing. This reduces friction and helps it seat smoothly.
Make sure the grease covers both the inner and outer surfaces. Too much grease can attract dirt, so just a light coating is best.
2. Install The Bearing
- Position the bearing in the axle tube.
- Use a bearing installer (or a socket of matching size) and tap gently until flush.
- Make sure it’s fully seated—uneven installation causes premature failure.
Listen for a change in sound as you tap; when the bearing is fully seated, it will sound solid instead of hollow. Double-check alignment before moving on.
3. Reinstall The Axle Shaft
- Slide the axle shaft back into place.
- Secure with the retaining bolt.
- If you removed the differential cover, clean the gasket surface and replace the gasket.
- Refill with differential fluid (check your owner’s manual for capacity and type).
If your Jeep uses RTV sealant instead of a gasket, apply a thin, even bead and let it cure according to the instructions. Overfilling the differential can cause leaks, so measure fluid carefully.
4. Reassemble The Brake Components
- Reinstall the brake rotor and caliper.
- Tighten bolts to the recommended torque.
If your caliper bolts use thread locker, reapply it before tightening. This helps prevent bolts from working loose over time.
5. Reinstall The Wheel
- Put the wheel back on.
- Lower the Jeep and torque the lug nuts.
Pro tip: Always use a torque wrench for lug nuts—overtightening can warp the brake rotor.
After tightening, re-check the lug nuts after your first test drive. Sometimes they settle and loosen slightly.
Comparing Oem Vs. Aftermarket Wheel Bearings
Choosing the right bearing matters for longevity and performance. Here’s a quick comparison:
| Feature | OEM Bearing | Aftermarket Bearing |
|---|---|---|
| Quality | Consistent, reliable | Varies (some excellent, some poor) |
| Price | Higher | Lower |
| Warranty | Usually longer | Often shorter |
| Availability | Dealership only | Most auto stores |
For most drivers, aftermarket bearings from reputable brands offer good performance and value. Avoid unknown brands—they may fail early.
Another detail: Some aftermarket bearings come pre-greased, while others require you to grease them yourself. Always check instructions to avoid missing this step.
Common Mistakes And How To Avoid Them
Many first-timers make errors that lead to extra work or damage:
- Not cleaning the axle tube: Dirt causes bearing wear.
- Incorrect installation angle: Crooked bearings don’t last.
- Skipping grease: Dry bearings fail fast.
- Using wrong torque: Too loose or tight can ruin parts.
- Forgetting new seals: Always install new axle seals with the bearing.
Non-obvious insight: If the old bearing was noisy, check the wheel hub for scoring or damage. Replacing the bearing alone won’t fix hub problems.
Another mistake: Not checking brake pads and rotors for wear while everything is apart. It’s easier to replace these now than later.
How Long Does A Rear Wheel Bearing Replacement Take?
For a beginner, expect 2 4 hours. Experienced mechanics can finish in about an hour. Take breaks if needed rushing increases mistakes.
If you run into stuck parts, plan extra time for penetrating oil or tool rental. Working slowly and carefully is better than forcing parts and risking damage.
Cost Breakdown: Diy Vs. Professional Repair
Here’s a quick look at the costs:
| Repair Option | Parts Cost | Labor Cost | Total Cost |
|---|---|---|---|
| DIY | $60–$120 | $0 | $60–$120 |
| Professional Mechanic | $60–$120 | $200–$300 | $260–$420 |
Doing it yourself can save you hundreds, but you must work carefully.
Keep in mind: Tool rental fees and extra supplies like brake cleaner or shop towels may add $20–$40 to your DIY cost. Still, you’ll save a lot compared to shop labor.
Practical Tips For Success
- Lay out all tools before starting.
- Take photos of each step—helps with reassembly.
- Label bolts and parts if you’re unsure.
- Don’t force anything—if stuck, double-check instructions.
- Test drive slowly after repair, listening for unusual noises.
If you’re working in poor lighting, use a headlamp or portable light. Clean hands and tools make it easier to spot problems.
Take notes if you notice anything unusual during disassembly.
When Should You Consider Professional Help?
If you encounter:
- Severe rust or seized parts
- Damaged axle shafts
- Unusual noises after reassembly
It’s smart to consult a mechanic. Some repairs need specialized tools.
If you don’t feel confident or lack the right tools, paying for a professional is safer. Mechanics can diagnose hidden issues, like worn hubs or leaking seals, that might be easy to miss.
Recommended Brands And Where To Buy
For the 2004 Jeep Grand Cherokee, Timken, Moog, and SKF are trusted bearing brands. You can find them at local parts stores or online retailers. Always check for warranty and reviews.
For more detailed specs and compatibility, visit Jeep Official Site.
When shopping online, check seller ratings and return policies. Some sites offer bundles that include axle seals and grease, saving you time and money.
What To Expect After Replacement
A successful repair means:
- Smooth, quiet ride
- No wheel play or vibration
- Even tire wear
Monitor your Jeep for a few days. If any issues appear, recheck your installation.
After your test drive, inspect for fluid leaks and check the torque on the lug nuts. Listen for any new noises or vibrations these could signal a missed step or a faulty new bearing.
Frequently Asked Questions
How Do I Know If My Wheel Bearing Is Bad?
You’ll hear a humming, grinding, or rumbling noise from the rear wheel area, especially at speed. You might also feel vibration or see uneven tire wear.
If the noise changes when turning or gets louder with speed, that’s a classic sign. Sometimes, a bad bearing will make the wheel feel loose or wobbly when lifted.
Is It Safe To Drive With A Bad Wheel Bearing?
No. A failing bearing can cause loss of control or wheel detachment. It’s best to repair it as soon as possible.
Driving too long with a bad bearing can damage the axle and brakes, leading to more expensive repairs.
Can I Replace Just One Wheel Bearing, Or Should I Do Both?
You can replace just the bad bearing, but many experts suggest doing both sides if one has failed, especially on older vehicles.
Replacing both bearings ensures balanced performance and reduces the chance of future breakdowns.
What’s The Most Difficult Part Of The Job?
Removing the old bearing is often hardest, especially if it’s seized or rusted. Using a bearing puller and patience helps.
Some bearings require special adapters or extra force. If you don’t have the right tools, ask your parts store or consider professional help.
How Long Should A New Wheel Bearing Last?
A quality bearing should last 80,000–100,000 miles. Cheap bearings may fail sooner, so choose wisely.
Check your Jeep’s service schedule for recommended inspection intervals, especially if you drive in harsh conditions.
Replacing the rear wheel bearing on your 2004 Jeep Grand Cherokee isn’t just a fix—it’s an investment in safety and performance. With careful work and the right parts, your Jeep will run smoother and quieter for thousands of miles to come. If you’re nervous, remember: patience and preparation are your best tools.