Mounting a third brake light on your Jeep is a practical upgrade, especially if you’ve changed to larger tires or want better visibility and safety. Many Jeep owners find their factory third brake light blocked or removed after installing a spare tire carrier or bigger wheels. Without this important light, your Jeep may not meet legal requirements—and you lose a major safety feature. This guide will walk you through everything you need to know: why it matters, what you’ll need, how to do it step by step, common mistakes, and some unique tips few people mention.
Why You Need A Third Brake Light On Your Jeep
The third brake light, often called the center high mount stop lamp (CHMSL), is more than just a legal requirement. It improves your Jeep’s visibility to drivers behind you, reducing the risk of rear-end collisions. In fact, after the US required third brake lights on new cars, rear-end crashes fell by about 5%. For Jeeps with a rear-mounted spare tire, the original light often gets blocked or removed. A missing third brake light can get you pulled over, fail inspections, or—worse—lead to accidents.
Choosing The Right Third Brake Light Kit
Not all third brake light kits are the same. Here’s what to consider before buying:
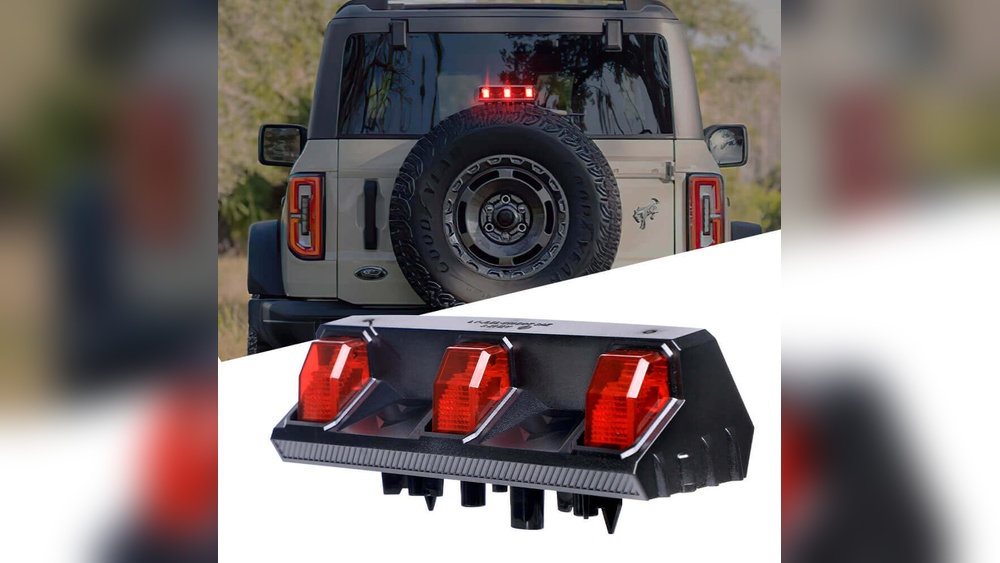
Compatibility
Check if the kit is designed for your Jeep model and year (e.g., Wrangler JK, JL, TJ). Some kits fit only certain tire carriers or wheels.
Mounting Style
Common types include:
- Spare tire ring mount: Attaches behind the spare tire
- Bolt-on bracket: Mounts to the tire carrier or tailgate
- Integrated wheel lights: LEDs that shine through wheel spokes
Lighting Type
Most modern kits use LEDs for brightness and long life. Some still use halogen bulbs, but LEDs are a better choice for off-road vehicles.
Adjustability
Can you move the light up or down to fit different tire sizes? Adjustable kits are more flexible if you change wheels often.
Weather Resistance
Look for waterproof and dustproof ratings (like IP67). Off-roading exposes your Jeep to mud and rain, so durability is important.
Here’s a simple comparison of common mounting options:
| Mount Style | Pros | Cons |
|---|---|---|
| Spare Tire Ring | Easy to install, fits most wheels | May block some wheel designs |
| Bolt-on Bracket | Sturdy, adjustable height | Takes more time to install |
| Integrated Wheel LEDs | Modern look, very visible | Not compatible with all wheels |

Tools And Materials You’ll Need
Before you start, gather these items:
- Third brake light kit (make sure it fits your Jeep and wheel/tire setup)
- Basic hand tools: Socket set, screwdrivers, wrenches
- Wire strippers and crimpers
- Electrical tape or heat-shrink tubing
- Zip ties for neat wiring
- Torx bits (many Jeep bolts use Torx heads)
- Drill (sometimes needed, but many kits are no-drill)
- Test light or multimeter (to check electrical connections)
Step-by-step: How To Mount Your Jeep’s Third Brake Light
Ready to begin? Here’s the full process, broken down for clarity.
Most Jeep owners can do this in about 1 2 hours.
1. Remove The Spare Tire
Start by taking the spare tire off the tailgate. Most Jeeps use three lug nuts.
This gives you full access to the mounting area.
2. Disconnect The Old Third Brake Light (if Present)
If your Jeep still has the factory third brake light:
- Unplug the wiring harness behind the tire carrier.
- Remove any screws or bolts holding it in place.
- Set aside the hardware if you’ll reuse it.
3. Test Fit The New Light
Before wiring anything, hold the new third brake light in position. Make sure:
- It lines up with the spare tire mount.
- The light will be clearly visible above or through the spare tire.
- The wiring reaches your Jeep’s brake light circuit.
4. Mount The Bracket Or Led Ring
Depending on your kit:
- For a spare tire ring, slide the ring over the mounting studs.
- For a bolt-on bracket, use supplied hardware to attach it to the tire carrier.
- For LED wheel lights, follow the instructions to secure them (often using the wheel studs).
Tighten all bolts evenly. If the kit uses spacers for big tires, install them now.
5. Route The Wiring
Route the new brake light wires along the tire carrier and into the tailgate. Use zip ties to keep wires away from moving parts. For most kits:
- Follow existing wiring paths for the factory light.
- Use factory grommets or rubber plugs to avoid sharp metal edges.
Here’s a quick comparison of common wiring methods:
| Wiring Method | Pros | Cons |
|---|---|---|
| Plug-and-play | Fast, no splicing, less error | Only fits certain models |
| Splice into factory wires | Works with any kit | Requires careful connection |
| Separate circuit | Custom setups possible | More complex wiring |
6. Connect The Wiring
- For plug-and-play kits, simply connect to the factory harness.
- For kits needing a splice, use wire strippers to expose the brake light wire (usually white with a green or yellow stripe, but check your manual).
- Crimp the connectors or solder, then seal with tape or heat-shrink tubing for weather protection.
7. Test The Third Brake Light
Before reinstalling the spare tire, have a friend press the brake pedal or use a heavy object. The new light should turn on brightly. If not:
- Double-check wiring connections.
- Inspect the fuse (usually labeled CHMSL in your fuse box).
- Use a test light or multimeter to confirm power.
8. Reinstall The Spare Tire
Once the light works, put the spare tire back on. Check that the new brake light is fully visible through or above the wheel. Adjust the bracket or ring if needed.
9. Tidy Up
Use zip ties to secure any loose wires. Make sure nothing can rub or get pinched when you close the tailgate.

Tips And Tricks Most People Miss
- Adjust for Tire Size: If you change to even larger tires later, remember you may need to move the light up or out for visibility.
- Check State Laws: Some states require the third brake light to be fully visible from a certain distance (usually 300 feet). Double-check your setup.
- Add Quick-Disconnects: If you often remove your spare tire (for off-roading or repairs), use quick-disconnect plugs in the wiring for easy removal.
- Waterproof All Connections: Even if your kit says “weatherproof,” adding extra heat-shrink tubing or dielectric grease can prevent corrosion.
- Use Factory Grommets: Avoid drilling new holes if possible—using factory holes and grommets keeps things looking neat and avoids leaks.
Common Mistakes To Avoid
Many Jeep owners make simple errors when installing a third brake light. Here’s what to watch out for:
- Not checking visibility: After mounting, step far behind your Jeep and see if the light is blocked by the tire or wheel spokes.
- Loose wiring: Dangling wires can get caught and damaged when off-roading.
- Skipping weatherproofing: Even small gaps can let in water, leading to electrical problems over time.
- Wrong wiring connection: Connecting to the wrong wire means your light won’t work. Double-check your Jeep’s wiring diagram.
- Over-tightening bolts: This can strip threads or crack plastic parts.
Real-world Example: Installing On A Jeep Wrangler Jk
Let’s look at a practical example. Alex owns a 2015 Jeep Wrangler JK with 35-inch tires.
His factory third brake light was hidden behind the new wheel.
He picked an LED ring kit. Here’s what he did:
- Removed the spare tire using a 19mm socket.
- Mounted the LED ring on the factory studs.
- Routed the wiring through the factory grommet.
- Used crimp connectors and heat-shrink tubing to splice into the existing brake light wire.
- Tested the light before putting the tire back on.
- Adjusted the light upward for full visibility.
Alex finished in about 90 minutes. The new light is much brighter, and he passed state inspection with no issues.
Maintenance And Troubleshooting
Even after a perfect install, problems can occur. Here are common issues and fixes:
- Light not working: Check fuse, wiring, and connections. Sometimes the issue is just a loose ground.
- Dim light: Might be a poor connection or low-quality LED. Clean contacts and check voltage.
- Flickering: Usually a sign of a loose wire or water in the connector.
- Corrosion: Clean with contact cleaner and add dielectric grease to prevent future issues.
Regularly check your third brake light every time you rotate tires or wash your Jeep.

Cost Of Installing A Third Brake Light
Here’s a quick look at what you might spend:
| Component | Typical Cost (USD) |
|---|---|
| Third Brake Light Kit | $40–$120 |
| Basic Tools (if not owned) | $20–$50 |
| Professional Installation | $50–$150 |
Most Jeep owners do the job themselves, but a shop can install it if you’re not comfortable with wiring.
Where To Buy Quality Third Brake Light Kits
You can find third brake light kits at major auto parts stores, 4×4 specialty shops, or online. Look for brands with good reviews and clear instructions. For more in-depth product comparisons, the Consumer Reports website offers reliable advice.
How Do I Know If My Third Brake Light Is Working?
Have a friend stand behind your Jeep while you press the brake pedal, or back up to a wall at night to see the reflection. The light should be bright and steady.
Can I Use My Old Third Brake Light With Bigger Tires?
Often, no. The factory light is usually too low or blocked by larger tires.
Some kits let you reuse the stock light by raising it, but most people upgrade to an LED ring or bracket.
Is It Legal To Drive Without A Third Brake Light?
In most US states, it’s not legal. The third brake light is required on vehicles made after 1986.
You could get a ticket or fail inspection without it.
Do I Need Special Tools To Install A Third Brake Light?
Most kits only need basic hand tools: sockets, wrenches, screwdrivers, and wire strippers. Some kits may need a drill, but many are no-drill.
Will Installing A Third Brake Light Drain My Battery?
No, the light only turns on when you press the brakes. Modern LED lights use very little power and have almost no effect on battery life.
Mounting a third brake light on your Jeep is a smart upgrade for both safety and style. With the right kit and careful installation, you’ll enjoy better visibility and peace of mind on every adventure.