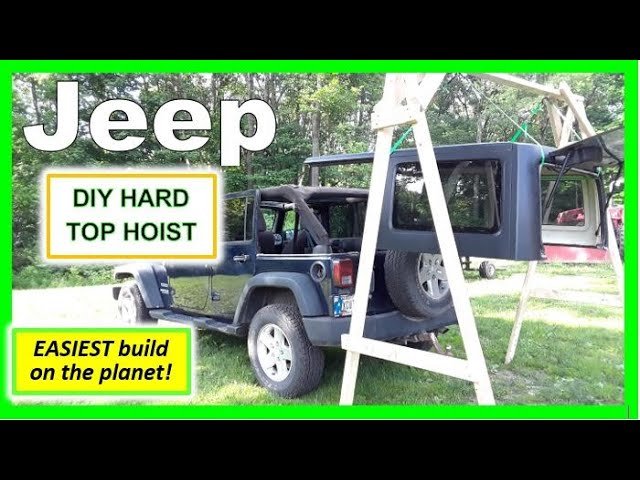
Many Jeep owners love the freedom of removing their Jeep hardtop for open-air drives. But if you’ve ever tried to take off a hardtop by yourself, you know it’s not easy. Jeep hardtops are heavy and awkward to move. Lifting it alone can risk damage or injury. That’s why building a DIY hardtop lift is a smart upgrade for your garage. With the right lift, you can safely remove and store your Jeep’s hardtop any time you want—without help.
This guide will show you exactly how to make a lift for your Jeep hardtop. You’ll learn what materials to buy, step-by-step building instructions, safety tips, and how to use your new lift.
Whether you drive a Wrangler JL, JK, or older model, this project can save your back and your hardtop for years to come.
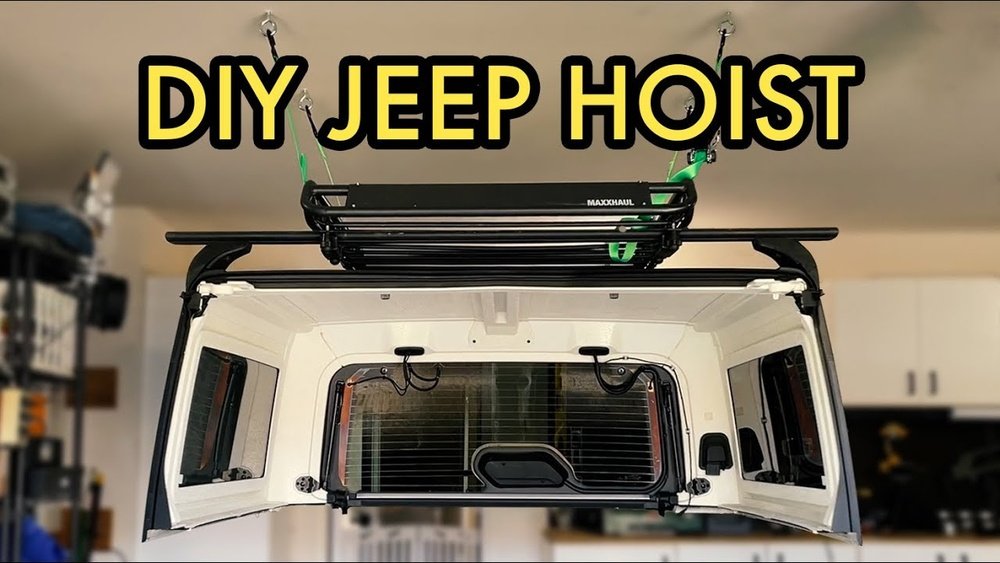
Why Build A Hardtop Lift?
Before starting, it’s important to understand the benefits. Many Jeep owners try to muscle the hardtop off or use makeshift solutions. But a proper lift offers:
- Safety: No more straining your back or risking dropping the hardtop.
- Convenience: Remove or reinstall the top in minutes, even by yourself.
- Storage: Keep your hardtop out of the way, suspended and protected.
- Cost savings: DIY lifts cost less than commercial hardtop hoists.
A well-built lift also helps you avoid common mistakes, like damaging the hardtop’s seals or scratching the paint.
Types Of Jeep Hardtop Lifts
There are several ways to build a Jeep hardtop lift. The most popular options are:
- Manual pulley hoist – Uses ropes or cables and pulleys to manually raise and lower the hardtop.
- Electric hoist system – Uses an electric winch for easy lifting at the press of a button.
- Overhead frame with winch – A sturdy frame holds a manual or electric winch and supports the hardtop.
The best option depends on your garage, budget, and how often you remove your hardtop.
Comparing Lift Types
To help you choose, here’s a comparison of the three main types:
| Lift Type | Cost | Skill Needed | Ease of Use | Garage Fit |
|---|---|---|---|---|
| Manual Pulley Hoist | Low | Basic DIY | Moderate | Most garages |
| Electric Hoist System | Medium–High | Moderate DIY, wiring | Easy | Needs power outlet |
| Overhead Frame & Winch | Medium | Intermediate DIY | Easy | Larger garages best |
For this guide, we’ll focus on the manual pulley hoist. It’s affordable, safe, and works in nearly any garage.
Materials And Tools Needed
Building a hardtop lift doesn’t require special tools. Here’s a complete list for a manual pulley hoist:
Materials
- 4 heavy-duty pulleys (rated for at least 200 lbs each)
- Braided nylon or steel cable (30–40 feet, rated for 300 lbs)
- 2 ceiling hooks or eye bolts (for joist mounting)
- 1 locking boat cleat (to secure the rope/cable)
- 4 padded straps or ratchet straps (to cradle the hardtop)
- 2 carabiners (locking, climbing-rated)
- Lag bolts (for securing hardware to joists)
- Optional: Scrap wood or pool noodles (for extra padding)
Tools
- Cordless drill
- Socket wrench
- Stud finder
- Tape measure
- Ladder
- Pencil
- Safety glasses
Cost Estimate
Here’s a simple cost breakdown for the DIY pulley hoist:
| Item | Estimated Cost (USD) |
|---|---|
| Pulleys (4) | $24 |
| Nylon/steel cable | $15 |
| Ceiling hooks/eye bolts | $12 |
| Boat cleat | $7 |
| Straps | $20 |
| Carabiners | $10 |
| Lag bolts | $5 |
| Total | $93 |
You may already have some items at home, so your actual cost could be lower.
Step-by-step Instructions: Building Your Jeep Hardtop Lift
Follow these steps to build a strong, reliable lift for your Jeep hardtop.
1. Find The Right Ceiling Location
Use a stud finder to locate the ceiling joists in your garage. Your lift must mount into solid wood, not just drywall. Mark two points about 4 feet apart (wider than your hardtop’s width).
2. Install Ceiling Hardware
Drill pilot holes, then screw in the eye bolts or hooks directly into the joists at your marked points. Use a socket wrench to make sure they’re tight. These will hold the main pulleys and bear all the weight.
3. Attach The Pulleys
Thread your pulleys onto the eye bolts. Make sure the pulleys hang straight down and can spin freely. If using additional pulleys for mechanical advantage, mount them as needed.
4. Prepare The Cable Or Rope
Cut your nylon rope or steel cable to size. Thread one end through the pulleys, creating a “V” shape with both ends hanging down. Make sure the cables are long enough to reach the hardtop when the Jeep is parked under the lift.
5. Add Straps And Carabiners
Attach padded straps to the ends of each cable. Use carabiners for quick and secure connection. The straps will loop under the hardtop, cradling it safely when lifting.
6. Install The Locking Cleat
Mount your boat cleat to the wall at a comfortable height. You’ll wrap the loose end of the rope around this cleat to lock the hardtop in the raised position.
7. Test The System Empty
Before lifting your hardtop, test the system with some weight like a bag of sand. Slowly pull the rope to lift the weight, checking that all hardware holds firm and nothing slips.
8. Lift Your Jeep Hardtop
With the Jeep parked under the lift, loop the straps under the hardtop (one near the front, one near the back). Double-check that straps are secure, centered, and padded to avoid scratches.
Pull the rope slowly and evenly. The hardtop should rise smoothly.
Once it’s high enough, tie off the rope at the cleat. Make sure the hardtop hangs level and doesn’t swing.
9. Roll The Jeep Out
With the hardtop suspended, carefully drive your Jeep out from under it. Your hardtop now hangs safely in the garage, ready for reinstalling when needed.
Safety And Practical Tips
Building your own hardtop lift is straightforward, but safety is crucial. Here are important tips:
- Always double-check that all hardware is rated for at least double the hardtop’s weight (most Jeep hardtops are 140–150 lbs).
- Inspect the system before every use for any wear or damage.
- Keep children and pets clear while lifting or lowering the hardtop.
- Never walk under the hardtop while adjusting the cables.
- If you’re unsure about ceiling strength, consult a contractor before installing.
Two Non-obvious Insights
- Padding is critical: Many beginners skip padding where straps contact the hardtop. Even soft straps can leave marks or scratches over time. Pool noodles or foam pipe insulation make excellent, cheap padding.
- Balance matters: If the straps are not spaced evenly, the hardtop can tilt dangerously when lifted. Always measure strap placement before lifting, and adjust as needed.
Using And Storing Your Hardtop Safely
Once your lift is built, using it becomes easy. Lower the hardtop when you want to reinstall it.
Make sure the Jeep is parked precisely under the hardtop before lowering. If the hardtop is stored for months, cover it with a soft cloth or tarp to protect from dust and sunlight.
If you want extra security, consider adding a secondary safety strap that anchors to a different ceiling point. This backup can prevent accidents if a main cable or hook fails.
Common Mistakes And How To Avoid Them
Many Jeep owners make simple errors when building or using a hardtop lift:
- Using undersized hardware that can’t support the weight.
- Forgetting to check for studs—mounting into drywall alone is unsafe.
- Not padding straps, leading to paint damage.
- Lifting too quickly or unevenly, which stresses the hardtop.
The best way to avoid these mistakes is to take your time, measure carefully, and always test the system before putting your hardtop at risk.
Upgrades And Alternatives
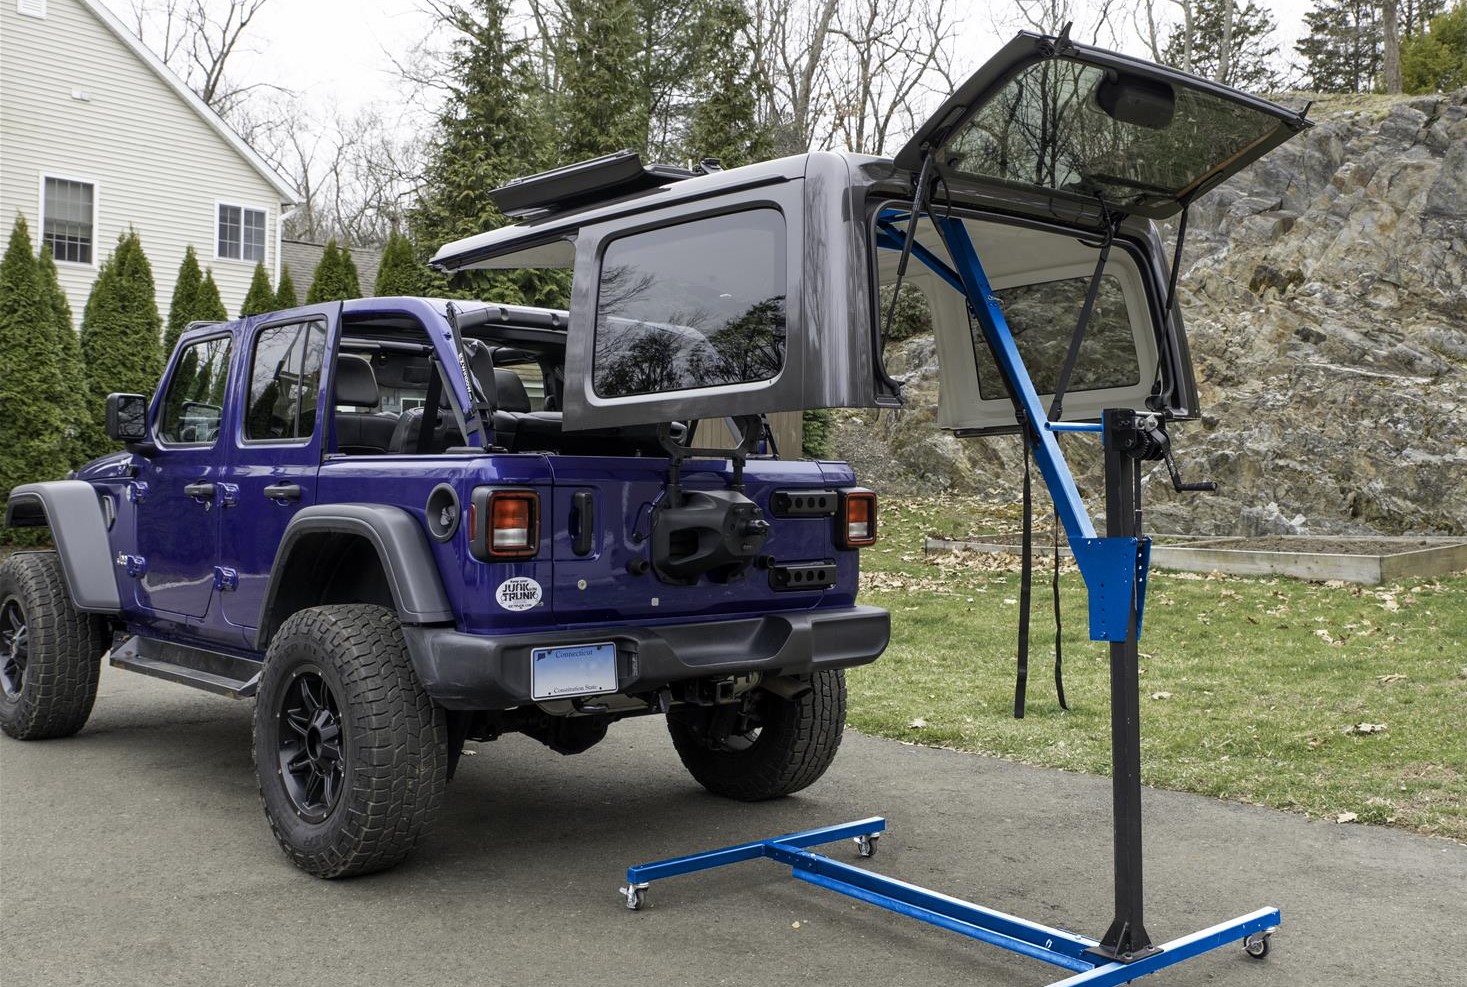
If you want an easier lift, you can upgrade to an electric hoist. These cost more but let you raise and lower the hardtop with a switch. Some Jeep owners build a custom steel frame for even more strength and stability, especially in large garages.
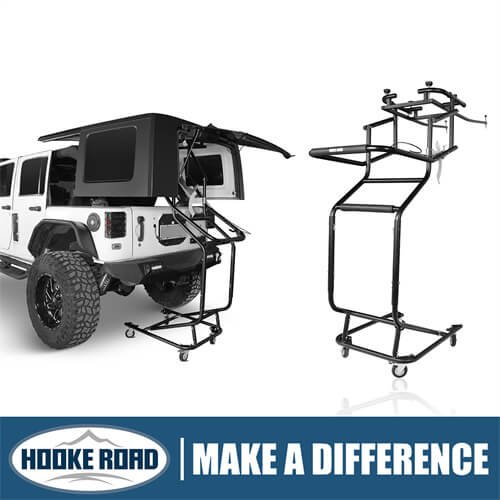
Ready-made hardtop hoist kits are also available from brands like Harken and Lange Originals. These kits include all hardware and clear instructions but cost $150–$400. If you want a quick solution and don’t mind the price, a commercial kit can be a good investment.
For more on professional kits, see this Quadratec guide on Jeep hardtop hoists.
Frequently Asked Questions
How Much Weight Can A Diy Hardtop Lift Hold?
A well-built pulley hoist using proper hardware can safely lift up to 200–300 lbs. Most Jeep hardtops weigh 140–150 lbs. Always use hardware rated for at least twice the expected weight for safety.
Can I Use A Bike Hoist Or Kayak Hoist For My Jeep Hardtop?
Bike/kayak hoists are not designed for the size and weight of a Jeep hardtop. Their hardware and straps may fail.
Always use gear rated for heavy, wide loads, and check specifications carefully before adapting other systems.
Will A Diy Hardtop Lift Damage My Hardtop Or Paint?
If you use padded straps and keep straps away from sharp edges, your hardtop should not be damaged. Always add extra padding and check for pressure points after the first lift. Never lift by glass or unsupported sections.
Do I Need To Reinforce My Garage Ceiling?
Most garages with wood joists can support a hardtop lift. However, older homes or garages with thin joists may need reinforcement.
If unsure, consult a contractor or engineer before installing your lift.
How Long Does It Take To Build And Install A Hardtop Lift?
Most DIYers complete the project in 2–3 hours. Gathering materials and planning placement usually takes the most time. With all tools and hardware ready, actual installation is quick and straightforward.
Final Thoughts
Building a Jeep hardtop lift transforms the way you enjoy your Jeep. No more asking for help or worrying about storage your hardtop is safely out of the way, ready whenever you need it.
With careful planning and the right materials, you can complete this project in one afternoon.
Remember to double-check safety, use proper padding, and test before lifting your hardtop for the first time. Small investments in a safe DIY lift pay off every summer when you swap between open-air freedom and your weatherproof hardtop with ease.