If you own a Jeep XJ (Cherokee), you may want better lighting for trails or night driving. One of the most popular upgrades is adding lower windshield light brackets. These brackets let you mount LED pods or small spotlights near your windshield, improving visibility and safety. But installing them can seem confusing if you’ve never done it before. This guide will walk you through the process with clear steps, real examples, and practical advice—so you can get the job done even if you’re not a pro mechanic.
Why Install Lower Windshield Light Brackets?
Adding lower windshield light brackets isn’t just about looks. Here’s why Jeep XJ owners choose this upgrade:
- Improved Night Vision: Extra lights help you see animals, rocks, or mud on dark trails.
- Better Side Illumination: Windshield lights cover areas your headlights miss, making it safer to turn or spot obstacles.
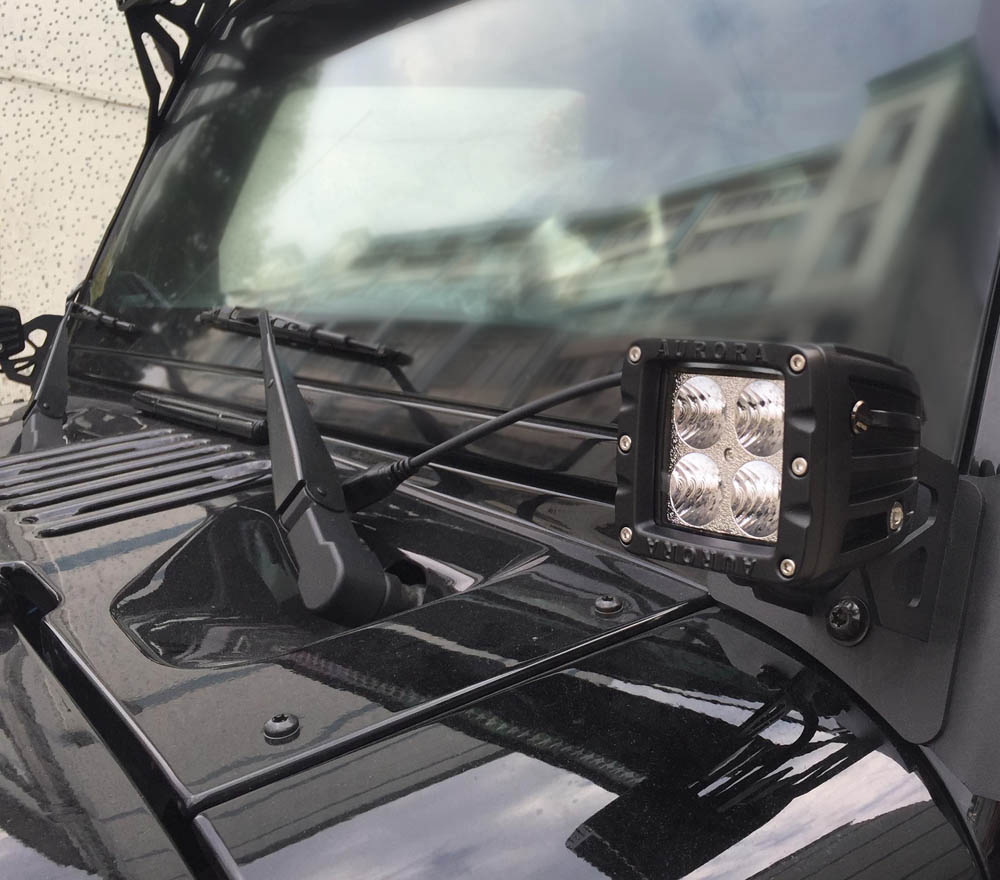
- Easy Mounting: Most brackets use factory bolts, so you avoid drilling into your Jeep’s body.
- Custom Options: You can choose from many types of lights—LED pods, cubes, or mini bars—to fit your style.
Most beginners don’t realize that these brackets also keep wires neat and safe from damage, since they’re mounted high and close to the cabin.
What You Need Before You Start
Preparation is key to a smooth installation. Make sure you have these items ready:
Parts:
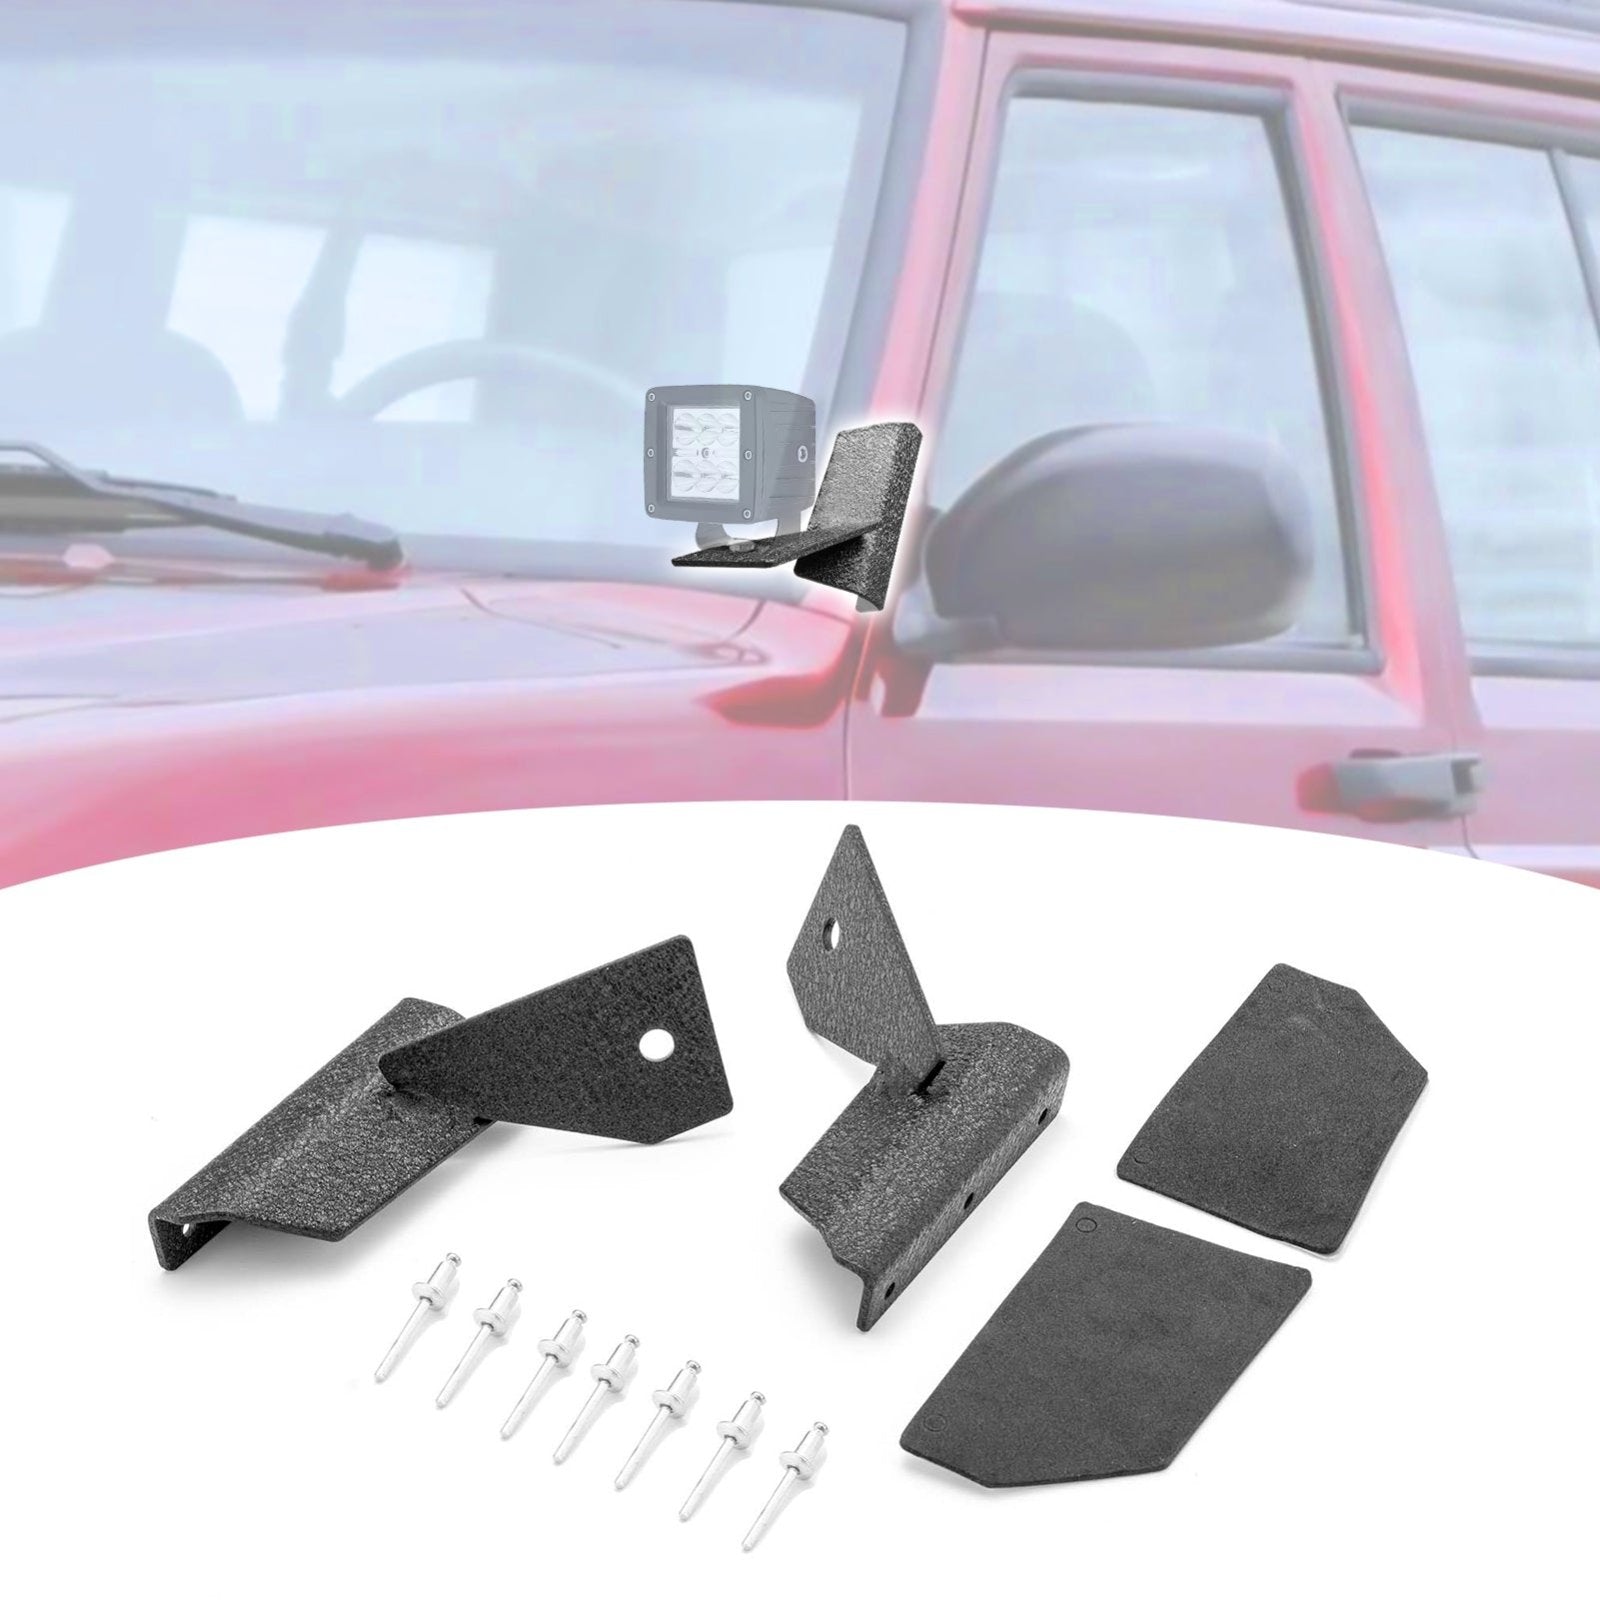
- Lower windshield light brackets (specifically for Jeep XJ, 1984–2001)
- Compatible LED pods or spotlights (2 units)
- Light wiring harness (with relay and switch)
- Rubber grommets (to protect wires passing through metal)
- Stainless steel mounting hardware (if not included)
Tools:
- 10mm and 13mm socket wrenches
- Phillips screwdriver
- Trim removal tool (plastic preferred)
- Electrical tape or heat-shrink tubing
- Drill with small metal bit (sometimes needed)
- Zip ties
- Torx bit set (T-25 and T-30)
- Safety glasses and gloves
Tip: Some kits come with all needed bolts and washers, but always double-check before starting. Running to the hardware store mid-install can be frustrating.
Choosing The Right Brackets And Lights
Not all brackets and lights are the same. Here’s a comparison of popular choices for Jeep XJ owners:
| Bracket Brand | Material | Finish | Price Range | Warranty |
|---|---|---|---|---|
| Rugged Ridge | Steel | Black powder coat | $35–$50 | 5 years |
| KC HiLiTES | Stainless steel | Gloss black | $50–$70 | 23 years |
| RT Off-Road | Steel | Satin black | $30–$45 | 1 year |
Non-obvious tip: Some brackets are thicker and less prone to vibration, which reduces light “shaking” when driving off-road. Thinner brackets are cheaper but may flex more.
When choosing lights, check the wattage and beam pattern. Spot beams throw light far ahead, while flood beams cover more area close to your Jeep. For most off-roaders, a flood or combo beam works best on the lower windshield.
Step-by-step Installation Guide
Step 1: Prepare Your Jeep
- Park on level ground.
- Turn off the engine and remove the keys.
- Open the hood and disconnect the negative battery terminal (safety first).
- Put on your safety glasses and gloves.
Step 2: Remove The Cowl Screws
- Find the black plastic cowl panel at the base of your windshield.
- Use a T-30 Torx bit to remove the outermost screws on both driver and passenger sides.
- If your Jeep has a roof rack or accessories, check if they block access—remove them if needed.
- Keep screws in a small tray so you don’t lose them.
Beginner mistake: Some people remove all cowl screws. Only the outermost ones are needed for most bracket types. Removing the whole cowl can make reinstalling it tricky.
Step 3: Test-fit The Bracket
- Hold the bracket in place, lining up the mounting holes with the screw holes you just exposed.
- Check for clearance around the door and windshield. The bracket should not touch the glass or rub when you open the door.
- Mark any areas that might need adjustment.
Extra insight: Some brackets are not perfectly symmetrical. Mark left and right sides to avoid confusion.
Step 4: Install The Bracket
- Place the bracket over the cowl, aligning holes.
- Insert the factory Torx screw through the bracket and into the original hole. Start by hand to avoid cross-threading.
- Tighten the screw using your Torx bit. Do not overtighten—over-torquing can strip the hole.
- If your kit includes extra bolts, install them now, following the included instructions.
Pro tip: Add a small dab of anti-seize compound to bolts if you live in a rust-prone area. This makes future removal easier.
Step 5: Mount The Lights
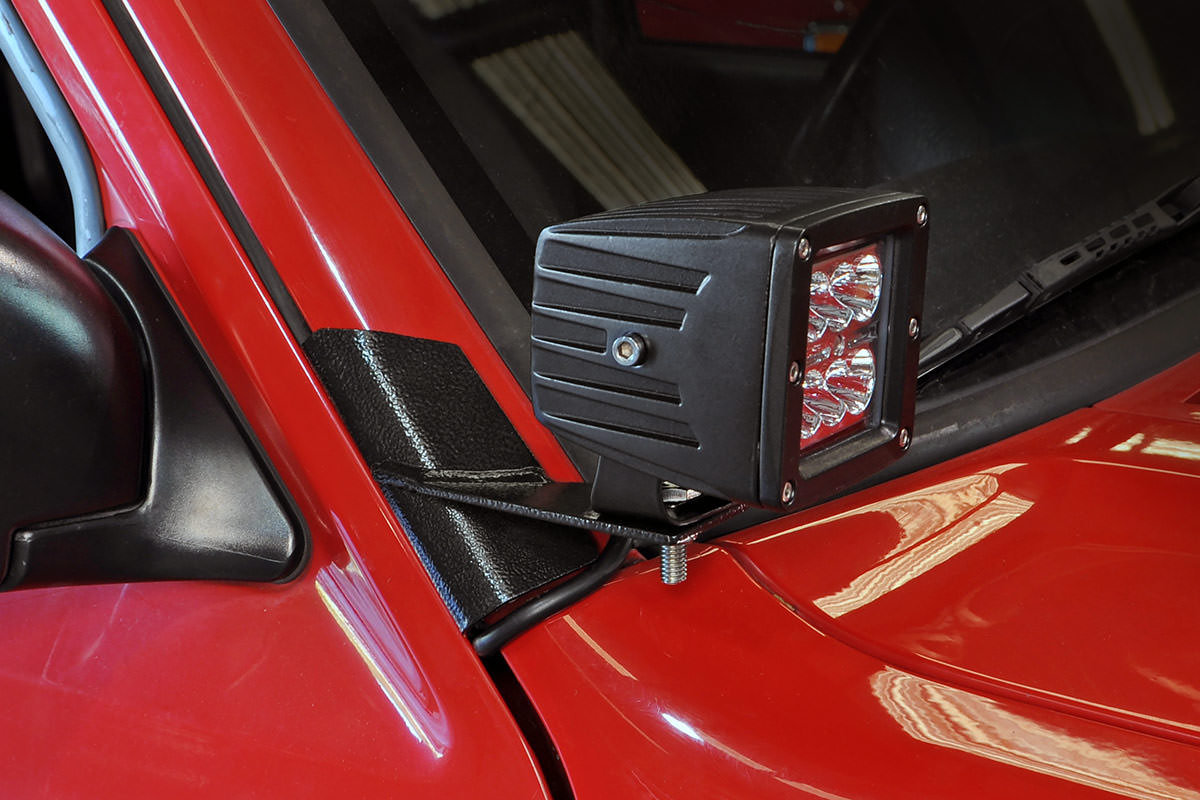
- Attach each LED pod or spotlight to the bracket using the supplied hardware.
- Adjust the lights to your preferred angle but do not fully tighten yet.
- Once both lights are mounted, step back and check alignment.
- Tighten all bolts securely.
Common error: Forgetting to snug the bolts after adjusting can cause the lights to rotate or fall out while driving.
Step 6: Run The Wiring
- Route the light wires under the hood, following factory wiring paths when possible.
- Use rubber grommets if you need to pass wires through metal to prevent cutting.
- Secure wires with zip ties every 8–12 inches to prevent movement.
- Connect the harness relay to the battery positive terminal, and ground to a clean, unpainted bolt.
- Run the switch wire through the firewall grommet and mount the switch inside your cabin.
Important: Keep wires away from hot engine parts and sharp edges. Check for moving parts like wipers before finalizing wire paths.
Step 7: Test The Lights
- Reconnect your Jeep’s battery.
- Turn on the switch and check both lights. Ensure they turn on and off cleanly.
- If one or both lights do not work, check your ground connection and fuse.
- Adjust the lights for the best beam pattern, then fully tighten all fasteners.
Unexpected lesson: Sometimes, cheap light pods come with weak connectors. If you notice flickering, try replacing connectors with higher-quality ones for better reliability.
Comparing Light Output: Stock Vs. Aftermarket
To see the difference, here’s a look at typical light output before and after installing windshield lights.
| Lighting Setup | Lumens (Approx.) | Beam Pattern | Coverage |
|---|---|---|---|
| Factory Headlights Only | 1,200–1,500 | Low/High | Straight ahead |
| Headlights + Windshield Flood Pods | 4,000–6,000 | Combo (spot + flood) | Wide, left/right and ahead |
Result: Lower windshield lights can more than triple your usable light on the trail, especially at low speeds or when making sharp turns.
Maintenance And Long-term Tips
- Check brackets and bolts every few months. Off-road vibrations can loosen hardware.
- Clean your lights with a soft cloth after muddy rides—dirt can block light output.
- Inspect wiring for damage, especially if you drive in brushy areas.
- Apply anti-corrosion spray to bolts if you live in wet climates.
Many owners forget that rubber gaskets under the bracket base can crack or wear out. Replacing them every few years can prevent rust and leaks.
Troubleshooting Common Problems
Light Flickering Or Not Turning On
- Check all connections for tightness.
- Inspect the fuse in your harness. Replace if blown.
- Test the ground wire—bad grounding is a frequent issue.
Water Leaks After Installation
- Make sure all screws are tight and grommets are in place.
- Add a thin bead of silicone sealant if you see leaks around the bracket base.
Excessive Light Vibration
- Use thicker brackets if possible.
- Add rubber washers between the bracket and body to absorb shocks.
Legal And Safety Notes
Some states have rules about auxiliary lighting. Check your local laws—some require covers on lights when driving on public roads. Always aim your lights so they don’t blind oncoming drivers. Proper adjustment keeps you legal and courteous.
When To Get Professional Help
If you’re not comfortable with wiring or drilling, consider visiting a 4×4 shop. Pros can finish the job fast and ensure a clean, safe install.
This is especially wise if your Jeep has custom accessories or modified fenders.
How Long Does It Take To Install Lower Windshield Light Brackets On A Jeep Xj?
For most DIYers, the job takes 1.5 to 3 hours. Beginners may need extra time for careful wiring and aligning the lights.
Do I Need To Drill Holes In My Jeep Xj To Install These Brackets?
Most quality brackets use existing factory holes, so no drilling is required. Rarely, cheaper kits may need a small hole for extra support—but this is not common.
What Size Lights Should I Use With These Brackets?
Most brackets fit 3-inch to 4-inch LED pods or cubes. Check your bracket specs to confirm. Avoid oversized lights, as they can block your view or hit the hood.
Will Installing These Brackets Cause Rust?
If installed correctly with stainless hardware and rubber gaskets, rust risk is low. Apply a dab of anti-seize and keep the area clean to prevent rust.
Where Can I Find More Info Or Wiring Diagrams?
Official Jeep forums and manufacturer sites often have guides. For technical info, visit JeepForum—a trusted resource for XJ owners.
Upgrading your Jeep XJ with lower windshield light brackets is one of the best mods for safety and style. With the right parts, tools, and a bit of patience, you’ll have improved visibility for years to come. Take your time, follow each step, and enjoy the brighter trails ahead.