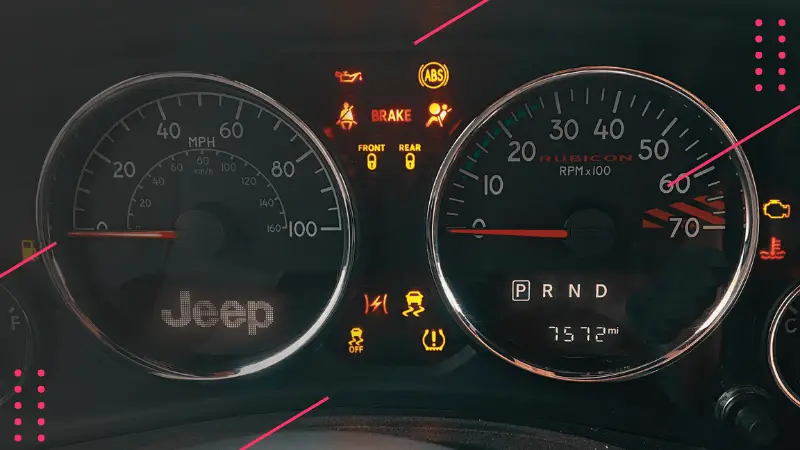
A “No Bus” message on a Jeep usually means one or more control modules have stopped communicating over the vehicle’s data network.
On older Jeep models, this may involve the CCD or PCI bus. The problem may come from low battery voltage, a poor ground, damaged wiring, a failed instrument cluster, or a control module pulling the communication circuit down.
Do not replace the PCM immediately. Start with the battery, power feeds, grounds, fuses, and scan-tool communication.

Then isolate wiring or module faults using the correct service information for your Jeep model and year.
What Does “No Bus” Mean on a Jeep?
Your Jeep uses a communication network to share information between electronic modules. Depending on the model year, the network may connect the powertrain control module, transmission control module, instrument cluster, ABS controller, airbag controller, body controller, and other systems.
When the cluster cannot receive expected data, the odometer display may show:
no bus
The message does not identify one failed part. It tells you the communication path is interrupted or one module is no longer responding.
This distinction matters. Replacing random parts often wastes money because a damaged wire, weak battery connection, or one shorted module may create the same warning.
Common Symptoms
A Jeep with a bus communication fault may show one symptom or several symptoms at the same time.
Typical signs include:
- “No Bus” displayed in the odometer area
- Gauges dropping to zero
- Warning lights appearing together
- The speedometer or tachometer stops intermittently
- Check engine light remains on
- Airbag or ABS warning light appears
- Scan tool failing to communicate with one or more modules
- Crank-no-start condition on some vehicles
- Engine starting and then shutting off on vehicles with immobilizer-related communication loss
The exact symptom pattern helps narrow the problem.
If every gauge stops and several modules disappear from the scan tool, suspect a shared network, power, or ground problem.
If only one module stops responding while the rest remain accessible, focus on that module, its wiring, and its power supply.
Most Common Causes
1. Weak Battery or Poor Battery Connections
Start with the battery before checking modules.
A weak battery, loose terminal, or corroded cable may create unstable voltage during key-on or cranking. Electronic modules need stable power to communicate correctly.
Check:
- Battery resting voltage
- Battery terminal tightness
- Corrosion on both terminals
- Negative cable connection at the engine and body
- Positive cable condition
- Voltage drop during cranking
A fully charged 12-volt battery usually measures about 12.6 volts with the engine off. If voltage collapses during cranking, charge and test the battery before continuing.
2. Bad Grounds
Poor grounds often create intermittent electrical problems.
Inspect the main battery ground cable first. Then check the engine-to-body and body-to-chassis ground points listed in the service manual for your exact model.
Look for:
- Loose fasteners
- Rust
- Paint under a ground eyelet
- Damaged cable strands
- Previous repair work
- Water intrusion
- Green or white corrosion inside connectors
Do not rely on visual inspection alone. A cable may look acceptable outside, while corrosion increases resistance inside the insulation.
3. Blown Fuse or Lost Module Power Feed
A module that loses power or ground may stop communicating even when the data wire is intact.
Check the fuse box diagram for your model year. Inspect fuses related to:
- PCM
- TCM
- Instrument cluster
- ABS module
- Airbag module
- Body control module
- Ignition switch output
- Power distribution center
Use a test light or multimeter. Do not rely only on looking through the fuse window.
4. Damaged Bus Wiring
Older Jeep networks may use a twisted pair of communication wires or a single data wire, depending on the vehicle.
A communication failure may result from:
- Wire shorted to ground
- Wire shorted to the power
- Open circuit
- Pinched harness
- Corroded connector
- Water-damaged splice
- Poor repair from an alarm, stereo, remote starter, or accessory installation
Inspect areas where harness damage is more likely:
- Behind the instrument cluster
- Around the steering column
- Near the battery tray
- Close to the fuse box
- Through firewall pass-through points
- Under the carpet after water leaks
- Around aftermarket wiring
Do not pierce random wires without a wiring diagram. Use the correct pinout for the vehicle.
5. Instrument Cluster Connector or Cluster Fault
Some Jeep owners see intermittent gauge loss, warning lights, or a “No Bus” display while the engine still runs.
In this situation, inspect the instrument-cluster connectors and wiring carefully. Look for loose pins, oxidation, damaged terminals, or poor connector seating.
A scan tool helps separate a cluster fault from a total network fault:
- If other modules communicate normally, the cluster circuit or cluster becomes a stronger suspect.
- If no modules communicate, look for a shared bus, power, or ground problem first.
6. One Module Pulling the Network Down
A failed control module may short the communication circuit and block other modules from talking.
Possible modules vary by model and equipment. They may include:
- PCM
- TCM
- Instrument cluster
- ABS controller
- Airbag controller
- Body control module
- Security module
- Overhead console or trip computer
- Aftermarket accessory connected to factory wiring
Module isolation requires care. Disconnecting modules in the wrong order may confuse the diagnosis, especially on older CCD systems where specific modules provide network bias or termination.
Follow the service manual sequence for your model.
A PCM should not be the first replacement.
A control module may fail internally, but the same warning may appear when the real issue is:
- Missing power
- Poor ground
- Corroded connector
- Harness damage
- Incorrect replacement module
- Sensor or circuit fault affecting module operation
- Ignition-switch power-feed problem
On some older Jeeps, owners and technicians also investigate crankshaft-position-sensor circuits when a no-start condition occurs. Treat this as a model-specific diagnostic path, not a universal fix.
Step-by-Step Diagnostic Order
Step 1: Record the Symptoms Before Disconnecting Anything
Write down:
- Does the engine crank?
- Does the engine start?
- Does the warning appear immediately or intermittently?
- Do the gauges drop to zero?
- Which warning lights appear?
- Did the problem start after rain, a battery replacement, stereo installation, or repair work?
- Does moving the steering column or cluster area change the symptom?
These details help distinguish a loose connection from a hard network fault.
Step 2: Test the Battery and Main Connections
Check the battery with the engine off.
Then inspect:
- Positive terminal
- Negative terminal
- Engine ground
- Body ground
- Cable condition
- Charging-system output after starting, when possible
Clean and tighten poor connections before moving to advanced testing.
Step 3: Check Fuses and Power Supplies
Use the owner’s manual and wiring diagram for your Jeep.
Test the fuses supplying the PCM, cluster, ignition circuits, and other affected modules.
A fuse may look intact but fail under load.
Step 4: Scan Every Available Module
Use a scan tool capable of communicating with multiple modules, not only generic engine codes.
Record which modules respond.
This is one of the most useful decision points:
- If several modules respond, focus on the missing module and its local circuit.
- If almost nothing responds, suspect a shared data-bus problem, missing power feed, poor ground, or a shorted module.
- If communication returns intermittently, inspect connectors and harness movement points.
Step 5: Inspect the Cluster and Accessible Connectors
If the gauges fail but the engine still runs, remove the cluster only after reviewing the correct procedure.
Inspect:
- Connector seating
- Bent terminals
- Oxidation
- Loose pins
- Harness tension
- Signs of previous repair
Reconnect the cluster securely and retest.
Step 6: Use the Wiring Diagram to Test the Network
At this point, use service information for the exact year, model, engine, and trim.
Do not assume a Wrangler TJ, Cherokee XJ, Liberty KJ, and Grand Cherokee WJ use the same network architecture.
Check:
- Data-bus wire continuity
- Short to ground
- Short to battery voltage
- Connector condition
- Splice condition
- Module power and ground
A conventional voltmeter alone may not show all network activity clearly. A capable scan tool and, when needed, an oscilloscope provide better diagnostic information.
Step 7: Isolate Modules Carefully
If the wiring diagram and service procedure support module isolation, disconnect modules one at a time in the specified order.
When communication returns after disconnecting one module, that module or its local circuit becomes a strong suspect.
Do not disconnect airbag-system connectors without following the required safety procedure.
Step 8: Confirm the Repair
After repairing the cause:
- Reconnect all modules
- Clear stored codes
- Cycle the ignition
- Start the engine
- Confirm gauge operation
- Rescan all modules
- Road-test the vehicle safely
- Recheck for returning codes
A repair is not complete until communication remains stable.
Model-Year Differences Matter
The phrase “No Bus” appears most often in discussions of older Chrysler and Jeep electrical systems. These vehicles may use CCD or PCI communication networks.
Later Jeep models use newer CAN-based networks and may display different messages or store different communication codes.
The diagnostic principle remains similar:
- Verify voltage.
- Verify module power and ground.
- Identify which modules communicate.
- Check the shared network.
- Isolate the failed circuit or module.
The wire locations, expected readings, modules, and test sequence still depend on the exact vehicle.
When Should You Stop Driving?
Do not keep driving if the Jeep has:
- Stalling
- No-start condition
- Unreliable gauges
- Overheating risk
- Charging-system warning
- ABS warning with braking concerns
- Airbag warning after electrical work
- Intermittent power loss
- Burning smell or hot wiring
A communication fault may start as an intermittent dash problem and later become a no-start condition.
FAQ
Is “No Bus” an OBD-II Trouble Code?
No. It is a communication warning shown by the vehicle.
A scan tool may also find separate communication-related trouble codes or modules that fail to respond.
Can a Bad Instrument Cluster Cause a “No Bus” Message?
Yes, but do not replace the cluster first. Check whether other modules still communicate.
Inspect the cluster connectors, power supply, ground, and network wiring before buying parts.
Can a Weak Battery Trigger the Warning?
Yes. Low or unstable voltage may disrupt module communication.
Test the battery and cables before moving to an expensive diagnosis.
Should I Replace the PCM?
Only after testing the battery, grounds, fuses, wiring, connectors, and network communication. PCM replacement without diagnosis often wastes money and may require programming.
Final Takeaway
A “No Bus” warning on a Jeep means the vehicle’s electronic modules are not communicating correctly. The correct repair starts with simple checks: battery voltage, cable condition, grounds, and fuses.
Then use a capable scan tool to identify which modules respond and which ones do not.
Avoid replacing the PCM, cluster, or sensors based on guesswork. Follow the wiring diagram and service procedure for the exact Jeep model year.
A structured diagnosis saves time, prevents unnecessary parts replacement, and leads to a reliable repair.