Removing a tail light from a 2001 Jeep Cherokee is a task many owners face, whether for repair, replacement, or upgrading bulbs. It may look difficult, but with a careful approach, you can detach the tail light safely and quickly.
This guide gives step-by-step advice, clear examples, and practical tips for beginners and experienced DIYers alike. By the end, you’ll feel confident working on your Jeep’s tail lights without risking damage.
Preparing To Remove The Tail Light
Before you start, gather a few basic tools and check your work area:

- Phillips screwdriver
- Flathead screwdriver
- Socket wrench (8mm or 10mm)
- Protective gloves
- Clean cloth
Park your Jeep Cherokee on a flat surface. Turn off the ignition and remove the keys.
Make sure the tail light is cool to the touch. If you recently used the lights, wait a few minutes for safety.
Safety First
Always wear protective gloves to avoid cuts from sharp edges. If you’re working outside, choose a dry day and avoid direct sunlight. This prevents glare and keeps the tail light plastic from getting too hot.
Step-by-step: Detaching The 2001 Jeep Cherokee Tail Light
Follow these steps for a smooth process.
1. Open The Rear Hatch
Lift the rear hatch fully. This gives you access to the tail light assembly. If your Jeep has a cargo cover, remove it for more space.
2. Locate Mounting Screws
On the inside edge near the tail light, find two or three Phillips screws holding the assembly. They may be hidden under a small plastic cover. Use a flathead screwdriver to gently pry the cover off if needed.
3. Remove The Screws
With your Phillips screwdriver or socket wrench, loosen and remove the screws. Place them in a safe spot; you’ll need them later.
Avoid dropping screws inside the body panel, as they are hard to retrieve.
4. Gently Pull The Tail Light
Once screws are out, grip the tail light assembly firmly. Pull it outward with gentle, steady force.
The tail light may feel stuck due to weather seals, but avoid using excessive force.
Pro tip: Wiggle the assembly side to side while pulling. This helps break the seal without cracking the plastic.
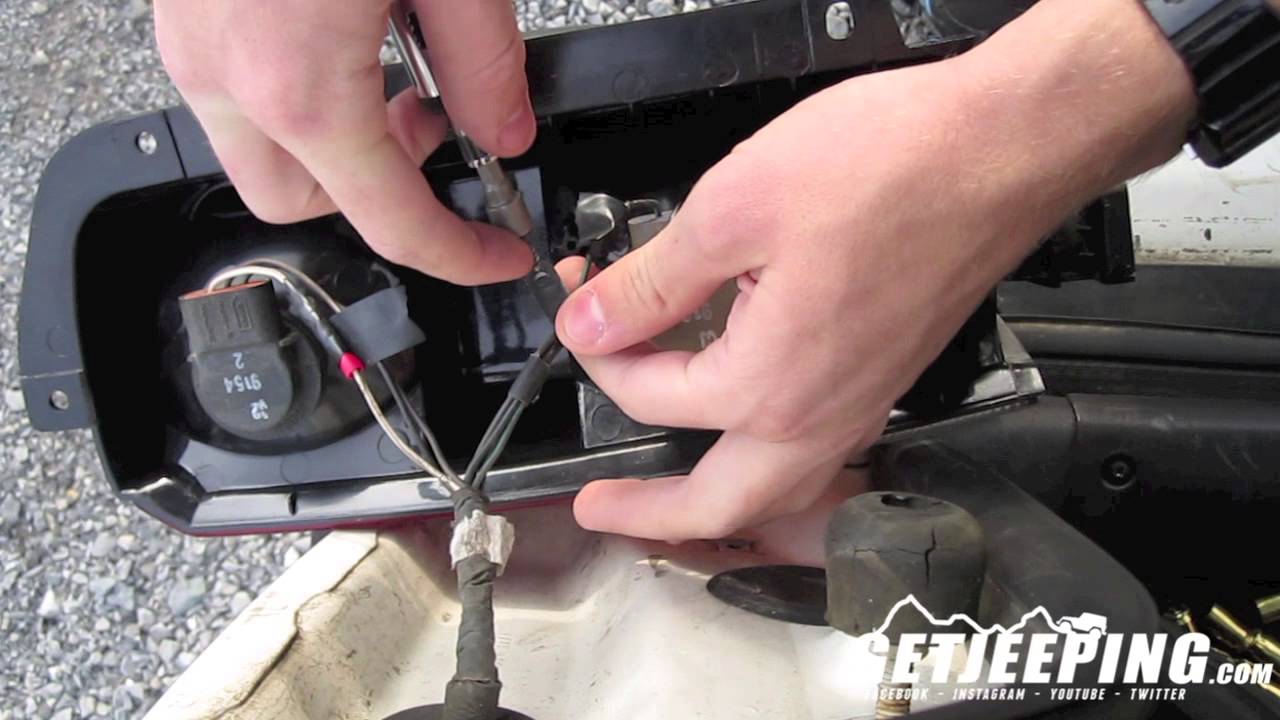
5. Disconnect Wiring Harness
After the tail light is free from the body, locate the wiring harness at the back. Press the release tab and pull the connector out. Don’t yank the wires; hold the connector base.
If you plan to change bulbs, now is the time. Otherwise, set the tail light aside on a clean cloth.

Common Mistakes And How To Avoid Them
- Forgetting to disconnect the wiring: This can damage wires or connectors.
- Using too much force: Tail light housings are plastic and can crack.
- Losing screws: Keep a small container nearby for screws and parts.
Some owners miss the release tab on the wiring harness, causing frustration. Always check carefully before pulling.
Comparing Tail Light Removal: Jeep Cherokee Vs Other Suvs
Here’s a comparison of tail light removal steps for a 2001 Jeep Cherokee and two popular SUVs.
| Step | 2001 Jeep Cherokee | Ford Explorer (2001) | Toyota RAV4 (2001) |
|---|---|---|---|
| Access | Rear hatch | Rear hatch | Rear hatch |
| Screw Location | Inside edge | Under plastic trim | Behind panel |
| Wiring Disconnect | Direct access | Remove bulb holder | Release connector |
The Cherokee’s tail light is easier to reach compared to some rivals, thanks to fewer panels and direct wiring access.
Signs Your Tail Light Needs Replacement
Understanding when to detach the tail light is important. Watch for:
- Cracks or chips in the lens
- Water inside the tail light housing
- Dim or flickering bulbs
- Broken mounting tabs
- Wiring issues or burnt connectors
A cracked tail light can lead to water leaks and bulb failure. Prompt replacement prevents further damage.
Choosing A Replacement Tail Light
When buying a replacement, look for:
- OEM quality for best fit
- Clear lens and matching color
- Proper wiring connector
- Warranty (at least 1 year)
Avoid cheap aftermarket parts. They often fit poorly and may not seal against water.
Here’s a quick comparison of OEM vs aftermarket replacements.
| Feature | OEM | Aftermarket |
|---|---|---|
| Fit | Perfect | Varies |
| Seal | Weatherproof | Sometimes weak |
| Price | Higher | Lower |
| Warranty | 1-2 years | 0-1 year |
For more advice on choosing parts, see AutoZone.

Reinstalling The Tail Light
After your repair or replacement, reconnect the wiring harness. Align the tail light with the mounting holes.
Insert screws and tighten gently. Avoid overtightening, as it can crack the plastic.
Test the tail light by turning on your Jeep’s lights and checking brake and turn signals. If all bulbs work, your job is complete.
Frequently Asked Questions
How Long Does It Take To Remove A Tail Light?
Most people need 10–20 minutes for this task. If it’s your first time, allow extra time for careful steps.
Can I Use A Regular Screwdriver For All Screws?
Usually, a Phillips screwdriver is enough. If screws are rusted, try a socket wrench.
Should I Replace The Bulbs When Removing The Tail Light?
It’s a good idea. Bulbs are cheap and easy to swap when the assembly is out.
Is It Safe To Drive With A Cracked Tail Light?
No. A cracked tail light can cause water leaks and reduce visibility. It may also be illegal.
Where Can I Find Oem Tail Light Replacements?
Check trusted auto parts stores or online retailers. Look for OEM parts for best results.
Removing a 2001 Jeep Cherokee tail light is easy with the right tools and steps. Stay patient, follow the guide, and avoid common mistakes.
With careful work, you’ll keep your Jeep safe and looking great.