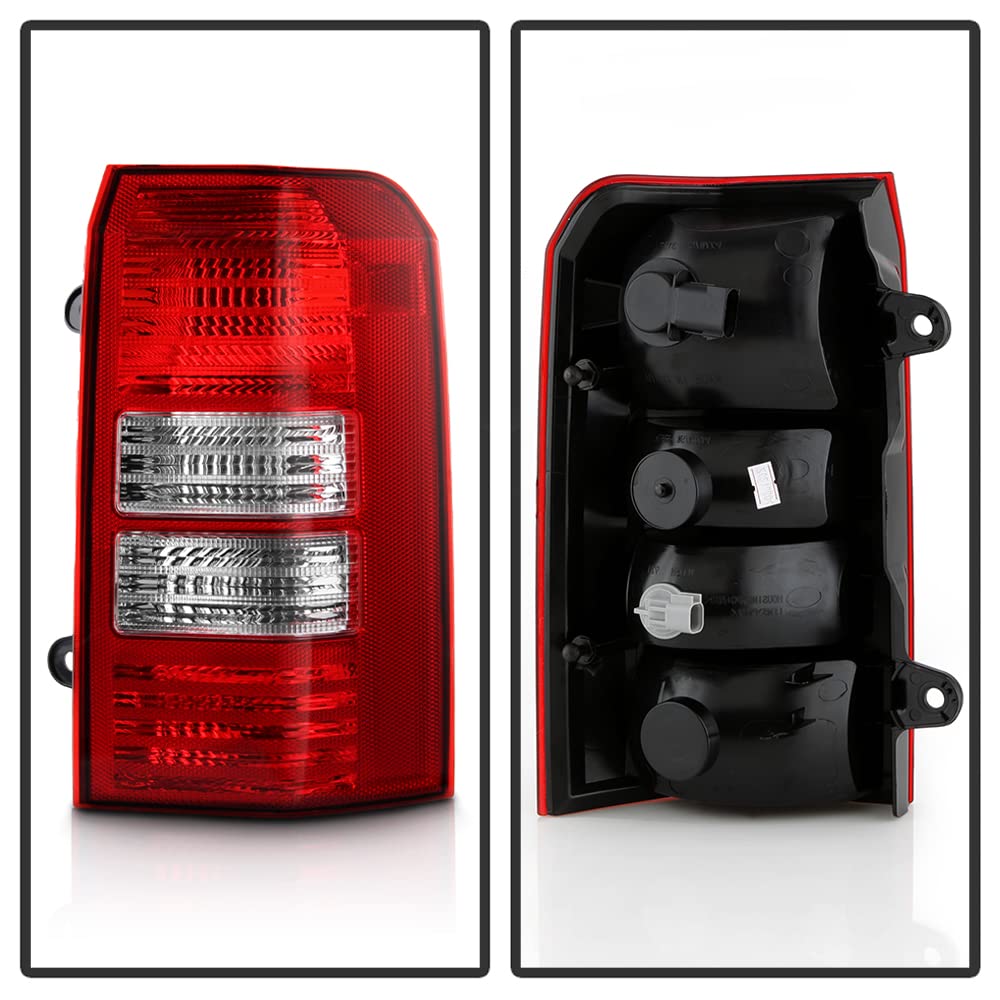
Changing the rear brake light in your 2011 Jeep Patriot might sound complicated, but it’s a straightforward job you can do at home. Many people don’t realize how important a working brake light is for safety—and also to avoid getting a ticket. But more than that, learning this simple maintenance skill can save you money and time at the mechanic. If your brake light is out, don’t worry. You don’t need advanced tools or a lot of experience. Just a bit of patience and the right steps will get you back on the road quickly and safely.
Why Brake Lights Matter
Brake lights are a key part of your car’s safety system. They alert drivers behind you when you are slowing down or stopping. Even one broken brake light can make your car less visible, especially at night or in bad weather. If police see your brake light out, you could face a fine. Keeping your lights working is an easy way to avoid problems and keep everyone safe.
Tools And Materials You’ll Need
Before you start, gather these items:
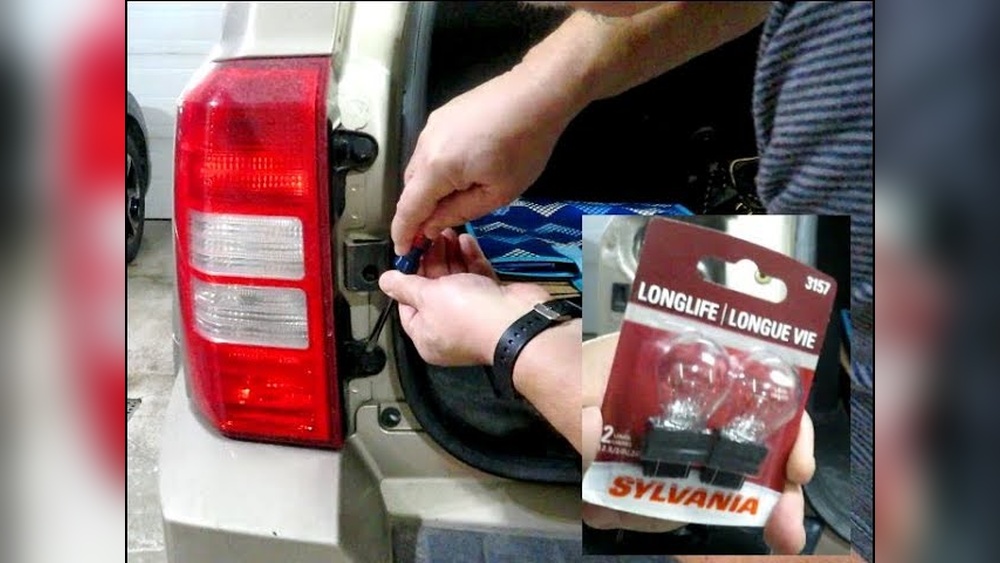
- Replacement brake light bulb (for the 2011 Jeep Patriot, typically a 3157 bulb)
- Flathead screwdriver
- Phillips screwdriver (may be needed)
- Gloves (to keep the new bulb clean)
- Clean cloth
Optional but helpful:
- Small socket wrench
- Owner’s manual (for quick reference)
Having the correct bulb type is important. If you’re unsure, check your owner’s manual or ask at an auto parts store. Bringing the old bulb with you can help the staff match it exactly.
Step-by-step Guide To Changing The Rear Brake Light
Let’s walk through the process. It’s best to work in a well-lit area and park your Jeep on a flat surface with the engine off.
1. Open The Rear Hatch
First, open the rear hatch of your Jeep Patriot. This gives you access to the back of the tail light assembly.
Make sure the car is off and the keys are removed from the ignition for safety.
2. Locate The Tail Light Assembly
Look at the rear corner where the brake light is located. You’ll see the tail light assembly held in place by a few screws or bolts usually on the side when you open the hatch.
3. Remove The Tail Light Assembly
Use a flathead or Phillips screwdriver (depending on your car) to remove the screws. Place them in a safe spot so you don’t lose them.
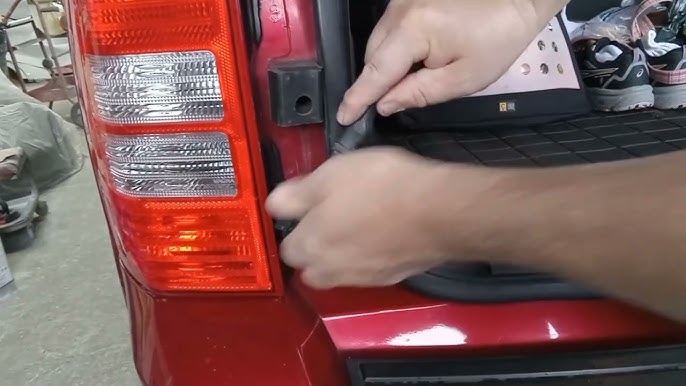
Once the screws are out, gently pull the tail light assembly away from the car body. Be careful, as it may be snug. Do not force it—wiggle it gently until it comes loose.
4. Find The Brake Light Bulb
On the back of the assembly, you’ll see multiple bulb sockets. The brake light bulb is usually the largest or the one in the middle. Twist the bulb socket counterclockwise and pull it out.
5. Remove The Old Bulb
Carefully pull the old bulb straight out of the socket. If it’s stuck, wiggle it gently. Do not use too much force.
6. Install The New Bulb
Take your new bulb. If you’re wearing gloves, you’ll avoid getting oil or dirt on the glass, which can shorten the bulb’s life.
Push the new bulb into the socket until it clicks into place.
7. Reinstall The Bulb Socket
Insert the bulb socket back into the tail light assembly and twist it clockwise to lock it.
8. Reattach The Tail Light Assembly
Align the assembly with the holes and gently press it back into place. Replace and tighten the screws.
9. Test The Brake Light
Before closing the hatch, ask a friend to press the brake pedal while you check if the new brake light works.
If you’re alone, you can use a heavy object to hold the pedal down or back up to a wall and check the reflection.
10. Clean Up
Wipe off any fingerprints and make sure everything is secure. Put away your tools and close the hatch.
Comparison: Diy Vs. Mechanic Brake Light Replacement
Here’s a quick look at the differences between changing the brake light yourself and visiting a mechanic.
| Factor | DIY Replacement | Mechanic Replacement |
|---|---|---|
| Cost | $5–$15 (bulb only) | $30–$70 (parts + labor) |
| Time Required | 15–30 minutes | 1–2 hours (including waiting) |
| Skill Level | Beginner | Not required |
| Convenience | At home | Shop visit needed |
As you can see, doing it yourself is usually quicker and much cheaper.
Common Problems And How To Avoid Them
Sometimes, changing the brake light doesn’t go as smoothly as planned. Here are a few issues people face and how to avoid them:
- Wrong bulb type: Always double-check the bulb number before buying.
- Difficulty removing the assembly: If the assembly is stuck, check for hidden screws. Don’t pry too hard or you might crack the plastic.
- Bulb not lighting up: After replacing, if the new bulb doesn’t work, the problem could be a blown fuse, wiring issue, or corroded socket.
- Touching the glass with bare hands: Oils from your skin can make the bulb burn out faster.
If you face a problem you can’t solve, it’s smart to visit a professional.
When Should You Replace Both Brake Lights?
While you only need to replace the burnt-out bulb, many experts recommend changing both rear brake lights at the same time. Why?
If one bulb has failed, the other is likely close behind. Doing both saves you time and gives you peace of mind.
Important Safety Tips
- Turn off your car before working on the electrical system.
- Use gloves when handling bulbs to prevent damage.
- Do not force parts if they feel stuck—double-check for hidden screws or clips.
- Test your lights every few months to catch issues early.
Typical Lifespan Of Brake Light Bulbs
The standard halogen brake light bulb in a 2011 Jeep Patriot usually lasts 4 to 6 years, depending on usage and driving conditions. If you drive often in stop-and-go traffic, you may need to replace bulbs more frequently. Upgrading to LED bulbs can give you a longer lifespan—sometimes up to 10 years or more.
Upgrading To Led Brake Light Bulbs
Many Jeep Patriot owners consider switching to LED bulbs. LEDs are brighter, last longer, and use less power. The upgrade process is almost the same, but some LED bulbs may require a special adapter to prevent hyper-flashing or error messages.
Here’s a quick comparison between halogen and LED bulbs for your 2011 Jeep Patriot:
| Feature | Halogen Bulb | LED Bulb |
|---|---|---|
| Lifespan | 4–6 years | 10+ years |
| Brightness | Standard | Brighter |
| Energy Use | Higher | Lower |
| Cost | $5–$15 | $15–$35 |
Environmental Impact
Choosing longer-lasting bulbs, like LEDs, reduces waste. Fewer burned-out bulbs mean less trash and fewer trips to the store.
It’s a small step, but it helps the environment.
How To Check If Your Brake Light Is Working
Many people don’t realize their brake light is out until someone tells them. Here are some simple ways to check:
- Ask a friend to stand behind your car and press the brake pedal.
- Use a wall or garage door: Back up close, press the brake, and look for the red reflection.
- Check at night: The light is easier to see in the dark.
Making this a monthly habit can help you catch problems early.
Real-world Example: Why Quick Replacement Matters
A Jeep Patriot owner once shared their story online. They noticed the brake light warning on their dashboard, but kept putting off the repair.
A week later, they were stopped by police for the broken brake light. The officer gave them a warning but said a fine would follow if not fixed.
The owner replaced the bulb in 20 minutes at home, saving at least $50. This shows how a small repair can prevent bigger issues.
Extra Tips Most Beginners Miss
- Check the fuse if the new bulb doesn’t work. Your Jeep Patriot uses a fuse box in the engine compartment; the owner’s manual will show the exact location.
- Clean the lens: Dust and dirt can block light, making your brake light dim even if the bulb is fine. Wipe the lens inside and out when the assembly is off.
These extra steps help ensure your brake light is bright and reliable.
Cost Breakdown Of Brake Light Replacement
Let’s look at an average cost breakdown for replacing your 2011 Jeep Patriot’s brake light yourself:
| Item | Estimated Cost |
|---|---|
| Replacement bulb (halogen) | $5–$15 |
| LED bulb (optional upgrade) | $15–$35 |
| Tools (if needed) | $0–$10 |
| Total DIY cost | $5–$45 |
Compared to a mechanic’s fee, doing it yourself is the clear winner in terms of savings.
Where To Find More Information
If you’re ever unsure, the owner’s manual for your Jeep Patriot has step-by-step instructions and diagrams. You can also find video tutorials online, or visit car maintenance forums for advice. For more on vehicle lighting regulations, check the National Highway Traffic Safety Administration.
What Type Of Bulb Does The 2011 Jeep Patriot Use For The Rear Brake Light?
The standard bulb for the 2011 Jeep Patriot’s rear brake light is usually a 3157 halogen bulb. Always double-check your owner’s manual to be sure, as there can be variations.
Can I Replace The Brake Light Without Any Special Tools?
Yes, most people only need a flathead or Phillips screwdriver. Sometimes a small socket wrench helps if the screws are tight. No advanced tools are required.
How Do I Know If My Brake Light Fuse Is Blown?
If the new bulb does not work, check your fuse box (usually under the hood). The owner’s manual will show which fuse controls the brake lights. If the fuse looks broken or the metal strip is melted, replace it with one of the same amperage.
Is It Legal To Drive With One Brake Light Out?
No, driving with a non-working brake light is illegal in most states. You can be stopped by police and fined.
It’s best to replace the bulb as soon as possible.
Should I Upgrade To Led Bulbs?
LED bulbs last longer, shine brighter, and use less power. They may cost more upfront, but most drivers find the benefits worth it. Just make sure they fit your Jeep Patriot and don’t require extra adapters.
Changing the rear brake light on your 2011 Jeep Patriot is a simple task that pays off in safety, savings, and peace of mind. With a little effort, you keep your car legal, protect yourself and others, and build practical car maintenance skills.