Building your own frame for a Power Wheels Jeep is a rewarding project. It can turn an old, broken toy car into something fun and safe for your kids.
Many people upgrade their Power Wheels to handle rough terrain, support heavier kids, or even add custom features.
If you want your Power Wheels Jeep to last longer, perform better, or look cooler, building a solid frame is the first big step. This guide will help you understand each phase, from planning to finishing touches.
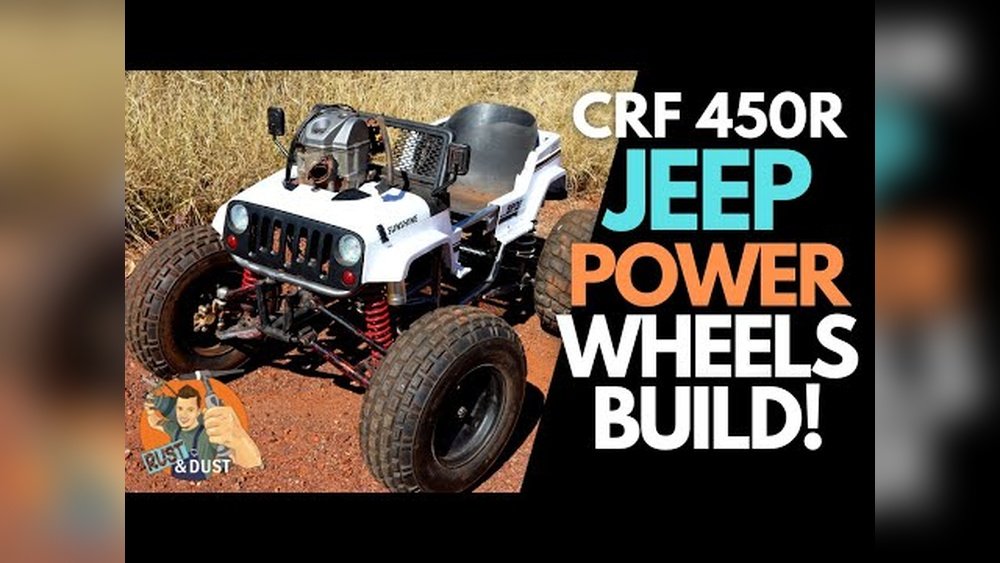
Whether you’re a beginner or have some DIY experience, you’ll learn how to create a strong, reliable frame without getting lost in confusing instructions.
Understanding The Purpose Of The Frame
The frame is the backbone of your Power Wheels Jeep. It supports the body, wheels, and all the electrical components. A good frame makes the Jeep safer, more durable, and able to carry extra weight. If you’re planning to upgrade the motor or add a bigger battery, a strong frame is even more important. Most stock frames are plastic and crack easily. By building your own, you can use better materials like steel, aluminum, or wood.
Non-obvious insight: Many people don’t realize that a homemade frame can also improve steering and stability. If you choose the right design, your Jeep won’t tip over easily, even on hills or rough surfaces.
Planning Your Frame Build
Before you start cutting metal or wood, you need a clear plan. Planning saves time, money, and avoids mistakes later.
Measuring And Sketching
Start by measuring your Power Wheels Jeep. Write down these key measurements:
- Length: From front to back bumper
- Width: Side to side across the widest part
- Height: From bottom to top of the body
- Wheelbase: Distance between the front and rear axles
Draw a rough sketch of the frame using these measurements. Include space for the wheels, battery, and motor.
Choosing Materials
You need to decide if you’ll use metal or wood. Here’s a quick comparison:
| Material | Strength | Weight | Cost | Ease of Use |
|---|---|---|---|---|
| Steel | Very strong | Heavy | Moderate | Requires welding |
| Aluminum | Strong | Light | Higher | Can be bolted |
| Wood | Good for light use | Light | Low | Easy with basic tools |
Steel is best for durability, but wood is easier for beginners. Aluminum works well if you want something light and are comfortable with metalwork.
Tools You’ll Need
Gather these basic tools:
- Tape measure
- Saw (for wood) or angle grinder (for metal)
- Drill and bits
- Wrenches or socket set
- Welding machine (if using steel)
- Safety gear (gloves, goggles)
If you don’t have a welding machine, use bolts and brackets for aluminum or wood.
Non-obvious insight: If you want to add suspension later, leave extra space between the frame and wheels. Many first-time builders forget this, making upgrades harder.
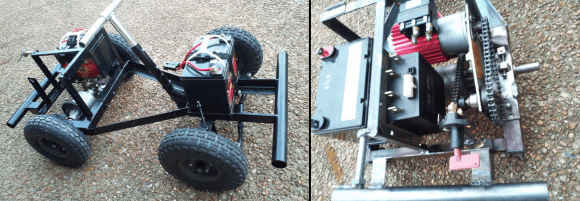
Building The Frame Step-by-step
Let’s move through the steps to build a Power Wheels Jeep frame. Go slowly and check your work at each stage.
Step 1: Prepare The Work Area
Clear a space in your garage or backyard. Lay out all your tools and materials.
Make sure there’s enough room to move around the Jeep.
Step 2: Disassemble The Power Wheels Jeep
Remove the plastic body, wheels, and old frame. Keep the wheels and axles they can be reused.
Take out the motor and battery carefully. Save all bolts and screws.
Step 3: Cut Your Frame Materials
Use your measurements to cut metal bars or wood beams. Cut two long pieces for the sides, and shorter pieces for the front, rear, and cross supports.
Example for a standard Jeep (approximate):
- Two side beams: 36 inches each
- Two front/rear beams: 20 inches each
- Two cross supports: 18 inches each
Check each piece for rough edges and sand or file them smooth.
Step 4: Assemble The Basic Frame
Lay out the beams in a rectangle shape. Attach the corners with bolts, brackets, or welds.
Add cross supports in the middle for strength.
| Frame Area | Recommended Support | Attachment Method |
|---|---|---|
| Front/Rear | Double beams | Bolts or welds |
| Middle | Cross beam | Brackets |
| Corners | Angle brackets | Bolts |
Make sure the frame is square. Measure diagonally across the rectangle both sides should be equal.
Step 5: Mount The Axles And Wheels
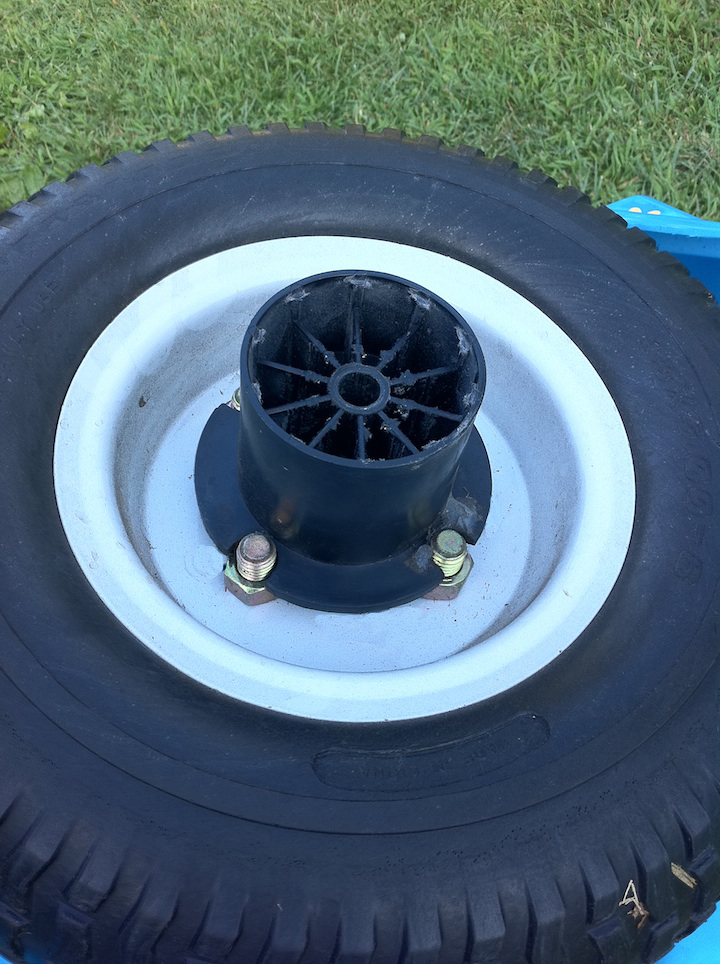
Position the axles under the frame. Attach them with U-bolts or brackets. Make sure the wheels are straight and turn freely. Test-fit the wheels before tightening everything.
If you want to upgrade to larger wheels, check their size against your frame design. Sometimes, bigger wheels need higher clearance or wider axle mounts.
Step 6: Add Motor And Battery Supports
Create a platform or brackets inside the frame to hold the motor and battery. Use strong wood or metal, depending on your material.
Make sure the motor lines up with the rear axle.
Practical tip: Leave space for wires and cooling. Batteries can get hot—don’t pack them too tightly.
Step 7: Attach The Jeep Body
Place the plastic body on top of your new frame. Mark where it sits best.
Drill holes and use bolts or zip ties to secure the body. Check that the hood, doors, and seats fit comfortably.
Step 8: Check Alignment And Adjustments
Roll the Jeep forward and backward. Check if anything rubs or catches.
Make small adjustments to the axle brackets or frame width. Fix any issues before adding electronics.
Upgrading And Customizing Your Frame
Building your own frame gives you a lot of freedom. You can add extra features that most Power Wheels Jeeps don’t have.
Adding Suspension
Suspension helps the Jeep handle bumps and rough terrain. You can use small springs or rubber bushings under the axles. Some people use old bicycle shocks.
Upgrading Wheels
Many builders upgrade to rubber tires or larger wheels. This makes the Jeep faster and more stable on grass or gravel.
| Wheel Type | Terrain | Durability | Cost |
|---|---|---|---|
| Plastic | Pavement | Low | Low |
| Rubber | Grass, gravel | High | Moderate |
| Foam-filled | Mixed | Moderate | High |
Custom Paint And Accessories
Once the frame is finished, you can add lights, horns, or custom paint. This makes your Jeep unique and fun.
Non-obvious insight: If you plan to add a tow hook or trailer, reinforce the rear frame with extra metal or wood beams. This prevents bending or damage.
Safety Checks And Final Adjustments
Safety is the most important part. Before letting kids drive the Jeep, check every bolt and bracket. Make sure there are no sharp edges.
- Test the brakes and steering.
- Check that the battery is secure and covered.
- Make sure the motor wires are protected and cannot be pulled loose.
- If you added suspension, make sure it moves smoothly but doesn’t let the Jeep tip.
Tip: Add foam or rubber padding around the frame edges for extra safety.
Common Mistakes And How To Avoid Them
Many beginners make the same mistakes. Here’s how to avoid them:
- Rushing the build: Take your time. Double-check each step.
- Wrong measurements: Measure twice, cut once.
- Loose bolts: Use lock washers or thread-locking fluid.
- Weak motor mounts: Reinforce with extra brackets.
- Sharp edges: Always sand or cover exposed metal or wood.
If you need more guidance, check forums or official guides. For example, the Power Wheels Wikipedia page has helpful background info.
Frequently Asked Questions
How Much Does It Cost To Build A Frame For A Power Wheels Jeep?
Costs depend on materials. Using wood, you might spend $50 $100.
Steel or aluminum can cost $100 $250, including bolts and brackets. Upgrading wheels and adding suspension increases the budget.
Can I Build A Frame Without Welding?
Yes. Aluminum and wood frames can be bolted together using brackets.
For steel, some parts can use bolts, but welding makes the frame stronger and safer.
What Tools Do I Need For A Beginner Build?
Basic tools include a tape measure, saw, drill, wrenches, and safety gear. For metal frames, an angle grinder and welding machine are helpful, but not always required.
Is It Possible To Add Suspension Later?
Yes, but it’s easier if you leave extra space during the initial build. Small springs or bushings can be added under the axles.
Planning ahead saves you from cutting and rebuilding parts.
How Can I Make My Power Wheels Jeep Safer?
Check every bolt and bracket, cover sharp edges, use strong materials, and make sure the battery and motor are secure. Add foam padding around the frame for extra safety.
Building a frame for a Power Wheels Jeep takes time, but the result is a stronger, safer, and more enjoyable ride. With careful planning and the right materials, even beginners can create something special.
Take your time, follow each step, and don’t be afraid to customize.
Your kids will thank you, and you’ll gain valuable skills for future projects.


















