Wiring external reverse lights on your Jeep Wrangler is a smart upgrade if you drive off-road, tow trailers, or often reverse in dark places. The stock backup lights are often not bright enough for these situations. Many Wrangler owners find that adding aftermarket reverse lights brings a huge improvement in safety and visibility. This guide will walk you through the process, from choosing the right lights to wiring them safely and legally. Whether you are a DIY beginner or have some experience with vehicle wiring, you’ll find clear steps and tips to help you get the job done right.
Why Add External Reverse Lights To Your Jeep Wrangler?
Jeep Wranglers are built for tough conditions, but their stock reverse lights can struggle to light up obstacles at night. External backup lights offer several benefits:
- Brighter illumination: You’ll see rocks, tree stumps, or people behind you.
- Wider coverage: Larger lights cover more area, making parking and reversing safer.
- Custom placement: Put lights where you need them most (bumper, roof, spare tire carrier, etc. ).
- Better for accessories: If you tow, carry bikes, or have a rear cargo rack, extra lights help you see past these items.
Many Jeep owners install LED pods or light bars as external reverse lights. These are energy-efficient, long-lasting, and bright. Some models are even waterproof and shock-resistant for rough trails.
What You Need Before You Start
Preparation is key to a smooth install. Here’s a list of what you’ll need:
- External reverse lights (LED pods, bars, or cubes)
- Wiring harness (with relay and fuse)
- Switch (optional, for manual control)
- Inline fuse holder
- Connectors (heat-shrink or weatherproof)
- Electrical tape or heat-shrink tubing
- Wire stripper/crimper
- Drill and mounting hardware
- Multimeter (for checking voltage)
- Zip ties
Before buying, check your Wrangler’s model year. Wiring colors and access points can vary. Always choose lights rated for exterior use—they should be weatherproof (IP67 or higher).
Choosing The Best Reverse Lights For Your Needs
Not all reverse lights are equal. Here’s a quick comparison of popular light types:
| Light Type | Brightness (Lumens) | Durability | Price Range | Ease of Install |
|---|---|---|---|---|
| LED Pods | 1,200-3,000 | High | $30-$80 | Easy |
| LED Bar | 2,000-6,000 | High | $40-$150 | Moderate |
| Halogen Bulbs | 700-1,200 | Medium | $20-$40 | Easy |
LED pods are the most popular for Wranglers. They’re compact, bright, and easy to mount in many locations. Some Jeep-specific kits include brackets for the rear bumper or tire carrier. Make sure to pick a legal color (white is standard for reverse).
Planning The Wiring: Key Decisions
Before you start running wires, decide how you want the lights to work. There are two main wiring methods:
- Automatic (with reverse gear): Lights turn on whenever you shift into reverse.
- Manual (with a switch): You control the lights anytime, even if the Jeep isn’t in reverse.
Many owners use both, adding a switch so the lights can be used as work lights when camping. If you want this, use a relay and a three-way switch.
Another key point: Never wire high-powered lights directly to your stock reverse wire. The factory circuit isn’t designed for extra load and could blow a fuse or damage the wiring. Always use a relay to power the new lights from the battery, with the reverse wire as a trigger.
Step-by-step: How To Wire External Reverse Lights
Step 1: Mount The Lights
- Choose strong mounting points (bumper, hitch, tire carrier).
- Use included hardware or stainless-steel bolts.
- Make sure the lights aren’t blocked by the spare tire or bumper.
- Angle the lights slightly down to avoid blinding other drivers.
Step 2: Plan Your Wire Route
- Run wires along factory harnesses where possible.
- Avoid moving parts, sharp edges, and hot areas.
- Use zip ties to secure the wires every few inches.
Step 3: Connect The Relay And Wires
Here’s a typical relay wiring diagram for this project:
| Relay Pin | Connects To | Description |
|---|---|---|
| 30 | Battery (+) via fuse | Main power for lights |
| 87 | Reverse lights (+) | Powers the new lights |
| 85 | Reverse signal or switch | Triggers relay |
| 86 | Ground | Completes circuit |
- Use a 16- or 18-gauge wire for the trigger circuit, and 14-gauge for the main power if your lights draw over 5 amps.
- Install an inline fuse close to the battery (20A is typical for two LED pods).
Step 4: Tap Into The Reverse Signal
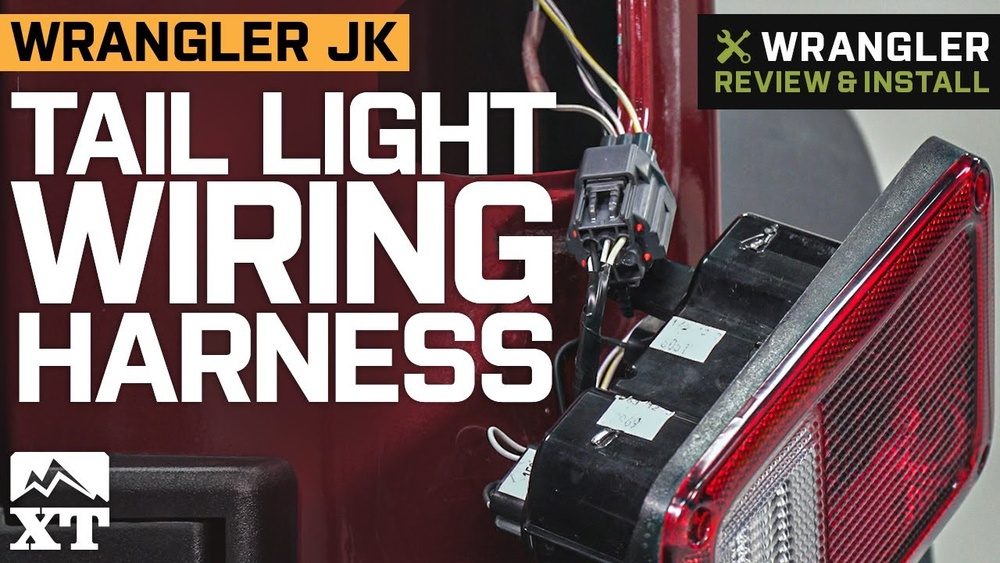
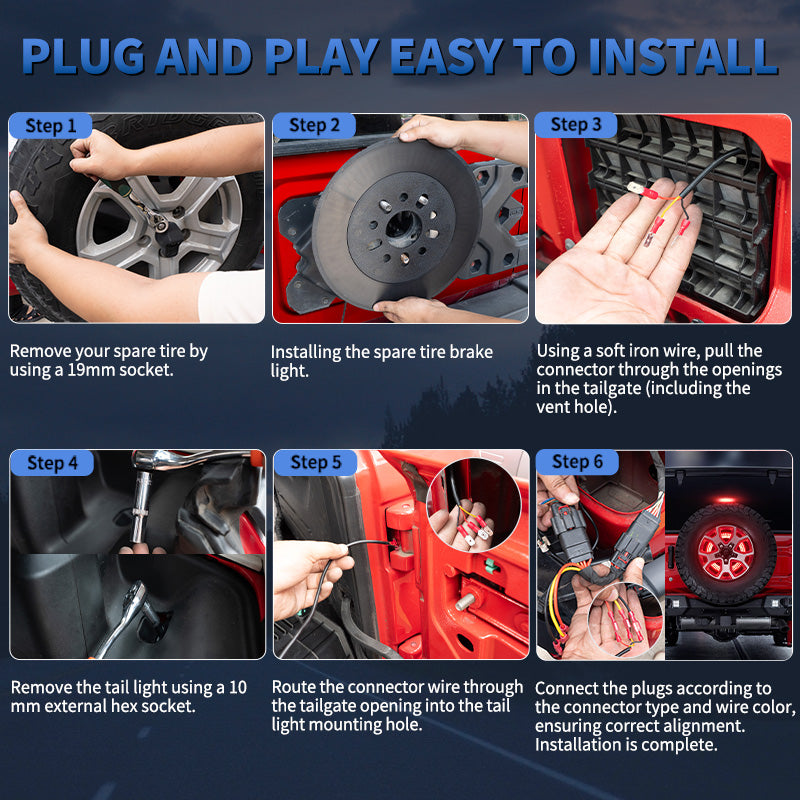
- Locate the reverse light wire at the rear tail light assembly.
- On many Wranglers (JK, JL), the reverse wire is white with a gray or tan stripe.
- Use a multimeter to confirm: Have a helper shift into reverse (with ignition ON, engine OFF), and probe wires until you find 12V.
Pro tip: Use a weatherproof T-tap or solder for a strong connection. Avoid regular wire taps, which can loosen over time.
Step 5: Grounding
- Use a factory ground bolt on the frame or body.
- Clean off paint for best contact.
- Attach all grounds (relay, lights) to the same spot if possible.
Step 6: Add A Switch (optional)
If you want manual control:
- Run a wire from the relay trigger (pin 85) to your dash switch.
- Bring power to the switch from an accessory fuse or ignition source.
- For a three-way setup (auto/manual/OFF), use a three-position switch wired to both the reverse signal and a constant 12V source.
Step 7: Test The System
- Reconnect the battery.
- Check that the lights turn on in reverse.
- Flip your manual switch (if installed) to make sure both functions work.
- Inspect all connections for heat or loose wires.
Final tip: If you see flickering or the lights don’t work, check your ground and fuses first.
Legal And Safety Considerations
Some states have rules about auxiliary lighting. Make sure your lights:
- Are white (not blue or red)
- Only come on with reverse or a switch (not when driving forward)
- Are aimed down, not straight back
If you plan to use your lights on the street, check your local vehicle codes. For more details, see the NHTSA’s lighting regulations.
Common Beginner Mistakes (and How To Avoid Them)
Many DIY installers make small mistakes that can cause problems later. Here are two that catch most people by surprise:
- Skipping the relay: Directly wiring lights to the reverse signal can overload your factory wiring and cause electrical issues.
- Bad grounds: A poor ground connection leads to dim lights, flickering, or no function at all. Always clean the contact point and use a star washer.
Other common errors:
- Not using an inline fuse (risking a fire hazard)
- Forgetting to weatherproof exterior connections (water can short the system)
- Using too-thin wires (which can overheat)
Take your time and double-check each step.
Example: Wiring Two Led Pods To A Jeep Wrangler Jl
Let’s say you bought two 1,500-lumen LED pods for your 2020 Jeep Wrangler JL. Here’s a summary of how you’d wire them:
- Mount the pods on your rear bumper using the brackets.
- Run the power wires up to the engine bay, following the frame rail.
- Connect the relay as shown above, with a 20A fuse near the battery.
- Tap into the reverse light wire at the rear tail lamp for your relay’s trigger.
- Ground the relay and both pods to a bolt under the bumper.
- Test the system: Lights should turn on only in reverse.
Many JL owners also add a dash switch for camping or working at night.

Quick Reference: Wiring Comparison
Here’s a final look at the pros and cons of the two most popular wiring methods:
| Wiring Method | Pros | Cons | Best For |
|---|---|---|---|
| Automatic (reverse only) | Simple, legal, hands-free | No manual override | Daily driving, city use |
| Manual switch (with relay) | Full control, use as work lights | More wiring, may need legal check | Off-roading, camping, towing |
Final Checks And Tips
- Label your wires: If you ever need to troubleshoot, labeled wires save time.
- Keep a wiring diagram: Note colors and routing, or snap phone photos as you go.
- Check for errors: After install, check your dash for warning lights—if you see a bulb-out warning, your Jeep’s CAN bus may need a resistor or a special harness.
Installing external reverse lights is a project that gives big rewards for a small investment. The process teaches you about your Jeep’s wiring, and the results are instantly noticeable every time you back up in the dark.
If you plan carefully, use the right parts, and follow safety steps, your new lights will serve you for years to come.
How Many Lumens Do I Need For External Reverse Lights?
For most Jeep owners, 1,500 to 3,000 lumens total is more than enough for good visibility. More powerful lights (over 4,000 lumens) can cause glare for others, so aim for a balanced setup.
Do I Need A Relay For Led Pods?
Yes, always use a relay when wiring LED pods or bars. This protects your factory wiring and allows you to power the lights directly from the battery without overloading stock circuits.
Can I Wire The Lights Directly To The Battery?
You can, but you should always include a fuse and relay. The fuse protects against shorts, while the relay allows for safe switching and integration with your reverse gear.
Will Adding External Reverse Lights Drain My Battery?
Not if wired correctly. LED lights use little power and only draw current when switched on.
Make sure your wiring is fused and doesn’t have any shorts that could cause a slow drain.
Are External Reverse Lights Street Legal?
Yes, as long as they are white and only come on when reversing (or via a switch when not driving). Always check your local rules, as some areas have limits on brightness or require the lights to be aimed downward.
With the right tools and preparation, wiring external reverse lights on your Jeep Wrangler is a rewarding project. Take your time, double-check every step, and enjoy the improved safety and confidence every time you put your Jeep in reverse.