A backup light switch might seem like a small part of your Jeep Wrangler, but when it starts leaking, it can lead to bigger problems. Leaking often means there’s fluid coming out from around the switch, usually transmission fluid.
This not only creates a mess but can also affect your Jeep’s electrical system and cause your backup lights to malfunction.
Many Wrangler owners face this issue, especially as their vehicles get older. Fixing a leaking backup light switch is not too complex, but it does require some careful steps and the right tools.
If you want to avoid expensive repairs later, handling this leak early is important.
This guide will show you how to replace a leaking backup light switch on a Jeep Wrangler, what you need to know before starting, and some pro tips to avoid common mistakes.
Why The Backup Light Switch Leaks
The backup light switch, sometimes called the reverse light switch, is screwed into the transmission. Its job is simple: when you shift into reverse, the switch completes a circuit and turns on the backup lights. Over time, the switch’s seal can wear out. Heat, vibration, and age make the rubber or plastic parts brittle, so fluid can escape.
Often, the leak starts small and gets worse. A few drops of transmission fluid under your Jeep may not seem urgent, but if left unchecked, the leak can let in dirt or moisture, damage the switch, and even cause a short circuit.
Signs Your Backup Light Switch Is Leaking
Knowing what to look for is key to catching the problem early. Common signs include:
- Puddle or drip of red or brown fluid under your Jeep, especially near the transmission
- Backup lights not turning on when you shift to reverse
- Transmission fluid level dropping faster than normal
- Burning smell from leaking fluid on hot engine parts
Sometimes, you may notice only one or two of these. If your backup lights stop working and you see fluid, the switch is a likely suspect.
Tools And Parts Needed
Before you start, gather everything you’ll need. Missing tools can slow you down or cause mistakes.
- Replacement backup light switch (for your Jeep’s model year)
- Socket set (usually 7/8″ or 22mm deep socket)
- Ratchet wrench
- Jack and jack stands (if needed for ground clearance)
- Drain pan
- Rags or shop towels
- Thread sealant (recommended for the new switch)
- Transmission fluid (to top off if you lose some)
- Work gloves
- Safety glasses
Having these ready will make the process smoother and safer.
Where The Switch Is Located
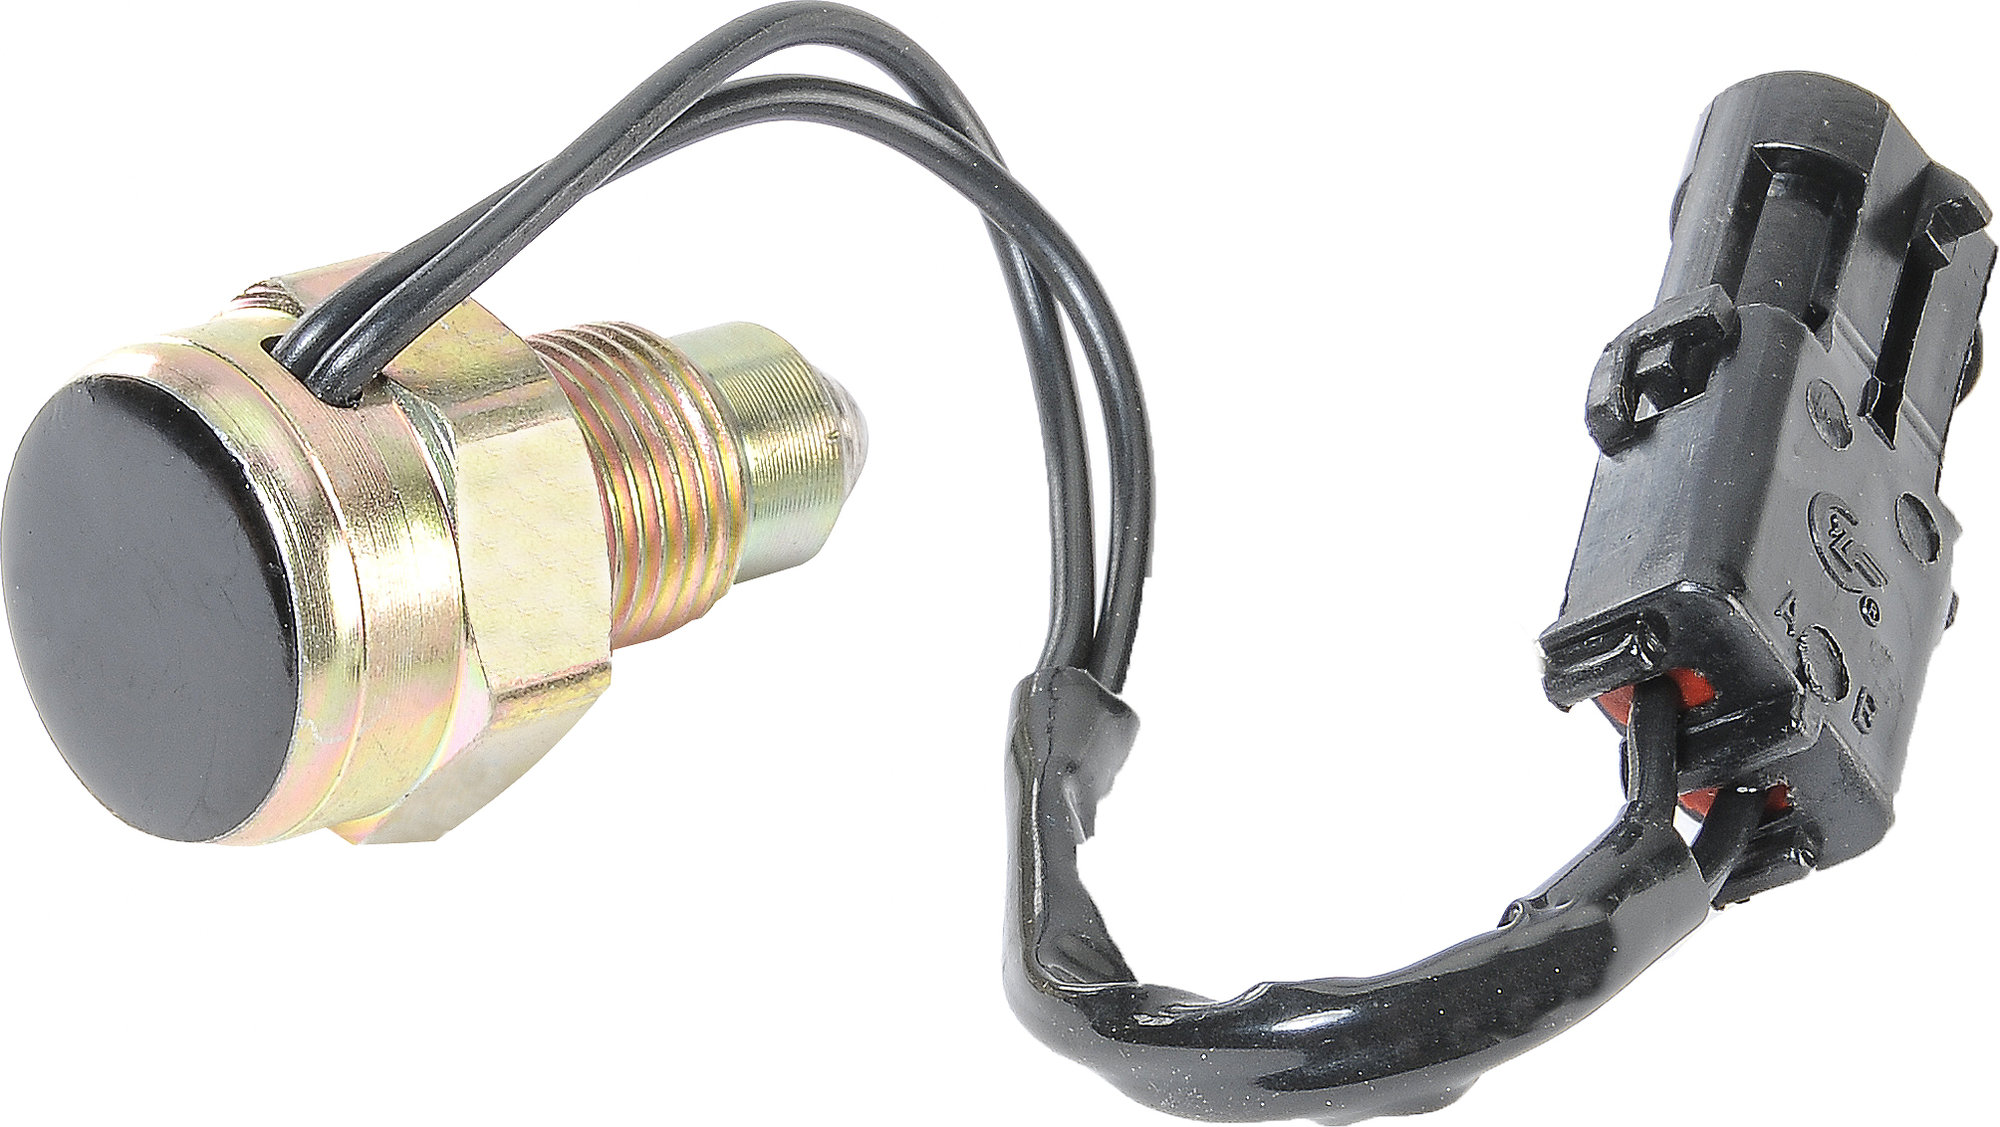
On most Jeep Wranglers, especially YJ, TJ, and JK models, the backup light switch is on the driver’s side of the transmission. You can usually see it from under the vehicle, near the shift linkage.
It's a small cylindrical part with an electrical connector attached.
For clarity, here’s a quick comparison of switch locations on popular Jeep Wrangler generations:
| Model | Switch Location | Tools Needed |
|---|---|---|
| YJ (1987-1995) | Driver’s side, near rear of transmission | 22mm socket, ratchet |
| TJ (1997-2006) | Driver’s side, mid-transmission | 22mm deep socket |
| JK (2007-2018) | Driver’s side, near shifter | 7/8″ deep socket |
Always check your owner’s manual or a service manual to confirm for your specific year.
Step-by-step: Changing A Leaking Backup Light Switch
Working safely and methodically is important. Here’s how to replace the switch, even if you’re not an expert mechanic.
1. Prepare The Area
Park your Jeep on a flat, stable surface. Engage the parking brake.
If needed, jack up the vehicle and set it securely on jack stands. Put on your gloves and safety glasses.
Place a drain pan under the transmission area. Some fluid may leak out when you remove the switch.
2. Locate And Disconnect The Switch
Find the backup light switch on the driver’s side of the transmission. There will be an electrical connector plugged into the switch.
Press the tab and carefully pull the connector off.
A common mistake here is pulling on the wires instead of the connector. Always grip the connector to avoid breaking the wires.
3. Remove The Old Switch
Use the correct size socket (usually 22mm or 7/8″) and a ratchet to carefully unscrew the switch. Turn slowly counterclockwise.
If it feels stuck, spray a little penetrating oil and wait a few minutes.
Keep the drain pan in place, as some transmission fluid will likely drip out.
4. Inspect The Old Switch And Sealing Surface
Look at the removed switch. If it’s covered in fluid or the seal is visibly cracked or missing, that’s a clear sign it was leaking.
Also, check the threads and sealing area on the transmission for dirt or damage. Clean this area with a rag.
If there’s dirt or old sealant left, the new switch may not seal properly. This is a common beginner oversight.
5. Install The New Switch
Apply a small amount of thread sealant (or Teflon tape if recommended) to the threads of the new switch. Don’t overdo it—excess can squeeze into the transmission.
Carefully screw in the new switch by hand to avoid cross-threading. Then tighten with your socket and ratchet.
Do not overtighten. Most switches need only about 15-20 ft-lbs of torque.
Too much force can crack the switch or the transmission case.
6. Reconnect The Electrical Connector
Push the connector back onto the new switch until you hear or feel it click. Double-check that it’s secure.
7. Check And Refill Transmission Fluid
Some fluid likely leaked out. Check your transmission fluid level using the dipstick (for automatics) or fill plug (for manuals).
Top off with the correct type of fluid if needed.
For reference, here’s a quick guide to Jeep Wrangler transmission fluid types:
| Model Year | Transmission Type | Fluid Type |
|---|---|---|
| 1987-1999 | Manual (AX-5, AX-15) | 75W-90 gear oil |
| 2000-2006 | Manual (NV3550, NSG370) | Synchromesh or 75W-85 |
| All years | Automatic | ATF+4 |
Always use the fluid type specified in your owner’s manual.
8. Test The Repair
Start your Jeep and shift into reverse. Check that the backup lights come on. Look under the vehicle for leaks around the new switch. Wipe away any old fluid to see if new leaks appear.
Drive the Jeep for a short distance, then check again for leaks and confirm the lights work.
Tips For A Smooth Replacement
Changing a leaking backup light switch can be straightforward, but a few pro tips make it easier and safer:
- Never use pliers or adjustable wrenches on the switch—this can round off the edges
- If the connector is corroded, clean it with electrical contact cleaner
- Always double-check fluid levels after the job; running low can harm your transmission
- Don’t reuse the old switch’s seal; always use the new one provided
- If you find metal shavings on the old switch, your transmission might have bigger problems—consider a professional inspection
Understanding The Cost And Difficulty
Many Jeep owners wonder if this repair is worth doing themselves. On average, a backup light switch costs $15–$40. Shops may charge $100–$200 for labor, depending on location.
Here’s a simple comparison of DIY vs. shop repair:
| Repair Option | Parts Cost | Labor Cost | Total |
|---|---|---|---|
| DIY | $15–$40 | $0 | $15–$40 |
| Repair Shop | $15–$40 | $100–$200 | $115–$240 |
The process usually takes about 30–60 minutes for most beginners. If you’re comfortable with basic hand tools, this is a good DIY project.
Non-obvious Mistakes To Avoid
Most guides miss these easy-to-overlook errors:
- Not disconnecting the battery: While not always required, disconnecting the negative terminal can prevent accidental short circuits if your Jeep’s wiring is old or brittle.
- Forgetting to check the O-ring: Some switches come with a separate O-ring seal. If it falls out or gets pinched, the new switch may leak immediately.
- Mixing up connectors: If you unplug multiple sensors during the repair, label them to avoid confusion during reassembly.
- Skipping the fluid check: Even a small loss of fluid can cause shifting problems or gear damage. Always check and top off.

When To Call A Professional
If the switch is stuck, the transmission case is cracked, or you see signs of a bigger leak, it’s best to get help.
Also, if you’re not comfortable working under your vehicle or don’t have the right tools, a shop can do the job safely.
For more detailed technical guidance, you can refer to the official Jeep Wrangler service manual or reliable resources like Jeep’s official website.
What Does The Backup Light Switch Do?
The backup light switch turns on your Jeep’s reverse lights when you shift into reverse. This alerts other drivers and pedestrians that you are backing up.
Will A Leaking Backup Light Switch Cause Transmission Problems?
A small leak usually won’t damage the transmission right away, but losing too much fluid can cause shifting issues and even long-term transmission damage if not fixed.
Do I Need To Drain All The Transmission Fluid To Replace The Switch?
No, you only need to catch the small amount that leaks out when you remove the switch. Topping off the fluid afterward is usually enough.
Can I Drive With A Leaking Backup Light Switch?
You can drive for a short time, but it’s best to fix the leak soon. Fluid loss can become serious, and malfunctioning backup lights are a safety risk.
How Do I Know Which Backup Light Switch Fits My Jeep Wrangler?
Check your Jeep’s model year and transmission type. The parts store or online catalog will list the correct switch. Bringing the old switch as a sample can also help.
Taking care of a leaking backup light switch on your Jeep Wrangler keeps your vehicle safe, road-legal, and reliable. With a little patience and the right tools, most owners can handle this repair themselves.
Don’t ignore the leak fix it before it causes bigger problems down the road.