Many parents find themselves needing to take apart a Power Wheels Jeep. Maybe it’s time for repairs, upgrading parts, storing the toy, or simply making space in the garage. The idea might sound tricky if you’ve never done it before, but with the right guidance, you can safely disassemble your child’s electric ride-on vehicle—even if you’re not a mechanic. This detailed guide will walk you through every step, highlight what tools you’ll need, and share the tips most beginners miss. By the end, you’ll feel confident taking apart a Power Wheels Jeep without damaging any parts or risking your safety.
Why Take Apart A Power Wheels Jeep?
There are several good reasons to disassemble a Power Wheels Jeep:
- Replacing worn-out parts: Over time, the battery, motor, or wheels may need changing.
- Upgrading components: Some parents swap in better batteries or motors for more speed or longer playtime.
- Cleaning and maintenance: Dirt and moisture can build up inside, causing issues.
- Storage or moving: Disassembled, the Jeep is much easier to transport or store.
- Troubleshooting: If the Jeep stops working, taking it apart helps you find the problem.
Knowing your purpose helps you decide how far you need to go sometimes you only need to remove the seat, while other times you’ll need to strip it down to the frame.
Tools And Supplies You’ll Need
Before you start, gather these common tools and materials:
- Phillips and flathead screwdrivers (both medium and small sizes)
- Needle-nose pliers
- Socket wrench set (usually 7mm or 10mm sizes fit most Power Wheels)
- Plastic trim removal tool (to avoid scratching plastic parts)
- Small containers or labeled bags (for keeping screws and small parts organized)
- Camera or smartphone (take photos as you go for reference)
- Marker and masking tape (label wires or connectors)
- Gloves (protect your hands from sharp plastic edges)
Some models may require specialty bits (like Torx), so check your Jeep’s manual or inspect the screws before starting.
Safety Tips Before Disassembly
Taking apart a Power Wheels Jeep is safe if you follow these precautions:
- Disconnect the battery first. Never work on the Jeep with the battery connected.
- Work in a clean, well-lit area. Lay down a mat or towel to protect parts.
- Keep small children and pets away during the process.
- Use the right size tools to avoid stripping screws.
- Wear gloves if you’re working with old, brittle plastic.
A common beginner mistake is forgetting to disconnect the battery, which can lead to shorts or even small shocks.
Step-by-step Guide: How To Take Apart Power Wheels Jeep
1. Remove The Battery
- Lift the seat to access the battery compartment.
- Disconnect the battery’s quick-connect plug.
- Remove the battery and set it aside.
Pro tip: Always take a picture of the battery wiring before unplugging, so you can easily reassemble it later.
2. Take Off The Seat And Interior Parts
- Most seats are held by screws underneath or at the back.
- Use a Phillips screwdriver to remove these screws.
- Lift the seat out gently.
Other parts like dashboards, steering wheels, or shifters may also have screws or plastic clips. Remove them carefully, using a trim tool if needed.
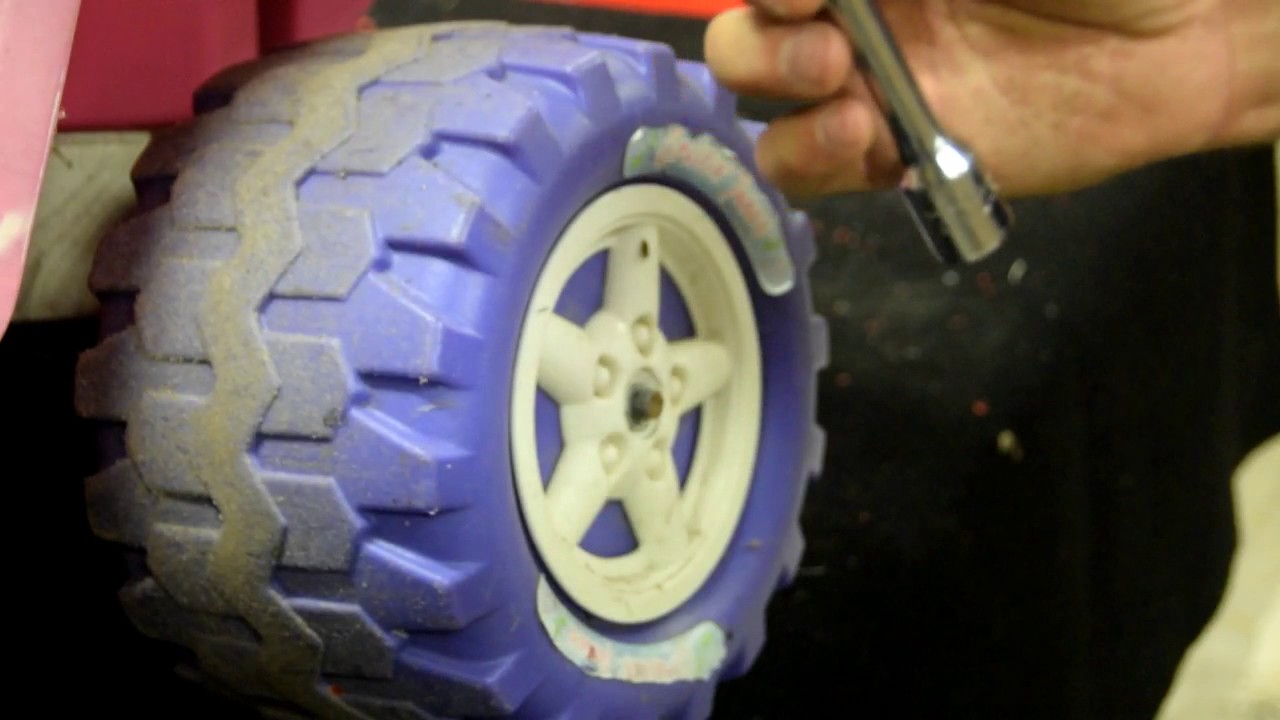
3. Remove Wheels And Axles
- Flip the Jeep onto its side or back for easier access.
- Wheels are usually held by plastic caps or nuts.
- Use a flathead screwdriver to pry off wheel caps.
- Use a socket wrench to remove wheel nuts.
- Slide the wheels off the axle.
For some models, you may need to remove a small retainer clip or washer.
4. Take Off The Body Panels
- Body panels (like doors, hoods, or bumpers) are usually held by screws or plastic tabs.
- Unscrew all visible screws.
- Use a trim removal tool to gently pry apart panels connected by tabs.
If you feel strong resistance, double-check for hidden screws under decals or stickers.
5. Disconnect Electrical Components
- Label all wires with masking tape for easy reassembly.
- Disconnect plugs and wires from the motor, pedal, and battery terminal.
- If wires are held with zip ties, cut them carefully with scissors or a wire cutter.
Non-obvious insight: Some Power Wheels Jeeps have different wire colors for each function (e.g., red for power, black for ground). Taking photos of each connection will save a lot of time later.
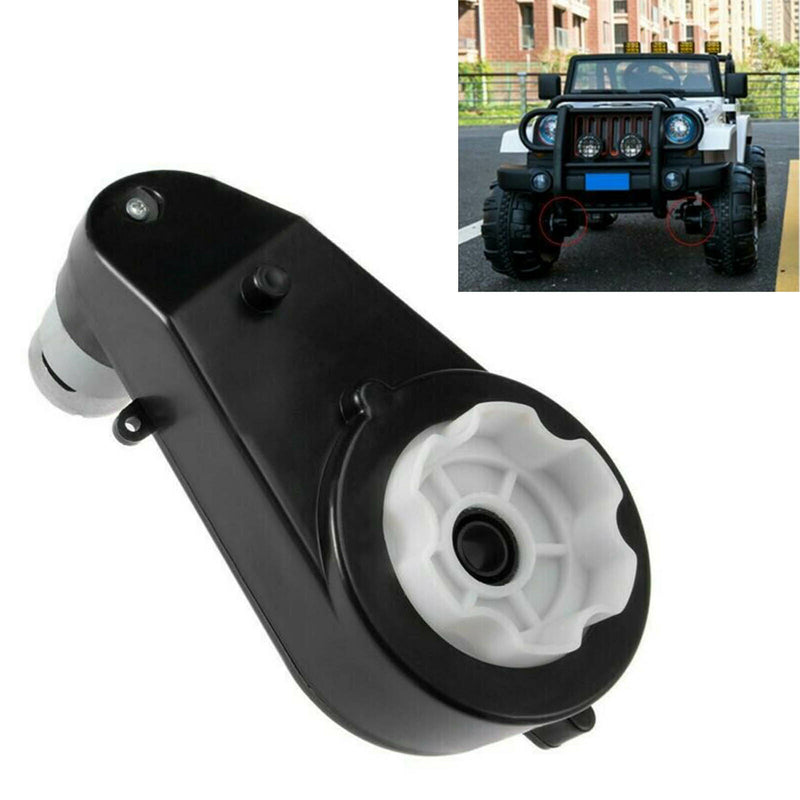
6. Remove Motors And Gearboxes
- Motors are usually attached to the rear axle inside the wheel well.
- Remove the screws holding the motor housing.
- Gently pull the motor and gearbox out, unplugging any remaining connectors.
If the gearbox is stuck, avoid using too much force wiggle it gently or check for hidden fasteners.
7. Separate The Main Body From The Chassis
- The last step is to separate the plastic body from the frame (chassis).
- Look for screws or bolts connecting the two.
- Remove all fasteners and carefully lift the body off the chassis.
You now have a fully disassembled Power Wheels Jeep, ready for repair, upgrade, or storage.
Real-world Example: Disassembly Time And Difficulty
Here’s an example of how long each step might take for a standard Power Wheels Jeep:
| Step | Estimated Time | Difficulty (1-5) |
|---|---|---|
| Remove Battery | 5 minutes | 1 |
| Seat & Interior | 10 minutes | 2 |
| Wheels & Axles | 15 minutes | 3 |
| Body Panels | 20 minutes | 3 |
| Electrical Parts | 10 minutes | 2 |
| Motors & Gearboxes | 15 minutes | 4 |
| Body/Chassis Separation | 15 minutes | 4 |
Most people can finish the job in 60–90 minutes if they have the right tools and follow instructions carefully.
Parts Overview: What You’ll Find Inside
When you take apart a Power Wheels Jeep, you’ll see several key parts:
| Part | Function |
|---|---|
| Battery | Powers the motor and electronics |
| Motors | Drive the wheels |
| Gearboxes | Reduce speed, increase torque |
| Wiring Harness | Connects all electrical parts |
| Steering Mechanism | Allows the wheels to turn |
| Body Panels | Make up the Jeep’s shape |
| Seat and Dashboard | For the rider, controls |
Knowing these basic parts helps you understand what you’re removing and why each step matters.

Common Problems And Solutions
During disassembly, you might face a few issues:
- Stripped screws: Use a rubber band between the screw and screwdriver for extra grip.
- Stuck wheels: Tap gently with a rubber mallet—never use metal tools that can crack the plastic.
- Lost screws or small parts: Always store each group of screws in a labeled bag as you go.
- Hard-to-remove panels: Double-check for hidden clips or screws, especially under stickers.
A mistake many beginners make is forcing parts apart Power Wheels Jeeps are mostly plastic, so they can crack easily if you use too much strength.
Reassembly Tips: Making It Easy To Put Back Together
Taking apart is only half the job—putting it back together is where good planning pays off. Here’s how to make reassembly smooth:
- Take photos at every major step. These will guide you later.
- Label wires and connectors. Use masking tape to mark where each wire goes.
- Sort screws and parts in separate, labeled containers.
- Lay out parts in order of removal.
- Check parts for damage or wear before reinstalling.
A surprising tip: If you plan to upgrade or repair, order replacement parts before you start. Many Power Wheels parts, like gearboxes or wheels, are available online and can be swapped during reassembly. For official parts and manuals, visit the Mattel Power Wheels Service website.
Maintenance Insights Most People Overlook
When you open up a Power Wheels Jeep, you have a perfect chance to:
- Clean inside the body: Dust and dirt build up inside and can cause electrical problems.
- Check connectors for corrosion: Battery terminals and motor wires sometimes corrode—clean them with a bit of vinegar and a brush.
- Lubricate moving parts: A small amount of silicone spray on axles and gears can prevent squeaks.
- Inspect for stress cracks: Look at corners and joints for cracks that may need gluing before reassembly.
Most beginners miss these chances and put the Jeep back together without maintenance then wonder why issues return.
Comparison: Power Wheels Jeep Vs. Other Ride-on Toys (disassembly Difficulty)
How does taking apart a Power Wheels Jeep compare to other popular ride-on vehicles?
| Ride-On Type | Disassembly Difficulty | Typical Time |
|---|---|---|
| Power Wheels Jeep | Moderate | 60–90 min |
| Power Wheels ATV | Easy | 30–45 min |
| Power Wheels Truck | Hard | 90–120 min |
| 12V Electric Scooter | Easy | 20–30 min |
The Jeep is a bit more complex than an ATV but easier than some trucks.
How Do I Know Which Screws To Remove First?
Start with the most visible and accessible screws. Usually, this means removing the seat and wheels first, then working inward.
Taking photos and labeling parts as you go helps avoid confusion.
Can I Take Apart A Power Wheels Jeep Without Special Tools?
Most of the job can be done with basic screwdrivers and a socket wrench. However, some models may need Torx bits or specialty tools.
Always check your model’s manual or inspect the screws before starting.
Is It Safe To Let My Child Help?
Children can help with simple steps, like storing screws in bags or wiping off parts, but should not handle electrical components or sharp tools. Always disconnect the battery first.
Will Taking Apart My Power Wheels Jeep Void The Warranty?
Disassembling the Jeep can void the warranty if it’s still under coverage. If you’re not sure, check the warranty information before you start or contact the manufacturer.
Where Can I Find Replacement Parts?
You can order official replacement parts from the Mattel Power Wheels Service website or trusted retailers. Make sure to have your Jeep’s model number handy for the correct fit.
Taking apart a Power Wheels Jeep might look like a big job, but with patience, clear labeling, and good photos, it’s a process anyone can handle.
Each step is a chance to learn more about how your child’s toy works and to keep it running smoothly for years.
Remember to use the right tools, stay organized, and don’t rush your Power Wheels Jeep will be back together and ready for the next adventure in no time.