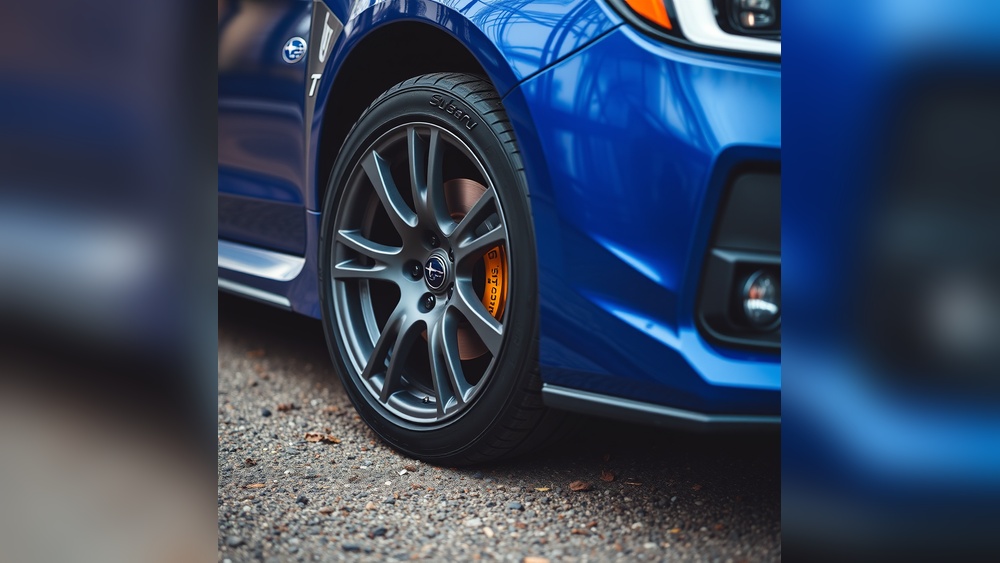
Mounting auxiliary lights on your Jeep is more than just adding style. It’s about increasing visibility, boosting safety, and sometimes, making adventures possible after dark. Many Jeep owners want to install auxiliary lights but feel unsure about the process. With the right steps, it’s not as complicated as it may seem—even if you’re new to DIY car projects. This guide will walk you through everything you need to know, from choosing the right lights to wiring and mounting them properly. Along the way, you’ll find tips, mistakes to avoid, and insights that most beginners miss.
Why Add Auxiliary Lights To Your Jeep?
Auxiliary lights offer several real benefits. The most obvious is improved visibility when off-roading, driving in fog, or exploring remote areas at night. Stock Jeep headlights often don’t provide enough light for serious trails or poorly lit roads. Auxiliary lights fill these gaps.
 UPLUS BCI Group 48 Car Battery, AGM-L70-M Maintenance Free 12V 70Ah Premium AGM Batteries H6 L3 Automotive Battery, 760CCA, 120RC$145.34$152.99
 Weize Platinum AGM Battery BCI Group 94R - 12v 80ah H7 Size 94R Automotive Battery, 140RC, 850CCA, 36 Months Warranty, Dimensions 12.4" L x 6.89" W x 7.48" H$173.99
 Weize Platinum AGM Battery BCI Group 47-12v 60ah H5 Size 47 Automotive Battery, 100RC, 680CCA, 36 Months Warranty, Dimensions 9.52" L x 6.89" W x 7.48" H$149.99$174.99
 ACDelco Gold AUX14-200 (88866185) 36 Month Warranty Auxiliary AGM 200 CCA Battery$111.62
 ACDelco Gold 94RAGM (88864542) 36 Month Warranty AGM BCI Group 94R Battery$153.84$180.99
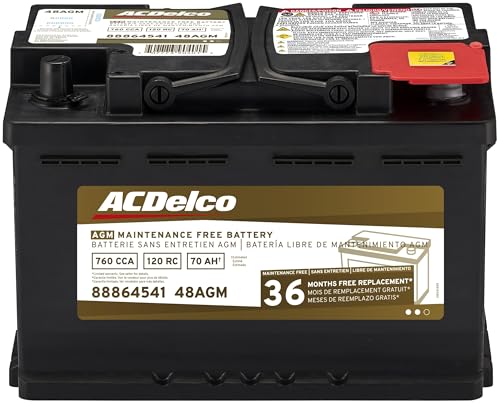 ACDelco Gold 48AGM (88864541) 36 Month Warranty AGM BCI Group 48 Battery$152.99$179.99
They also make your Jeep more noticeable to others, which can help prevent accidents. Plus, certain types of lights, like amber fog lights, can cut through dust or heavy rain in ways regular lights can’t.

For enthusiasts, mounting lights is also an affordable way to customize the look of a Jeep.
Types Of Jeep Auxiliary Lights
Before you mount anything, you need to pick the right type of auxiliary light. Each serves a different purpose:
| Type | Purpose | Best For |
|---|---|---|
| Fog Lights | Short, wide beam for low visibility | Rain, snow, fog, dust |
| Spot Lights | Long, narrow beam | Seeing far ahead on trails |
| Flood Lights | Wide, short-range illumination | Lighting up campsites or work areas |
| Light Bars | Multiple LEDs in a row | Maximum area coverage |
| Rock Lights | Small lights under the vehicle | Spotting obstacles off-road |
Non-obvious tip: Not all auxiliary lights are legal for road use in every state. Always check your local laws before installation.

What You Need Before Starting
Gathering the right tools and materials makes the job much easier. Here’s what you’ll typically need:
- Auxiliary light kit (comes with lights, brackets, wiring harness, relay, switch)
- Basic hand tools: Screwdriver, wrench set, pliers
- Drill and drill bits (if new holes are needed)
- Wire crimper and stripper
- Electrical tape or heat shrink tubing
- Multimeter (for checking connections)
- Zip ties or cable clamps (for neat wiring)
If you buy a kit, most of these items are included except basic hand tools.
Choosing The Best Mounting Location
Where you mount your lights impacts both performance and legality. Here are the most common mounting spots for Jeep auxiliary lights:
| Location | Pros | Cons |
|---|---|---|
| Bumper | Easy access, legal in most states | Limited field of view |
| Windshield Pillar (A-pillar) | Great for side illumination | May create glare if misaligned |
| Roof or Light Bar | Widest coverage | Potential wind noise, legal restrictions |
| Grille | Low profile, protected | May block airflow or be less effective |
| Underbody (Rock Lights) | Excellent for off-roading | Not useful for street driving |
Practical advice: For most beginners, bumper or A-pillar mounts are the easiest and safest choices.
Step-by-step Guide: How To Mount Jeep Auxiliary Lights
Let’s break down the process into simple steps. This example uses bumper or A-pillar mounting, but the basic process is similar for other locations.
1. Plan Your Setup
Decide exactly where you want to place your lights. Hold the light in position and look at the beam pattern.
Make sure nothing will block the light and the wires can reach the battery or fuse box. Mark your mounting points with a pencil or masking tape.
2. Attach Mounting Brackets
Most light kits come with brackets designed for specific locations. Secure the brackets using existing bolts if possible. If not, you may need to drill new holes. Always check behind the area before drilling to avoid damaging wires or hoses.
Pro tip: Use anti-seize lubricant on bolts to make future removal easier, especially if you drive in wet or salty conditions.
3. Install The Lights
Attach the lights to the brackets. Adjust the angle so the beams point slightly down and away from other drivers’ eyes. Tighten all hardware but don’t overtighten this can crack plastic housings.
4. Route The Wiring
Wiring is where many beginners get stuck. Take your time. Most light kits include a wiring harness with a relay, fuse, and switch.
- Route the wires from the lights to the battery, following the path of existing wires when possible.
- Avoid sharp edges and hot engine parts.
- Use zip ties to secure the wires neatly.
- Feed the switch wire through the firewall to the cabin.
Beginner mistake: Running wires without protection can cause short circuits. Always cover exposed wires with split loom tubing or electrical tape.
5. Connect To Power
- Connect the black (ground) wire to a bare metal surface on the chassis.
- Connect the red (power) wire to the positive battery terminal or fuse box.
- Install the relay and fuse as shown in your kit’s diagram.
- Double-check all connections with a multimeter.
Non-obvious insight: If you plan to use multiple auxiliary lights, use a switch panel or power distribution block. This keeps your wiring organized and safer.
6. Mount The Switch
Choose a spot in the cabin that’s easy to reach but doesn’t get bumped accidentally. Many people mount switches near the dash, center console, or on blank switch panels. Drill a small hole for the switch if needed, then secure it.
7. Test Everything
Before tidying up, test the lights:
- Turn on the switch. The lights should come on without flickering.
- If they don’t, check all connections, fuses, and the ground wire.
- Adjust the beam angle as needed.
Only tidy up the wires and close everything up once you’re sure the system works.
Common Problems And How To Avoid Them
Even experienced DIYers make mistakes. Here are a few to watch for:
- Loose connections cause flickering or total failure. Always tighten all terminals.
- Grounding to painted surfaces can prevent the circuit from working. Always ground to bare metal.
- Mounting lights too high can cause glare and may be illegal on the street.
- Not using a relay overloads your switch and wiring, which can lead to electrical fires.
- Using the wrong fuse size risks blowing fuses or worse, damaging your Jeep’s wiring.
How To Aim Your Auxiliary Lights
Proper aiming is essential. Poorly aimed lights can blind other drivers or be useless off-road.
- For bumper-mounted fog lights, the top of the beam should be just below the hood line when parked 25 feet from a wall.
- For spot or flood lights, angle them slightly downward and outward.
- Roof or A-pillar lights should be used only off-road, as they can cause glare on the road.
Maintenance Tips
Auxiliary lights are tough, but they still need care:
- Clean lenses regularly to keep light output strong.
- Check mounts and hardware every few months, especially after off-roading.
- Inspect wiring for wear or damage after rough trails.
- Replace bulbs or LEDs as soon as they dim or fail.

Cost Breakdown
Installing auxiliary lights can be affordable or expensive, depending on your choices. Here’s a quick comparison:
| Component | Budget Option | Premium Option |
|---|---|---|
| Light Kit | $50–$100 | $300–$600+ |
| Wiring Harness | Included | Included or $50+ |
| Mounting Brackets | Included/Extra $20 | Custom $100+ |
| Professional Installation | DIY | $150–$500 |
DIY installation is usually the best value unless you’re not comfortable with wiring.
Safety And Legal Considerations
Auxiliary lights are powerful, so safety comes first. Always use a relay and fuse, double-check wiring, and never exceed your Jeep’s electrical limits.
Many states have strict rules about how many lights you can have and how they can be used on public roads.
Cover roof-mounted lights when not off-roading, and check regulations to avoid tickets.
For more on vehicle lighting laws, check the Automotive Lighting page on Wikipedia.

Pro Tips For A Professional Look
- Use heat shrink tubing instead of electrical tape for permanent, waterproof connections.
- Add weatherproof connectors if your lights are exposed to water or mud.
- Label your wires and switches, especially if you add more lights later.
- Take photos of each step, so you remember how everything fits.
Frequently Asked Questions
How Many Auxiliary Lights Can I Legally Add To My Jeep?
This depends on state laws. Most states allow two auxiliary lights on the bumper. Roof or A-pillar lights may need to be covered on public roads. Always check your local Department of Motor Vehicles for up-to-date rules.
Do I Need To Disconnect My Jeep’s Battery Before Installation?
Yes, always disconnect the negative battery terminal before starting any electrical work. This prevents accidental shorts and protects you from shocks.
Can I Wire Multiple Lights To One Switch?
Yes, but only if you use a relay and ensure the total current doesn’t exceed your wiring’s capacity. For three or more lights, consider a dedicated switch panel with fused circuits.
What’s The Difference Between Spot And Flood Lights?
Spot lights focus light in a narrow, long beam for distance. Flood lights spread light over a wide area for close-up visibility. Many Jeep owners use both for best results.
Will Adding Auxiliary Lights Drain My Jeep’s Battery?
If installed correctly with a relay and only used when the engine is running, the battery will not drain. Running high-wattage lights with the engine off can drain the battery quickly.
Mounting auxiliary lights on your Jeep can transform your night driving and off-road adventures. With careful planning, the right tools, and attention to detail, you’ll enjoy brighter trails and a safer ride.
Whether you choose bumper fogs or a full light bar, the confidence of DIY installation is hard to beat.