If you drive a Jeep Wrangler, you know the feel of the steering wheel is important. Over time, the factory steering wheel can wear out, feel slippery, or just not match your style.
Installing a new wrap is an easy way to improve grip, update your interior, and protect the wheel from damage.
Even if you’re new to car DIY projects, you can learn how to wrap a Jeep Wrangler steering wheel with a bit of patience and the right guide. Let’s walk through the process step-by-step, with practical tips and clear instructions.
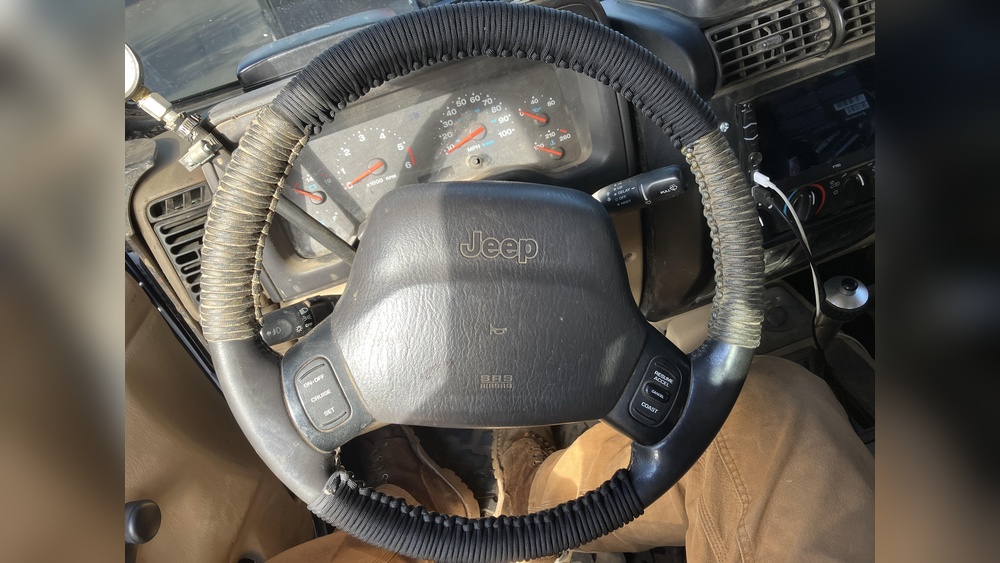
Why Wrap Your Jeep Wrangler Steering Wheel?
A steering wheel wrap does more than look good. Here are some real benefits:
- Better grip: Many wraps use textured materials for a non-slip hold.
- Comfort: Padded wraps reduce hand fatigue on long drives.
- Protection: They shield the original wheel from sun, sweat, and scratches.
- Style: Choose colors or patterns that fit your Jeep’s personality.
- Resale value: A clean, protected steering wheel makes a better impression.
Some drivers even report that using a quality wrap reduces temperature extremes in hot or cold weather, making the wheel comfortable year-round.
Choosing The Right Steering Wheel Wrap
Before you start, you’ll need the right wrap. Not all wraps fit all steering wheels, and the Jeep Wrangler has its own size and shape.
| Wrap Type | Material | Fit | Average Price |
|---|---|---|---|
| Universal Slip-On | Rubber, Synthetic Leather | Loose | $10–$25 |
| Stitch-On Custom | Genuine/Synthetic Leather | Snug, Custom | $30–$60 |
| Pre-Molded Covers | Plastic, Silicone | Varies | $15–$40 |
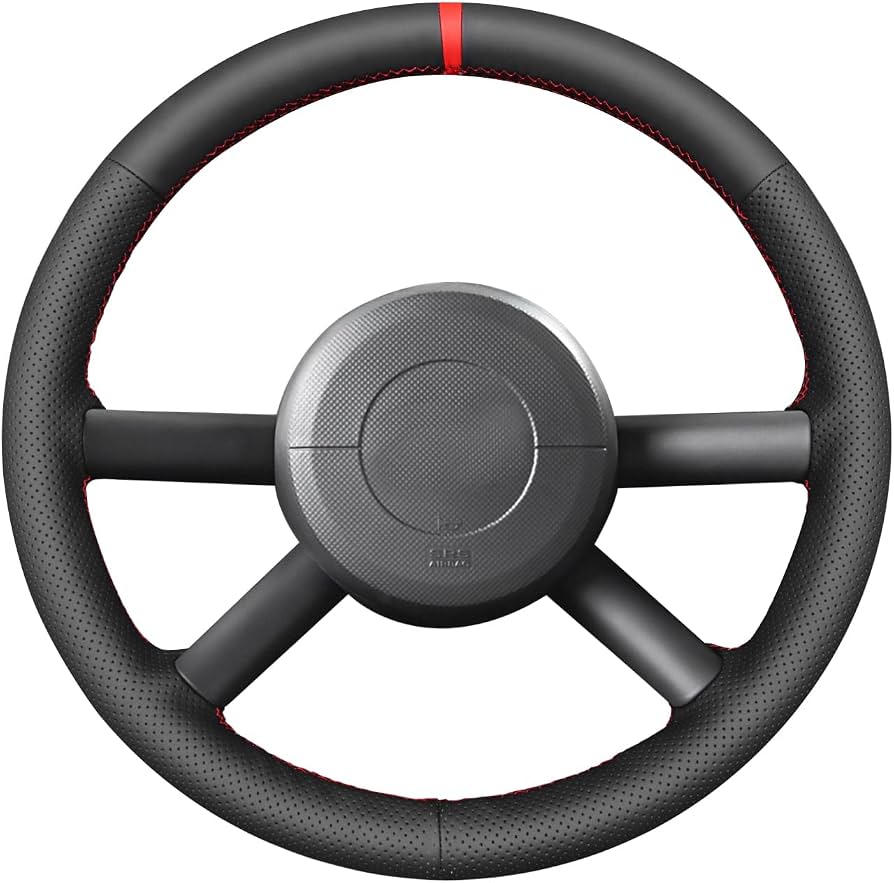
Stitch-on custom wraps are the best for a Wrangler. They fit tightly, feel premium, and won’t slip during off-road driving. Look for one made for your Jeep’s model year. Measure your wheel’s diameter and grip thickness before buying.
Key Features To Look For
- Material: Leather feels natural and lasts long. Microfiber is soft and easy to clean. Silicone grips well but can look less refined.
- Color/Style: Match your Jeep’s seats, dash, or exterior. Black with red stitching is popular for a sporty look.
- Breathability: Perforated or ventilated wraps stay cooler in summer.
- Ease of installation: Some kits include pre-punched holes and strong thread.
Common Mistakes When Choosing
- Buying a universal cover that’s too loose.
- Not checking compatibility with your Jeep year/model.
- Ignoring thread color—contrast stitching can look odd if mismatched.
Tools And Materials Needed
You won’t need many tools, but having the right ones makes installation much easier.
- Steering wheel wrap kit (should include thread and needle)
- Scissors
- Double-sided tape (optional, for extra grip)
- Measuring tape
- Alcohol wipes or a mild cleaner
- Cloth or microfiber towel
- Clips or binder clips (to hold wrap in place while stitching)
- Patience! (this is not a 5-minute job)
Most quality kits include extra thread. If you’re a beginner, buy a kit with detailed instructions or a QR code link to a video.
Preparing Your Jeep Wrangler Steering Wheel
Proper prep helps the wrap last longer and look better.
- Clean the wheel thoroughly. Use alcohol wipes or a cloth with mild cleaner to remove dirt, oil, and sweat. Let it dry fully.
- Check for damage. If the original wheel has cracks or loose material, sand it lightly or glue down loose parts.
- Test fit the wrap. Place it around the wheel before stitching to ensure it covers the entire grip area.
- Align any markings. If the wrap has a center stripe or logo, align it at the top center.
A small detail: If you use double-sided tape under the wrap (optional), it can prevent slipping, especially in hot climates.
How To Wrap The Steering Wheel: Step-by-step
1. Position The Wrap
Slide the wrap onto the wheel, matching its seams or markings with the spokes. Use clips to hold it in place. Make sure it’s centered and even on all sides.
2. Thread The Needle
Most kits include extra-strong thread. Cut a length about 3 4 times the wheel’s circumference. Thread the needle and tie a knot at the end.
3. Start Stitching
Begin at the lower center of the wheel (near the bottom spoke). Insert the needle through the first holes of both sides of the wrap, pulling the thread tight. Use the baseball stitch method for best results:
- Pass the needle under the wrap and up through the next hole on the opposite side.
- Cross over and repeat, keeping stitches snug and even.
A tip many beginners miss: Don’t pull the thread too tightly at first. If you do, the wrap may bunch up or misalign. Instead, stitch loosely for the first round, then tighten all stitches gradually.
4. Work Around The Wheel
Continue stitching, adjusting the wrap as you go. Pay special attention to the area around spokes this can be tricky. Some wraps have cutouts or special holes for these parts.
If the wrap bunches up near the spokes, pause and gently stretch the material to smooth it. Use extra clips if needed.
5. Finish And Secure
When you reach the starting point, tie off the thread with a double knot. Tuck any excess thread under the wrap using the needle. Remove any clips.
If you used tape, press firmly all around the wheel to set the adhesive.
6. Final Adjustments
Check the alignment. If the wrap shifts, gently rotate it back into place and retighten any loose stitches.
Wipe the wrap with a clean cloth to remove fingerprints.
Tips For A Perfect Finish
- Take breaks: Stitching takes time. Rushing can lead to uneven lines or finger fatigue.
- Keep thread tension even: Uneven tension is the most common cause of a lumpy look.
- Use good lighting: You’ll need to see small holes clearly.
- Practice the stitch: Try a few stitches on scrap material if you’ve never used a baseball stitch before.
- Let the wrap settle: In hot weather, the wrap will stretch a bit and fit even more snugly after a few days.
Comparison: Diy Wrap Vs. Professional Installation
Should you do it yourself or pay a pro? Here’s a quick look:
| DIY Installation | Professional Installation |
|---|---|
| $30–$60 (kit cost) | $100–$200 (parts + labor) |
| 2–3 hours (first time) | 1–2 hours (you wait) |
| Personal satisfaction, custom fit | Expert result, no effort |
| Risk of mistakes, but fixable | Guaranteed fit and finish |
Most Jeep owners choose DIY because it’s not too hard and saves money. Plus, you get to say you did it yourself.
Maintenance And Care After Wrapping
A quality wrap should last for years if maintained well.
- Clean regularly: Wipe with a damp cloth every week. For leather, use a special conditioner every few months.
- Avoid harsh chemicals: Alcohol or bleach can dry out or discolor the wrap.
- Protect from sun: Use a sunshade if you park outdoors. UV rays fade and crack even the best materials.
- Watch for loose stitches: If you see any, tighten or repair immediately to prevent bigger problems.
Many drivers forget to condition leather wraps, which leads to early wear. A little care goes a long way.
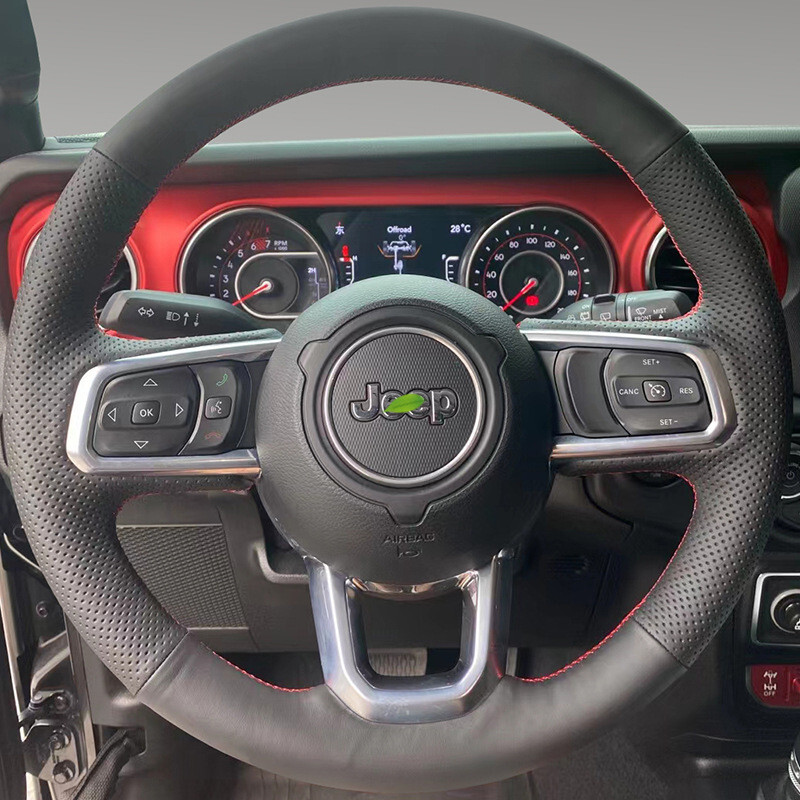
Real-world Example: Jeep Wrangler Steering Wheel Wrap Results
After wrapping the wheel, many Jeep owners report:
- Better driving feel: The wheel feels thicker and more secure.
- No more slippery grip: Especially helpful off-road or in wet conditions.
- Personalized look: A custom wrap can match seat covers, shifters, or dash accents.
- Increased comfort: Especially on long trips or during hot/cold weather.
One Jeep forum member shared that after installing a black leather wrap with red stitching, his friends thought he had replaced the entire wheel. This upgrade can make your older Wrangler’s interior look new again.
Mistakes To Avoid
Even careful DIYers make these errors:
- Skipping the cleaning step: Dirt under the wrap causes bumps and early wear.
- Overtightening stitches immediately: This can deform the wrap. Tighten gradually.
- Choosing a poor-quality kit: Thin materials or weak thread can break quickly.
- Not aligning the wrap: A crooked center stripe is very noticeable.
- Ignoring spoke areas: These are the hardest parts—go slow and be patient.
When To Replace Or Rewrap
Most quality wraps last 2–5 years, depending on use and climate. Replace if you notice:
- Fading or cracking
- Loose or broken stitches
- Odor or mold (usually from trapped moisture)
- Loss of grip
A quick rewrap can keep your Jeep’s interior looking and feeling fresh.
Where To Find The Best Kits
You can buy steering wheel wrap kits from major auto parts stores, online retailers, or specialty shops. For quality and fit, look for brands with good reviews and Jeep-specific sizing.
For more advice on choosing materials and brands, check Consumer Reports.
How Long Does It Take To Wrap A Jeep Wrangler Steering Wheel?
For beginners, expect 2 to 3 hours. Experienced DIYers may finish in 1 to 1. 5 hours. Take your time for the best result.
Can I Wrap A Steering Wheel Without Removing It From The Jeep?
Yes, you can install most wraps while the steering wheel is still in the Jeep. Just turn the wheel as you work to reach all areas.
Will A Wrap Make My Steering Wheel Thicker?
Yes, most wraps add 1 2 mm of thickness. This often improves grip and comfort but can feel bulky if you have small hands.
What If I Make A Mistake During Installation?
If you notice a problem (like uneven stitches or misalignment), gently remove the thread and start over. Most wraps can handle being redone once or twice without damage.
Do Steering Wheel Wraps Affect Airbags?
No, as long as you install the wrap only on the wheel’s grip area and not on the center or spokes. Never cover or interfere with the airbag housing.
A new steering wheel wrap can make your Jeep Wrangler feel like a whole new ride. With the right kit and careful work, you’ll enjoy better comfort, style, and protection for years to come.