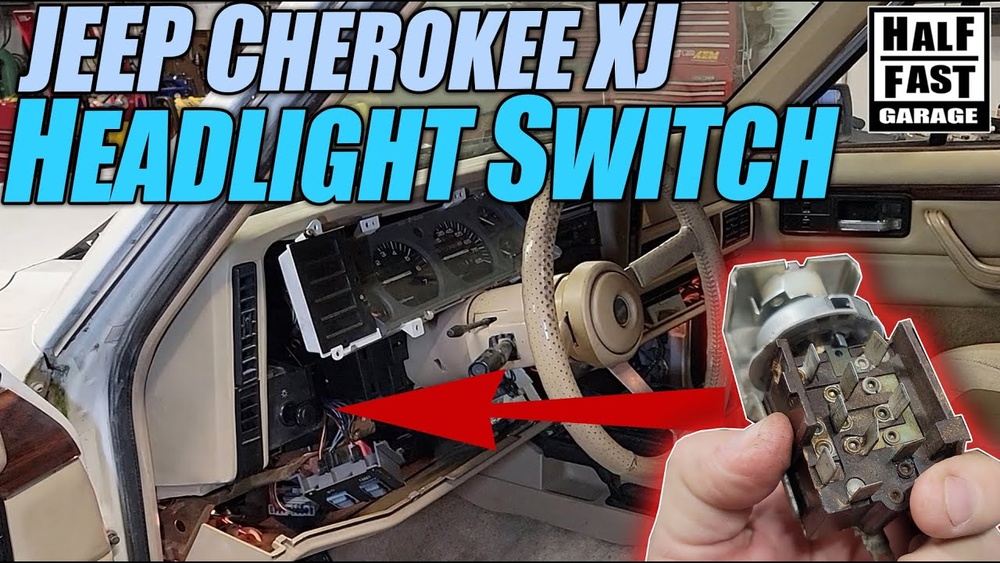
If your Jeep Cherokee’s light switch has become faulty, sticky, or simply stopped working, replacing it can help restore your headlights, interior lights, and dashboard controls. Many drivers are surprised to learn that removing the light switch is a manageable DIY project. With the right steps, some patience, and a few basic tools, you can save both time and money by handling this repair yourself. Whether you have an older XJ model or a newer Cherokee, this guide will walk you through the complete process—covering safety, tools, detailed steps, and real-world tips for a smooth switch removal.
Why Remove The Jeep Cherokee Light Switch?
The light switch in your Jeep Cherokee controls essential functions: headlights, parking lights, dashboard illumination, and sometimes fog lights. Over time, this switch can wear out from frequent use, exposure to dust, or electrical issues. Signs you may need to remove or replace your switch include:
- Headlights won’t turn on or off
- Dash lights flicker or fail
- Switch feels loose, sticky, or stuck
- Burning smell or visible damage around the switch
Ignoring a faulty switch can be unsafe, especially if your headlights stop working at night or in bad weather. Replacing the switch ensures your vehicle remains road-legal and safe.
Tools And Parts Needed
Before you begin, gather these items for a safe and efficient removal:
- Screwdrivers: Phillips and flathead
- Socket set: Typically 7mm and 10mm sockets
- Trim removal tool (plastic recommended to avoid scratches)
- Replacement light switch (for your Jeep Cherokee year/model)
- Flashlight (if working in low light)
- Work gloves (optional but protects hands)
- Small container for screws and clips
Keep in mind that Cherokee models from 1984–2001 (XJ) differ from 2014 and newer models. The older models have a more mechanical switch design, while newer ones use more electronics and sometimes require special security tools.
Safety Steps Before You Start
Car electrical systems can be dangerous if handled carelessly. Before you touch anything, always:
- Disconnect the negative battery cable. This prevents electrical shorts or accidental airbag deployment.
- Wait at least 10 minutes after disconnecting the battery. This lets any stored power in the system drain out.
- Keep your keys out of the ignition during the process.
For extra safety, wear gloves and eye protection, especially if you’re new to working with auto parts.
Step-by-step: Removing The Light Switch
The following steps focus on the Jeep Cherokee XJ (1984–2001), but most principles are similar for other models. If you drive a newer Cherokee, check your owner’s manual for extra steps, especially if your switch is integrated into a multifunction stalk.
1. Remove Dashboard Panels
Most light switches sit behind a trim panel on the dashboard. To access it:
- Use a trim removal tool to gently pry off the dash bezel around the instrument cluster. Start from one corner and work slowly to avoid cracking the plastic.
- Remove any screws securing the bezel. Typical locations are above the instrument cluster and near the steering column.
- Set the bezel aside in a safe place.
2. Locate And Unfasten The Switch
With the trim off, you’ll see the light switch and its mounting screws.
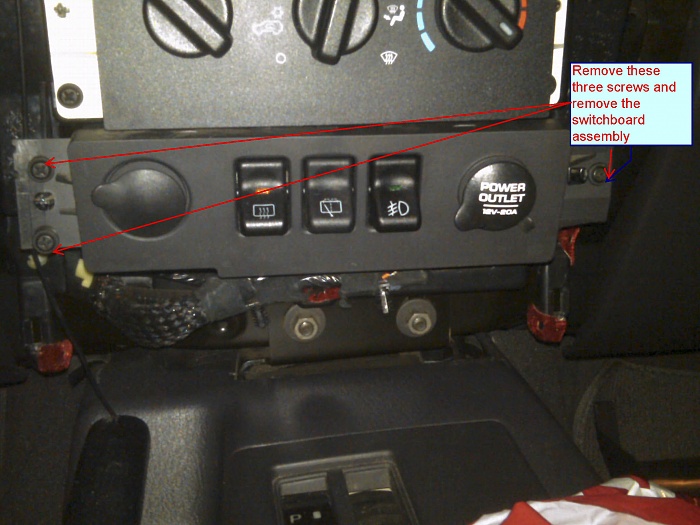
- Use a Phillips screwdriver or socket to remove the screws holding the switch in place.
- Carefully pull the switch out just enough to access the wiring harness at the back.
3. Disconnect The Wiring Harness
The wiring harness may have a locking tab. To disconnect:
- Press the locking tab and gently pull the connector away from the switch.
- Avoid pulling on the wires themselves, as this can damage the harness.
4. Remove The Light Switch
Once the connector is off:
- Slide the switch out completely.
- If you plan to reuse the old switch, place it somewhere clean to avoid damage.
5. Inspect For Damage
Before installing a new switch (or reassembling the dash), check:
- The wiring connector for signs of corrosion or melted plastic
- The mounting area for broken clips or loose screws
- The switch itself for burnt areas or melted contacts
If you see any damage, address it before reinstalling parts. Sometimes, a faulty harness can cause repeated switch failures.

Tips For Different Jeep Cherokee Models
Not all Cherokees are the same. Here’s a comparison of common switch removal features across generations:
| Model Year | Switch Location | Removal Difficulty | Special Notes |
|---|---|---|---|
| 1984–2001 XJ | Left dashboard bezel | Easy | Simple screws, no electronics |
| 2002–2013 Liberty/KK | Steering column stalk | Moderate | Multifunction lever, may need Torx |
| 2014–present KL | Lower dash panel | Medium-Hard | Electronic, may need dealer reprogram |
For newer models, always check if the light switch is part of a larger electronic module. If so, removing it may require special tools or dealer programming.
Common Mistakes To Avoid
DIY repairs go smoother when you know what to watch out for. Here are mistakes many beginners make:
- Forgetting to disconnect the battery – This can cause a short or trigger the airbag.
- Breaking dashboard clips – Plastic gets brittle with age. Use a plastic trim tool, not a screwdriver.
- Losing screws or clips – Keep a small container nearby for all hardware.
- Forcing connectors – If a plug won’t come off, double-check for a hidden tab.
- Skipping harness inspection – A burned or corroded connector can ruin a new switch.
A surprising insight: In some models, the switch knob must be pulled out and turned before the bezel can be removed. Always check your manual for model-specific steps.

Step-by-step: Reinstalling The Light Switch
Once you’ve removed the old switch, installing a new one is almost the reverse process. Here’s how to do it right:
- Plug the wiring harness into the new switch until it clicks.
- Slide the switch into the dashboard and secure it with screws.
- Reattach the dashboard trim, pressing gently to avoid breaking clips.
- Reconnect the negative battery cable.
- Test all lights (headlights, parking, dash, fog) before closing up.
If your lights do not work after installation, double-check the connector and fuse.
Troubleshooting After Replacement
Sometimes, replacing the switch doesn’t fix all the problems. Here’s a quick troubleshooting table for common issues:
| Problem | Possible Cause | What to Check |
|---|---|---|
| Headlights still won’t work | Blown fuse or relay | Check fuse box and headlight relay |
| Dash lights flicker | Loose harness or bad ground | Inspect connector and ground wire |
| Switch gets hot | Overloaded circuit | Check for aftermarket high-watt bulbs |
| Lights stay on after removing key | Faulty switch or relay | Test with a known good switch |
If these steps don’t solve the issue, consult a professional mechanic or a Jeep specialist.
How Much Does It Cost?
Removing and replacing a Jeep Cherokee light switch is generally affordable compared to many auto repairs. Here’s a breakdown of typical costs:
| Expense | Price Range (USD) | Notes |
|---|---|---|
| Light switch (aftermarket) | $20–$50 | Varies by model/year |
| Light switch (OEM) | $40–$120 | Dealer or specialty parts |
| Labor (if not DIY) | $60–$150 | 1–2 hours standard rate |
| Trim tools | $10–$20 | Reusable for other projects |
Doing the job yourself can save up to $150 in labor, and you’ll gain useful hands-on experience.
Real-world Tips For A Smooth Switch Removal
- Label your screws and parts. Use masking tape to mark where each screw came from—this helps during reassembly.
- Take smartphone photos as you go. These can be a lifesaver if you forget how something fits.
- Don’t rush. Rushing is the number one cause of broken clips and stripped screws.
- Test the switch before fully reassembling. Make sure everything works before snapping panels back into place.
- Check your manual for quirks. Some Cherokees have unique steps, especially around the steering column.
A non-obvious insight: If your switch fails more than once, check the headlight relay and wiring harness for hidden problems. Sometimes the switch is just a symptom, not the root cause.
When To Seek Professional Help
While most Cherokee owners can remove and replace the light switch themselves, there are situations when a professional is best:
- If your model has steering wheel airbags (common in 2000s and newer), improper handling can be dangerous.
- For newer KL models, dealer reprogramming may be needed after switch replacement.
- If you see melted wires or burning smells, there may be a deeper electrical fault.
In these cases, a certified mechanic or dealer has the right tools and training. For more info on automotive electrical repairs, check the Automotive Lighting Wikipedia page.
How Do I Know If My Jeep Cherokee Light Switch Is Bad?
Common signs include headlights or dash lights not working, a switch that feels loose, or a burning smell. Sometimes, flickering lights or the switch not staying in position are also clues.
Can I Drive My Jeep Without A Working Light Switch?
It’s not safe or legal to drive without working headlights or taillights. If your switch fails, repair it before driving at night or in poor weather.
Do I Need Special Tools To Remove The Light Switch?
Usually, only basic tools like screwdrivers and a socket set are needed. Some newer models may require Torx bits or special security tools.
Will Replacing The Switch Fix All My Lighting Problems?
Not always. If the problem is in the wiring, fuses, or relays, simply changing the switch may not solve everything. Always check for underlying issues.
How Long Does It Take To Remove And Replace The Light Switch?
For most people, the job takes 30–60 minutes. If it’s your first time, allow extra time to go slowly and avoid mistakes.
Swapping out your Jeep Cherokee light switch is one of those repairs that sounds difficult but is very doable for most owners. With a careful approach, the right tools, and a little patience, you can restore your lighting controls and save on repair costs.
Remember to follow safety steps, consult your manual, and double-check your work before hitting the road.