If you drive a 2000 Jeep Wrangler, you know how important the dashboard lights are. They help you see speed, fuel, and warning signals at night. When these lights stop working or become dim, driving can be uncomfortable or even unsafe. Changing dash lights is a simple task if you have basic tools and a little patience. This guide will show you step-by-step how to change dash lights on your Jeep Wrangler, including tips and common mistakes. You don’t need special skills—just follow each step and you’ll have bright dash lights again.
Understanding Dash Lights On 2000 Jeep Wrangler
Dash lights are small bulbs behind your dashboard gauges. They light up the speedometer, tachometer, fuel gauge, and warning icons. When these bulbs fail, the dash becomes dark or hard to read. Most Wranglers use simple wedge bulbs (type 194 or similar). You can buy replacements online or at auto parts stores. Some owners upgrade to LED bulbs for brighter light and longer life.
Jeep Wrangler dashboards are known for their rugged design. But the dash panel removal can be tricky if you’ve never done it.
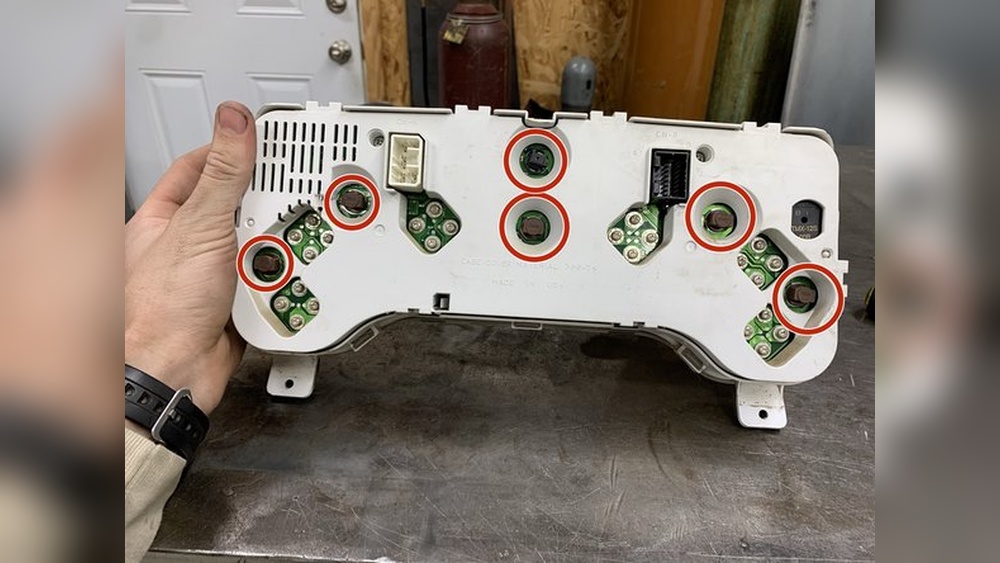
The dash lights are not hard to reach, but you’ll need to remove some panels and screws.
Tools And Materials You’ll Need
Before starting, gather these tools:
- Phillips screwdriver (medium size)
- Flathead screwdriver
- Socket wrench (7mm or 8mm, sometimes needed)
- Replacement dash bulbs (type 194, or LED upgrade)
- Gloves (optional, keeps bulbs clean)
- Flashlight (if working in dim area)
Some parts may need gentle prying, so a plastic trim tool is helpful. Don’t use metal tools for prying metal can scratch your dashboard.
Step-by-step Guide To Changing Dash Lights
Let’s break down the process into clear steps.
1. Disconnect The Battery
Safety first. Disconnect the negative battery cable before starting. This prevents electrical shorts and keeps you safe.
- Open hood, find battery.
- Use wrench to loosen negative terminal (black).
- Move cable away from battery.
2. Remove Dash Panel
The dash panel covers the gauges and bulbs. Removing it gives access to the back of the cluster.
- Locate screws around dash bezel (usually below steering column and above glove box).
- Remove screws with Phillips screwdriver.
- Gently pull bezel outward. Some clips may hold it—use plastic trim tool if needed.
- Set bezel aside.
3. Remove Instrument Cluster
The instrument cluster is where the bulbs are installed.
- Unscrew cluster mounting screws (usually 4).
- Carefully pull cluster toward you.
- Disconnect wiring harness at the back. Press tab to release.
- Place cluster on clean surface.
4. Replace Dash Bulbs
Bulbs are visible at the back of the cluster. Each bulb sits in a small socket.
- Turn bulb sockets counterclockwise to remove.
- Pull old bulb out of socket.
- Insert new bulb (type 194 or LED).
- Reinstall bulb socket by turning clockwise.
For LED bulbs, check polarity. If bulb doesn’t light up after installation, flip it around.
5. Reinstall Cluster And Dash Panel
- Reconnect wiring harness to cluster.
- Place cluster back in dash and secure with screws.
- Align dash bezel and snap into place.
- Reinstall screws.
6. Reconnect Battery And Test
- Attach negative cable back to battery.
- Turn ignition to “ON.”
- Check dash lights. If all bulbs work, you’re done.
If a bulb doesn’t light up, double-check installation and bulb type.
Practical Tips For Changing Dash Lights
- Wear gloves to keep bulbs clean. Oil from fingers can shorten bulb life.
- Take photos during removal. This helps you remember screw locations.
- If upgrading to LED, buy CANBUS-compatible LEDs. These prevent error codes and flickering.
- Don’t force panels. If stuck, check for hidden screws.
- Test new bulbs before fully reassembling dash.
Common Mistakes And How To Avoid Them
- Forgetting to disconnect the battery: Can cause electrical shocks.
- Using wrong bulb type: Always check bulb size before buying.
- Breaking dash clips: Use gentle pressure and plastic tools.
- Not testing bulbs before reassembly: Save time by checking lights before putting panels back.
- Installing LED bulbs with wrong polarity: Flip bulb if it doesn’t light.
Comparison: Standard Vs Led Dash Bulbs
Many Jeep owners switch to LED bulbs. Here’s a comparison:
| Bulb Type | Brightness | Life Span | Cost | Installation |
|---|---|---|---|---|
| Standard (Type 194) | Moderate | 2-3 years | $1-2 per bulb | Easy |
| LED (CANBUS) | High | 5+ years | $3-7 per bulb | Easy (check polarity) |
LEDs are brighter and last longer, but cost more. They also use less power, which is good for battery life.
Data: How Often Should You Change Dash Lights?
Dash bulbs usually last 20,000–30,000 miles. Some drivers notice dimming after 3–4 years, especially with heavy night driving. LED bulbs can last over 50,000 hours. If your dash lights flicker or turn off, it’s time to change them.
| Bulb Type | Average Lifespan (Miles) | Recommended Change Interval |
|---|---|---|
| Standard | 20,000–30,000 | Every 3–4 years |
| LED | 50,000+ | Every 7–10 years |
Example: Changing Dash Lights For Night Off-roading
Many Jeep Wrangler owners drive off-road at night. Bright dash lights help you check speed and engine status quickly.
Upgrading to LEDs is popular for this reason. One owner installed blue LED dash bulbs for better visibility during trail rides.
The result was easier reading of gauges and less eye strain.
Signs Your Dash Lights Need Replacement
Watch for these signs:
- Dash is dark or hard to read at night
- Some gauges are brighter than others
- Flickering or intermittent light
- Burning smell (rare, but possible with old bulbs)
- Warning icons not visible
Don’t wait for all bulbs to fail. Replace them when you notice dimming.
Cost Estimate For Changing Dash Lights
Changing dash lights yourself costs less than a shop visit. Here’s a typical breakdown:
- Replacement bulbs: $10–$30 (for full set)
- Tools: Most are common household tools
- Labor: DIY, free; shop charges $80–$120
Doing it yourself saves money and gives you confidence to fix other small car issues.
Jeep Wrangler Dash Panel Removal: Extra Tips
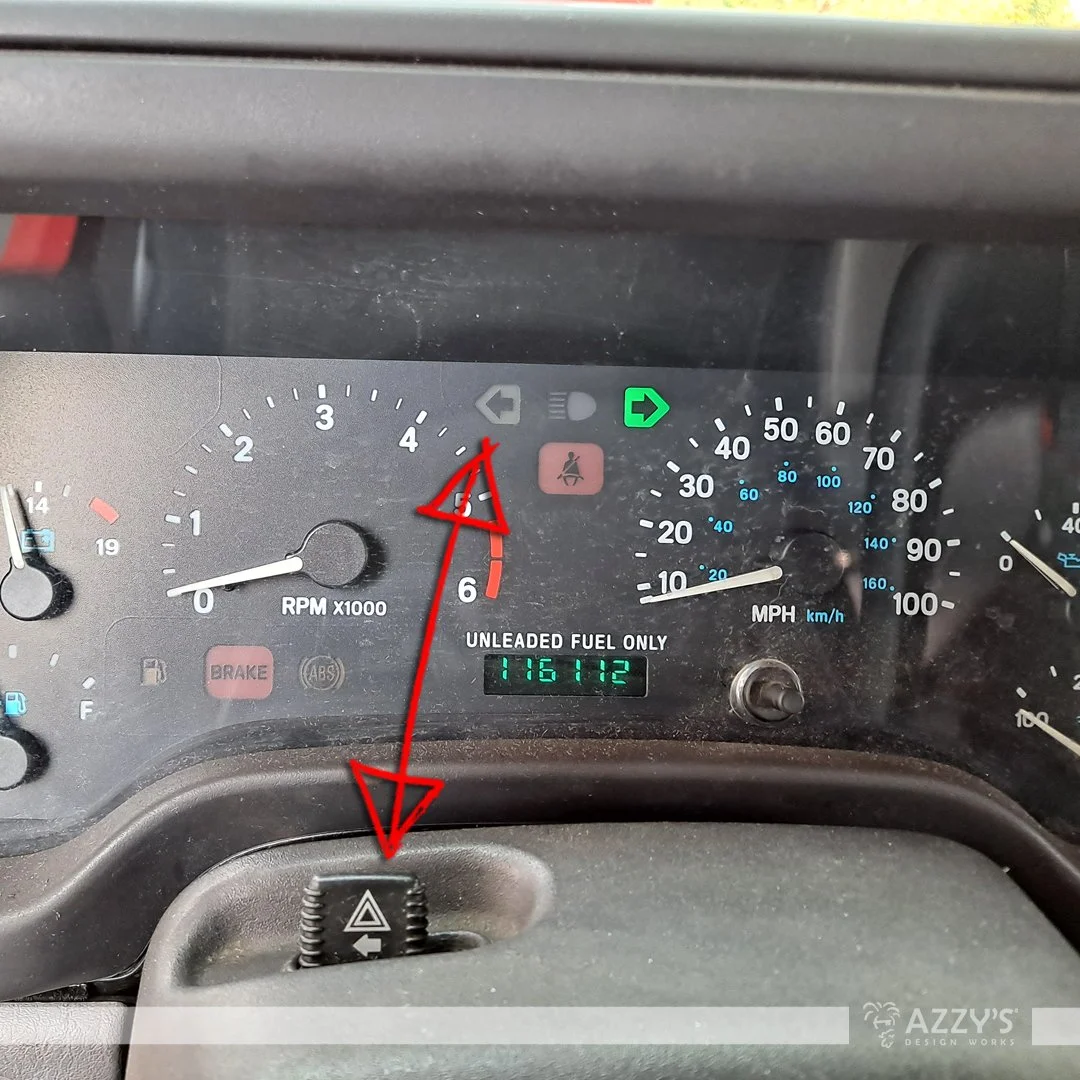
Some dash panels have hidden screws or clips. Check under the steering column and near air vents.
If panel won’t budge, look for extra screws. Use a flashlight to spot hard-to-see fasteners.
Never yank the panel gentle pressure prevents breaking clips.
Preventing Future Dash Light Problems
- Buy quality bulbs (brand name or trusted supplier)
- Avoid touching bulbs with bare hands
- Check dash wiring if bulbs fail quickly
- Upgrade to LED if you drive often at night
If dash lights fail repeatedly, a wiring issue may be present. Inspect harness connectors and look for corrosion.

Real Owner Experiences
Many Jeep owners share stories on forums. One driver replaced dash bulbs after noticing flickering during winter.
He used standard bulbs and reported easy installation. Another upgraded to LEDs for a brighter, more modern look.
Both recommended taking your time and keeping track of screws.
For more tips, check the official Jeep Wrangler community: JeepForum.
How Many Dash Lights Are In A 2000 Jeep Wrangler?
Most 2000 Jeep Wranglers have 6–8 dash bulbs. The exact number depends on your gauge layout and trim.
What Bulb Type Do I Need For Dash Lights?
The standard bulb is type 194. LED upgrades are available, but make sure they fit and are CANBUS-compatible.
Can I Change Dash Lights Without Removing The Dash?
No. You must remove the dash bezel and instrument cluster to access bulbs. It’s not possible from the front.
Why Do My New Led Dash Bulbs Flicker?
Some LEDs need CANBUS compatibility. If they flicker, replace with CANBUS bulbs or check for wiring issues.
Is It Safe To Change Dash Lights Myself?
Yes, if you follow safety steps. Always disconnect the battery and handle bulbs gently.
Changing dash lights on your 2000 Jeep Wrangler is a straightforward project. With basic tools and careful work, you can restore bright, clear dashboard lighting. You’ll drive more safely at night and enjoy a modern look if you choose LED upgrades. Remember to check bulb type, disconnect the battery, and test lights before reassembly. This small job makes a big difference in your driving comfort and confidence.