Changing the back blinker light on a Jeep Patriot is a simple repair that saves you time and money. Many Patriot owners are surprised to learn they can do it themselves with a few tools and basic steps. Whether your turn signal is blinking fast, not working, or you just failed an inspection, replacing the bulb is an easy fix. This guide gives you all the details you need to get it right the first time.
Why Replace The Back Blinker Light Yourself?
The rear turn signal, or back blinker light, is important for safety. It tells other drivers when you plan to turn or change lanes. If the light is out, you risk getting pulled over or causing an accident. Dealerships and repair shops may charge $30–$60 just for labor, but the bulb itself usually costs under $10. Replacing it yourself means you save money and avoid waiting for an appointment.
Many people are nervous about working on their car’s electrical system. The truth is, changing a bulb does not require special skills.
You don’t need to disconnect the battery or use advanced tools. With a Phillips screwdriver, a new bulb, and this guide, you’ll be done in about 15 minutes.
Tools And Parts You’ll Need
Before you start, gather these items:
- Replacement bulb (usually 3157 or 7440, but check your owner’s manual)
- Phillips screwdriver
- Flathead screwdriver (for prying clips, if needed)
- Gloves (optional, to keep fingerprints off the bulb)
- Clean rag
If you’re unsure about the exact bulb type, look at the old bulb or check your manual. Some models and years use different bulbs for the turn signal and brake light.
Common Bulb Types For Jeep Patriot
Here’s a handy reference for common model years:
| Year | Turn Signal Bulb Type | Brake/Running Bulb Type |
|---|---|---|
| 2007–2010 | 3157 | 3157 |
| 2011–2017 | 7440 | 7443 |
Be sure to confirm your model’s requirements before buying.
Step-by-step Guide To Replacing The Back Blinker Light
1. Make Sure The Vehicle Is Safe
Park your Jeep Patriot on a flat surface. Turn off the engine and remove the keys. This prevents any accidental electrical issues. For extra safety, set the parking brake.
2. Access The Rear Taillight Assembly
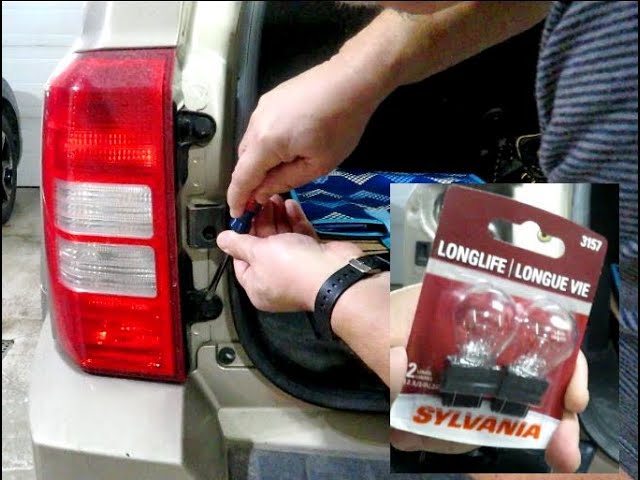
Open the rear hatch. Look at the inside edge of the taillight, where it meets the body of the car.
You’ll see two screws holding the taillight assembly to the vehicle. These are usually Phillips head screws.
Use your screwdriver to remove both screws. Keep them in a safe spot you’ll need them to reinstall the taillight.
Some Patriots have plastic clips or covers over the screws. If so, gently pry them off with a flathead screwdriver.
3. Remove The Taillight Assembly
With the screws out, gently pull the taillight away from the vehicle. It may feel tight; there are sometimes plastic pins holding it in place.
Pull straight back, not sideways, to avoid breaking the pins or scratching the paint.
Tip: If the assembly is stuck, wiggle it gently or use your hand to tap the back edge. Avoid using metal tools, as they can crack the plastic.
4. Locate And Remove The Blinker Bulb
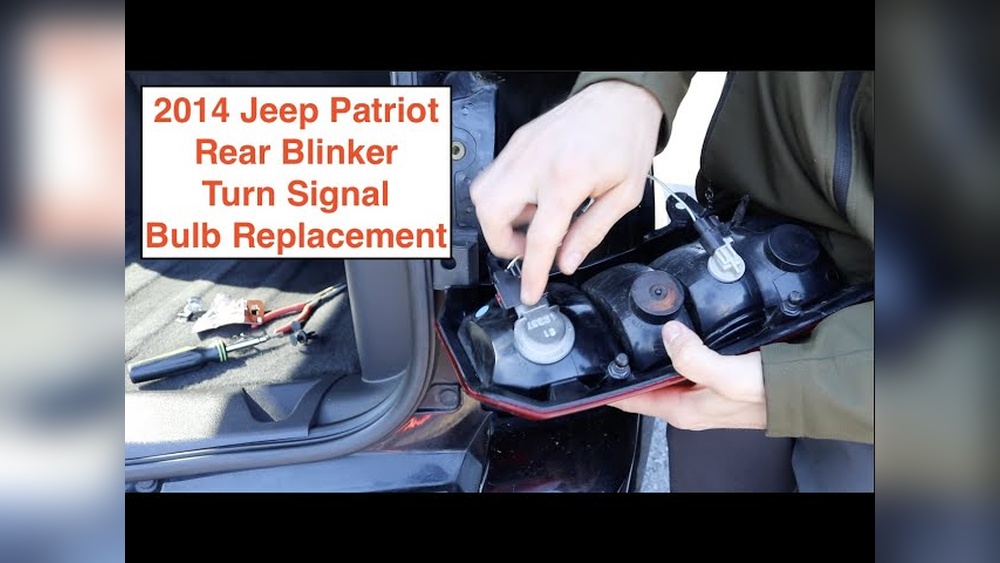
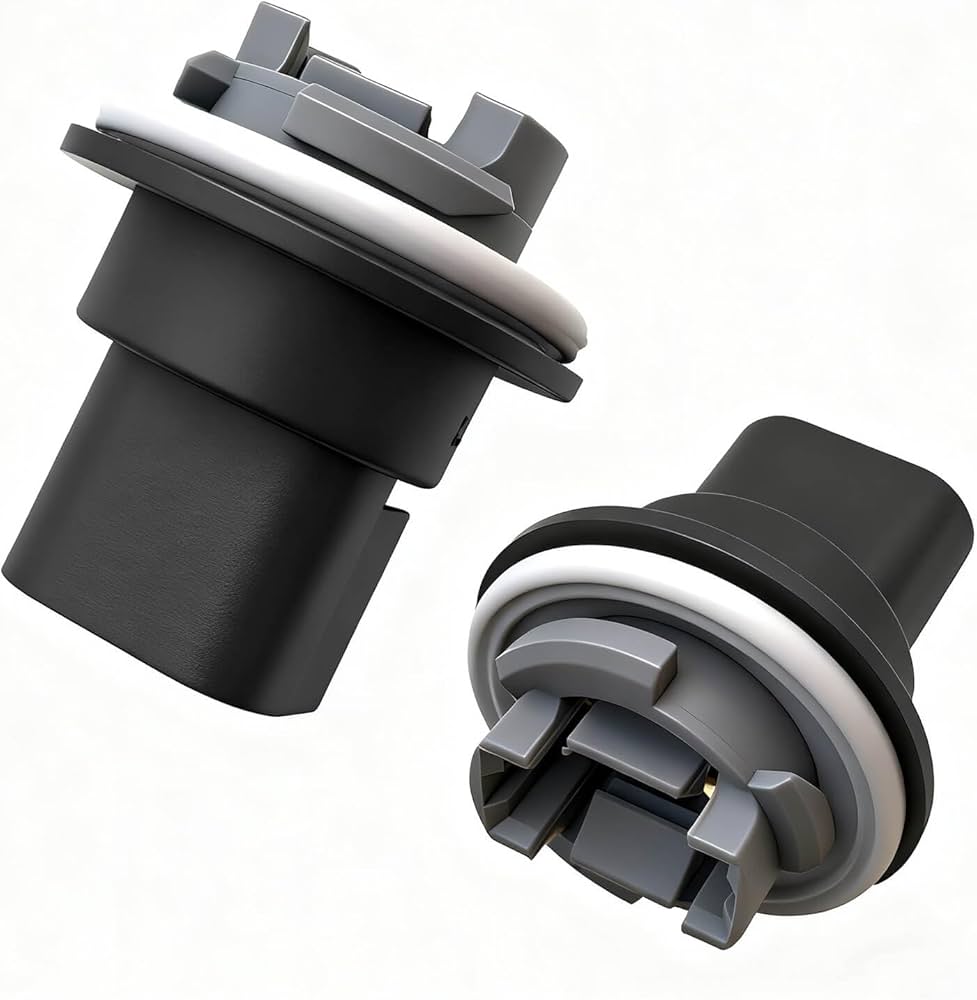
On the back of the taillight, you’ll see several bulb sockets. The blinker bulb is usually at the bottom or outer corner. Twist the bulb socket counterclockwise (left) to release it.
Carefully pull the old bulb straight out. If it’s stuck, wiggle gently don’t twist hard, as the glass can break.
5. Install The New Bulb
Take the new bulb and line up the pins with the socket. Push it in until it clicks.
Avoid touching the glass with bare fingers; oils can shorten the bulb’s life. If you do touch it, wipe with a clean rag.
Twist the socket back into the assembly clockwise (right) until secure.
6. Reinstall The Taillight Assembly
Line up the taillight with the holes in the body. Push it gently until the pins pop into place.
Reinstall the screws and tighten by hand do not over-tighten, as this can crack the plastic.
7. Test Your Work
Before closing the hatch, turn on the ignition (you don’t need to start the engine) and activate the turn signal. Check to see if the new blinker works.
If it does, you’re done! If not, check that the bulb is seated correctly, and that you installed the right type.
Quick Comparison: Diy Vs. Professional Replacement
If you’re deciding whether to do it yourself or pay for service, here’s a quick look:
| DIY Replacement | Professional Service |
|---|---|
| Cost: $5–$15 (bulb only) | Cost: $30–$75 (parts and labor) |
| Time: 10–20 minutes | Time: 30–60 minutes (including wait) |
| Skill: Basic | Skill: None needed |
| Convenience: At home, anytime | Convenience: Requires appointment |
Common Mistakes And How To Avoid Them
Many first-time DIYers run into similar problems. Here’s how to avoid them:
- Using the wrong bulb – Always check your manual or the old bulb for the exact type. Some bulbs look similar but have different electrical ratings.
- Not seating the bulb fully – If the bulb isn’t pushed in all the way, the blinker won’t work or may flicker.
- Breaking the taillight tabs – Pull the assembly straight back. Don’t twist or pry with tools.
- Forgetting to test before reassembly – It’s easier to fix a mistake before screwing everything back in.
- Touching the bulb glass – Oils from your skin can cause hot spots and early failure. Use gloves or a cloth.
Choosing The Right Replacement Bulb
Not all bulbs are equal. You have several options:
- OEM (original equipment manufacturer) bulbs: These match factory specs and are reliable.
- LED bulbs: Brighter and last longer, but may require an adapter to prevent “hyper-flashing.”
- Long-life halogen bulbs: Designed to last longer but usually cost more.
Here’s a quick comparison:
| Bulb Type | Brightness | Lifespan | Cost |
|---|---|---|---|
| Standard Halogen | Medium | 1–2 years | Low |
| Long-life Halogen | Medium | 2–4 years | Medium |
| LED | High | 5+ years | High |
If you choose LED, check your owner’s manual or ask at the auto parts store about compatibility.
Pro Tips For A Smooth Replacement
- Take a picture of the taillight before removing anything. This helps if you forget how it goes back together.
- Replace both side bulbs if one is out. They often fail at similar times.
- Check all rear lights while you have the assembly out—brake, reverse, and tail lights.
- Keep a spare bulb in your glove box for future needs.
- Dispose of the old bulb properly—don’t throw it in regular trash if it’s broken.

When To Seek Professional Help
Most Jeep Patriot owners can handle this repair. But sometimes, you may need a pro:
- The blinker still doesn’t work after bulb replacement.
- The taillight assembly is cracked or waterlogged.
- Electrical problems (like all lights out on one side).
- You’re uncomfortable working with car parts.
If you need more information or want to see a visual guide, the official Jeep Mopar site is a great resource.
What Size Is The Jeep Patriot Back Blinker Bulb?
Most Jeep Patriot models use 3157 (2007–2010) or 7440 (2011–2017) for the rear turn signal. Always check your owner’s manual or the old bulb to be sure.
How Do I Know If My Back Blinker Bulb Is Bad?
A fast blinking signal, a dashboard warning, or no blinking at all are common signs. You may also see that the turn signal light at the back doesn’t come on when activated.
Can I Upgrade To Led Bulbs?
Yes, many Patriot owners upgrade to LED bulbs for longer life and brighter light. You may need a special adapter (resistor) to prevent fast blinking. Make sure the LED is compatible with your vehicle.
Do I Need To Disconnect The Battery Before Changing The Bulb?
No, you do not need to disconnect the battery to change the rear blinker bulb. The voltage is low and safe, as long as the car is off.
Is It Illegal To Drive With A Broken Back Blinker?
Yes, in most states, it is illegal and unsafe to drive with a non-working turn signal. Police can stop you and issue a ticket, and you risk causing an accident.
Replacing the back blinker light on your Jeep Patriot is a quick and simple job with big safety benefits. Doing it yourself not only saves money, but also gives you the confidence to handle other small repairs. With the right bulb, a screwdriver, and a few minutes, you’ll have your turn signal working like new—making the road safer for you and everyone around you.