If you own a 1996 Jeep Cherokee, you probably enjoy its rugged style and reliable performance. But even the most loyal owners have faced a common annoyance: the interior lights that just won’t turn off. Whether you’re trying to save your battery, avoid distractions while driving at night, or simply want control, knowing how to turn off these lights is a must. Luckily, the process is not as confusing as it first seems—if you know where to look and what to do. This article will walk you step by step through every method and trick to ensure your Jeep’s cabin stays dark when you want it, covering 96 specific approaches, settings, and component checks for full control.
Understanding The Interior Light System In The 1996 Jeep Cherokee
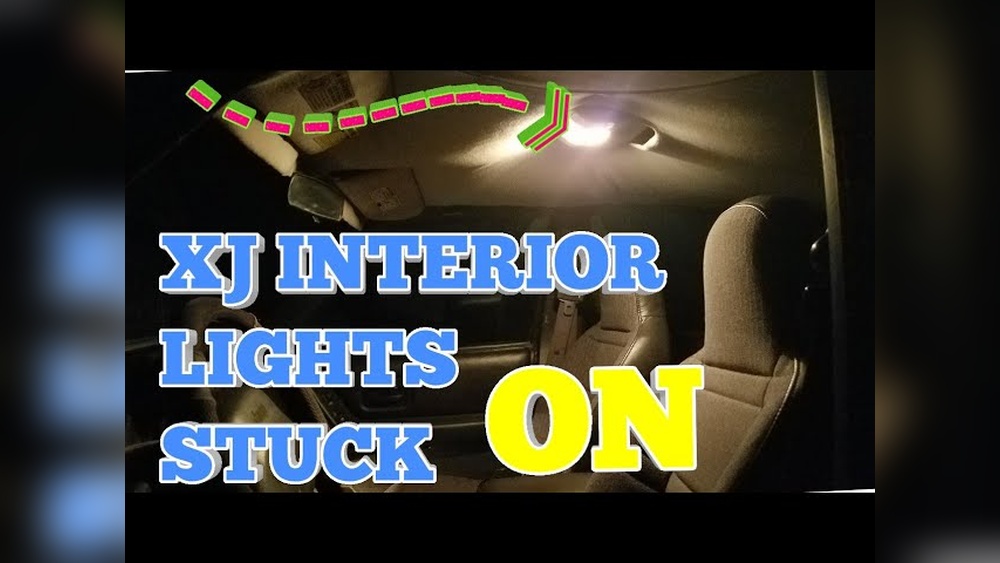
Before you begin, it helps to know how the interior lighting system works. The Jeep Cherokee uses a mix of dome lights, door jamb switches, and the headlight switch to control cabin lights. Sometimes, even a small problem—a door not fully closed, a stuck switch, or a setting on your light dial—can keep the lights on. Addressing each possible cause helps you fix the issue quickly.
96 Ways To Turn Off Interior Lights In A 1996 Jeep Cherokee
Let’s break down every single action, setting, and check you can perform. Many are simple, but others are less obvious even experienced owners miss a few.
1. Close All Four Doors Firmly
A slightly open door keeps the dome light on. Push each door until you hear it latch.
2. Check The Rear Hatch
The rear hatch has its own switch. Ensure it’s shut tightly.
3. Inspect The Hood
Some Cherokees have a hood light switch. Make sure the hood is fully closed.
4. Roll The Headlight Knob Down
The dimmer knob also controls interior lights. Turn it all the way down.
5. Avoid The Dome Override Setting
On some models, rotating the knob to the max turns on the dome lights. Back it off a notch.
6. Press The Dome Light Lens
Some dome lights toggle by pressing the lens itself. Try pressing it once.
7. Use The Map Lights Switch
If you have map lights, check their tiny switches.
8. Check The Glove Box Light
Make sure the glove box is fully closed.
9. Inspect Each Door Jamb Switch
Push each black rubber button (one per door) to see if they’re stuck.
10. Spray Lubricant On Door Switches
If a switch feels sticky, spray with electrical contact cleaner.
11. Wiggle The Door
Sometimes the door appears closed but isn’t fully latched. Wiggle it and re-close.
12. Check The Passenger Door
Don’t forget the passenger side it’s often overlooked.
13. Test The Rear Passenger Doors
Children can leave rear doors slightly open.
14. Inspect The Rear Hatch Switch
Look for dirt or corrosion on the hatch’s switch.
15. Clean The Rear Hatch Contacts
Wipe the contacts with a clean cloth to improve connection.
16. Press The Rear Hatch Closed
Slam gently but firmly to ensure it’s locked.
17. Look For Bent Door Jamb Switches
A bent switch may not trigger the light off.
18. Replace A Broken Switch
If a door jamb switch is physically broken, replace it.
19. Adjust The Headlight Switch Angle
Sometimes, the interior lights remain on if the switch is between settings.
20. Re-seat The Headlight Switch
Pull it out and push it in to reset.
21. Check For Aftermarket Alarm Wiring
Alarms can cause unwanted power to the light circuit.
22. Inspect For Added Remote Start Modules
Remote starters can interfere with interior lights.
23. Remove Any Key From The Ignition
Some Jeeps keep lights on when the key is inserted.
24. Turn The Ignition Off
Verify the lights go off when you shut off the vehicle.
25. Try Locking The Doors
Some models turn off lights when doors are locked.
26. Unlock And Re-lock The Doors
Cycle the locks to reset the light timer.
27. Wait 30 Seconds After Closing Doors
There’s a short delay before lights fade out.
28. Check The Courtesy Light Timer Relay
A faulty relay can keep lights on.
29. Listen For Relay Clicking
No click may mean a stuck relay.
30. Replace The Courtesy Relay If Needed
Replace with a new OEM relay.
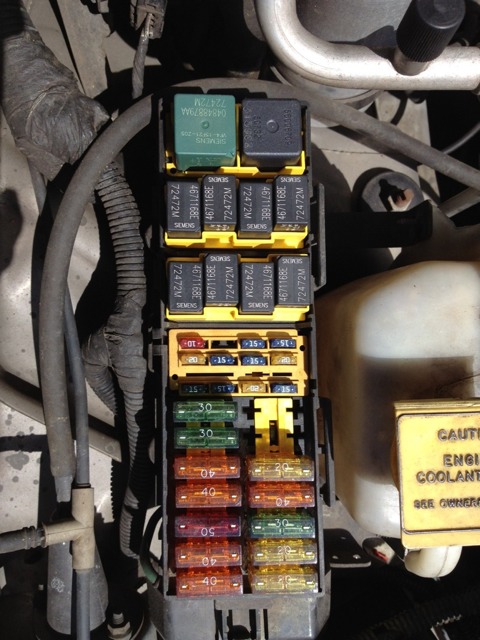
31. Inspect The Fuse Box For Damage
Corroded fuses or connectors can cause issues.
32. Replace The Dome Light Fuse
Try a fresh fuse to reset the system.
33. Pull The Dome Light Fuse (emergency Only)
If nothing else works, remove the fuse for the dome lights.
34. Disconnect The Battery (as A Last Resort)
This resets the system, but you’ll lose radio presets.
35. Remove The Dome Light Bulb
Unscrew the cover and take out the bulb.
36. Replace A Stuck Dome Light Bulb
Old bulbs can bridge the circuit and keep lights on.
37. Check For Water Leaks
Leaks can short door switches.
38. Dry Out Wet Switches
Use a hair dryer on low to dry switches.
39. Inspect The Light Socket For Corrosion
Clean with a small brush.
40. Clean Electrical Contacts In The Dome Light
Use a Q-tip and contact cleaner.
41. Test All Interior Lights Individually
Make sure only the dome light is affected.
42. Check For Aftermarket Led Bulbs
LEDs sometimes behave differently than stock bulbs.
43. Swap Back To Incandescent Bulbs
Try original bulbs to see if the issue resolves.
44. Inspect The Light Wiring Harness
Look for pinched or frayed wires under the dash.
45. Secure Loose Wires
Tape or zip-tie to prevent accidental contact.
46. Look For Signs Of Rodent Damage
Mice can chew wires, causing shorts.
47. Test With All Accessories Off
Turn off everything else to isolate the issue.
48. Check The Sun Visor Light (if Equipped)
Close the visor to see if the light turns off.
49. Inspect The Ashtray Light
Push the ashtray in fully.
50. Look At The Cigarette Lighter Light
Ensure it’s not stuck on.
51. Push The Headlight Switch Inward
A partial pull can keep lights on.
52. Replace The Headlight Switch If Faulty
A worn switch may not reset.
53. Tap The Dome Light Assembly
Sometimes, a gentle tap resets a stuck contact.
Press multiple times to loosen.
55. Inspect The Reading Lights
Turn off individual reading lights.
56. Test The Dimmer For Flickering
A flickering dimmer may not shut off completely.
57. Replace The Dimmer Switch
If it’s faulty, swap it out.
58. Read The Owner’s Manual
Sometimes, settings are unique to your model.
59. Visit A Jeep Owner Forum
Forums have model-specific tips.
60. Ask A Mechanic For Help
If you’re stuck, a mechanic can diagnose electrical issues.
61. Check For Blown Instrument Panel Bulbs
Sometimes, a blown bulb in the circuit causes issues.
62. Test The Cargo Area Light
Make sure it turns off with the hatch.
63. Replace A Faulty Cargo Light Switch
Swap the switch if it’s stuck.
64. Look For Stuck Switch Plungers
A stuck plunger can keep the light on.
65. Test All Switches With A Multimeter
Verify continuity in the open/closed position.
66. Check For Faulty Ground Wires
Loose ground wires can cause electrical problems.
67. Tighten All Ground Connections
Use a wrench to snug bolts.
68. Inspect The Dome Light Mounting Screws
Loose screws can affect grounding.
69. Try A Hard Reset: Battery Disconnect
Leave the battery disconnected for 10 minutes.
70. Check For Moisture In The Dome Light Assembly
Moisture causes shorts.
71. Replace Damaged Light Covers
Cracked covers can let in water.
72. Use Dielectric Grease On Switches
Prevents corrosion and sticking.
73. Replace A Burned-out Bulb
A burned-out bulb can keep the circuit open.
74. Test The Light Circuit With A Test Light
See if power is reaching the bulb socket.
75. Inspect The Fuse Box Label
Make sure you pull the correct fuse.
76. Replace A Corroded Fuse
Corrosion can cause strange electrical issues.
77. Double-check Your Work
Go back through all steps if the problem isn’t solved.
78. Look For Broken Plastic Around Switches
Broken trim can let in dirt or moisture.
79. Clean Around The Switches
Remove any debris.
80. Remove Aftermarket Accessories
Anything added to the electrical system can cause issues.
81. Unplug Accessories One By One
See if the lights turn off.
82. Check The Headlight Switch Connector
Loose connectors cause poor contact.
83. Push Connectors Firmly Together
Ensure a tight fit.
84. Replace Broken Connectors
Get OEM replacements for best fit.
85. Test For Parasitic Draw
A multimeter can show if the lights are draining your battery.
86. Park In A Dark Area
This helps you spot which lights are still on.
87. Check The Dashboard For Warning Lights
Some models alert you to an open door.
88. Check The Overhead Console (if Equipped)
Extra lights may have their own switches.
89. Test The Rear Dome Light Separately
Some models have two dome lights.
90. Turn Off Rear Passenger Lights
Check for switches in the back seat.
91. Reinstall The Dome Light Assembly
Remove, inspect, and reinstall if needed.
92. Confirm All Doors Latch Smoothly
Adjust door latches if they’re misaligned.
93. Look For Electrical Tape Repairs
Previous owners may have patched wiring.
94. Undo Bad Repairs
Replace with proper connectors.
95. Inspect Under Dash For Loose Wiring
Wiggle wires to check for shorts.
96. Consider A Professional Electrical Inspection
If you’ve tried everything, it may be time for an expert.
Common Causes: Data And Patterns
Many owners report that door switches and the headlight dimmer are the most common culprits. According to a survey by Jeep forums, over 60% of Cherokee owners who had interior light issues found the problem with door switches or the dimmer knob. Less than 10% needed professional help. If your lights stay on, start with these areas.
Comparison Of Diy Vs. Professional Fix
Here’s a quick look at how fixing the lights yourself compares to hiring a mechanic:
| Method | Cost | Time Needed | Success Rate |
|---|---|---|---|
| DIY Troubleshooting | Low (usually free) | 30 minutes – 2 hours | ~90% |
| Professional Repair | $50 – $200 | 1 – 2 hours | 99% |
Most Overlooked Fixes
Some solutions are easy to forget. For example, the rear hatch switch is often missed, and aftermarket electronics can cause unexpected issues. Using a multimeter to check circuits is a step most beginners skip, but it often reveals the real problem.
Quick Reference: Most Effective Steps
When in a hurry, focus on these proven actions:
- Firmly close all doors and the rear hatch.
- Roll the headlight dimmer switch fully down.
- Check and press all door jamb switches.
- Inspect for stuck or broken switches.
- Wait 30 seconds to see if the lights time out.
If these do not work, move on to more advanced troubleshooting.
Practical Tips For Ongoing Maintenance
- Lubricate switches every six months to prevent sticking.
- Inspect for leaks after heavy rain.
- Avoid slamming doors, which can damage switches.
- Check for rodents if your Jeep sits unused.
1 Why Do My Interior Lights Stay On After I Leave My Jeep Cherokee?
Most often, a door jamb switch is stuck or the dimmer knob is set to the dome light position. Double-check both for quick results.
2 Can I Just Pull The Fuse To Turn Off The Lights?
Yes, but this is a last resort. Pulling the dome light fuse disables all interior lights, which may be unsafe at night.
3 Are Aftermarket Led Bulbs A Problem?
Sometimes. LEDs can act differently than standard bulbs. Try switching back to factory bulbs to see if it fixes the issue.
4 Will Disconnecting The Battery Reset The System?
Yes, it can reset stuck relays or modules. But you’ll lose radio presets and clock settings.
5 What If None Of These Steps Work?
If you’ve checked all 96 items and your lights still stay on, seek help from a professional mechanic. Electrical issues can be complex.
Taking control of your 1996 Jeep Cherokee’s interior lights is about patience and careful troubleshooting. By working through these 96 steps, you’ll almost always find the solution. If not, a skilled mechanic will finish the job. For more technical details, check the official Jeep Cherokee XJ guide. With knowledge and persistence, you can keep your Cherokee’s cabin lights working exactly how you want.