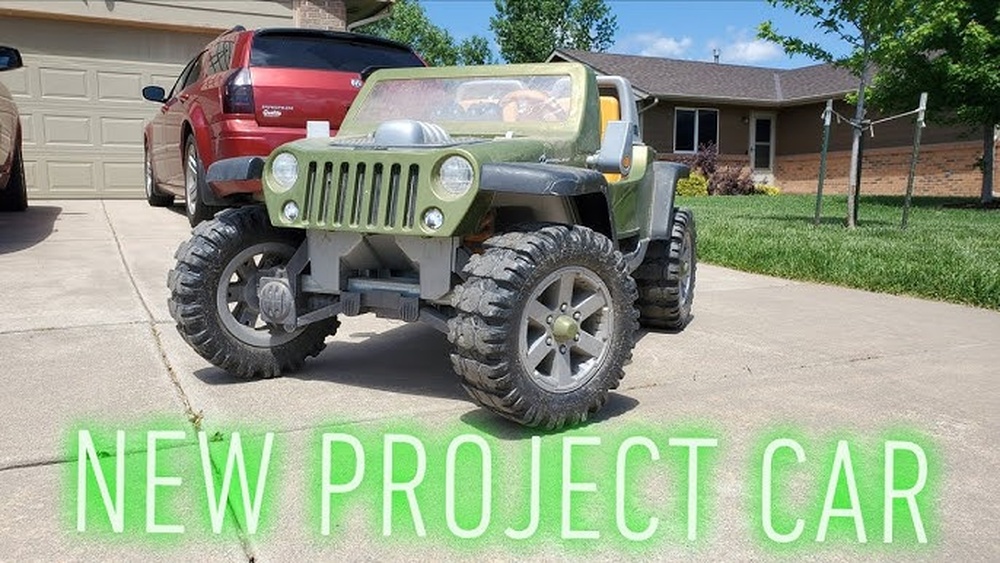
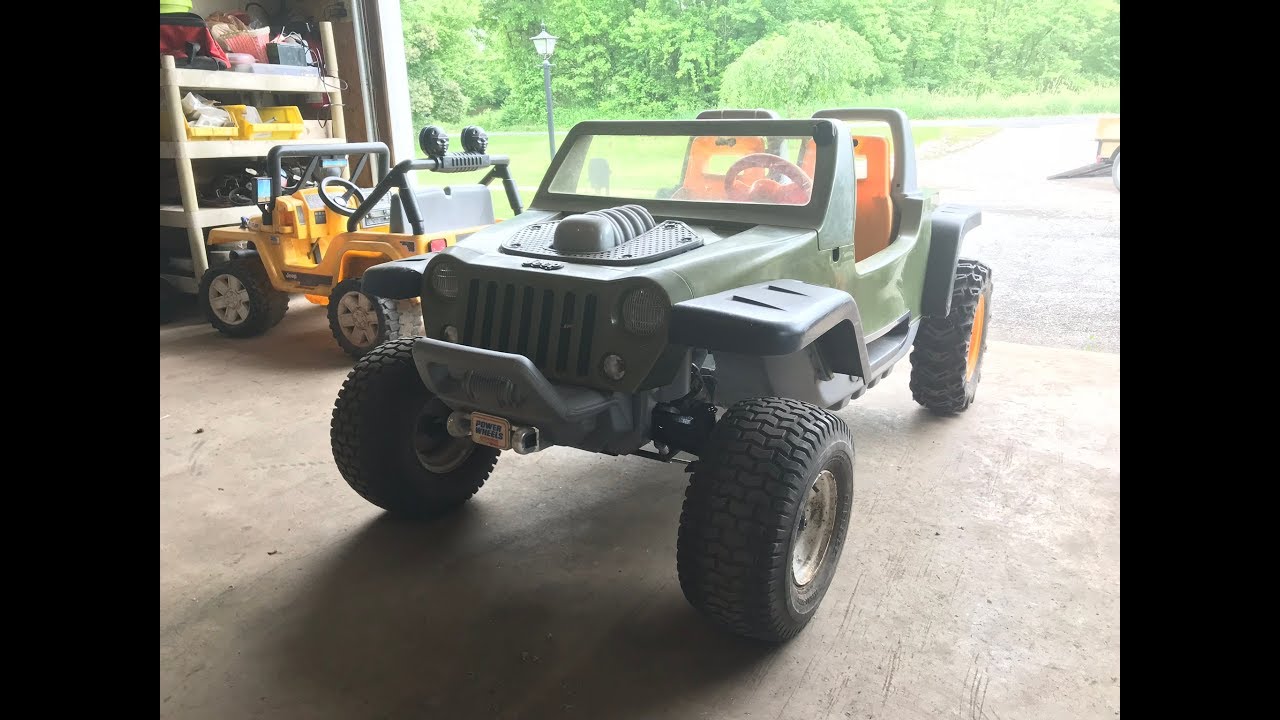
If you want to make your child’s Power Wheels Jeep Hurricane even more exciting, lifting it is a great upgrade. Lifting means raising the body higher above the wheels, just like with real trucks or Jeeps. This can give the toy a cool, rugged look and allow for bigger tires or better off-road play. But lifting a Power Wheels vehicle is not as simple as putting blocks under it. You need the right parts, tools, and some careful planning. In this article, you’ll learn exactly how to lift a Power Wheels Jeep Hurricane safely, what tools and materials you need, step-by-step instructions, and expert tips to avoid common mistakes.
Why Lift A Power Wheels Jeep Hurricane?
Many parents and hobbyists lift Power Wheels Jeeps for several reasons. The most popular reasons include:
- Creating a more realistic, off-road look
- Allowing for larger wheels and tires
- Improving ground clearance for rough terrain
- Making the toy more fun and unique for your child
A lifted Jeep Hurricane stands out from standard Power Wheels. Kids love the tough look, and it can handle grass, gravel, and bumps much better.
Just remember, any modification adds some risks, so safety and stability should always come first.
Planning Your Lift: What To Consider
Before you start, there are a few important points to think about:
- How high do you want to lift? Most lifts add 2–4 inches. More than this can make the Jeep unstable.
- What is your main goal? Is it looks, better off-road ability, or both?
- Will you upgrade the tires too? Bigger tires may need more lift and wheel well trimming.
- Can you make or buy lift parts? Some people buy kits, others make their own brackets or blocks.
- Do you have the tools and time? Lifting usually takes 2–4 hours, depending on your experience.
A well-planned lift project is much safer and more enjoyable. Rushing or skipping steps can lead to a wobbly, unsafe ride.
Tools And Materials You’ll Need
To lift a Power Wheels Jeep Hurricane, you’ll need some basic tools and a few special parts. Here’s a list to help you get ready:
Tools:
- Phillips and flathead screwdrivers
- Socket wrench set
- Drill and drill bits
- Measuring tape
- Marker or chalk
- Pliers
- Safety glasses and gloves
Materials:
- Lift kit (store-bought or homemade brackets/blocks)
- Longer bolts (if needed for your lift kit)
- Washers and nuts
- Optional: Spray paint for custom look
- Optional: New, larger tires
Tip: Always measure your Jeep’s current clearance and wheel gap before you start. This helps you decide how much lift you need.
Understanding Lift Kits And Diy Options
There are two main ways to lift a Power Wheels Jeep Hurricane:
- Pre-made lift kits: These are designed for the Jeep Hurricane and include all needed brackets, hardware, and instructions. They are easy to install but cost more.
- DIY lift blocks or brackets: You can make your own lift parts using pieces of plastic, wood, or metal. This is cheaper but takes more time and careful measuring.
Here’s a quick comparison of both methods:
| Method | Cost | Difficulty | Reliability |
|---|---|---|---|
| Pre-made kit | $$–$$$ | Easy | High |
| DIY blocks/brackets | $ | Medium–Hard | Varies |
A pre-made kit is best if you want a quick, reliable result. DIY is fun if you like building things and want to save money.
Step-by-step: How To Lift A Power Wheels Jeep Hurricane
Follow these steps for a safe and successful lift. The steps are similar for both pre-made kits and DIY options.
1. Preparation And Safety
- Put on safety glasses and gloves.
- Remove the battery and set it aside.
- Place the Jeep on a flat surface, like a garage floor.
- Gather all your tools and parts.
2. Remove The Wheels
- Use your socket wrench to remove all four wheels.
- Keep the nuts and washers in a safe spot—they’ll be needed later.
3. Detach The Axles
- On the Jeep Hurricane, both axles are held in with simple hardware.
- Use your screwdriver and wrench to loosen and remove the bolts holding the axles to the body.
- Carefully slide out each axle.
4. Install Lift Brackets Or Blocks
- If using a lift kit, follow its instructions to attach brackets between the body and the axles.
- For DIY, use your drill to make holes in your blocks (plastic or wood works best) that match the axle mounts. The blocks should be the same height on all sides—usually 2–3 inches.
- Bolt the blocks or brackets in place, using longer bolts if needed.
5. Reattach The Axles
- Place the axles onto the new lifted mounts.
- Make sure everything lines up evenly, so the Jeep sits level.
- Tighten all bolts firmly, but don’t overtighten (you don’t want to crack the plastic).
6. Check For Wheel Clearance
- Test-fit the wheels. Spin them by hand to make sure they don’t rub against the body or lift blocks.
- If using bigger tires, you may need to trim the wheel wells with a utility knife or a small saw.
7. Reinstall The Wheels
- Bolt the wheels back onto the axles.
- Double-check that all nuts and bolts are tight.
8. Inspect And Test
- Place the battery back in.
- Set the Jeep on the ground and check if it’s stable.
- Roll it back and forth to check for wobbles or strange noises.
- Let your child sit inside (with the Jeep turned off) to check balance.
- If everything looks and feels safe, take it for a slow test drive.
Comparison: Lift Heights And Tire Sizes
Choosing the right lift height depends on your goals and tire size. Here’s a helpful table showing how different lift heights fit with common tire upgrades:
| Lift Height | Max Tire Size | Stability | Best For |
|---|---|---|---|
| 2 inches | Stock + 1 inch | Very Good | Everyday play |
| 3 inches | Stock + 2 inches | Good | Light off-road |
| 4 inches | Stock + 3 inches | Fair | Show/looks |
Pro tip: Going above 3 inches is not recommended unless you are experienced and can add extra stability, like wider axles.
Common Mistakes (and How To Avoid Them)
Many first-time modifiers make these mistakes:
- Lifting too high: More lift makes the Jeep tip easier.
- Using weak materials: Only use strong wood, plastic, or metal for blocks.
- Forgetting longer bolts: Standard bolts may not reach through the new lift blocks.
- Not checking wheel clearance: Big tires may rub against the body.
- Skipping safety checks: Always test stability before letting kids drive.
It’s smart to double-check every bolt and connection. Also, explain to your child that their Jeep is now taller, so they should drive carefully, especially on hills or bumps.
Safety Tips For Lifted Power Wheels
Lifting a toy Jeep changes its center of gravity. This can make it easier to tip over if you’re not careful. Here’s how to keep things safe:
- Only lift as much as needed. Don’t go higher just for looks.
- Test the Jeep on flat ground before any rough play.
- Never let kids stand or jump inside the Jeep.
- If possible, widen the stance by using wheel spacers or wider tires.
- Check the bolts and blocks regularly for loosening or cracks.
If you want to learn more about toy vehicle safety, the official Consumer Product Safety Commission has helpful guidelines.
Customization: Going Beyond The Lift
Once your Power Wheels Jeep Hurricane is lifted, there are a few more fun upgrades you can try:
- LED lights: Add working headlights or underbody lights for nighttime play.
- Upgraded motors: Swap in a stronger motor for more speed (be careful, this can void warranties).
- Custom paint: Use spray paint designed for plastics to give the Jeep a unique look.
- Seat belts: Add real seat belts for extra safety.
Each of these upgrades can make your child’s Jeep even more exciting, but always balance fun with safety.
Real-life Example: A Parent’s Experience
Anna, a mom from Texas, wanted her son’s Power Wheels Jeep Hurricane to handle their bumpy backyard. She bought a 3-inch lift kit online and installed it with basic tools. The process took about three hours. Anna says:
“The kit made it easy I just followed the steps. My son loves how ‘big’ his Jeep looks now, and it drives over the grass way better.
We did have to trim a little plastic for the bigger tires, but it was worth it.
Just double-check your bolts, and don’t rush. ”
Her experience shows that lifting is possible for most handy parents, and the results can really improve playtime.
How Much Does It Cost To Lift A Power Wheels Jeep Hurricane?
The price depends on your method. A pre-made lift kit usually costs $30–$80. DIY lifts using blocks or brackets can cost less than $20, especially if you already have tools. Bigger tires or extra upgrades will add to the cost.
Is Lifting A Power Wheels Jeep Hurricane Safe For Kids?
A properly installed lift that’s 2 3 inches high is usually safe for normal play. The key is using strong parts, tightening all bolts, and checking stability often.
Never leave children unsupervised, especially after any modification.
Can I Use Bigger Tires After Lifting?
Yes, that’s one of the main reasons to lift. Most 2 3 inch lifts allow for tires that are 1 2 inches larger than stock.
Always check for rubbing, and trim the body if needed. Larger tires can also reduce battery life, so keep that in mind.
Will Lifting Void My Warranty?
Most Power Wheels warranties do not cover modifications. If your Jeep is new and under warranty, lifting it may void the coverage. Check your warranty terms before making changes.
What If My Jeep Tips Over After Lifting?
If your Jeep feels unstable or tips easily, lower the lift or add wider wheels for better balance. Never use lifts higher than 4 inches, and always supervise young children during play.
A lifted Power Wheels Jeep Hurricane can bring big smiles and more adventure to your child’s outdoor play.
With careful planning, the right tools, and attention to safety, you can give your toy Jeep an off-road style upgrade that’s both fun and reliable.
Enjoy the project and the proud look on your child’s face when they see their “monster” Jeep for the first time!