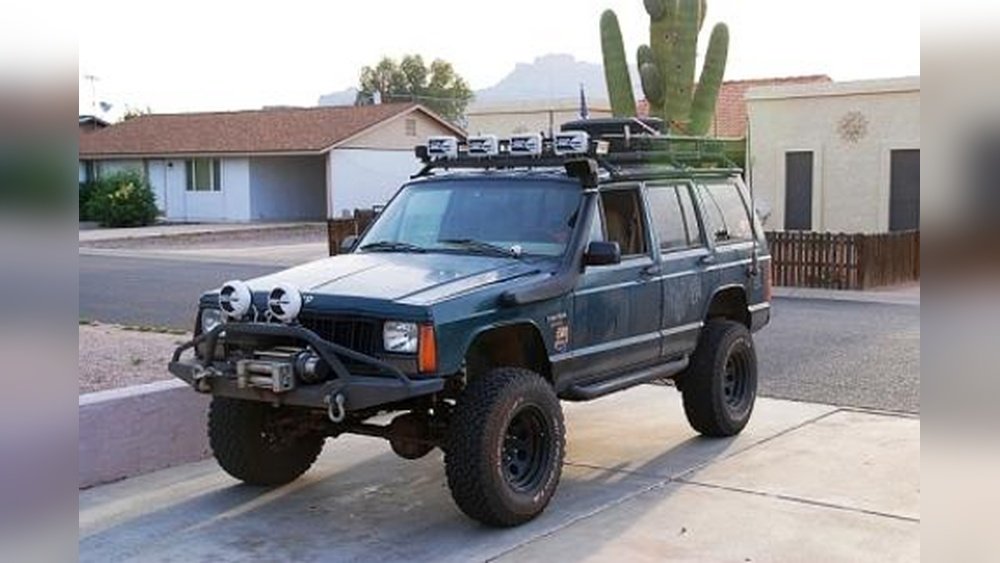
The Jeep Cherokee XJ is a legend among off-road enthusiasts. Its compact size, robust build, and legendary inline-six engine make it a fantastic platform for adventure. But even the most capable vehicles can be improved, and for those looking to push their XJ further, a snorkel is an essential upgrade.
A snorkel isn’t just about looking cool; it’s a functional piece of equipment that dramatically increases your vehicle’s ability to handle water crossings. It raises the engine’s air intake point, preventing water from being sucked into the engine, which can cause catastrophic damage.
Beyond water, it also provides cleaner, cooler air to the engine, especially in dusty conditions.
This article will explore everything you need to know about installing and using a snorkel on your Jeep Cherokee XJ. We'll cover why it's a smart investment, the different types available, the installation process, and crucial maintenance tips.
Whether you're planning a deep river fording expedition or just want to protect your investment from dust and water, understanding snorkels is key.
Why Install A Snorkel On Your Jeep Cherokee Xj?
The Jeep Cherokee XJ is known for its off-road prowess, but like any vehicle, it has limitations. The factory air intake is typically located low down in the engine bay, near the front fender or grille.
This position makes it vulnerable to water ingestion, especially during creek crossings, river fords, or even driving through deep puddles after heavy rain.
Preventing Water Ingestion (hydro-locking)
The most critical reason to install a snorkel is to prevent engine hydro-locking. This happens when water enters the engine’s air intake system. Since water cannot be compressed, when it’s drawn into the cylinders, it can cause severe damage. This damage can range from bent connecting rods to a cracked engine block, leading to extremely expensive repairs or even a complete engine replacement. A snorkel raises the air intake to a much higher position, typically near the roofline, making it far less likely that water will reach the engine during normal water crossings.
Cleaner, Cooler Air Intake
Beyond water protection, a snorkel offers other significant benefits. By drawing air from a higher point, it can often access cooler, less turbulent air than the factory intake. Cooler air is denser, meaning it contains more oxygen. More oxygen allows the engine to burn fuel more efficiently, potentially leading to a slight increase in power and fuel economy.
Furthermore, air drawn from higher up is generally cleaner. Dust and dirt tend to settle lower to the ground. A snorkel can help reduce the amount of fine particulate matter entering your air filter, extending its life and keeping your engine cleaner internally. This is particularly beneficial for XJs used in arid or dusty off-road environments.
Improved Performance In Dusty Conditions
Off-roading often means dealing with dust. When you follow other vehicles on a dry trail, a cloud of dust can be kicked up.
The factory air intake can quickly become overwhelmed with fine particles, leading to a clogged air filter.
This reduces airflow, hurting performance and potentially allowing some dust to bypass the filter. A snorkel, by drawing air from above the dust cloud, provides a steadier, cleaner supply of air.
This means your engine can breathe easier, maintaining performance even in the worst dust conditions.
Aesthetics And Off-road Image
While primarily a functional modification, many Jeep owners also appreciate the rugged aesthetic a snorkel adds to their XJ. It signals that the vehicle is built for adventure and capable of tackling more challenging terrain. It’s a visual cue that the owner has invested in their vehicle’s off-road capabilities.
Types Of Snorkels For Jeep Cherokee Xj
When looking for a snorkel for your XJ, you’ll find a few main types, primarily differing in material and design. The most common materials are plastic (like polyethylene or ABS) and fiberglass. Each has its pros and cons.
Plastic Snorkels (polyethylene/abs)
Plastic snorkels are the most popular choice for modern off-road vehicles, including the Cherokee XJ.
- Durability: High-quality plastics like polyethylene are incredibly tough and impact-resistant. They can flex and absorb minor bumps without cracking or breaking, which is a significant advantage when navigating tight trails or brushing against branches.
- UV Resistance: Most modern plastic snorkels are formulated with UV inhibitors to prevent degradation from sunlight exposure. This means they won’t become brittle or fade over time.
- Corrosion Resistance: Unlike metal, plastic will not rust or corrode, making it ideal for vehicles exposed to moisture, salt, or mud.
- Ease of Installation: Plastic snorkels are often designed with vehicle-specific mounting points, making installation relatively straightforward. They are also lighter than metal alternatives.
- Cost: Generally, plastic snorkels are more affordable than their fiberglass or metal counterparts.
Common brands that offer high-quality plastic snorkels for the XJ include ARB, TJM, and Safari Snorkel. These brands are known for their robust designs and vehicle-specific fitments.
Fiberglass Snorkels
Fiberglass snorkels were more common in older off-road builds but are still available.
- Strength: Fiberglass can be very strong, but it is also more brittle than high-impact plastics. It can crack or shatter upon significant impact.
- Customization: Fiberglass is easier to mold and shape, making it a good option for custom builds or if you need to adapt a snorkel to a non-standard setup.
- Weight: Fiberglass can be heavier than plastic.
- Corrosion: It does not rust, but it can be susceptible to damage from certain chemicals or prolonged exposure to harsh elements if not properly sealed.
- Cost: Fiberglass snorkels can vary in price, sometimes being more expensive than basic plastic options due to labor-intensive manufacturing.
Key Considerations When Choosing
When selecting a snorkel for your XJ, consider these factors:
- Vehicle Specificity: Always choose a snorkel designed specifically for the Jeep Cherokee XJ model year you own. This ensures proper fitment and alignment with body lines.
- Material Quality: Opt for UV-resistant, high-impact plastic for the best balance of durability, weight, and cost.
- Brand Reputation: Stick with reputable brands known for quality manufacturing and good customer support.
- Air Intake Location: Most snorkels for the XJ place the intake at the A-pillar or along the front fender edge. Consider which location you prefer and how it might affect visibility or clearance.
- Water Depth Rating: While snorkels raise the intake, they don’t make your vehicle amphibious. Understand the maximum safe water depth for your specific snorkel and vehicle setup. It’s usually limited by other vehicle components like differentials, transmission, and electronics.

Installing A Snorkel On Your Jeep Cherokee Xj: A Step-by-step Guide
Installing a snorkel on your Jeep Cherokee XJ is a project that requires patience, precision, and basic mechanical skills. While it can be done by a DIY enthusiast, careful measurement and drilling are crucial. If you’re not comfortable with drilling into your vehicle’s body panels, it’s best to have a professional installer handle it.
Disclaimer: This guide provides general steps. Always refer to the specific instructions provided by the snorkel manufacturer, as designs can vary. Incorrect installation can lead to leaks, poor performance, or damage to your vehicle. Consult a professional if unsure.
Tools And Materials You’ll Need
- Snorkel Kit: This includes the snorkel body, intake head, mounting brackets, template, and hardware.
- Drill and Drill Bits: You’ll need various sizes, including a step bit or hole saw for larger holes.
- Measuring Tape and Pencil/Marker: For accurate placement.
- Scribe or Awl: To mark drill points precisely.
- Angle Grinder or Jigsaw: For cutting fender openings if required by the snorkel design.
- Files and Sandpaper: To smooth cut edges.
- Silicone Sealant or Butyl Tape: To seal all holes and prevent leaks.
- Wrenches and Sockets: For mounting hardware.
- Screwdrivers: For various components.
- Safety Glasses and Gloves: Essential for protecting yourself.
- Rubbing Alcohol or Degreaser: To clean surfaces before applying sealant.
The Installation Process
- Read the Instructions: Thoroughly read the manufacturer’s instructions that came with your snorkel kit. Familiarize yourself with the specific steps and measurements for your XJ model.
- Template Placement: Most kits come with a paper template. Carefully position this template on the vehicle’s fender and A-pillar according to the instructions. Use masking tape to hold it securely. Double-check that it’s perfectly aligned and level. Accurate placement is critical for the snorkel to fit correctly and look good.
- Marking Drill Points: Once the template is perfectly positioned, use a scribe or awl to mark all the necessary drill points through the template onto the vehicle’s body. Mark the outline for any cutouts required for the intake pipe.
- Remove Fender Liner (if applicable): For many XJ snorkel installations, you’ll need to remove the inner fender liner on the side where the snorkel will be mounted. This provides access to the back of the fender and the engine bay.
- Drilling Pilot Holes: Start by drilling small pilot holes at the marked points. This makes it easier and more accurate to drill the final, larger holes.
- Cutting Fender Opening (if necessary): Some snorkels require a larger opening in the fender for the main intake pipe to pass through. If your kit requires this, carefully cut along the marked outline using a jigsaw or angle grinder. Take your time and make clean cuts.
- Drill Main Mounting Holes: Using the appropriate size drill bit (often specified in the instructions), drill out the main mounting holes for the snorkel brackets.
- Smooth Edges: After drilling and cutting, use files and sandpaper to smooth all cut edges and around the drilled holes. This prevents sharp edges and helps the sealant adhere better.
- Clean Surfaces: Thoroughly clean all areas where the snorkel will make contact with the body and around all drilled holes. Use rubbing alcohol or a degreaser to remove any dirt, grease, or wax.
- Apply Sealant: Apply a generous bead of high-quality silicone sealant or butyl tape around the back of the snorkel base, the edges of any cutouts, and around all drilled holes. This is your primary defense against water and rust. Ensure complete coverage.
- Mount the Snorkel: Carefully position the snorkel onto the fender and A-pillar, aligning the holes. Insert and tighten the mounting hardware. Do not overtighten, as this can strip threads or crack plastic components.
- Connect Internal Piping: Route the intake pipe from the snorkel head down into the engine bay, connecting it to the factory airbox or a custom intake system. Ensure all connections are secure and sealed. Manufacturers often provide specific adapters or require modifications to the airbox.
- Attach Snorkel Head: Install the air intake head onto the top of the snorkel tube. Ensure it’s oriented correctly (usually facing backwards to prevent direct rain entry).
- Reinstall Fender Liner: Once the snorkel is securely mounted and sealed, reinstall the fender liner.
- Final Check: Inspect all connections, mountings, and seals. Ensure there are no gaps where water or dust could enter. Start the engine and check for any unusual noises or air leaks.
Pro Tip: Consider using a drain plug at the lowest point of the snorkel system if one is not included. This allows you to drain any accumulated water or debris periodically.
Maintenance And Care For Your Snorkel
A snorkel is a robust piece of equipment, but like any modification, it requires some attention to ensure it performs optimally and lasts for years. Regular maintenance is simple and highly recommended, especially if you frequently use your XJ in challenging conditions.
Cleaning The Snorkel Head
The most visible part of the snorkel is the intake head. This is where air enters your system.
- Debris Removal: Periodically check the snorkel head for any accumulated leaves, insects, or other debris. Remove any obstructions to ensure unrestricted airflow. You can often do this by hand or with a soft brush.
- Pre-filter Cleaning (if applicable): Some snorkel systems or aftermarket setups might include a pre-filter or a mesh screen on the intake head. If yours does, follow the manufacturer’s instructions for cleaning or replacing it. This is especially important in very dusty environments.
Inspecting Seals And Mountings
The seal between the snorkel and your vehicle’s body is crucial for preventing water and dust intrusion.
- Regular Checks: Every few months, or after a significant water crossing or off-road excursion, visually inspect the seals around the snorkel base and where the pipe passes through the fender.
- Tighten Hardware: Check that all mounting bolts and hardware are still snug. Vibration from off-roading can cause them to loosen over time. Tighten them gently if needed.
- Resealing: If you notice any signs of the seal breaking down, cracking, or gaps appearing, it’s time to reseal. This usually involves removing the snorkel, cleaning off the old sealant, and applying fresh silicone or butyl tape. This is a critical step to prevent rust and corrosion from starting in the drilled holes.
Checking Internal Connections
While less frequent, it’s wise to periodically check the internal connections of the snorkel system.
- Airbox Connection: Ensure the connection between the snorkel’s internal pipe and the factory airbox (or aftermarket intake) is still secure and sealed. Any leaks here can allow unfiltered air and dust into your engine.
- Pipe Integrity: While rare, check the main snorkel pipe for any signs of damage, such as cracks or punctures, especially if you’ve had any significant impacts on the trail.
Water Crossings And Post-crossing Checks
After any significant water crossing, it’s good practice to perform a quick check.
- Drainage: If your snorkel has a drain plug, open it to let out any trapped water.
- Visual Inspection: Look for any obvious damage or leaks that may have occurred during the crossing.
Example: After a deep river crossing, I always make it a habit to check the snorkel mounting bolts and the seal around the fender opening. On one occasion, I found a bolt had vibrated loose, and a quick tightening prevented a potential air leak down the road.
Common Mistakes To Avoid With Snorkels
While a snorkel is a fantastic upgrade, improper installation or misuse can lead to problems. Being aware of common mistakes can save you a lot of headaches and potential damage.
Installation Errors
The most common issues arise from installation.
- Inaccurate Measurements and Drilling: This is the biggest mistake. If the template isn’t placed