The Jeep Wrangler JK is an iconic off-road vehicle, renowned for its ruggedness, versatility, and the sheer freedom it offers. For many JK owners, venturing off the beaten path isn't just a hobby; it's a way of life.
When you're miles from civilization, reliable communication becomes paramount. This is where a CB radio (Citizens Band radio) installation becomes not just a convenience, but a crucial safety tool.
However, the compact and often crowded interior of a JK presents a unique challenge for mounting a CB radio. This is where specialized top mounting brackets and kits come into play, offering an elegant and practical solution for integrating communication equipment without sacrificing valuable cabin space or compromising aesthetics.
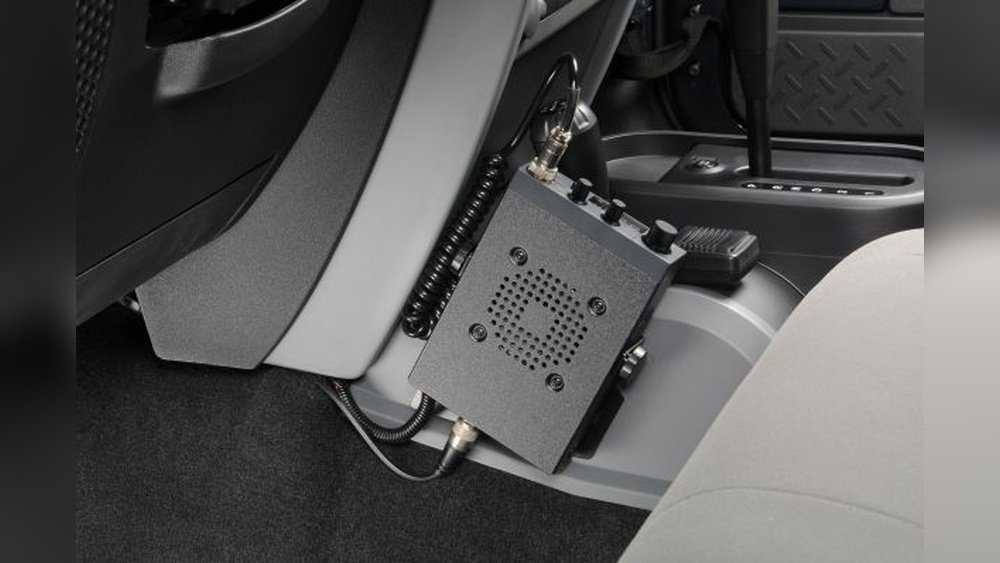
This guide will explore the ins and outs of installing a CB radio in your Jeep Wrangler JK using top mounting brackets. We’ll cover why this mounting solution is ideal, the types of kits available, essential considerations before you buy, the installation process itself, and tips for maximizing your CB radio’s performance and longevity.
Whether you’re a seasoned overlander or just starting your JK adventure, understanding these top mounting options can significantly enhance your off-road experience and peace of mind.
Key Takeaways
- Top mounting brackets offer a space-saving and accessible solution for installing CB radios in Jeep Wrangler JKs.
- Consider bracket material, vehicle model year, antenna placement, and ease of access when choosing a kit.
- Installation typically involves securing the bracket, mounting the radio, running wiring, and connecting the antenna.
- Proper antenna tuning and grounding are critical for optimal CB radio performance.
- Regular checks and maintenance can ensure the longevity and reliability of your CB radio setup.
Why Top Mounting For Your Jk Cb Radio?
The Jeep Wrangler JK, while spacious in some regards, has a cabin layout that can make interior modifications tricky. Traditional console or dashboard mounts can consume legroom, obstruct views, or require significant dashboard modification. Top mounting brackets specifically designed for the JK chassis offer a compelling alternative by utilizing often-overlooked overhead space. This approach provides several distinct advantages for JK owners looking to install a CB radio:
Maximizing Interior Space
The most significant benefit of top mounting is its space-saving nature. The JK’s interior, especially with the hardtop or soft top installed, has a natural void above the windshield and near the rearview mirror. Brackets designed for this area leverage this space, keeping the radio out of the way of occupants’ legs and arms. This is particularly important for JK models that might not have a dedicated “shelf” space or where owners prefer to maintain a clean, uncluttered dashboard. For those who frequently carry passengers or gear, freeing up floor and seat space is a major plus.
Accessibility And Visibility
When mounted overhead, a CB radio is generally within easy reach of the driver and front passenger. This allows for quick adjustments to channels, volume, and squelch without having to lean down or search for the unit. Furthermore, the overhead position often provides a clear line of sight to the radio’s display and controls, making it easy to monitor during driving. This contrasts with some lower-mounted positions that might be partially obscured by the steering wheel or other dashboard components. This accessibility is crucial for safety, allowing the driver to operate the radio with minimal distraction.
Aesthetics And Integration
Many top mounting kits are designed to integrate seamlessly with the JK’s interior aesthetics. They often mimic the factory look, using similar materials and finishes. This results in a cleaner, more professional installation compared to makeshift solutions. Some brackets are designed to attach to existing mounting points, minimizing the need for drilling or permanent modifications. This preserves the vehicle’s resale value and maintains its original appearance. The ability to keep the radio neatly tucked away overhead contributes to a more organized and less cluttered cabin environment.
Protection From Elements And Damage
Mounting the CB radio overhead can also offer a degree of protection. It keeps the unit further away from potential spills on the floor or dashboard, accidental kicks, and direct sunlight which can degrade electronics over time.
While not entirely immune, this position is generally safer than lower-mounted options that might be more exposed to the elements when doors are off or during off-road excursions where dust and debris can be prevalent.
Types Of Top Mounting Brackets And Kits For Jk Wranglers
The market offers a variety of top mounting solutions for Jeep Wrangler JKs, each with its own design, installation method, and compatibility. Understanding these options is key to selecting the best fit for your specific needs and your JK model year.
Overhead Console Mounts
Some JK Wranglers come equipped with an overhead console that houses interior lights and other controls. Overhead console mounts are designed to attach to or integrate with this existing factory console. These brackets often provide a dedicated platform or a way to secure a CB radio directly above the rearview mirror or in front of the console.
- Pros: Utilizes existing factory features, often designed for a clean OEM look, good accessibility.
- Cons: May not be compatible with all JK trim levels or aftermarket consoles, can sometimes obstruct the rearview mirror slightly, requires careful alignment.
Visor Or Header Panel Mounts
These brackets typically attach to the header panel above the windshield, where the sun visors are mounted, or directly to the visor brackets themselves. They create a mounting point for the CB radio that hangs down slightly or sits flush against the panel.
- Pros: Excellent use of often-unused space, generally easy to install without major disassembly, keeps the radio high and visible.
- Cons: Can vary in sturdiness, some designs might require drilling into the header panel, may slightly reduce overhead clearance.
Roll Cage Mounts
For JKs with aftermarket roll cages or even some factory roll bar components, specialized brackets can be attached directly to the tubing. This offers a robust mounting solution, especially for heavier radios or in applications where extreme off-roading is common.
- Pros: Extremely secure and stable, ideal for rugged use, versatile placement options along the cage.
- Cons: Requires a compatible roll cage structure, installation can be more involved, may require specific clamps or adapters, potentially less accessible than other overhead mounts.
Universal Overhead Brackets
These are more generic solutions that aim to fit a wide range of vehicles, including the JK. They often involve adjustable clamps or mounting plates that can be secured to the header panel or other overhead structures.
- Pros: High degree of flexibility, can be adapted to various mounting points.
- Cons: May require more improvisation during installation, less likely to have a custom-fit aesthetic, potential for vibration if not secured properly.
Integrated Kits
Some manufacturers offer complete CB radio installation kits that include the radio, antenna, and a custom-fit top mounting bracket. These kits are designed to simplify the process by providing all necessary components and instructions tailored for the JK.
- Pros: All-in-one solution, components are often designed to work well together, can save time on parts sourcing.
- Cons: May be more expensive, less flexibility in choosing individual components, might include a radio you don’t prefer.
When evaluating these options, consider:
- Your JK’s specific model year and trim: Some mounting solutions are year-specific.
- The size and weight of your CB radio: Ensure the bracket can support it securely.
- Ease of installation: Do you have the tools and skills for a more complex mount?
- Desired aesthetics: Do you want an OEM look or a more utilitarian setup?
Essential Considerations Before Buying A Jk Top Mount Bracket
Purchasing the right top mounting bracket kit for your Jeep Wrangler JK involves more than just picking the first option you see. Several critical factors can impact the success of your installation and the overall usability of your CB radio setup.
Bracket Material And Durability
CB radio brackets are typically made from steel or aluminum. Steel offers excellent strength and durability, capable of withstanding vibrations and impacts common in off-road driving. However, steel can be prone to rust if not properly coated or maintained. Aluminum is lighter and naturally resistant to corrosion, but may be less rigid than steel, especially in thinner gauges.
- Powder-coated steel is a popular choice, offering a balance of strength, corrosion resistance, and a clean finish.
- Look for brackets with thick gauge metal and robust welds to ensure longevity.
- Consider the finish: A textured or matte finish often matches the JK’s interior better than a glossy one.
Fitment And Compatibility With Your Jk
Jeep Wrangler JKs have evolved over the years, with minor variations in interior design and trim levels between model years (e.g., 2007-2010 vs. 2011-2018). It is crucial to verify that the bracket is specifically designed for your JK’s model year range.
- Check product descriptions carefully: Manufacturers usually list compatible years and trims.
- Read customer reviews: Other JK owners can confirm fitment issues or successes.
- Consider aftermarket accessories: If you have an aftermarket headliner, console, or soundbar, ensure the bracket will still work.
Radio Size And Antenna Clearance
Before purchasing a bracket, measure your CB radio’s dimensions (height, width, depth). Ensure the bracket provides adequate space and secure mounting points for your specific radio model.
- Radio height: Some overhead mounts have limited vertical space.
- Radio depth: Ensure the bracket doesn’t interfere with the rearview mirror or other components.
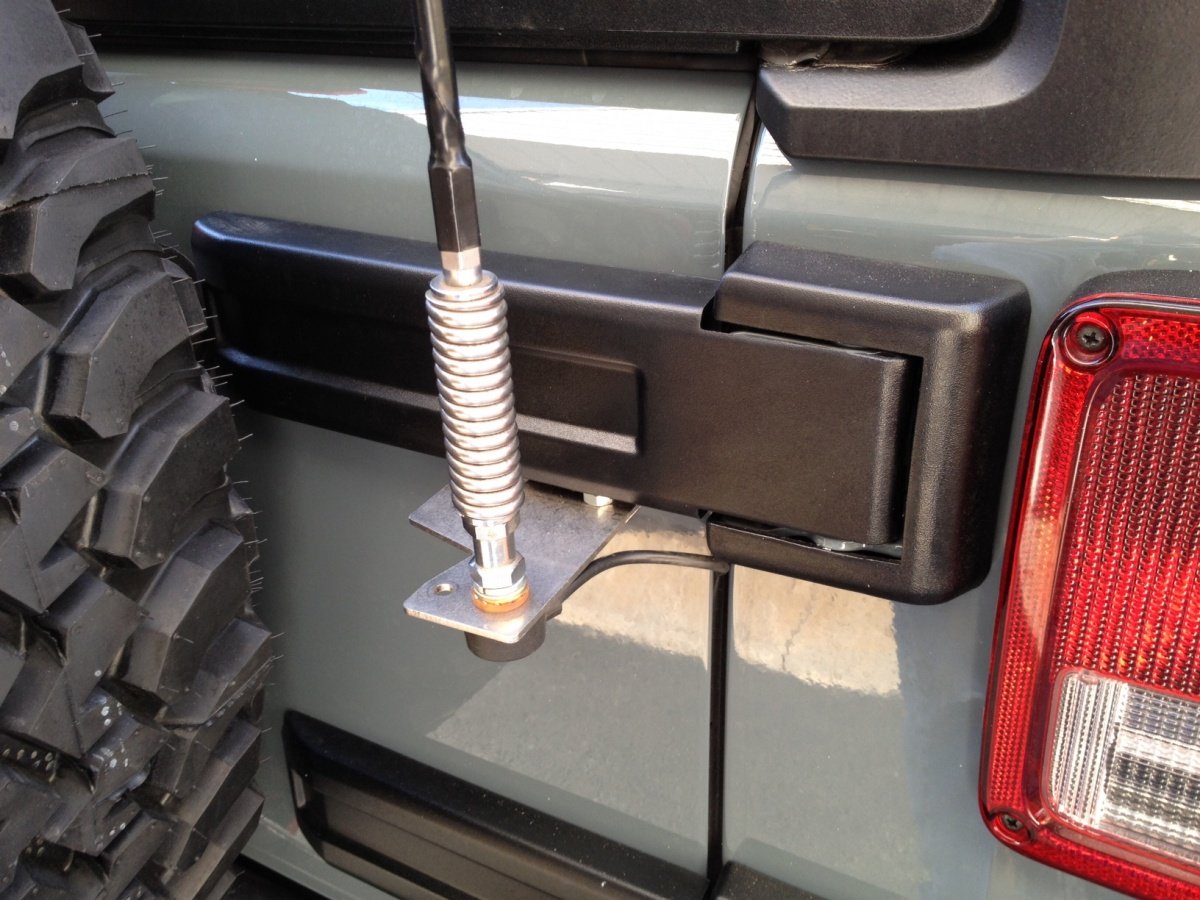
- Antenna placement: While the bracket holds the radio, you’ll need to consider where the antenna will be mounted. An improperly placed antenna can affect radio performance and may not have adequate clearance when the top is on or off. Many JK owners opt for fender mount antennas or spare tire mount antennas for overhead radio installations.
Ease Of Installation And Required Tools
Top mounting brackets vary in installation complexity. Some attach using existing screws or clips, requiring minimal tools.
Others might necessitate drilling into the header panel or dashboard.
- Evaluate your DIY skills: If you’re not comfortable with drilling or minor wiring, opt for a simpler, no-drill bracket.
- Check included hardware: Ensure the kit comes with all necessary nuts, bolts, and washers.
- Look for installation guides or videos: These can provide a clear picture of the process involved. A good example of a vehicle requiring specific installation considerations is the Jeep XJ with Ford Wheel Bolt Pattern, where modifications demand careful planning.
Ventilation And Heat Management
CB radios generate heat during operation. Mounting a radio in an enclosed overhead space can sometimes lead to overheating, especially in hot climates or during extended use.
- Check for ventilation slots: Some brackets are designed with cutouts or mesh to allow airflow.
- Consider ambient temperature: If you live in a very hot region, ensure your radio has adequate ventilation or consider a less enclosed mounting location.
- Radio power output: Higher wattage radios generate more heat.
Wiring Management
Think about how you will route the power and antenna cables. A well-planned wiring run is essential for a clean installation and to prevent damage to the cables.
- Power source: Most CBs require a 12V power source, usually from the battery or a fused accessory circuit.
- Antenna cable (coax): This needs to run from the radio to the antenna mount. Consider how it will exit the cabin.
- Look for brackets with integrated cable management features or plan your own routing path.
Step-by-step Jk Cb Radio Top Mount Installation Guide
Installing a CB radio with a top mounting bracket in your Jeep Wrangler JK is a rewarding DIY project that significantly enhances your vehicle’s communication capabilities. While specific steps may vary depending on the bracket and radio model, the general process remains consistent.
Phase 1: Preparation And Pre-installation
Before you begin, gather all necessary tools and components. This includes your chosen top mounting bracket kit, your CB radio, antenna, coaxial cable, power wire, fuses, wire connectors, and basic tools like screwdrivers, socket wrenches, wire strippers, crimpers, and a drill (if necessary).
- Read all instructions: Thoroughly review the manuals for both your bracket and your CB radio.
- Test the radio: Connect the radio to a temporary power source (like a battery charger) to ensure it functions correctly before mounting.
- Choose your mounting location: Identify the precise spot for your bracket, considering visibility, accessibility, and clearance for the radio and antenna.
- Disconnect the battery: For safety, always disconnect the negative terminal of your Jeep’s battery before starting any electrical work.
Phase 2: Mounting The Bracket
This is where the specific design of your bracket comes into play.
- No-Drill Brackets: These often use existing screws from the visor mounts, header trim, or overhead console. Simply remove the factory screws, position the bracket, and re-install the screws, ensuring the bracket is firmly secured. Some may use strong adhesive tape as a secondary securing method.
- Drill-Required Brackets: If your bracket requires drilling, carefully mark the hole locations using a template provided by the manufacturer or by test-fitting the bracket. Use a drill bit appropriate for the metal thickness. Deburr the drilled holes to prevent sharp edges. Mount the bracket using the provided hardware, ensuring a tight and secure fit. For metal panels, consider using rivnuts for a cleaner and more robust mounting solution.
Phase 3: Mounting The Cb Radio
Once the bracket is securely installed, you can mount the radio.
- Attach the radio’s mounting bracket: Most CB radios come with a U-shaped metal bracket. Secure this bracket to your chosen top mount using the provided screws or bolts. Ensure it’s oriented correctly for easy access to the radio’s controls.
- Slide the radio into place: Carefully slide the CB radio into its mounting bracket and secure it using the lock nuts or screws that came with the radio. Ensure it’s snug and won’t vibrate loose.
Phase 4: Wiring The System
This is often the most complex part of the installation. Proper wiring is crucial for performance and safety.
- Power Connection:
- Direct to Battery: For optimal performance, especially with higher-powered radios, connect directly to the battery terminals using an inline fuse holder as close to the battery as possible. Run the power wire through the firewall into the cabin, using an existing grommet or drilling a new hole (seal it well).
- Accessory Fuse Block: Alternatively, you can tap into a fused accessory circuit in your JK’s fuse box. This ensures the radio only powers on when the ignition is on, preventing battery drain. Use a fuse tap for a clean connection.
- Ground Connection: A good ground is essential. Connect the radio’s ground wire to a clean, unpainted metal surface on the Jeep’s chassis. A bolt on the frame or a dedicated grounding point is ideal. Avoid connecting to thin sheet metal or plastic components.
- Antenna Connection:
- Run the coaxial cable from your chosen antenna location to the CB radio. Route it carefully to avoid pinching or kinking. Many JK owners route coax through the firewall or along door jambs.
- Connect the coaxial cable to the antenna port on the back of the CB radio. Ensure the connector is snug.
Phase 5: Antenna Installation And Tuning
The antenna is critical for effective communication.
- Mount the Antenna: Install your chosen antenna according to its specific instructions. Common JK locations include the spare tire carrier, fender flares, or roof rack. Ensure the mount provides a solid connection to the vehicle’s ground plane.
- Tune the Antenna: This is a critical step for maximizing range and preventing damage to your radio. Use an SWR meter (Standing Wave Ratio meter) to tune your antenna.
- Connect the SWR meter between the radio and the antenna.
- Transmit a short burst of audio on Channel 1 (low), Channel 20 (middle), and Channel 40 (high).
- Adjust the antenna (usually by moving the whip up or down within its mount, or by adjusting set screws) until the SWR reading is as close to 1: 1 as possible across all channels, especially in the middle range. An SWR below 1.5:1 is considered good. Readings above 2:1 can damage your radio.
Phase 6: Final Checks And Testing
- Secure all wiring: Use zip ties or wire loom to neatly secure all cables, preventing them from dangling or interfering with moving parts.
- Re-connect the battery: Re-attach the negative battery terminal.
- Test the radio: Turn on your Jeep and the CB radio. Check if it powers up correctly.
- Test communication: Find a friend with a CB radio or use a local repeater (if available) to test transmitting and receiving. Listen for static and clarity.
Pro Tip: For a cleaner installation, consider running your power wires through a dedicated firewall grommet or using a Blue Sea Systems fuse block for a more organized power distribution system.
Optimizing Your Jk Cb Radio Performance
Simply installing a CB radio is only half the battle; ensuring it performs optimally for clear communication and reliable range is equally important. Several factors contribute to peak performance, from antenna placement to grounding and power.
Antenna Placement And Ground Plane
The antenna is your radio’s most critical component for transmitting and receiving signals. Its effectiveness is heavily influenced by its placement and the ground plane it operates against.
- Height: Generally, the higher the antenna, the better the transmission and reception. Overhead mounts naturally position the radio well, but the antenna’s location is paramount.
- Ground Plane: A CB antenna requires a good electrical connection to the vehicle’s chassis, which acts as a ground plane. This helps radiate the signal effectively. Mounting the antenna on a metal surface like a fender or a dedicated bracket that is securely bolted to the chassis is ideal. Avoid mounting on plastic components or fiberglass. For Jeep Wranglers, the spare tire carrier is a popular option if it’s properly grounded to the chassis.
- Antenna Type: Different antennas have different radiation patterns and gain. For general use, a 102-inch whip antenna or a 5-foot fiberglass antenna is common. Ensure the antenna is properly rated for CB frequencies (27 MHz).
Swr Tuning: The Cornerstone Of Performance
As mentioned in the installation guide, SWR (Standing Wave Ratio) tuning is non-negotiable. An improperly tuned antenna can lead to:
- Reduced range: Signals won’t transmit or receive effectively.
- Radio damage: High SWR can cause the transmitter to overheat and fail over time.
Regularly check your SWR, especially after any modifications to your Jeep or antenna system. An SWR meter is an inexpensive tool that can save you from costly repairs.
Power Supply And Grounding
A stable and sufficient power supply is vital for CB radio performance.
- Direct Battery Connection: For maximum power output and clarity, connecting directly to the battery with a properly sized inline fuse is the preferred method. This ensures the radio receives the full 12-13.8 volts it needs, even under heavy transmission loads.
- Quality Grounding: A poor ground connection is a common cause of static, low transmit power, and erratic performance. Ensure the ground wire is connected to a clean, unpainted metal surface of the chassis. Scrape away any paint or rust at the connection point. The shorter and thicker the ground wire, the better.
- Wire Gauge: Use appropriately sized wires for power and ground connections. Using wire that is too thin can lead to voltage drop, reducing transmit power and potentially causing overheating. Consult your radio’s manual for recommended wire gauge.
Noise Reduction Techniques
Electrical noise from your Jeep’s systems (alternator, ignition, fuel pump) can interfere with CB radio reception, creating static and making it difficult to hear transmissions.
- Shielding: Ensure all wiring is properly shielded and routed away from noisy components. Use shielded coaxial cable for your antenna.
- Ferrite Cores: Installing ferrite chokes or snap-on ferrite beads on power wires and coax cables can help suppress high-frequency noise.
- Noise Blanker/Filter: Some CB radios have built-in noise blankers or filters. Experiment with these settings to see if they improve reception without degrading audio quality.
- Antenna Location: Experimenting with different antenna mounting locations can sometimes move the antenna away from noise sources.
Maintenance And Longevity
Regular maintenance ensures your CB radio system remains reliable for years to come.
- Inspect Connections: Periodically check all electrical connections (power, ground, antenna) for corrosion or looseness.
- Clean the Radio: Keep the radio free of dust and debris, especially around ventilation areas.
- Check for Damage: Inspect the antenna and coax cable for any signs of physical damage.
- Re-tune as Needed: As mentioned, re-tune your SWR if you make any changes to your setup.
By focusing on these optimization techniques, you can ensure your Jeep Wrangler JK CB radio installation provides clear, reliable communication when you need it most, whether you’re navigating challenging trails or simply coordinating with your off-road group. For those looking to enhance their Jeep’s overall off-road prowess, exploring options like <a href="https://jeepinside.com