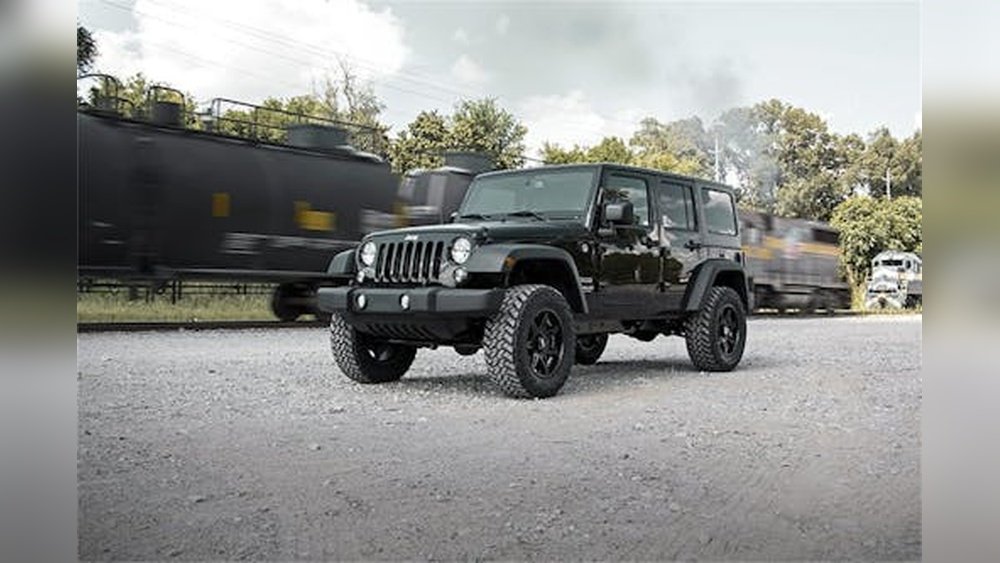
The Jeep TJ Wrangler is a beloved vehicle for off-road enthusiasts. Known for its robust design and capability, the TJ model (1997-2006) has a loyal following.
However, like any vehicle, it requires maintenance, and one crucial component that can cause significant issues if neglected is the wheel bearing. A failing wheel bearing can lead to noise, vibration, and in severe cases, wheel detachment.
This guide will walk you through understanding, identifying, and addressing Jeep TJ wheel bearing problems, including common tricks and tips for diagnosis and repair.
Understanding Jeep Tj Wheel Bearings
The Jeep TJ Wrangler uses a unitized wheel bearing and hub assembly. This means the wheel bearing is integrated into the hub, which is the part the wheel bolts onto. This design is common in many modern vehicles and simplifies some aspects of assembly but can make replacement a bit more involved than older designs where bearings were separate. The wheel bearing’s primary job is to allow your wheels to spin freely with minimal friction. It also supports the weight of the vehicle and handles the forces generated during acceleration, braking, and cornering.
On a TJ, the front wheel bearings are typically the ones that give trouble first. This is due to the increased load and stress they endure from steering.
The rear wheel bearings are generally more robust, often being part of the axle shaft assembly in a more traditional setup, though some variations exist.
When a wheel bearing starts to fail, it can manifest in several ways, often beginning subtly and progressing over time.
Types Of Wheel Bearings In A Tj
For the Jeep TJ, it’s important to distinguish between the front and rear setups.
- Front Wheel Bearings: These are the most common culprits for failure. They are part of a unitized hub assembly. This means you don’t just replace the bearing; you replace the entire hub assembly. This includes the bearing, the hub itself, and the wheel studs. This design is sealed and pre-greased, meaning there’s no user-serviceable grease pack like in older vehicles. The assembly bolts directly to the steering knuckle.
- Rear Wheel Bearings: In most TJ models, the rear wheel bearings are located inside the axle housing. They are typically press-fit into the axle tube. This setup is more traditional and allows for separate replacement of the bearing and seal, rather than the entire hub assembly. However, due to the solid axle design and the nature of off-roading, rear bearings can also wear out, though less frequently than the front ones.
The unitized front hub assembly is a critical component. When it fails, it’s not a simple bearing replacement.
You're replacing the whole unit. This can sometimes be a point of confusion for DIY mechanics used to older vehicle designs.
Understanding this difference is key to diagnosing and ordering the correct parts for your TJ.
Signs Of A Failing Jeep Tj Wheel Bearing
Recognizing the symptoms of a bad wheel bearing is crucial for preventing further damage and ensuring safety. The noises and sensations can be misleading, but a careful listener and observant driver can usually pinpoint the issue.
Common Symptoms
- Noise: This is the most common sign. A failing wheel bearing will often produce a humming, grinding, or clicking noise. This noise usually gets louder with speed. As the bearing wears out, the metal-on-metal contact increases, creating these sounds.
- Pitch Change: The noise might change pitch or intensity when you turn the steering wheel. If the noise gets louder when turning left, it often indicates a problem with the right-side wheel bearing, and vice versa. This is because turning loads the opposite side’s bearing.
- Rhythmic Clicking: Sometimes, a clicking noise can also indicate a wheel bearing issue, especially if it’s tied to wheel rotation. This can sometimes be confused with a CV joint problem, but if it changes with turning load, the bearing is a prime suspect.
- Vibration: You might feel a vibration or wobbling through the steering wheel or the floor of the vehicle. This vibration often increases with speed and can feel like you’re driving over a rough road, even on smooth pavement.
- Loose Wheel: In advanced stages, a severely worn wheel bearing can cause the wheel to feel loose or wobbly. This is a dangerous situation and requires immediate attention. If you can physically rock the wheel back and forth when the vehicle is jacked up, the bearing is likely shot.
- ABS or Traction Control Light: Modern vehicles, including the TJ, have Anti-lock Braking System (ABS) and traction control systems that rely on wheel speed sensors. A failing wheel bearing assembly often includes the hub, which contains the tone ring that the ABS sensor reads. If the bearing is compromised, the tone ring might be damaged or misaligned, causing the ABS or traction control warning light to illuminate on the dashboard.
Diagnosing The Problem
A proper diagnosis involves more than just listening. Here are some practical steps:
- Jack Up the Vehicle: Safely lift the front of your TJ using jack stands. Ensure the vehicle is stable.
- Spin the Wheels: With the vehicle in neutral and the parking brake off, spin each front wheel by hand. Listen for any unusual noises like grinding or humming.
- Check for Play: Grab the tire at the top and bottom, then try to rock it in and out. Repeat this by grabbing the tire on the left and right sides. Any significant looseness or play indicates a worn wheel bearing or potentially ball joints or tie rod ends. You need to differentiate.
- Listen While Driving (Carefully): On a quiet road, drive at various speeds and listen for the noises described above. Try turning gently left and right to see if the noise changes.
A Pro Tip: Sometimes, a bad brake component, like a warped rotor or a dragging caliper, can mimic wheel bearing noise. Ensure your brakes are in good condition before definitively blaming the bearing.
Common Jeep Tj Wheel Bearing Failure Points And Causes
Understanding why a wheel bearing fails can help you prevent future issues. While some failures are due to normal wear and tear, others can be accelerated by specific conditions or maintenance neglect.
Factors Contributing To Failure
- Wear and Tear: Wheel bearings are mechanical components that experience constant stress. Over time, the lubrication inside the bearing can degrade, and the internal components (rollers and races) can wear down. This is the most common cause of failure, especially on high-mileage vehicles or those frequently used off-road.
- Impacts and Potholes: Hitting large potholes, rocks, or curbs with significant force can shock the wheel bearing. These impacts can damage the bearing’s internal components or crack the housing, leading to premature failure. Off-roading, while fun, increases the risk of such impacts.
- Water and Contamination: The seals on the wheel bearing assembly are designed to keep contaminants like water, dirt, and mud out. If these seals are damaged (perhaps from debris or during installation), water can enter the bearing. This washes away the grease and causes rust and corrosion, accelerating wear. This is a major concern for TJ owners who take their Jeeps through mud or water crossings.
- Improper Installation: If a wheel bearing or hub assembly is not installed correctly, it can lead to premature failure. This includes over-tightening or under-tightening the hub nut (if applicable to the specific design, though TJ front hubs are generally torqued to spec without adjustment), or damaging the seals or bearing during installation. Using the wrong tools can also be a culprit.
- Corrosion: In areas with heavy road salt use, corrosion can attack the bearing assembly, especially around the seals and housing. This can lead to the bearing seizing or developing rough spots.
The Hub Assembly Vs. Individual Bearing
As mentioned, the front TJ setup uses a unitized hub assembly. This means the bearing is pressed into the hub, and the whole unit is sealed. When one part of this assembly fails (the bearing itself), the entire unit must be replaced. This is a significant difference from older vehicles where you might press out just the bearing. This integrated design means that if the bearing fails due to contamination, the hub itself might also be compromised, making replacement of the entire assembly the only viable option.
How To Replace A Jeep Tj Front Wheel Bearing Hub Assembly
Replacing a front wheel bearing hub assembly on a Jeep TJ is a moderately difficult DIY job. It requires basic mechanical skills, common tools, and a bit of patience.
If you're not comfortable with suspension components or working with torque wrenches, it's best to leave this to a professional mechanic.
Tools And Parts Needed
- New Wheel Bearing Hub Assembly: Ensure you get the correct part for your TJ’s year and drivetrain (2WD or 4WD).
- Socket Set: Including deep sockets and impact sockets (metric sizes, typically 13mm, 15mm, 18mm, 21mm).
- Torque Wrench: Essential for proper tightening of critical bolts.
- Breaker Bar: For loosening stubborn bolts.
- Pry Bar: Useful for manipulating suspension components.
- Hammer: A standard hammer and possibly a dead blow hammer.
- Wire Brush: For cleaning rust and debris.
- Penetrating Oil (e.g., PB Blaster): To help loosen rusted bolts.
- Jack and Jack Stands: For safely supporting the vehicle.
- Gloves and Safety Glasses: For personal protection.
- Optional: Ball Joint Separator: Can sometimes help.
Step-by-step Replacement Guide
- Loosen Lug Nuts: Before jacking up the vehicle, slightly loosen the lug nuts on the wheel you’ll be working on.
- Jack Up and Support: Safely lift the front of the Jeep and support it securely with jack stands under the frame or axle. Remove the wheel.
- Remove Brake Components:
- Remove the brake caliper and caliper bracket. You might need to hang the caliper out of the way using a bungee cord or wire to avoid stressing the brake line.
- Remove the brake rotor. If it’s stuck, you may need to tap it with a hammer or use a rotor puller.
- Disconnect Steering Components:
- You’ll need to disconnect components attached to the steering knuckle to get it free. This typically involves removing the tie rod end nut and separating the tie rod end from the knuckle. You might need a tie rod puller or a few sharp raps with a hammer to break it free.
- Some models might require disconnecting the ball joint as well.
- Remove the Hub Assembly: The hub assembly is usually held onto the knuckle by four or five bolts. These can be very tight and often rusted in place.
- Apply penetrating oil liberally to the bolts and let it soak.
- Use a breaker bar and the correct socket to loosen and remove these bolts. If they are severely seized, you might need to use an impact wrench or carefully apply heat (use extreme caution with heat around brake lines and grease).
- Once the bolts are out, the hub assembly should be free. You might need to use a pry bar or a hammer to persuade it to come loose. Be careful not to damage the knuckle.
- Clean the Mounting Surface: Thoroughly clean the mounting surface on the knuckle where the new hub will sit. Use a wire brush to remove all rust and debris. A clean surface is crucial for proper seating of the new hub.
- Install the New Hub Assembly:
- Position the new hub assembly onto the knuckle.
- Install the mounting bolts. Do not fully tighten them yet.
- Reassemble Steering and Brake Components:
- Reconnect the tie rod end and any other steering components you disconnected. Tighten the nuts to the specified torque.
- Reinstall the brake rotor and caliper bracket.
- Reinstall the brake caliper.
- Torque Hub Bolts: This is a critical step. Tighten the hub mounting bolts to the manufacturer’s specified torque. This is usually quite high (often over 100 ft-lbs). Consult your TJ’s service manual for the exact torque specification. Under-tightening can lead to failure, while over-tightening can damage the new hub.
- Reinstall Wheel and Lug Nuts: Put the wheel back on and snug up the lug nuts.
- Lower Vehicle and Final Torque: Lower the vehicle to the ground. Now, torque the lug nuts to the manufacturer’s specification in a star pattern.
- Test Drive: Take the vehicle for a test drive. Listen for any unusual noises and check for vibrations. Ensure the brakes feel normal.
Pro Tip For Stubborn Hubs
If the old hub assembly is severely corroded and won’t come off, you might need to resort to cutting the bolts off or using a hub puller tool. Sometimes, a few well-placed hammer blows on the hub itself (not the studs) can help break the corrosion bond.
Replacing Jeep Tj Rear Wheel Bearings
The rear wheel bearing replacement on a TJ is different from the front because it's not a unitized hub assembly in most cases. The bearings are pressed into the axle housing.
This job is generally more involved and often requires specialized tools.
Tools And Parts Needed
- New Rear Wheel Bearings and Seals: You’ll need a set for both sides.
- Axle Puller/Press: This is often the most specialized tool required. It allows you to press the old bearing out and the new one in without damaging the axle housing.
- Bearing Race Installation Tool: To properly seat the new bearing.
- Slide Hammer: Useful for removing seals and sometimes bearings.
- General Mechanics Tools: Sockets, wrenches, torque wrench.
- Gear Oil: For refilling the axle housing.
- Brake Cleaner: For cleaning parts.
- Safety Gear: Gloves, glasses.
Step-by-step Replacement Guide
- Remove Axle Shaft:
- Jack up the rear of the Jeep and support it securely.
- Remove the rear wheels.
- Remove the brake drums or calipers and rotors.
- Remove the differential cover (this allows access to the differential and retaining clips). You will lose gear oil, so have a drain pan ready.
- Remove the pinion shaft lock bolt and the pinion shaft.
- Carefully slide the axle shafts out of the housing. They might need a gentle tap with a hammer or slide hammer.
- Remove Old Bearing and Seal:
- The wheel bearing is pressed onto the end of the axle shaft, just inside