Removing the tail light from a 2006 Jeep Commander might seem tricky at first, but it’s actually a simple job if you follow the right steps. Whether you need to replace a burnt bulb, fix wiring, or upgrade to new lights, knowing how to take out the tail light safely can save time and money. This guide will show you how to do it, give you practical advice, and highlight common mistakes so you can work confidently.
Tools And Materials Needed
Before you begin, gather these tools:
- Phillips screwdriver
- Flat-head screwdriver (optional)
- Socket wrench (usually 8mm or 10mm)
- Gloves (to protect your hands)
- Clean cloth (for wiping surfaces)
You won’t need any special equipment. Most of these tools are already in a home toolbox.

Preparing Your Jeep Commander
Safety comes first. Park your 2006 Jeep Commander on a flat surface and turn off the engine. Make sure the parking brake is on, so your vehicle won’t roll. If you have a garage, use it for better lighting.
Open the rear hatch. This gives you access to the tail light area.
Remove any items blocking your way inside the trunk. It’s best to wear gloves so you don’t scratch the paint or get grease on your hands.
Locating And Removing The Tail Light Screws
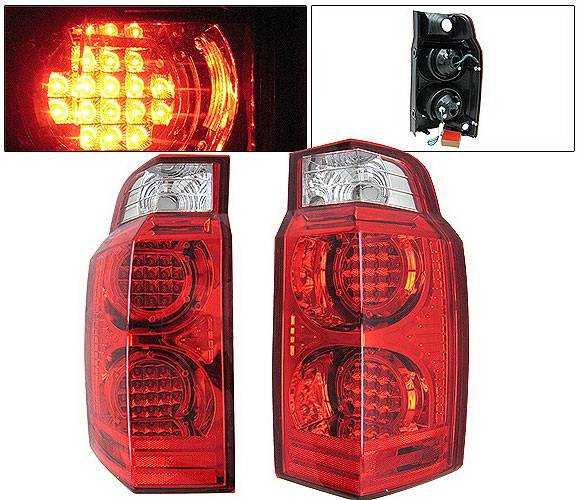
On the Jeep Commander, the tail light assembly is held by two screws on the inside edge. Look closely—these are usually Phillips head screws. Some models may have a bolt instead, so check before starting.
- Use a Phillips screwdriver to unscrew both fasteners. Turn counterclockwise.
- Place the screws in a safe spot; losing them can cause problems when reinstalling.
- If the screws are rusty or stuck, try a socket wrench. This gives better grip.
Non-obvious tip: The screws are often hidden by a plastic cover. If so, gently pry off the cover with a flat-head screwdriver. Don’t use too much force, or you may crack it.
Detaching The Tail Light Assembly
Once the screws are out, the tail light should feel loose. But it’s still held by clips.
- Hold the tail light firmly. Pull it straight back—do not twist or force it sideways.
- If it doesn’t budge, wiggle gently until the clips release.
Beginner mistake: Many people try prying the light upward or downward. This can break the housing. Always pull directly back.
Some tail lights on the Jeep Commander have a small alignment pin. Make sure it clears the slot as you remove the assembly.
Disconnecting The Wiring Harness
The tail light is connected to the car’s electrical system. You’ll see a wiring harness at the back.
- Locate the wiring connector. It’s usually a black plug with a locking tab.
- Press the tab and gently pull the connector out. Don’t yank the wires; hold the plug itself.
- If the connector is stuck, wiggle it slightly. If needed, use a flat-head screwdriver to press the release tab.
Practical tip: If you’re changing bulbs, you don’t need to unplug the harness. Instead, twist the bulb sockets counterclockwise and pull them out from the assembly.
Removing The Bulbs (optional)
If your goal is to replace bulbs:
- Identify which bulbs are burnt out.
- Turn the socket counterclockwise and pull it out.
- Remove the old bulb and insert a new one. Push firmly but not too hard.
Example: The Commander uses standard bulbs like 3157 or 194 for tail and brake lights.
Comparing Jeep Commander Tail Light Removal To Other Suvs
Sometimes, people wonder how Jeep’s process compares to other vehicles. Here’s a quick look:
| Vehicle | Number of Screws | Clip Type | Difficulty |
|---|---|---|---|
| 2006 Jeep Commander | 2 | Plastic alignment | Easy |
| Ford Explorer (2007) | 3 | Metal clip | Moderate |
| Toyota Highlander (2006) | 2 | Plastic snap | Easy |
The Jeep Commander is simpler than some other SUVs because the screws and clips are easy to reach.
Reinstalling The Tail Light
After removing the tail light, reinstalling is just the reverse process:
- Plug the wiring harness back in. Listen for a click to confirm it’s locked.
- Align the assembly with the slots and pins.
- Push the tail light in until the clips snap.
- Insert the screws and tighten them snugly (not too tight, or you may crack the housing).
Wipe down the surface with a clean cloth to remove fingerprints or dust.
Common Mistakes And How To Avoid Them
Avoid these errors:
- Over-tightening screws: This can break the plastic housing.
- Forcing the assembly: Pull straight back, not at an angle.
- Ignoring alignment pins: Failing to line up pins makes installation difficult.
- Touching bulbs with bare hands: Oils from skin can shorten bulb life.
Here’s a quick comparison of mistakes and solutions:
| Mistake | Consequence | Solution |
|---|---|---|
| Over-tighten screws | Cracked housing | Use gentle force |
| Force assembly | Broken clips | Pull straight back |
| Touch bulb glass | Short bulb life | Wear gloves |
Real-world Example
A Jeep Commander owner had a tail light out after a minor bump. They followed these steps, found the bulb socket loose, and fixed it with no extra parts. The whole process took under 15 minutes.

Useful Resources
If you want more details on Jeep Commander maintenance, visit the official Jeep site: Jeep Official.
Frequently Asked Questions
How Long Does It Take To Remove The Tail Light?
Usually, it takes about 10–15 minutes if you have the right tools and follow each step carefully.
What Bulb Types Does The 2006 Jeep Commander Use?
Most models use 3157 for brake and turn signals, and 194 for the small tail light. Check your owner’s manual for exact bulb types.
Can I Drive With A Missing Tail Light?
It’s not legal and unsafe to drive without a tail light. Always reinstall or replace it before driving.
Do I Need To Disconnect The Battery?
Not usually. But if you’re worried about electrical shorts, disconnect the negative terminal for extra safety.
Will Removing The Tail Light Affect Other Electrical Parts?
No, as long as you only unplug the tail light wiring harness. Avoid pulling on other wires to prevent damage.
Removing the tail light from your 2006 Jeep Commander is a straightforward task if you follow the steps. With basic tools and careful attention, you can finish the job quickly and safely. Taking your time ensures you won’t damage the assembly, and knowing these tips will help with any future repairs.