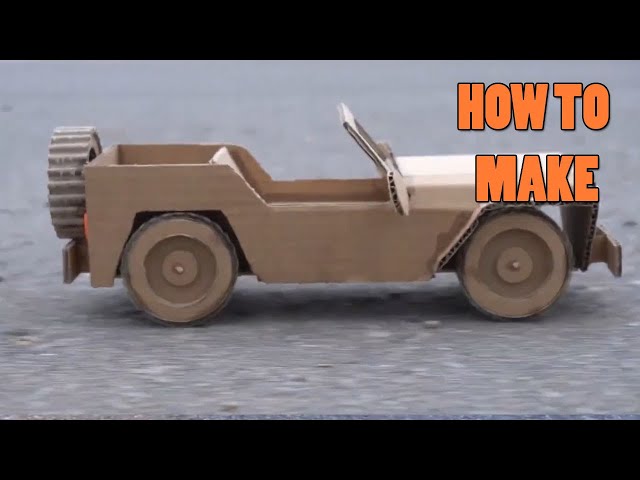
Building a jeep from cardboard might sound like a big challenge, but with the right steps, it can become a fun, creative project for kids and adults. Cardboard is cheap, easy to find, and safe to handle. Whether you want a cool model for display, a toy for your child, or a school project, making a cardboard jeep gives you a chance to learn, create, and enjoy the process.
In this guide, you’ll find practical advice, clear steps, and smart tips to help you succeed—even if you’re a beginner.
Materials And Tools You Need
Before you start, gather all your materials. This will save time and help you work smoothly.

Basic materials:
- Strong cardboard sheets (look for double-layered for best strength)
- Craft knife or box cutter
- Hot glue gun with glue sticks
- Ruler (at least 12 inches)
- Pencil and eraser
- Black marker
- Scissors
- Paints and brushes (for decorating)
- Four plastic bottle caps (for wheels)
- Wooden skewers or thick straws (for axles)
- Tape (masking or clear)
Optional extras:
- Colored paper for interiors
- Small LED lights for headlights
- Stickers for decoration
If you want to compare the strength of different types of cardboard, here’s a simple overview:
| Cardboard Type | Strength | Best For |
|---|---|---|
| Single-layer | Low | Small details |
| Double-layer | Medium | Body structure |
| Triple-layer | High | Base, wheels |
Tip: Always use a cutting mat for safety and cleaner cuts.
Planning And Drawing Your Jeep
Before cutting, it’s smart to plan the size and shape of your jeep.
- Decide the scale. For a toy jeep, a length of 12 inches, width of 6 inches, and height of 5 inches works well.
- Draw basic shapes. Use rectangles for the body and squares for the hood and roof. Mark out the wheel arches as half-circles.
- Label each part so you know where everything fits.
Here’s a sample measurement breakdown for a classic cardboard jeep:
| Part | Length (inches) | Width (inches) | Height (inches) |
|---|---|---|---|
| Main Body | 12 | 6 | 4 |
| Roof | 8 | 6 | 1 |
| Hood | 4 | 6 | 1 |
| Wheel Arches | 2 | 2 | 1 |
Non-obvious insight: It’s easier to build a jeep in layers—floor first, then sides, then details—than trying to make it all at once.

Building The Jeep Step By Step
1. Cut The Main Body
- Use your ruler to draw the body shape onto the cardboard.
- Cut out the base, two side panels, the back, and the front.
- Score (lightly cut) the edges where you’ll fold the cardboard for cleaner bends.
2. Assemble The Body
- Glue the sides to the base first.
- Attach the back and front panels.
- Hold pieces in place for a few seconds as the glue sets.
- Use tape to hold tricky corners while drying.
3. Add The Hood And Roof
- Cut out the hood and roof pieces.
- Attach the hood to the front top, then glue the roof to the back half.
- Leave the middle open if you want a classic jeep look.
4. Make Wheel Arches
- Draw and cut half-circles for each wheel arch.
- Glue these above where each wheel will go.
5. Prepare The Wheels And Axles
- Pierce a hole in the center of each bottle cap using a nail or skewer.
- Slide a wooden skewer or straw through the holes in the jeep’s base.
- Attach bottle caps on both ends for wheels.
If you want to compare wheel material options, check this:
| Wheel Material | Rolls Smoothly | Durability |
|---|---|---|
| Bottle caps | Yes | Medium |
| Cardboard circles | No | Low |
| Plastic toy wheels | Yes | High |
Tip: If the wheels are loose, add a drop of hot glue inside the cap.
6. Add Details
- Cut and glue small strips for bumpers, doors, and windshield frame.
- Use colored paper or markers to add windows and lights.
- For headlights, glue on small beads or use LED lights.
Beginner mistake: Skipping details makes the jeep look flat. Even simple lines can add realism.
Painting And Decorating
- Paint the body using acrylic or poster paint. Let each layer dry before adding details.
- Use a black marker for outlines, door handles, and grills.
- Add stickers or make a license plate from paper.
Pro tip: Paint small parts before gluing them on. This helps avoid messy edges.
Safety And Durability Tips
- Always cut away from your body, and keep fingers clear of blades.
- Use hot glue carefully to avoid burns.
- Store your finished jeep away from water and heavy items.
If you want inspiration or more design ideas, check the Jeep history page on Wikipedia.
Frequently Asked Questions
How Long Does It Take To Make A Cardboard Jeep?
For a beginner, it usually takes 3 to 5 hours, including drying and painting time. Complex designs or adding moving parts may take longer.
Can I Make The Jeep Bigger Or Smaller?
Yes, you can adjust the size by scaling your measurements up or down. Just remember, larger jeeps need stronger cardboard to stay sturdy.
What If I Don’t Have A Hot Glue Gun?
You can use strong white glue, but drying will take longer and the hold may be weaker, especially for wheels or thick parts.
Are There Alternatives To Bottle Caps For Wheels?
Yes, you can use plastic toy wheels, thick cardboard circles (but they don’t roll well), or even small wooden disks.
Is This Project Safe For Kids?
With adult help for cutting and glue, children aged 7+ can safely join in. Avoid sharp tools and hot glue unless supervised.
A cardboard jeep is a fantastic project for learning, creativity, and hands-on fun. Don’t worry about mistakes—each one teaches you something new. With patience and practice, your jeep can look great and roll smoothly. Happy crafting!